Search Our Database
How to Launch Your First Cloud Instance from Image
Overview
This tutorial will guide you through launching your first self-managed Cloud Instance from Image via Portal.
Prerequisite
Instructions
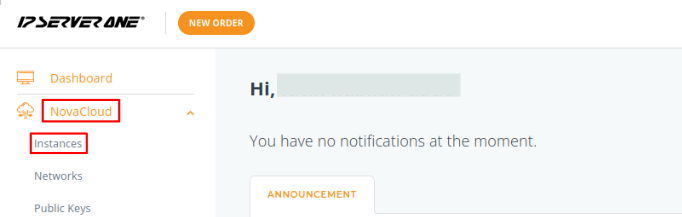
Step 1: Once logged in, click on NovaCloud and dropdown to Instances.
Step 2: Select the region where you want your Instance to be launched.
IMPORTANT: Please take note that the region of your Instance cannot be changed later.
First, select the region where you want to launch your instance and proceed to Launch Instance.

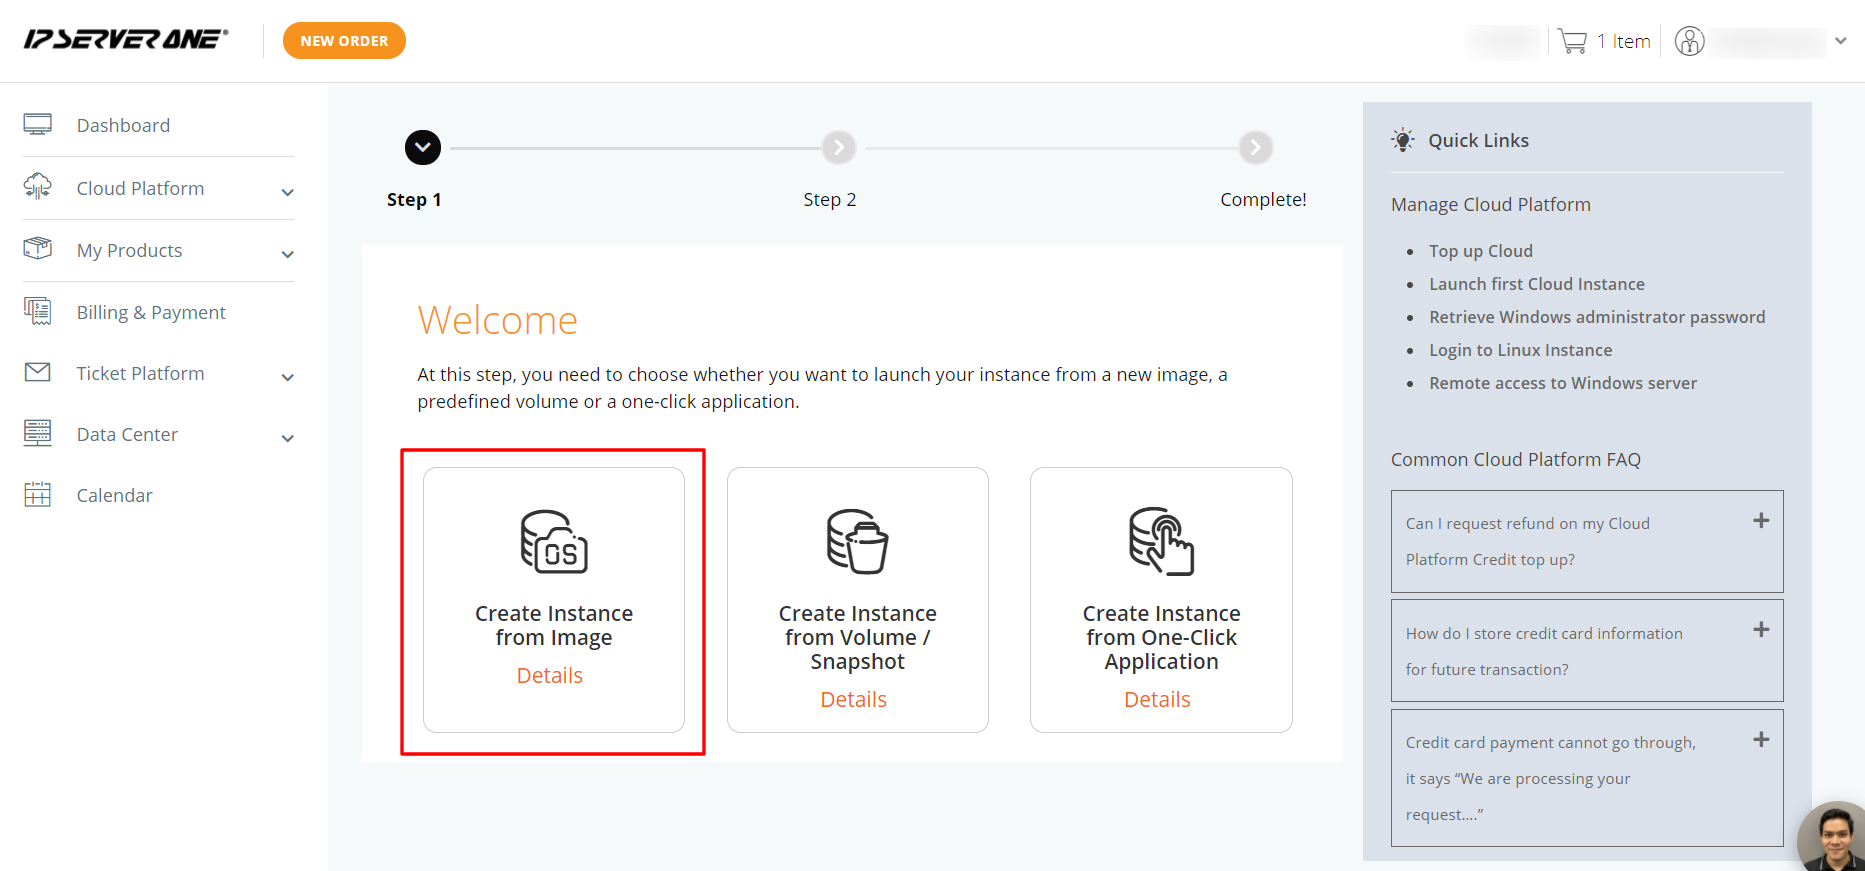
Step 3: For your first time creating an instance, select Create Instance from Image.
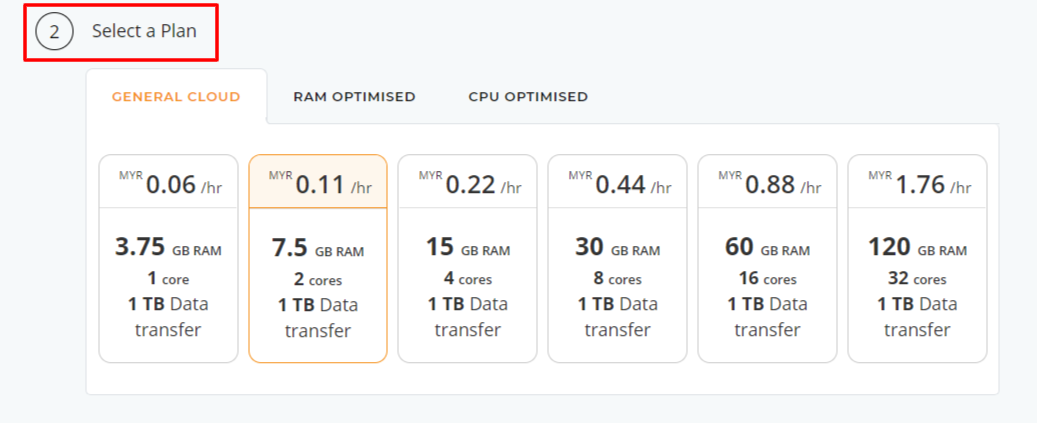
Step 4: Select a Flavor for your Instance.
Note: We offer a variety of Instance types (eg: General Optimized, RAM Optimized, CPU Optimized). You may select the flavor based on your use-case.
Flavor can be upgraded in the future when scaling is required. You may refer to this guide to upgrade the plan : How To Resize Cloud Instance.
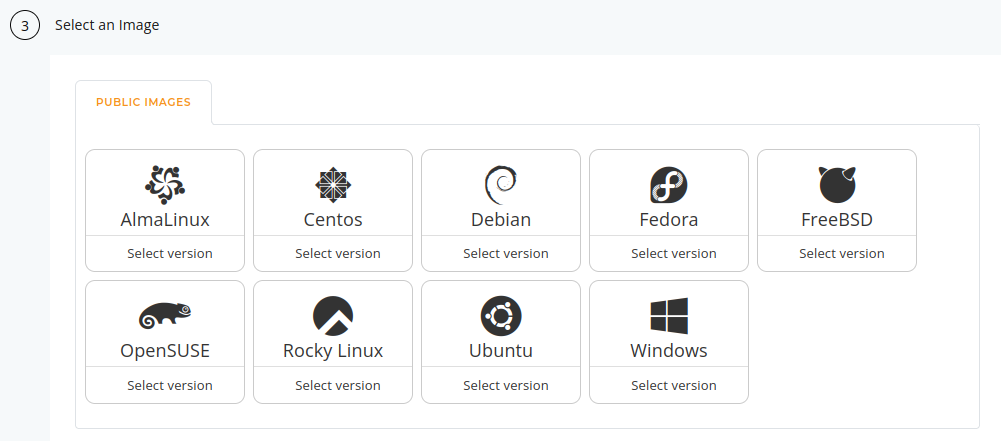
Step 5: Select an Image for your Instance.
Note: Windows images incur an additional charge for licensing.
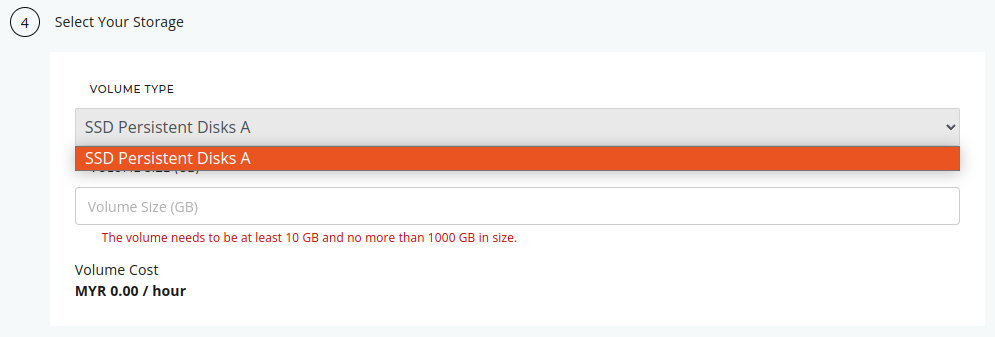
Step 6: Specify the type and size of your Volume.
IMPORTANT: It is advisable to plan for the size of your volume. If you do not have a volume in planning, type in the minimum amount (10GB) in the Volume Size (GB) type box.
You may extend the volume later by referring to this guide : How To Extend Cloud Volume.
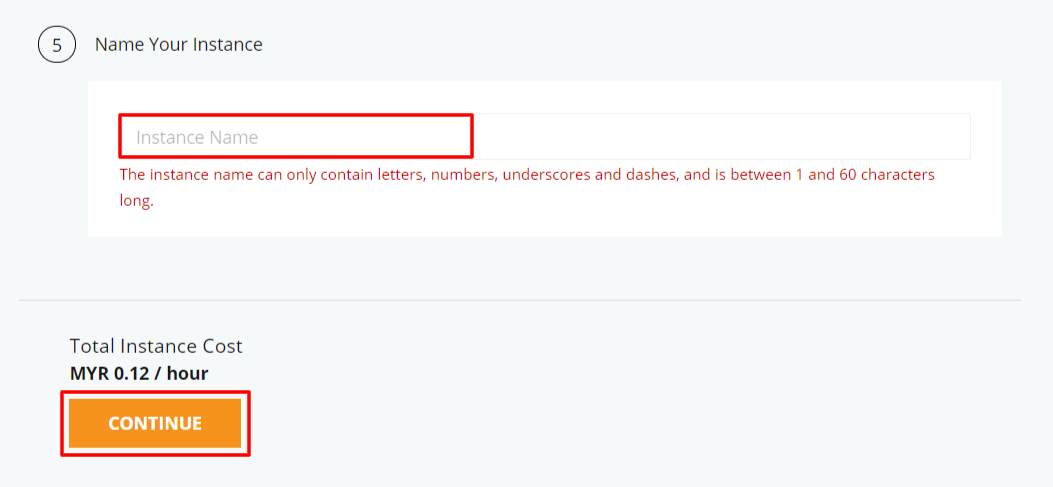
Step 7: Name your Instance and click Continue.
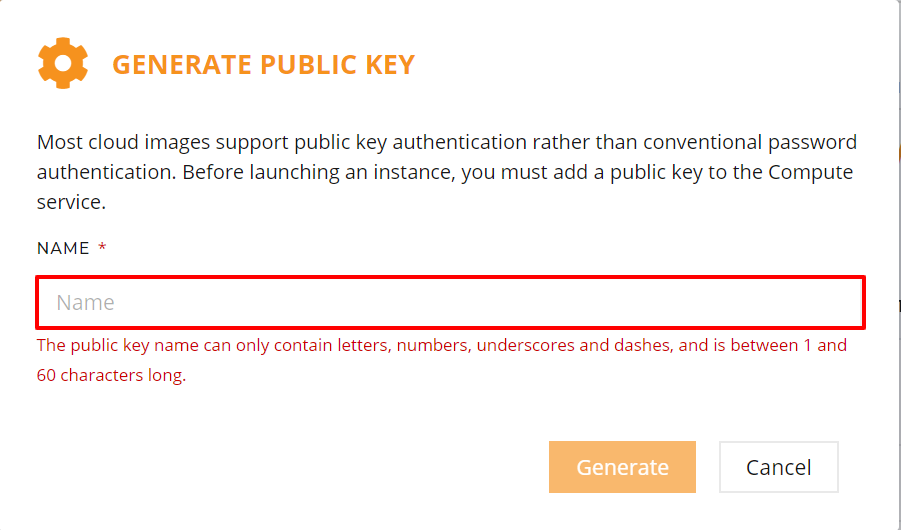
Step 8: Generate a new key-pair for your Instance.
Note: You can also Import and use your existing public key. If you do not have any public keys yet, click on Generate to create one.

Step 9: Enter a name for your key-pair. Once done, continue to click Generate.
Note: This key-pair will be used to access your Instance.
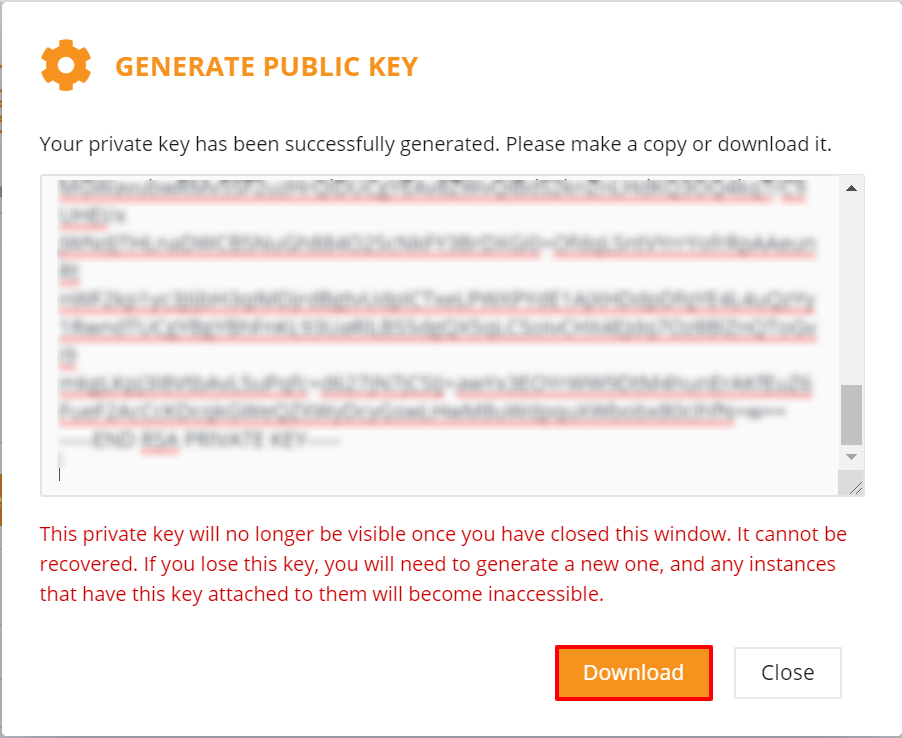
Step 10: Download your private key (.pem) for safekeeping.
Note: The private key is unique and non-retrievable nor re-settable, thus, in any case, this key goes missing, you may lose access to your Instance.
Step 11: Continue to select your new key-pair.

Step 12: (Optional) Apply Predefined Security Group Rules

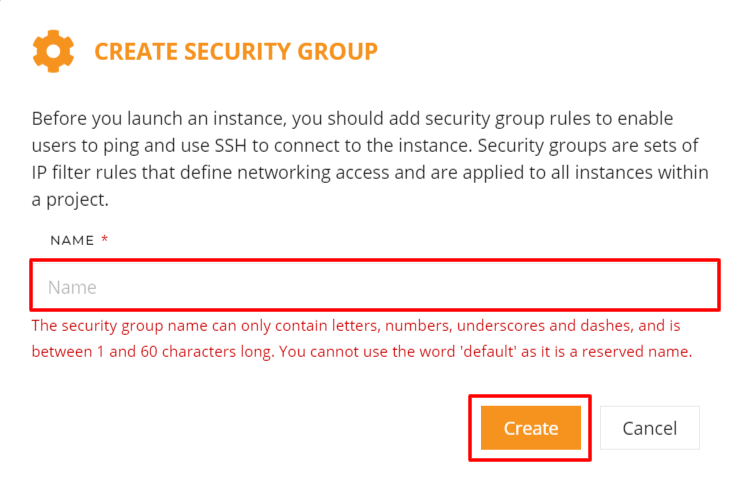
Step 13: (Optional) Create a new security group (firewall) rules by clicking Here.
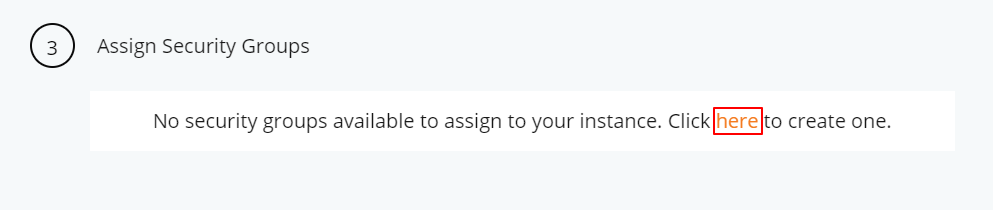
Next, enter a name for the new Security Group. Continue by clicking Create.
Then, select your Security Group. You can also view the Rules of your Security Group.
Note: The default security group allows all egress traffic and block all ingress traffic.

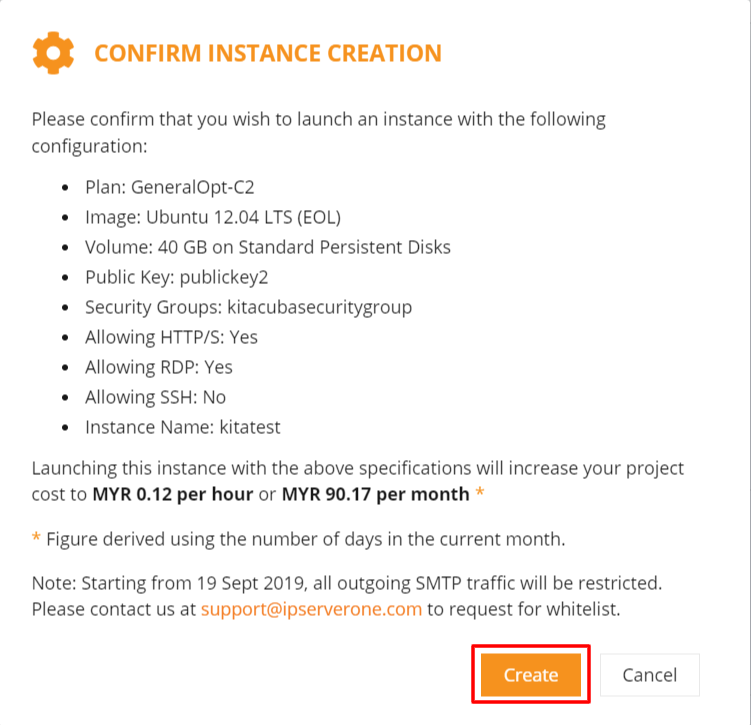
Step 14: Verify the cost of your Instance before you click on Create.
Note: Make sure you have sufficient credit in your account before launching an Instance.
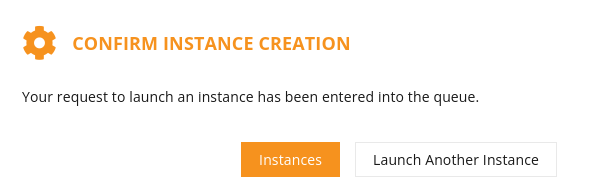
Step 15: Click on Instances to view your newly launched instance.
Step 16: Please wait while your Instance is being created. You may refresh this section to view the preparation status.

Result
Your Instance will be in Active status once the launch is successful.
Note: You might want to take note of the IP addresses that have been assigned to your Instance.
