Search Our Database
How To Launch Cloud Instance From One-Click Application
Introduction
In today’s fast-paced digital environment, being able to rapidly deploy applications is crucial for maintaining a competitive edge. Our One-Click Application Cloud Instance is the perfect solution for users who require quick and efficient instance launches with pre-configured applications. From databases like MySQL to caching solutions like Redis, our platform automates the installation process for you. This guide will navigate you through the simple steps to set up your instance with the application of your choice using the Customer Portal.
Prerequisite
Instructions
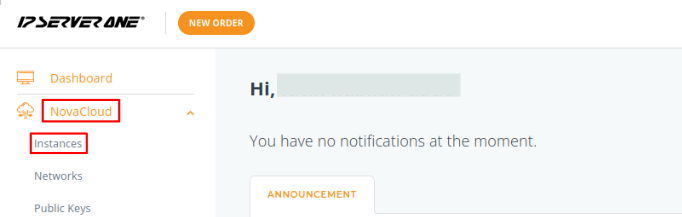
Step 1: Access Instances
- Log into your portal account.
- Click on NovaCloud and navigate to Instances from the dropdown menu.
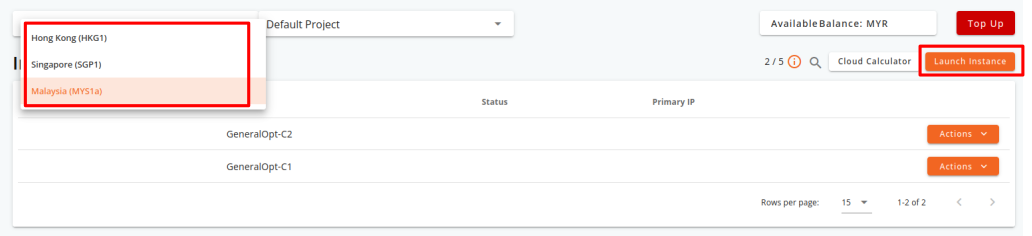
Step 2: Select Region
- Choose the region where you want to launch your instance and click Launch Instance.
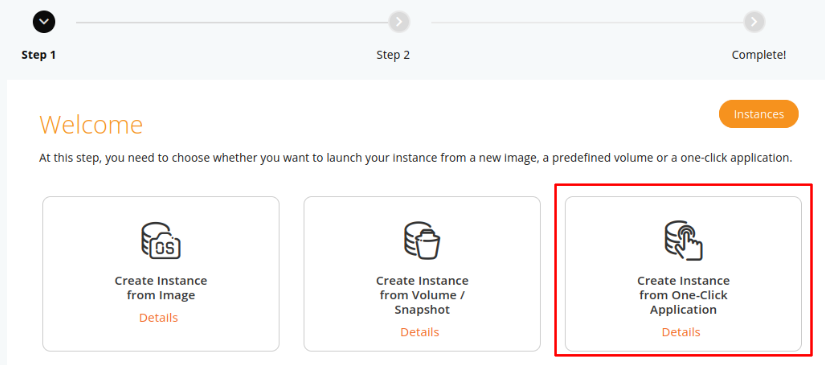
Step 3: Create Instance from One-Click Application
- Select Create Instance from One-Click Application.
Step 4: Select Application
- Choose an application to install alongside your instance from the available categories, such as database, cache, queue, big data, VPN, content management, app, containerization, or application stack.
- Click Select Version to choose the application version.
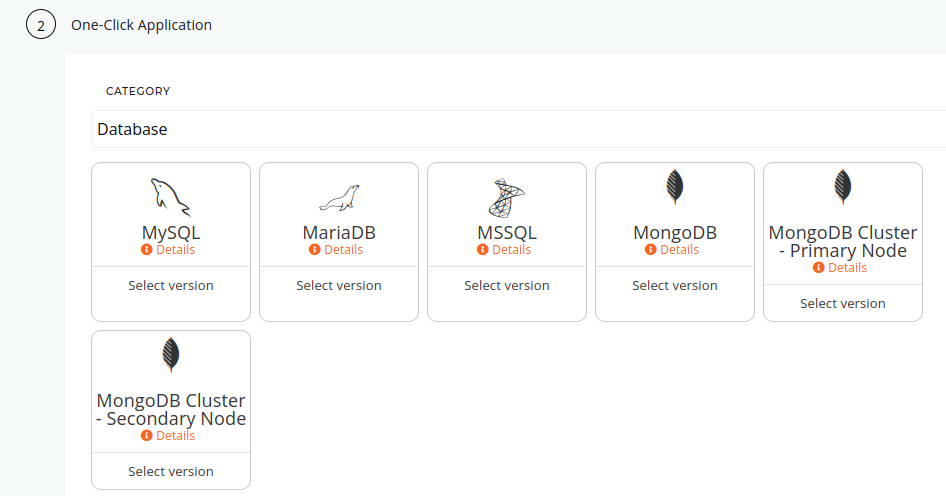
- Click Details to view the minimum and recommended requirements for the application, which will help in completing Step 5 and 6.
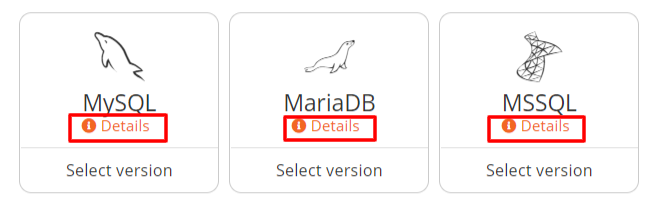 E.g. for MySQL:

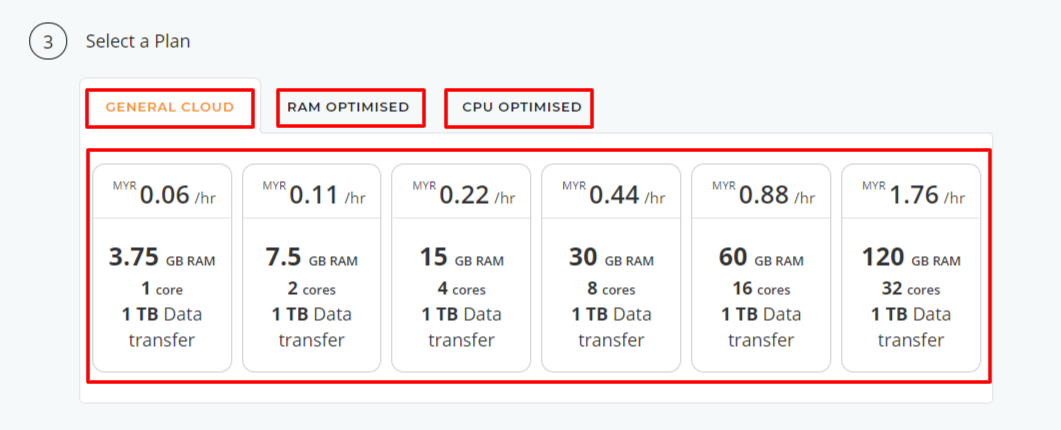
Step 5: Choose a Flavor
- Select a Flavor for your instance. Though one is auto-selected based on the application’s requirements, you can choose a higher plan if needed (e.g., General Optimized, RAM Optimized, CPU Optimized).
- Flavor can be upgraded in the future when scaling is required. You may refer to this guide to upgrade the plan : How To Resize Cloud Instance.
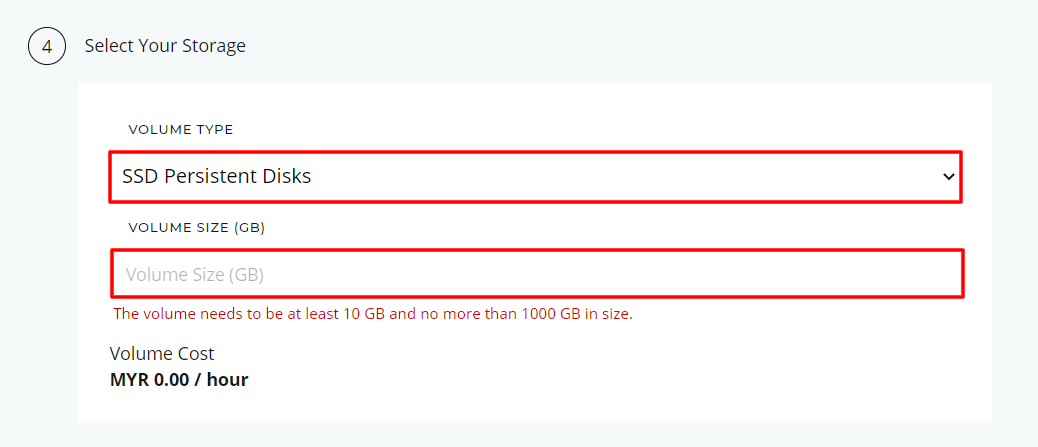
Step 6: Define Volume Size
- Specify the type and size of the volume based on the recommendations from Step 4.
- Enter the appropriate size in the Volume Size (GB) field.
Important Note: It is advisable to plan for the size of your volume. If you do not have a volume in planning, go for the recommended amount made available (from Step 4) to fill in the Volume Size (GB) type box.You may extend the volume later by referring to this guide: How To Extend Cloud Volume.
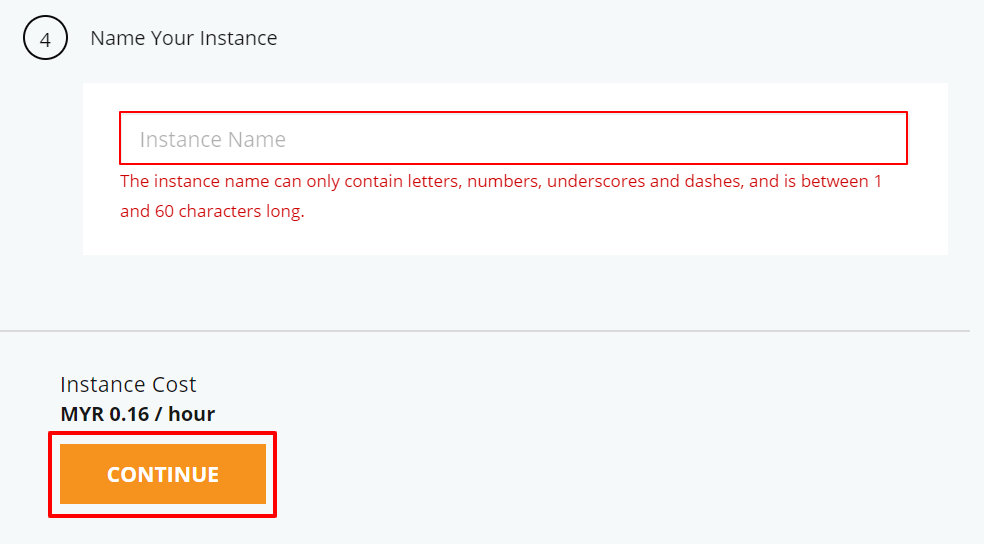
Step 7: Name Your Instance
- Enter a name for your instance and click Continue.
Step 8: Generate or Import a Key Pair
- Generate a new key pair or import an existing public key for secure access.

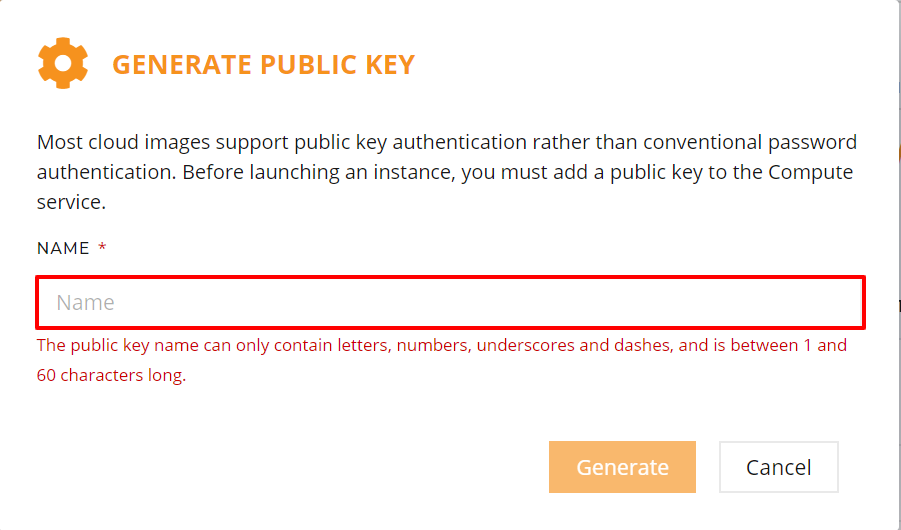
Step 9: Name and Generate Key Pair
- Enter a name for the key pair and click Generate.
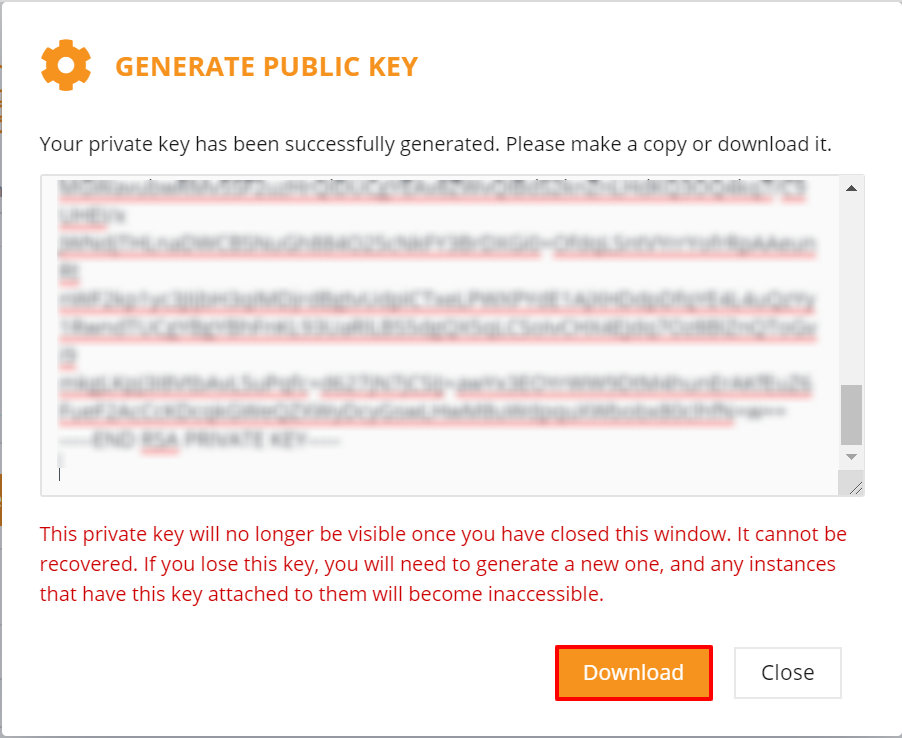
Step 10: Download Your Private Key
- Download the private key (.pem file) and store it securely.
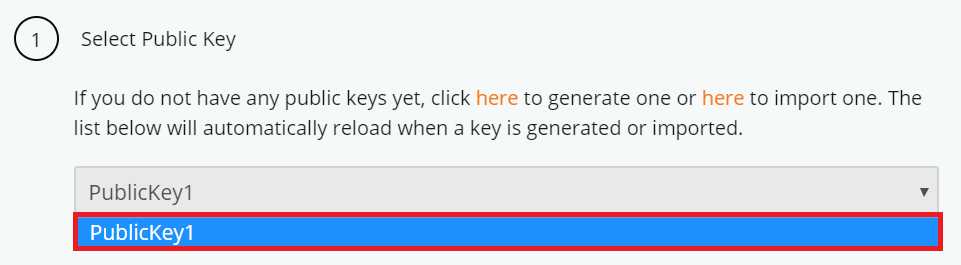
Step 11: Select Key Pair
- Select the newly generated key pair for your instance.
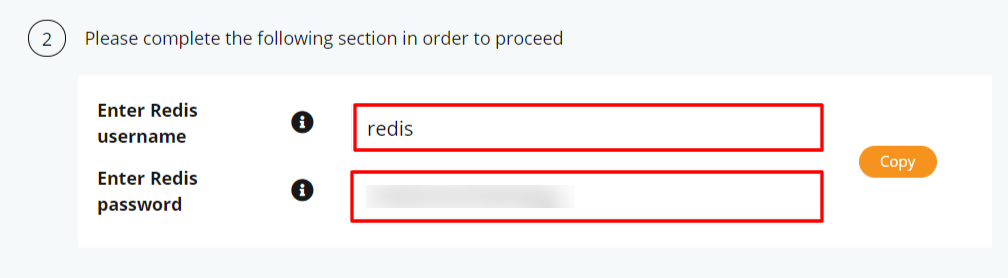
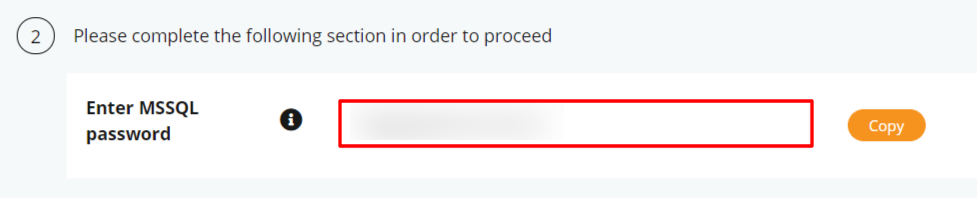
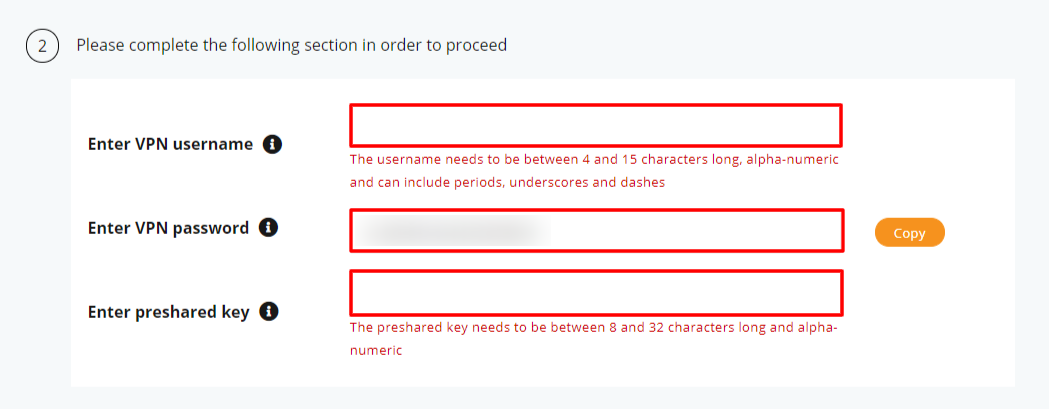
Step 12: Complete Application Credentials
- Enter the necessary credentials for the selected application. This step varies depending on the application you choose (e.g., Redis, MSSQL, VPN).
e.g. for redis
e.g. for MSSQL
e.g. for Remote-Access VPN: L2TP/IPsec (PSK)
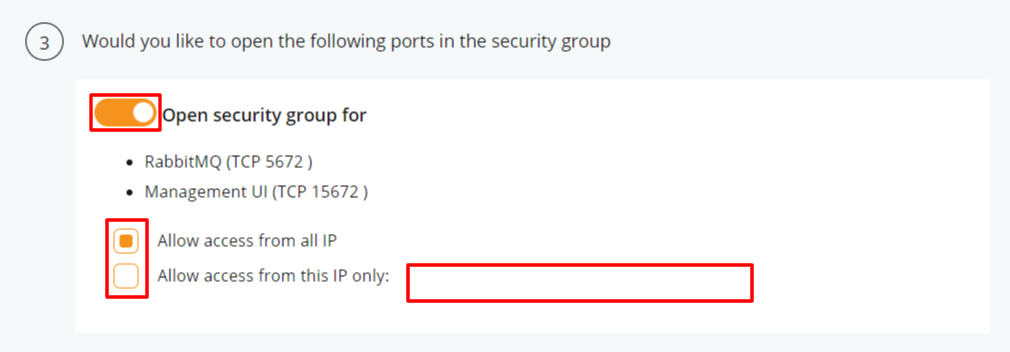
Step 13: Configure Security Groups
- You can choose to open or close security groups for the following ports by clicking the toggle button. Suggested security groups may vary depending on the application you have selected.
- If you choose to open the ports, you will be given the choice to allow instance access to users across all IP addresses or only to a specific IP address.
- If you choose to allow the latter, click on the Allow access from this IP only and fill in the blank with the IP address accordingly.
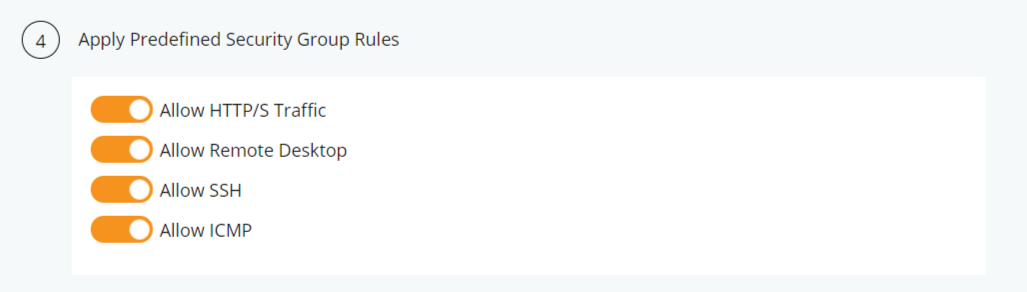
Step 14: (Optional) Apply Predefined Security Group Rules
- Apply any predefined security group rules as needed.
Step 15: (Optional) Create New Security Group
- Create a new security group (firewall) rules by clicking Here.

- Enter a name for the security group and click Create.
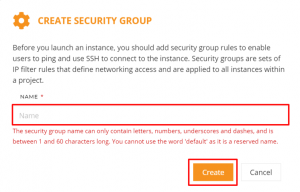
- Select the newly created security group and review its rules.

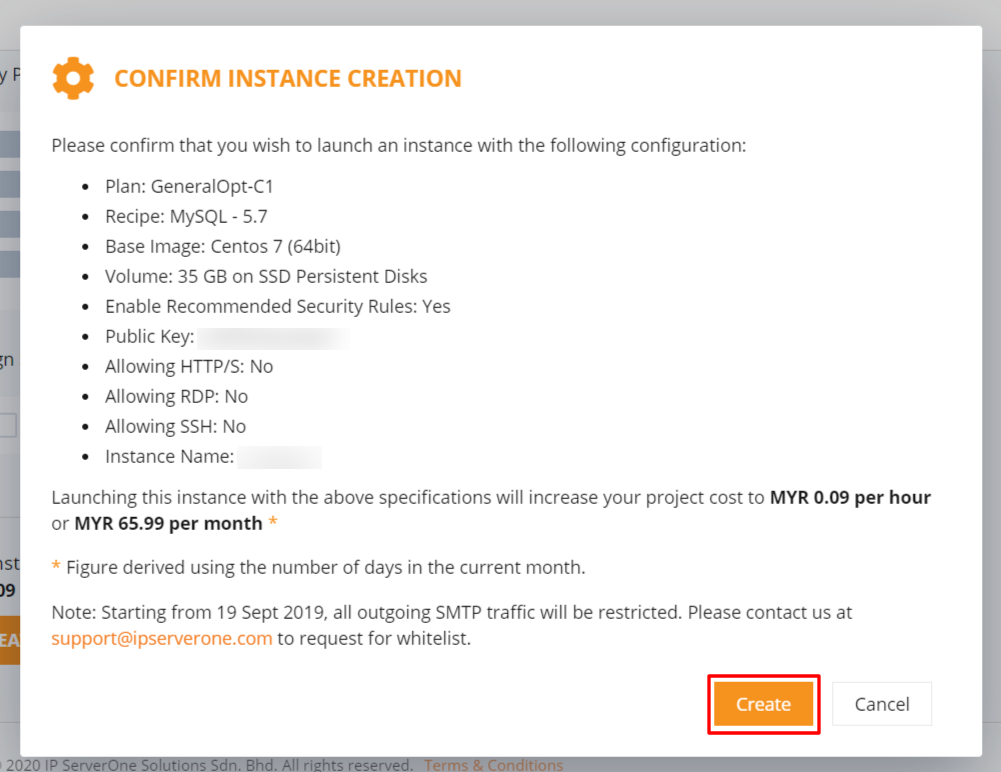
Step 16: Review Instance Costs
- Verify the total cost of your instance.
Step 17: View Launched Instance
- Click Instances to view your newly launched instance.
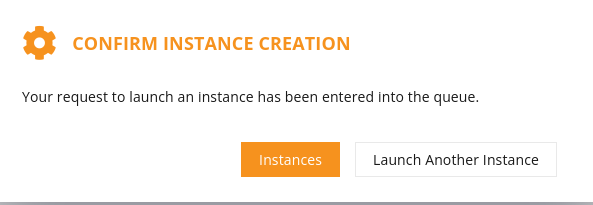
Step 18: Monitor Instance Creation
- Wait for the instance to be created.
- Refresh the section periodically to check the status.

Result
Your Instance will be in Active status once the launch is successful.
Note: You might want to take note of the IP addresses that have been assigned to your Instance.
Conclusion
By following this guide, you’ve successfully launched an instance with a pre-configured application, streamlining your deployment process. This one-click solution not only saves time but also ensures that your instance is set up with best practices in mind. Remember to keep your private key secure, as it is vital for accessing your instance.