Search Our Database
How to Purchase a Dedicated Server
Introduction
Purchasing a dedicated server is a significant step towards ensuring your website has the resources and reliability it needs to perform optimally. Dedicated servers provide your site with its own exclusive server, enhancing performance, security, and control. This guide will walk you through the process of purchasing a dedicated server through your customer portal, from selecting your server specifications to finalizing your order.
Steps to Purchase a Dedicated Server
Step 1: Login and Start a New Order
Login to customer portal and click on New Order.

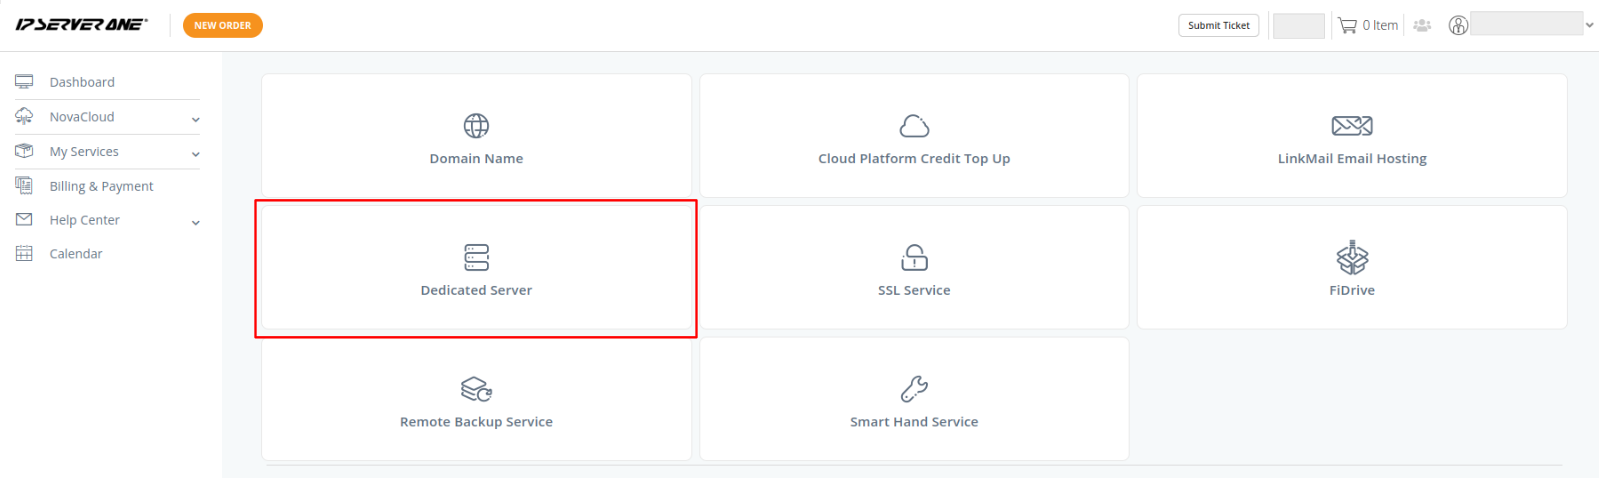
Step 2: Select Dedicated Server
Select Dedicated Server which allows you to customize for your website to has its own server all to itself!
Step 3: Choose Server Region and Plan
First, you must select the server region of your choosing. There are two server locations provided: Malaysia and Singapore. Select the Dedicated Server plan based on the subscription period (1 month, 3 months, 6 months, or 12 months) that you require. Proceed to click Next for server configuration page. 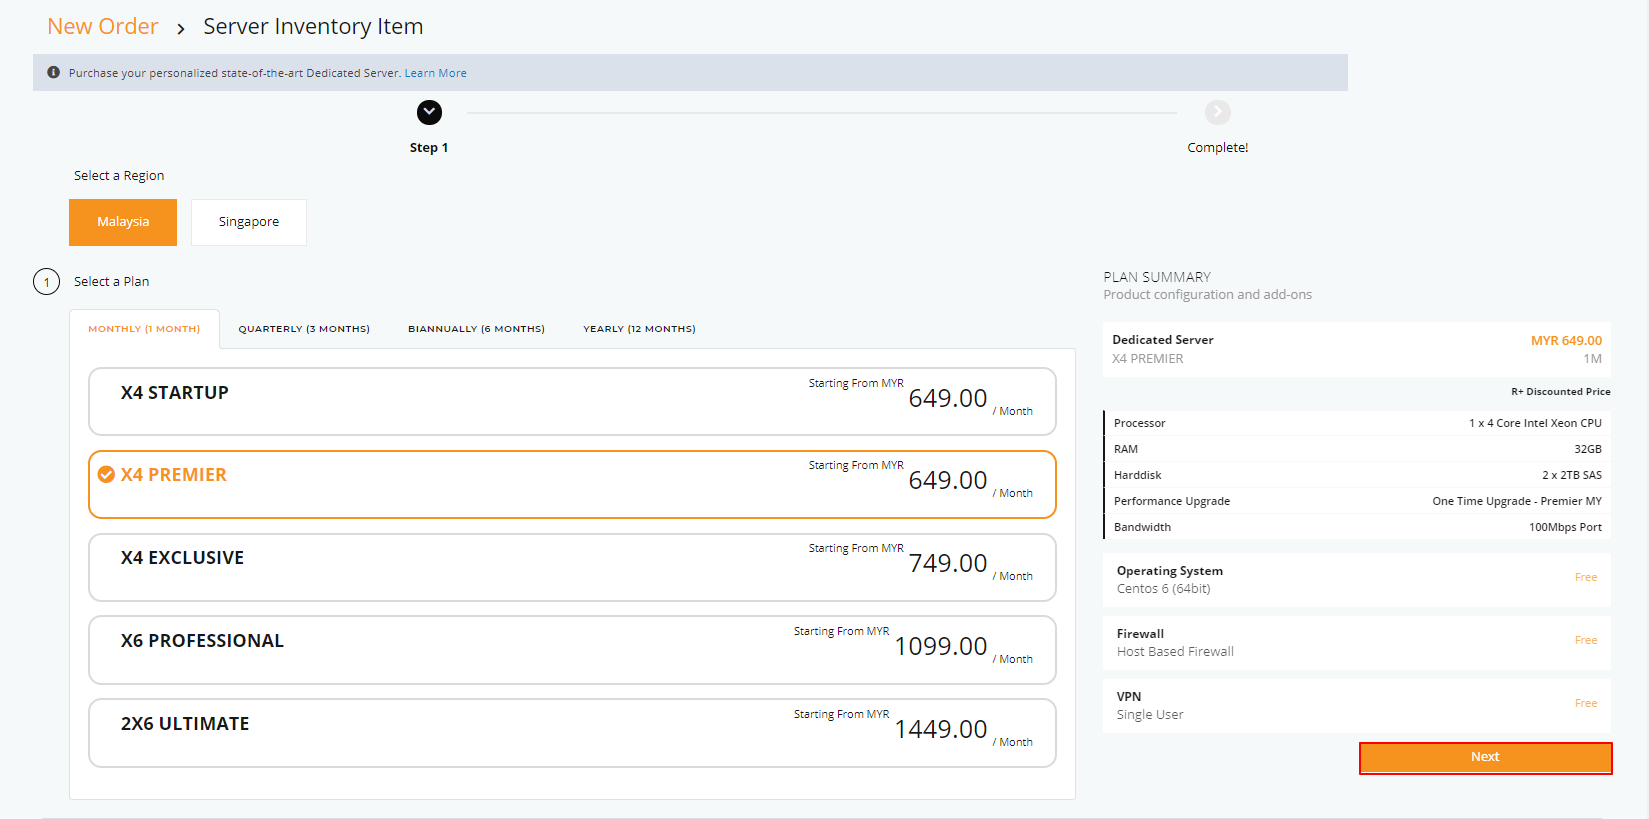
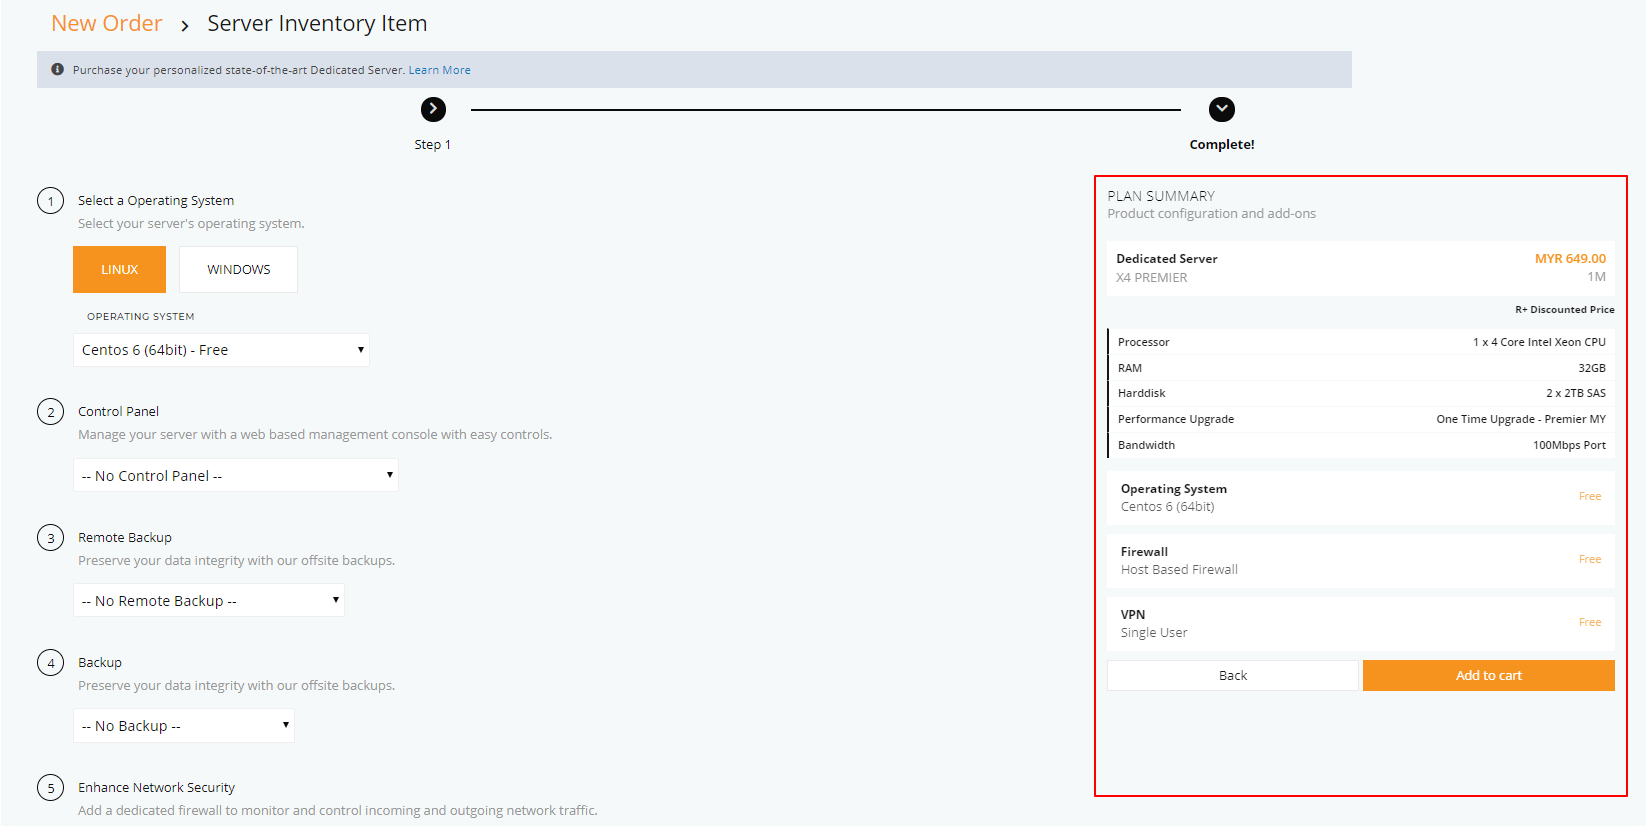
Step 4: Configure Your Server
On the server configuration page, select:
- Operating System
- Control Panel
- Remote Backup (optional)
- Backup
- Enhance Network Security (optional)
- Virtual Network Network (optional)
- Content Delivery Network (optional)
- Add Management (optional)
Step 5: Review Order Summary
Prior to Checkout, re-check your order selection from the Order Summary on the right-hand side.
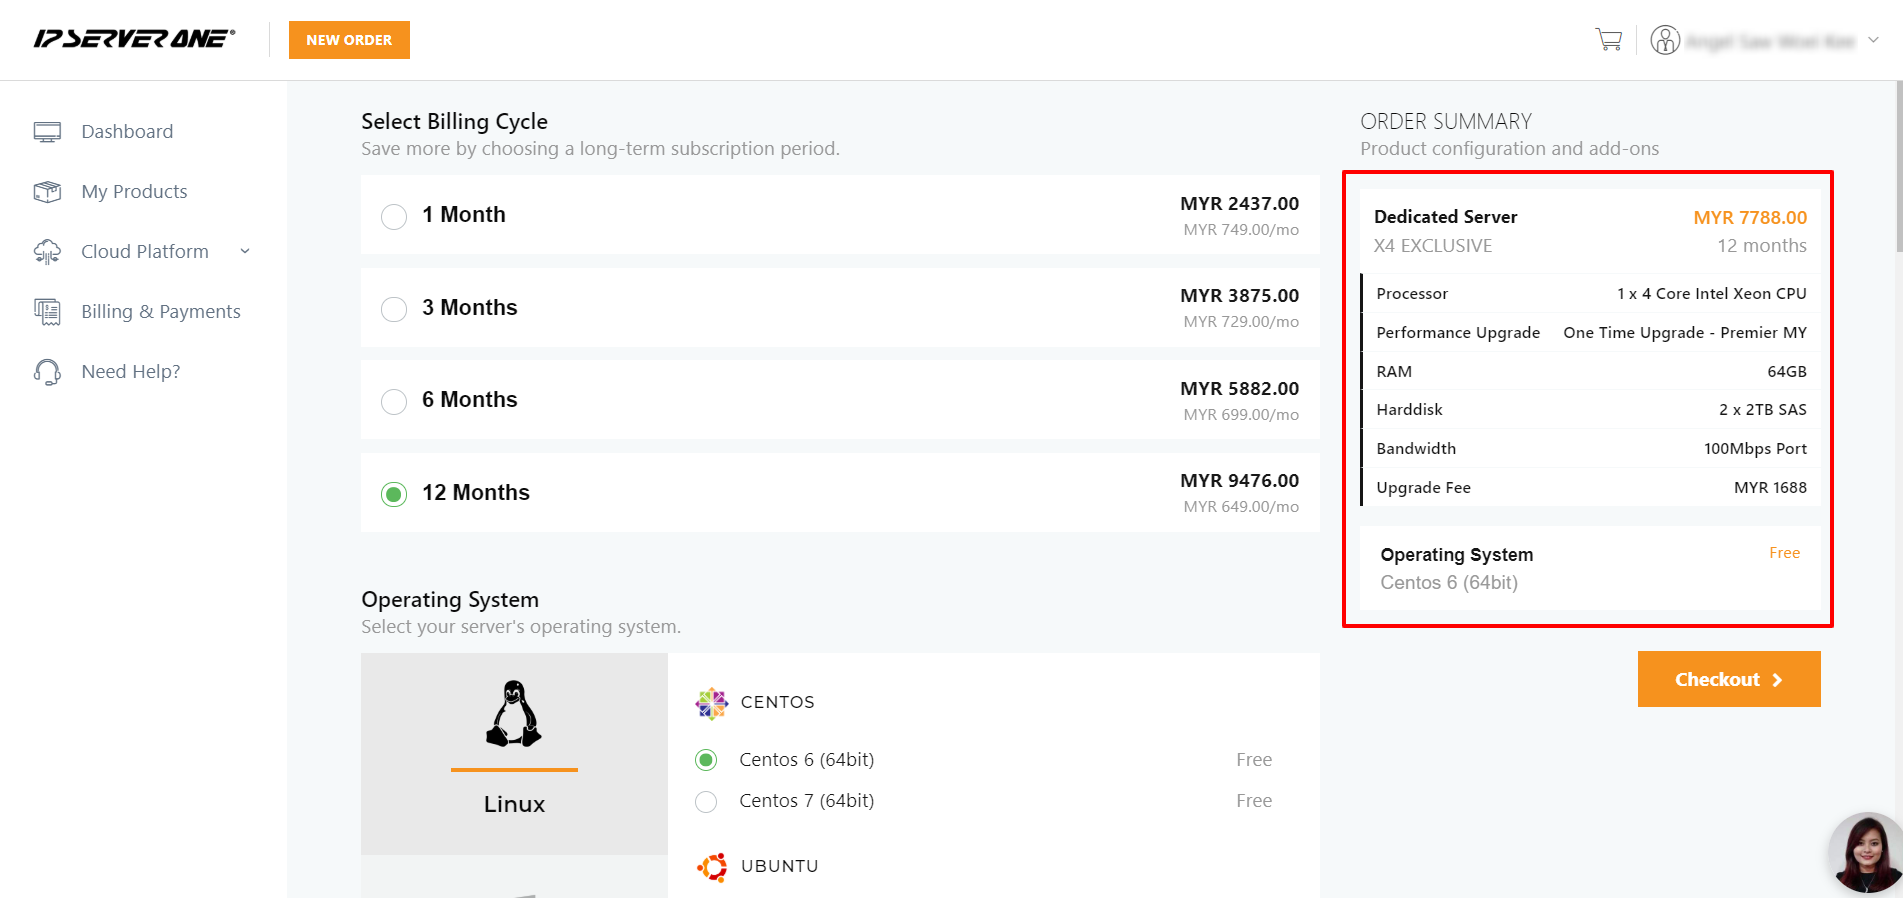
Step 6: Checkout
Once you have confirmed that all selections are correct, proceed to Checkout to complete your order.
Conclusion
By following these steps, you will have successfully purchased a dedicated server tailored to your website’s needs. Dedicated servers offer unparalleled performance and security, ensuring that your website runs smoothly and efficiently.