Search Our Database
How to Extend Cloud Volume in Portal
Introduction
As your data grows or application demands increase, expanding the storage capacity of your cloud instance becomes a crucial task. Fortunately, the customer portal offers a simple and efficient way to extend your instance’s volume without downtime. This guide will walk you through the steps to safely increase your volume size using the NovaCloud section of the portal.
Prerequisites
Before starting, ensure that the following steps are completed:
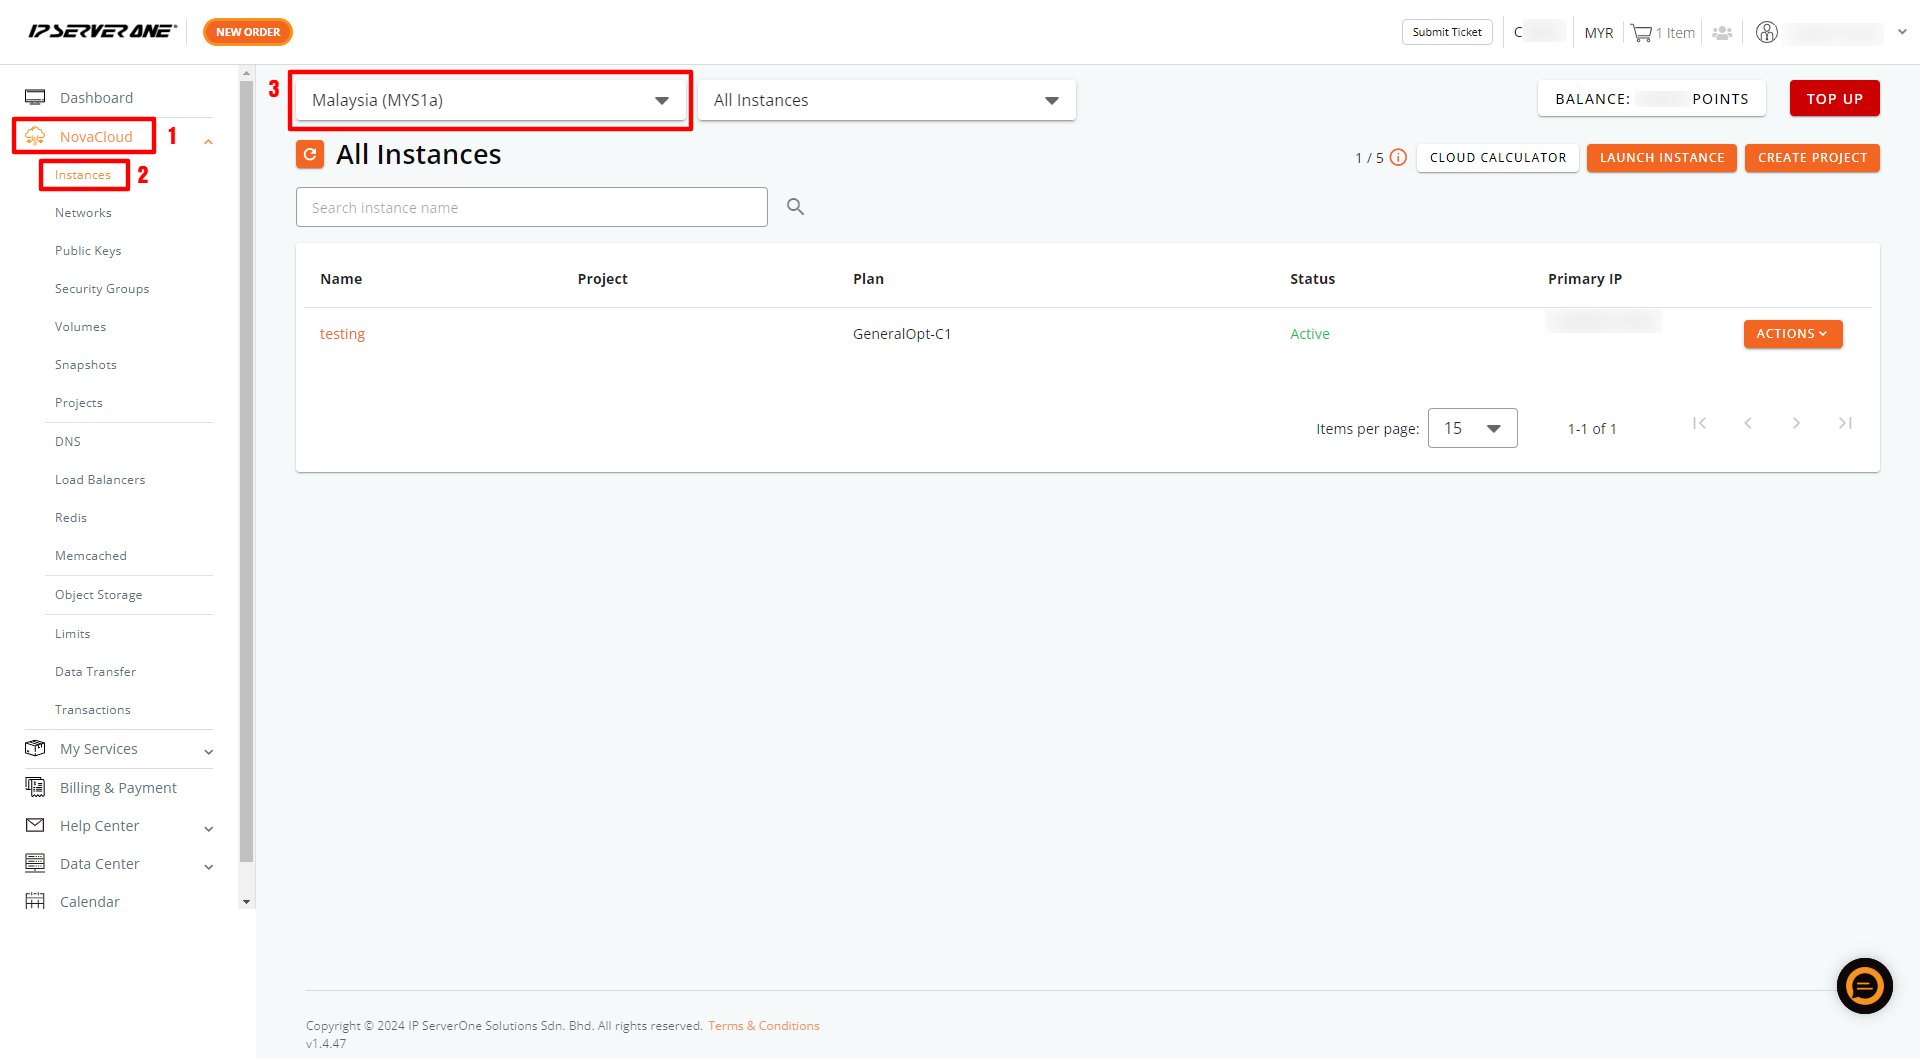
- Login to the Customer Portal, navigate to NovaCloud, and click the dropdown next to Instances.
- Select the region where your instance is hosted, then choose the instance you want to resize.
NOTE: Ensure your instance is stopped before proceeding with the volume extension.
- To stop the instance, select the instance, click the Actions dropdown, and then click the Stop button.
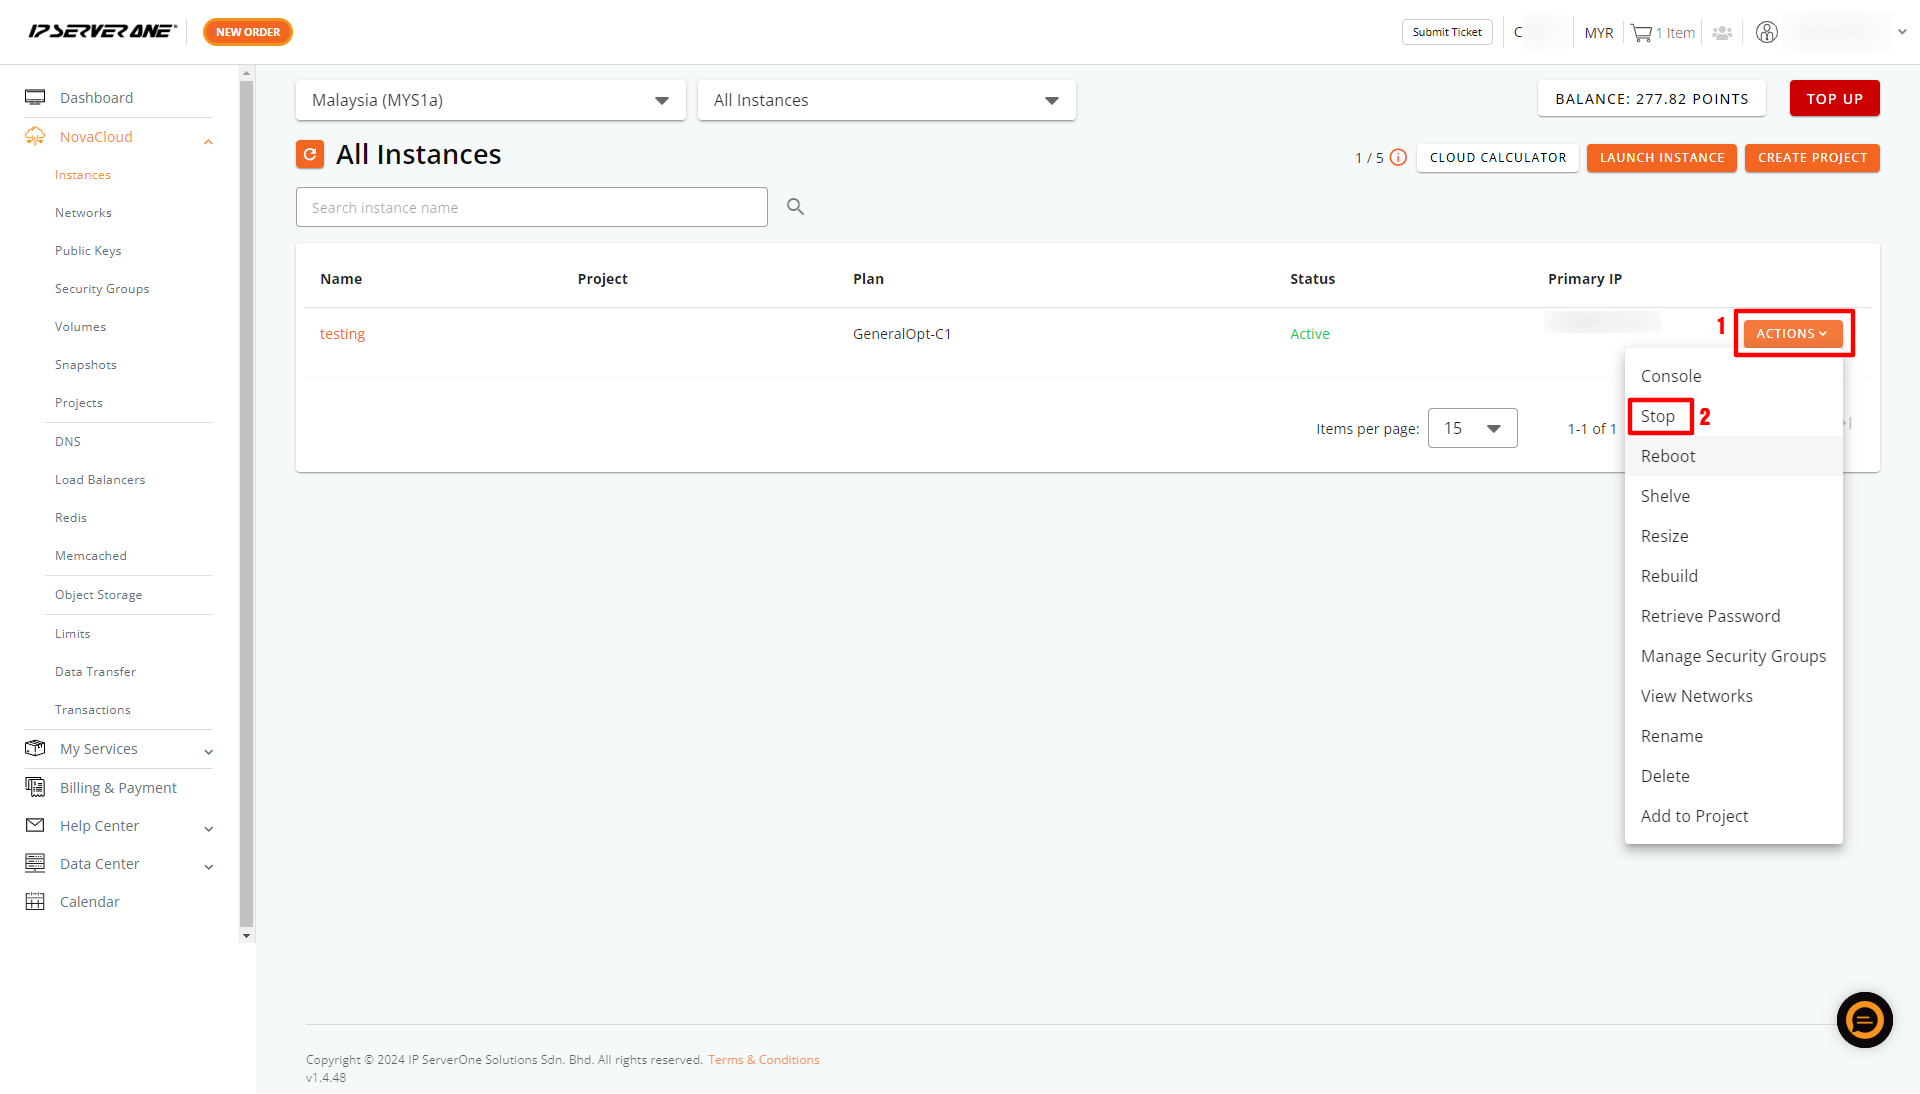
- Once the instance is stopped, you can proceed with extending its volume.
Instructions
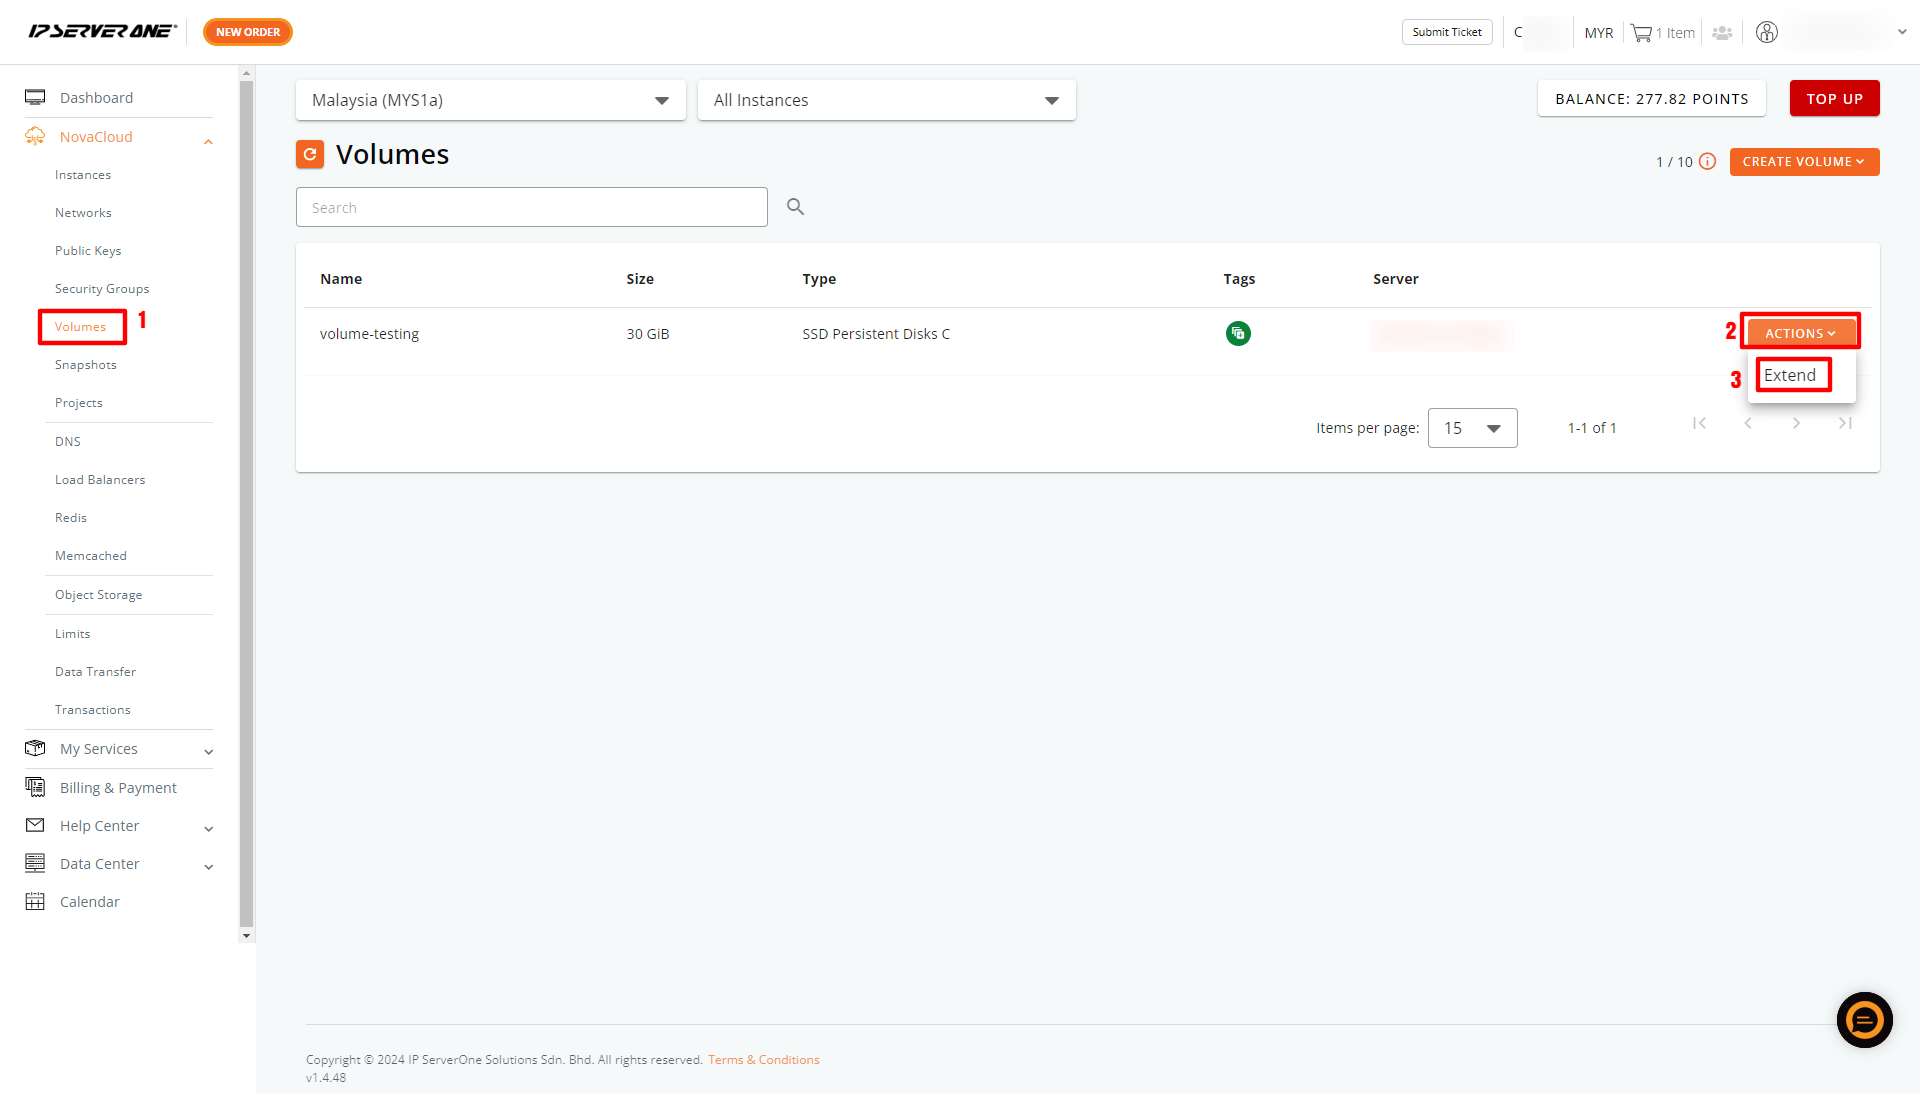
- Go to Volumes, locate your instance, and click the Actions button. From the dropdown, select Extend.
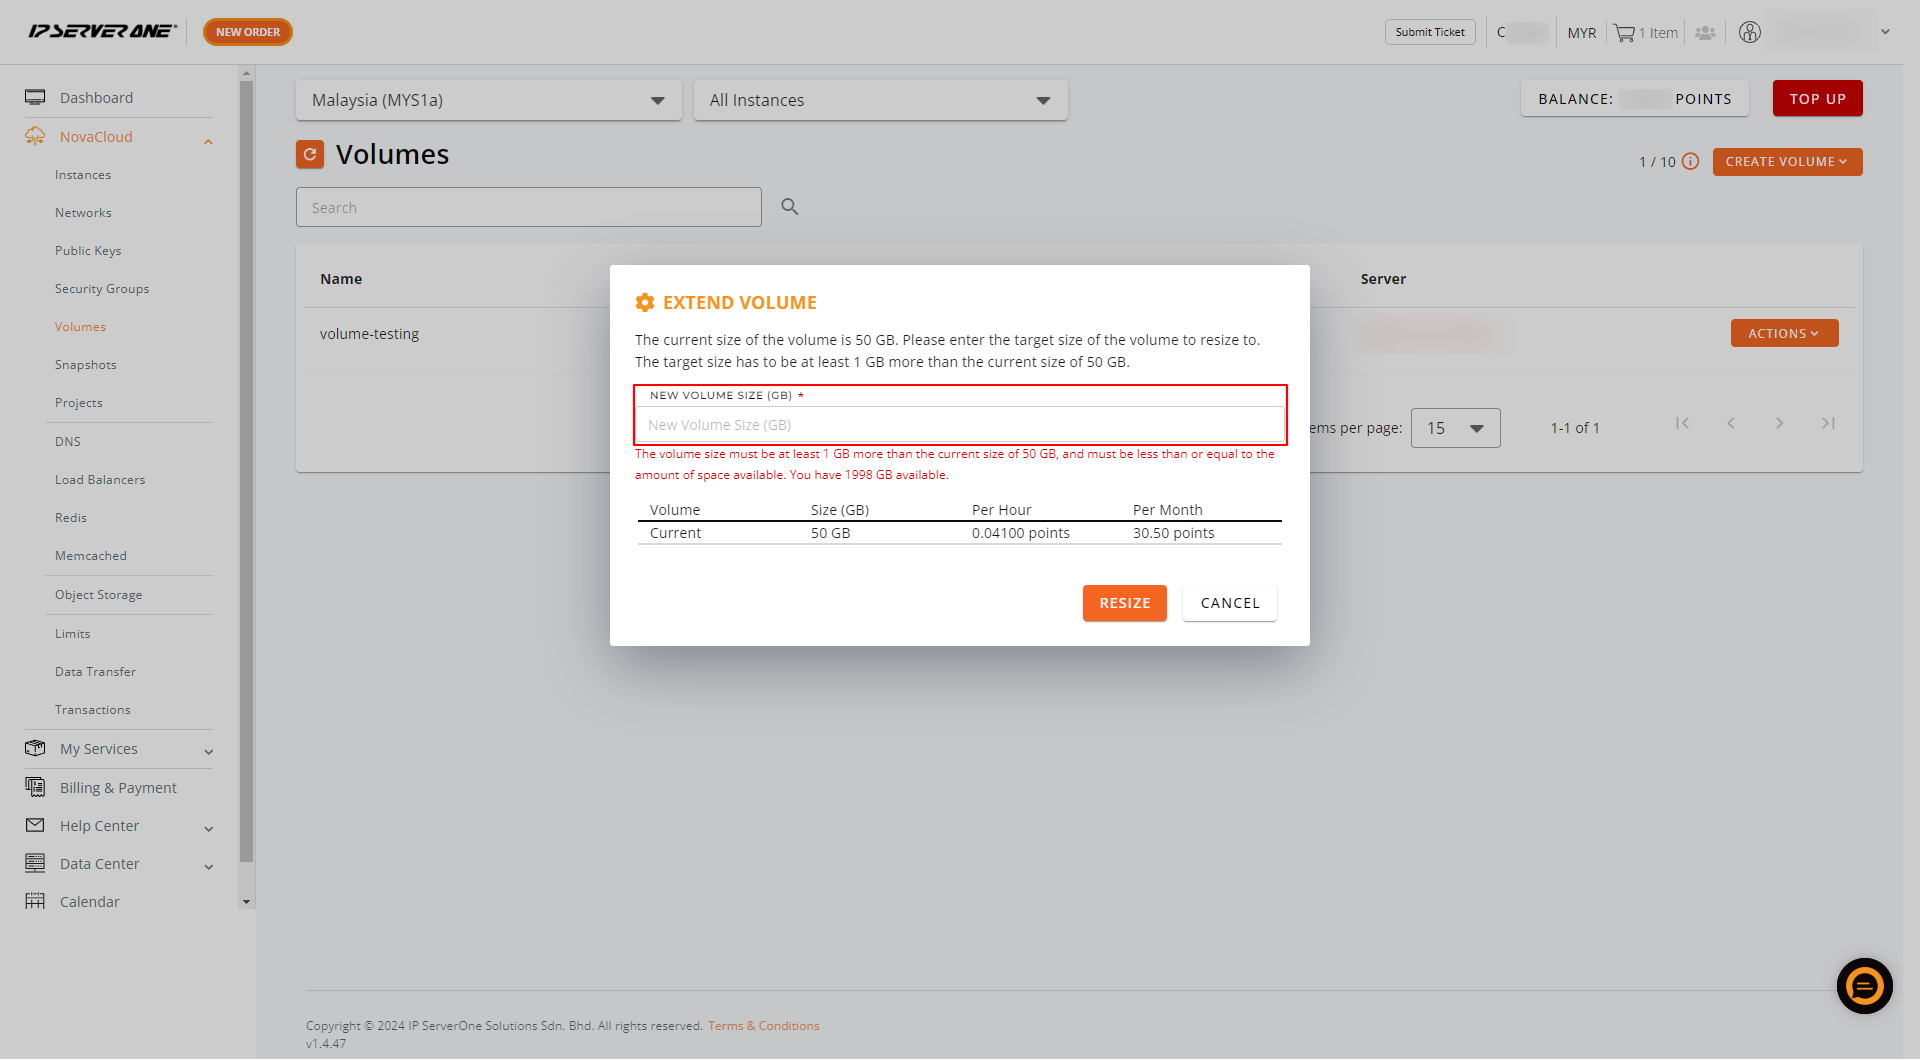
2. Enter the desired volume size and click the Resize button. The changes will apply within 15 minutes.
Conclusion
By following these steps, your instance’s volume will be successfully extended to the specified size, providing you with additional storage space. After resizing, it’s recommended to monitor your instance to ensure everything functions correctly. For any questions or further assistance, please open a ticket through your portal account or contact us at +603 – 2026 1688. We’re here to help!