Search Our Database
How to switch your Outlook account from POP to IMAP
Introduction
This guide provides detailed instructions for users who need to change their email account in Microsoft Outlook from POP3 connection to an IMAP connection.
Prerequisites
- Microsoft Outlook: Ensure you have Microsoft Outlook installed on your computer.
- Active Email Account: Have an active email account set up with POP3.
- Internet Connection: A stable internet connection is required for email synchronization.
- Backup Storage: Ensure you have sufficient storage for the backup of your mailbox.
- Email Server Details: Have your email server’s IMAP settings at hand (server addresses, ports, encryption methods).
Step-by-Step Guide
Step 1: Backing Up Your Mailboxes
- Open Outlook: Select File > Open & Export > Import/Export.
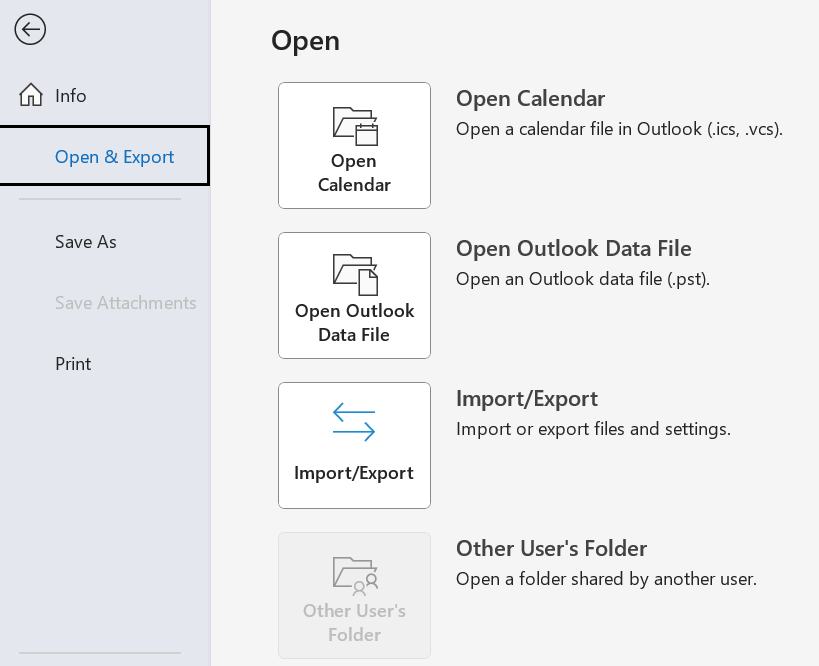
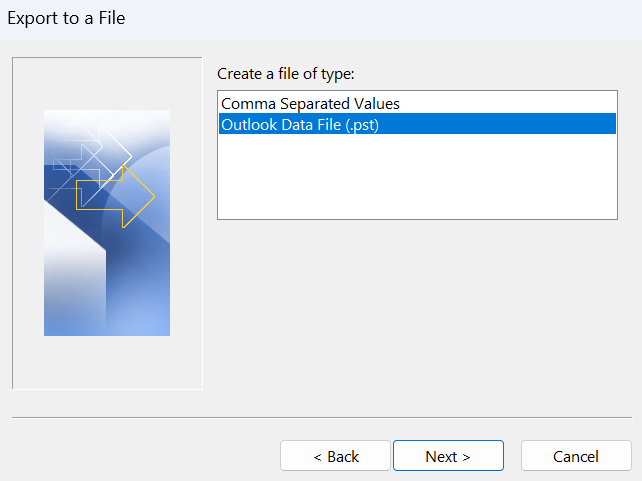
- Export Mailboxes: Choose Export to a file > Outlook Data File (.pst).
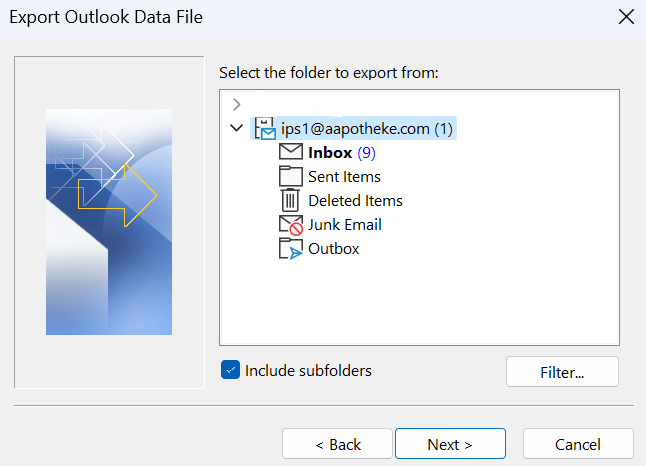
- Select Mailboxes: Choose the mailboxes and subfolders to back up.
- Save Backup: Choose a location to save your backup.
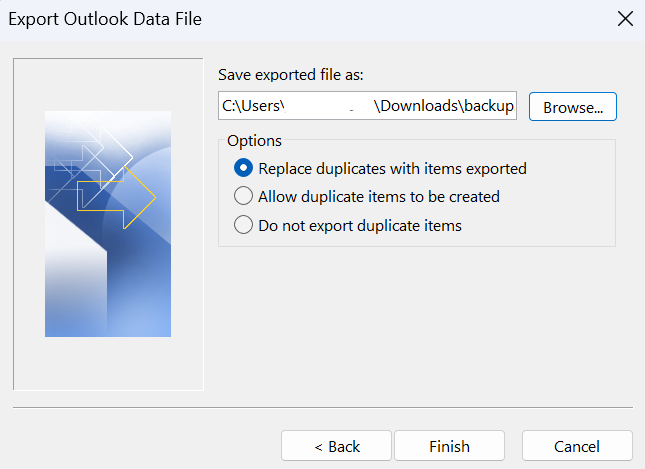
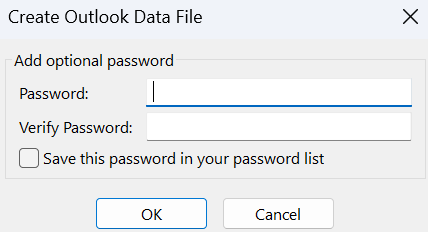
- Create password for the backup file.
Step 2: Deleting the POP Account
After create backup for your POP account, you can proceed to delete the POP account. Make sure you create backup before you delete the POP account.
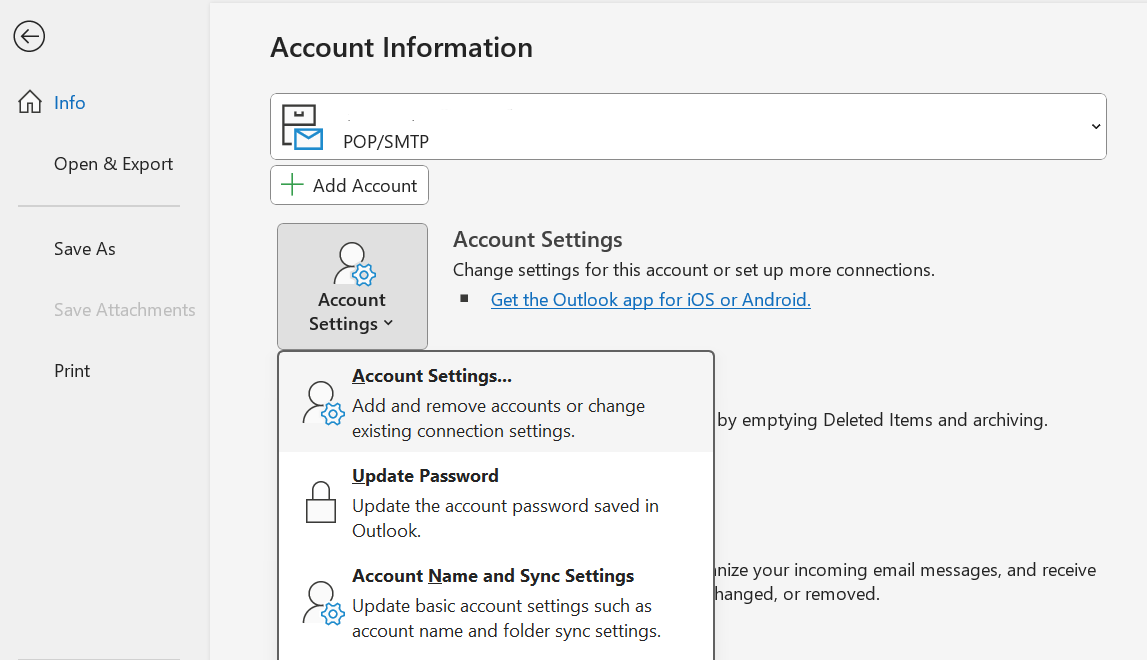
- Access Account Settings: Go to File > Info > Account Settings > Account Settings….
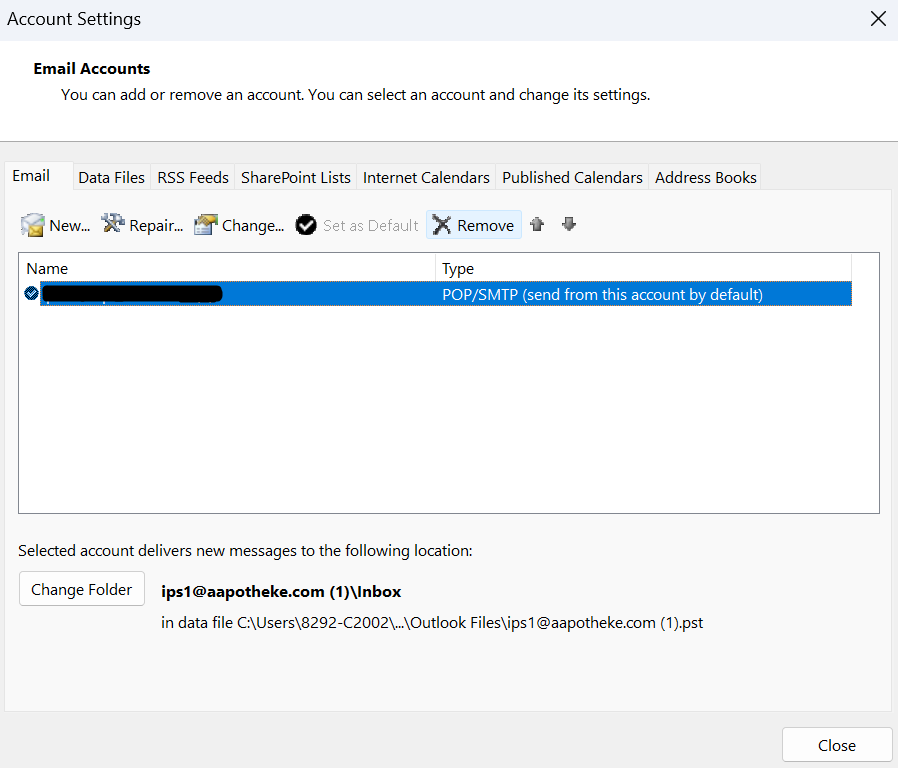
- Remove Account: Select the email account and click Remove. In the confirmation pop out, click Yes.
Step 3: Setting Up Your IMAP Account
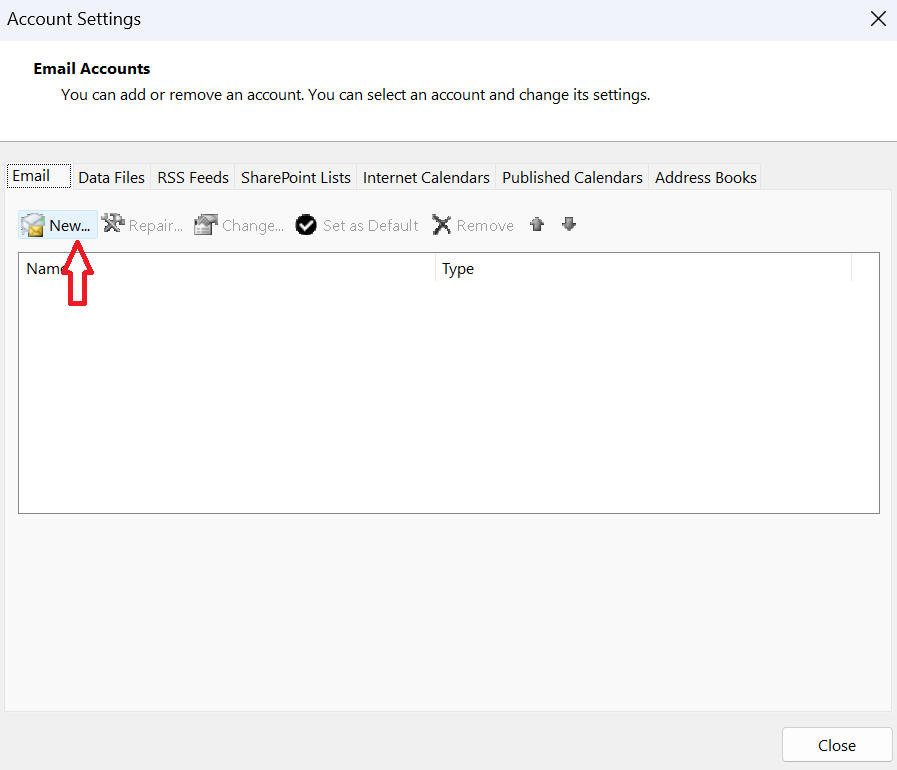
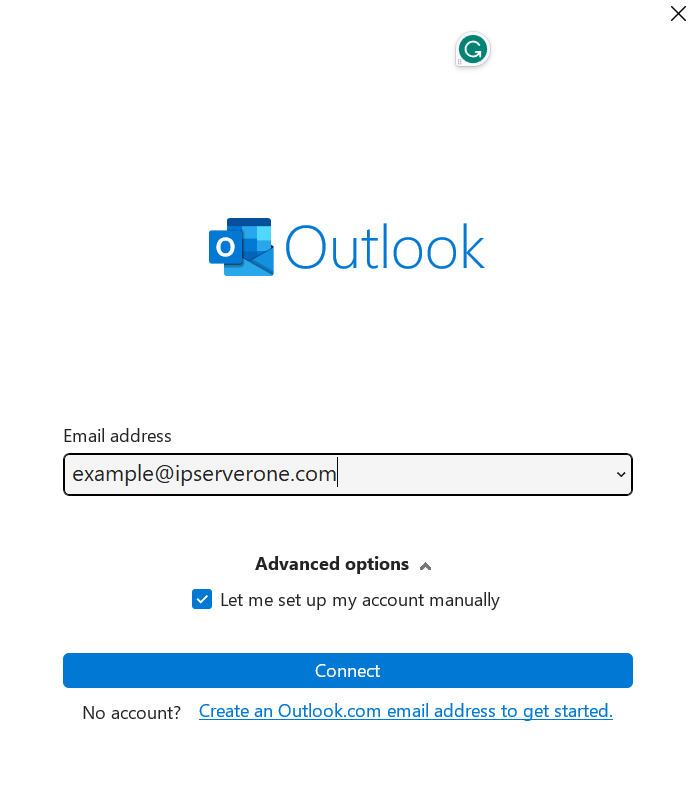
- Add IMAP Account: In Account Settings, click New…, or go to File > Add Account.
- Fill in email account and allow manual setup account
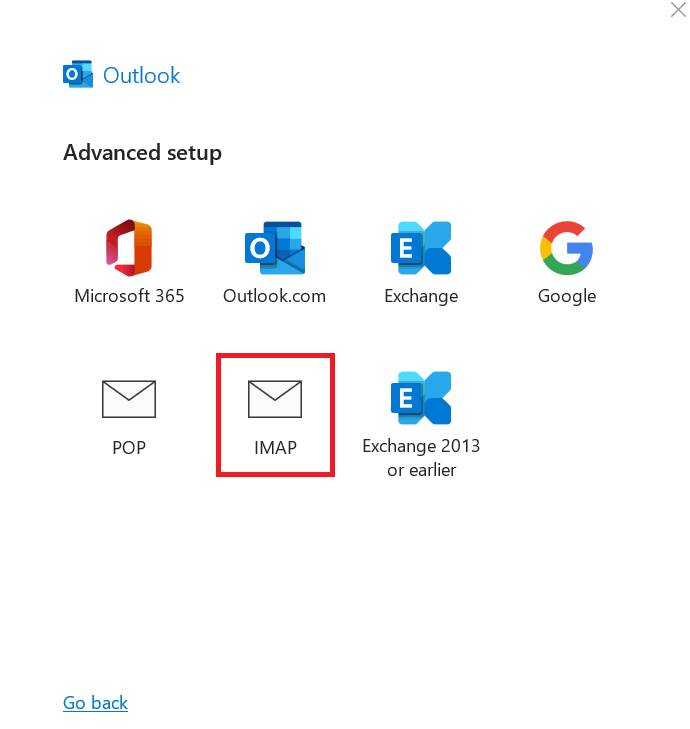
- Choose IMAP setup
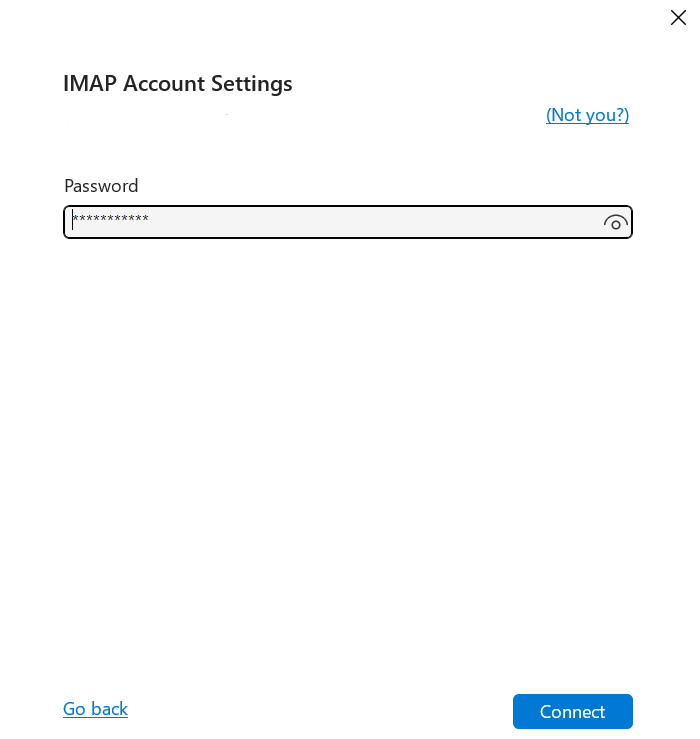
- Fill in the password and click Connect
*Follow the below settings for the hostname and port:
Incoming Mail
Server: mail.<domain_name>
Port: 993
Encryption method: SSL/TLS
Outgoing Mail
Server: mail.<domain_name>
Port: 465
Encryption method: SSL/TLS
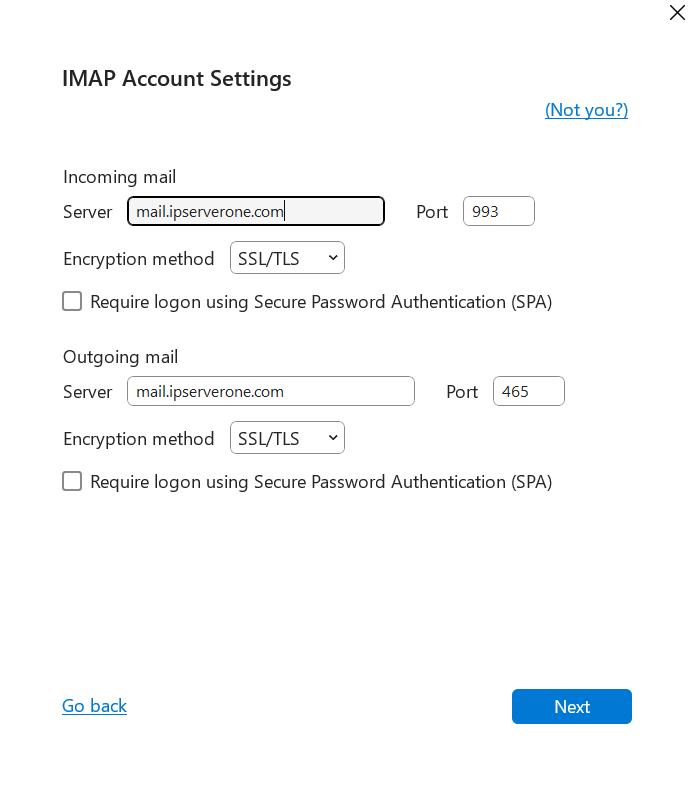
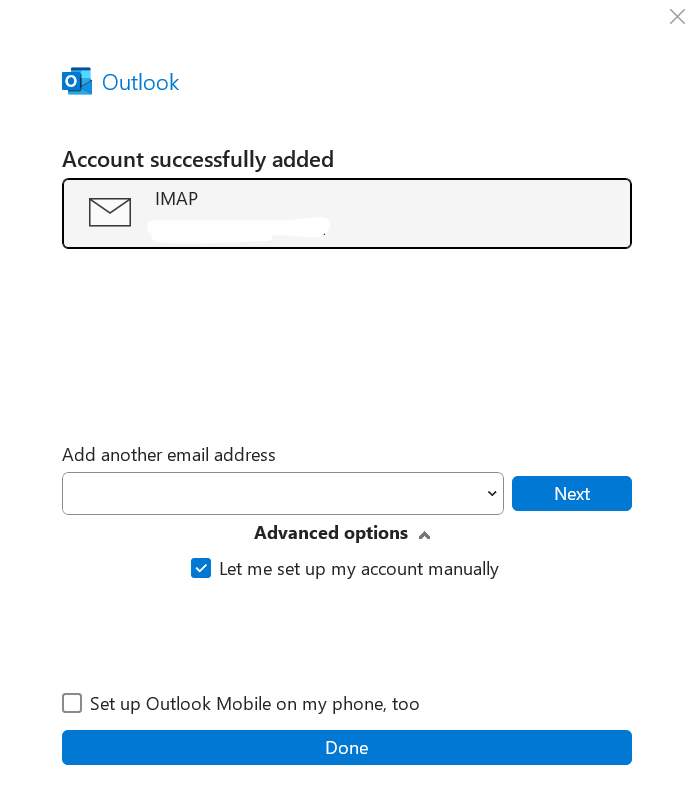
- Complete the IMAP setup
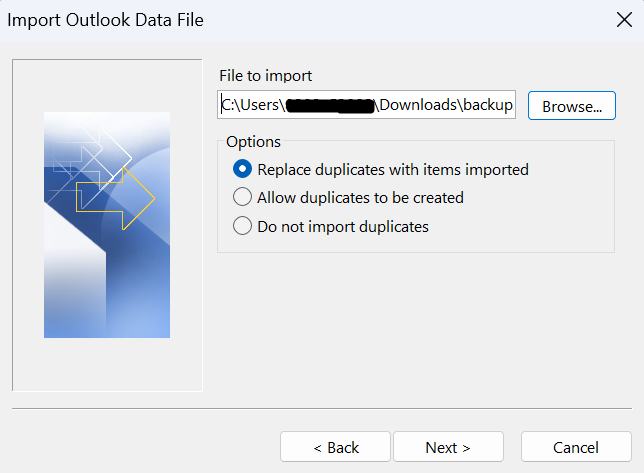
Step 4: Restoring Your Mailbox
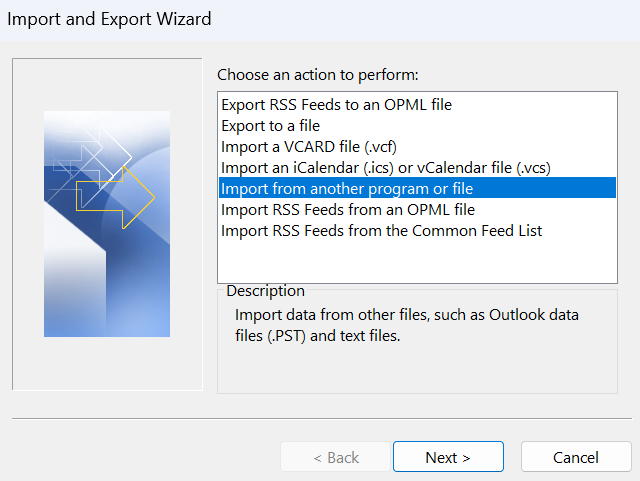
- Import Backup: Go to File > Open & Export > Import/Export > Import from another program or file.
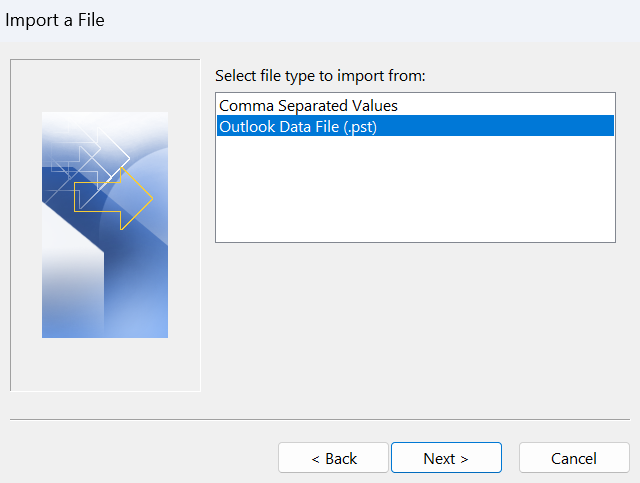
- Select Backup File: Choose Outlook Data File (.pst) and navigate to your backup file.
- Complete Restoration: Choose the destination folder and complete the process.
Conclusion
Congratulations! By following these steps, you’ve successfully transitioned your email account in Microsoft Outlook from a POP3 to an IMAP connection, ensuring smoother synchronization and backup management. If you have any questions or need further assistance, please don’t hesitate to reach out to our support team at support@ipserverone.com.