Search Our Database
Setup new email account on Outlook 2019
Introduction
This guide provides a step-by-step process for setting up a new email account in Outlook 2019, focusing on both IMAP and POP configurations. Outlook 2019 is a powerful email client, often used in professional and personal contexts for managing email communication efficiently. Configuring an email account properly allows users to send, receive, and organize emails seamlessly within the Outlook environment.
This guide is intended for users who already have an email address and login credentials, and who wish to configure these credentials in Outlook 2019. The instructions cover both IMAP and POP protocols, explaining how to adjust settings like server names, ports, and encryption options. By the end of this tutorial, users will have their email accounts configured and ready to use within Outlook 2019.
Prerequisites
- Access to Outlook 2019 installed on your device.
- Your email address and password.
- The server settings for your email account (IMAP or POP), including the correct port numbers.
- Information for SSL/TLS encryption as provided by your email service provider.
Step-by-Step Guide
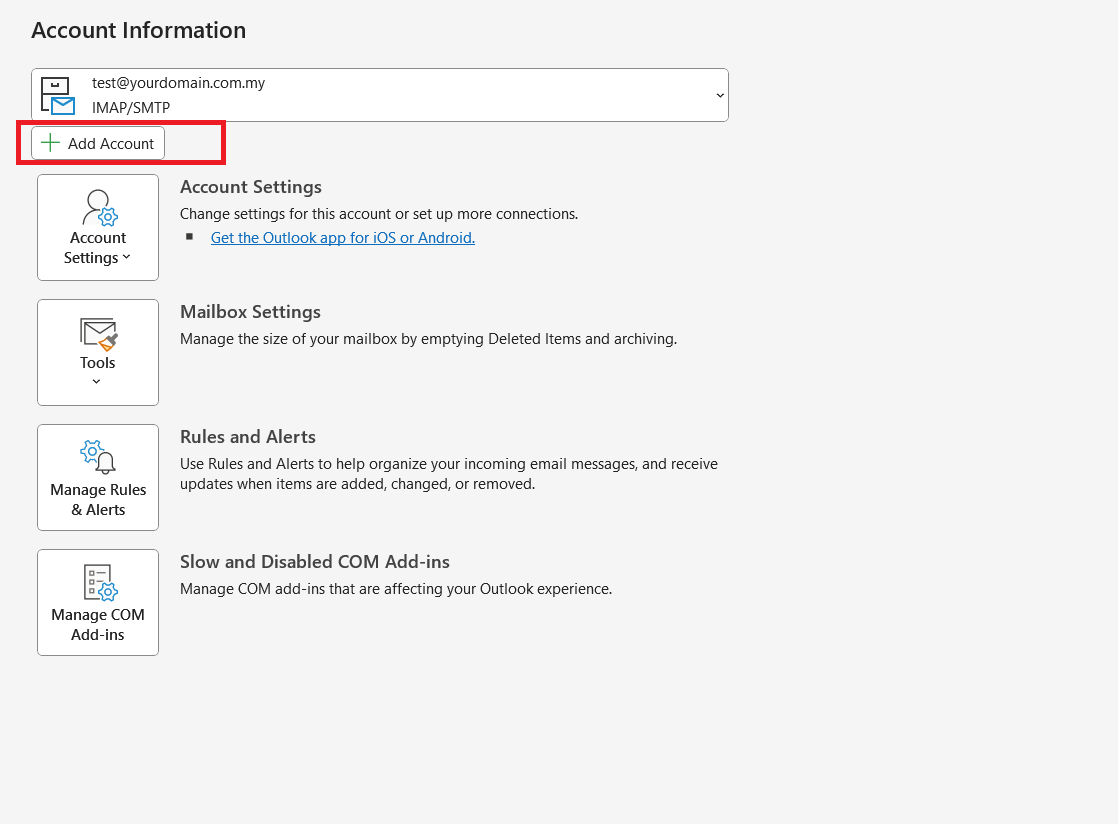
Step 1: Open Outlook 2019 and Access Account Setup
- Launch Outlook 2019.
- Click on the File tab in the upper left corner.
- Select Add Account from the options available.
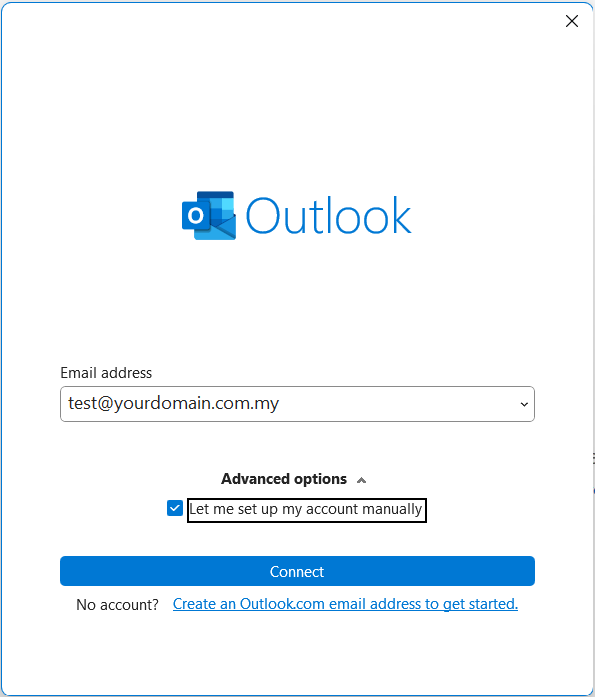
Step 2: Enter Email Address and Choose Manual Setup
- In the Add Account window, enter your email address.
- Expand the Advanced options dropdown and check Let me set up my account manually.
- Click Connect to proceed to the next page.
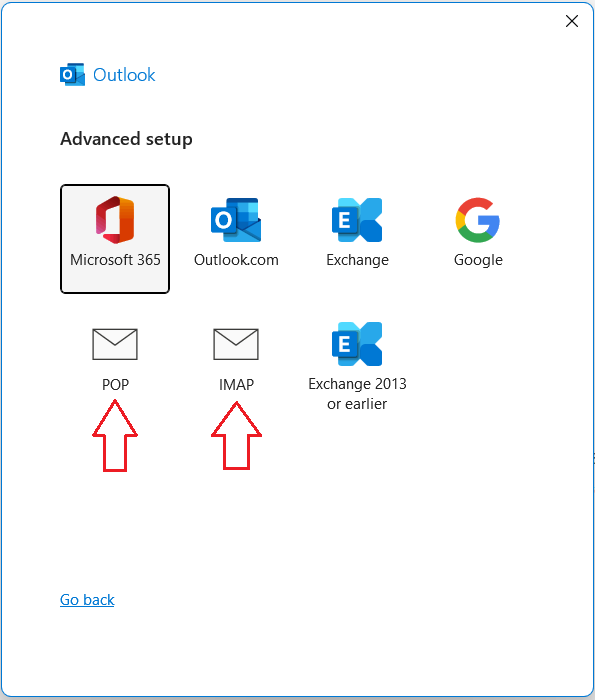
Step 3: Choose IMAP or POP Configuration
Select either IMAP or POP based on your preference and your email provider’s settings:
- IMAP: Recommended for accessing emails across multiple devices.
- POP: Used for managing emails on a single device, downloading messages directly.
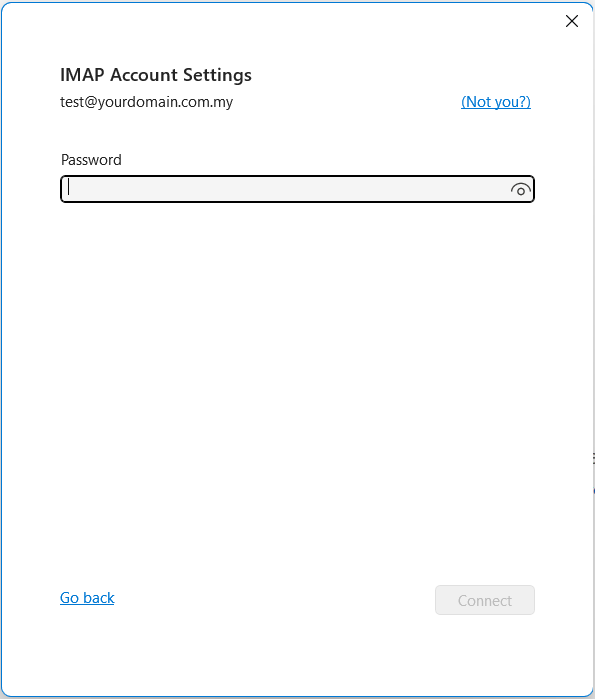
Step 4: Enter Your Email Password
Enter the password for your email account and click Connect.
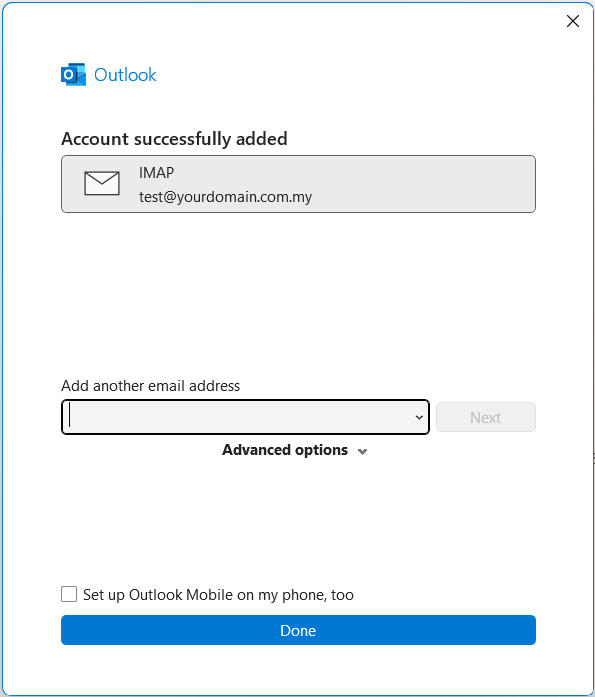
Step 5: Confirm Account Setup
Outlook will connect to your email provider and complete the basic setup for your account. You should see a confirmation message indicating that the account was added successfully.
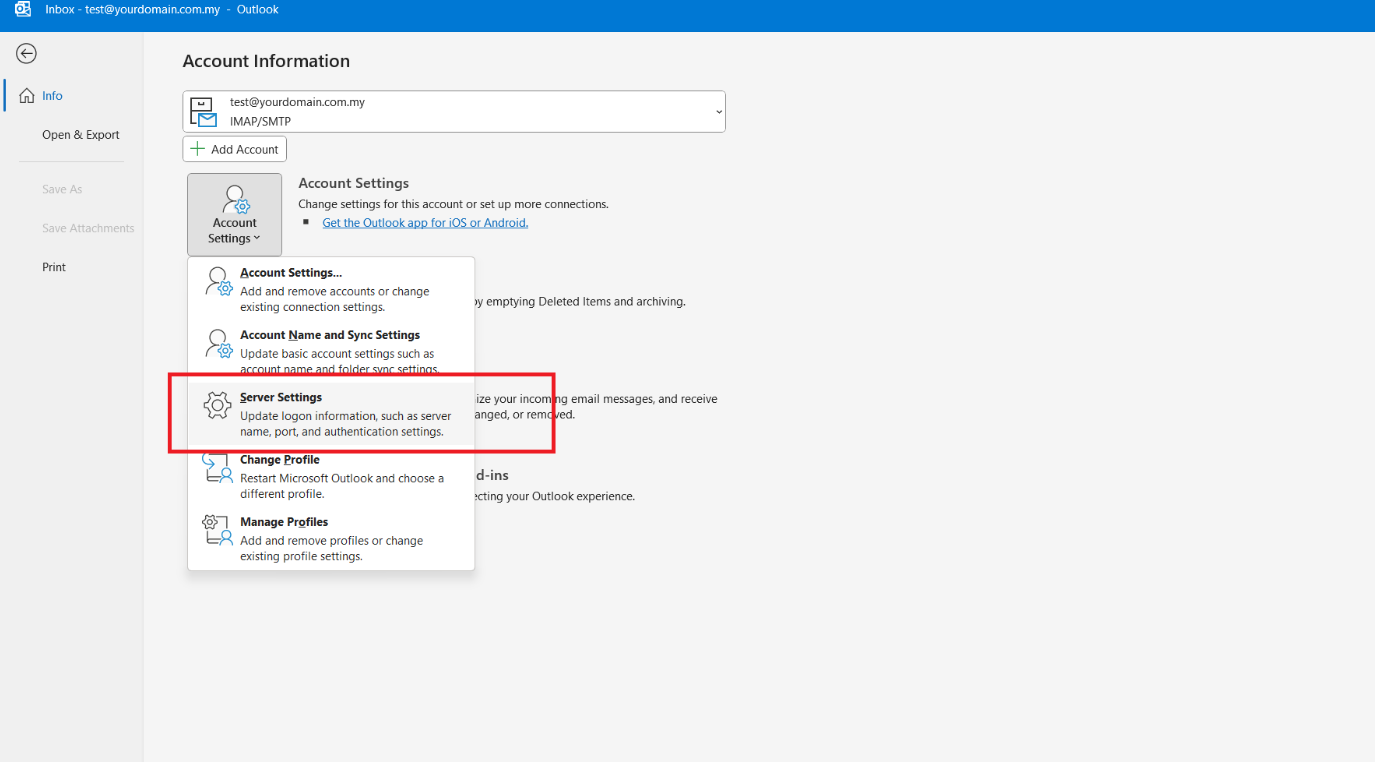
Step 6: Access Server Settings to Adjust Ports and Encryption
- Navigate to File > Account Settings > Server Settings.
- Configure incoming and outgoing server settings for secure email transmission.
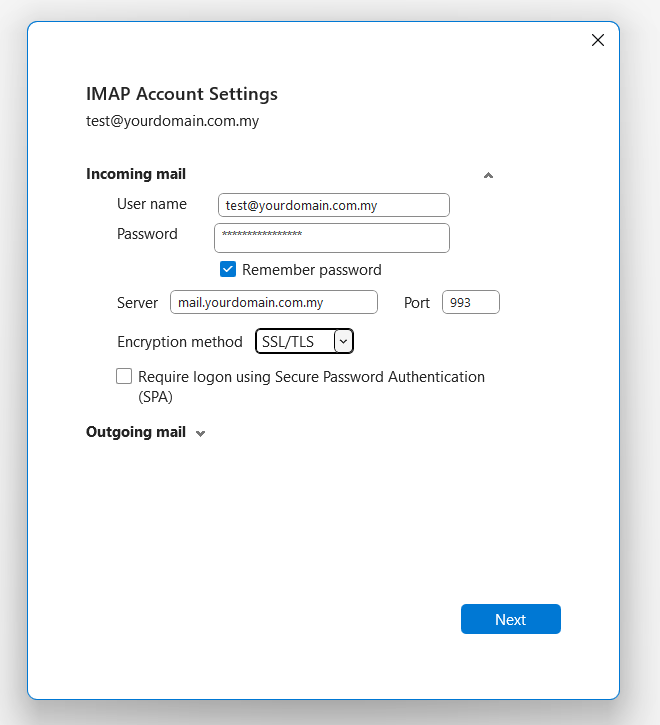
Step 7: Configure Incoming Mail Settings
Under Server Settings, select the Incoming mail tab and enter the following details:
- Username: Your email address.
- Password: Your email account password.
- Server hostname: Incoming server address (e.g., mail.yourdomain.com).
- Port:
- IMAP: 993
- POP: 995
- Encryption method: SSL/TLS.
Step 8: Configure Outgoing Mail Settings
In the Outgoing mail section, enter:
- Server hostname: Outgoing server address (e.g., mail.yourdomain.com).
- Port: 465 for both IMAP and POP.
- Encryption method: SSL/TLS.
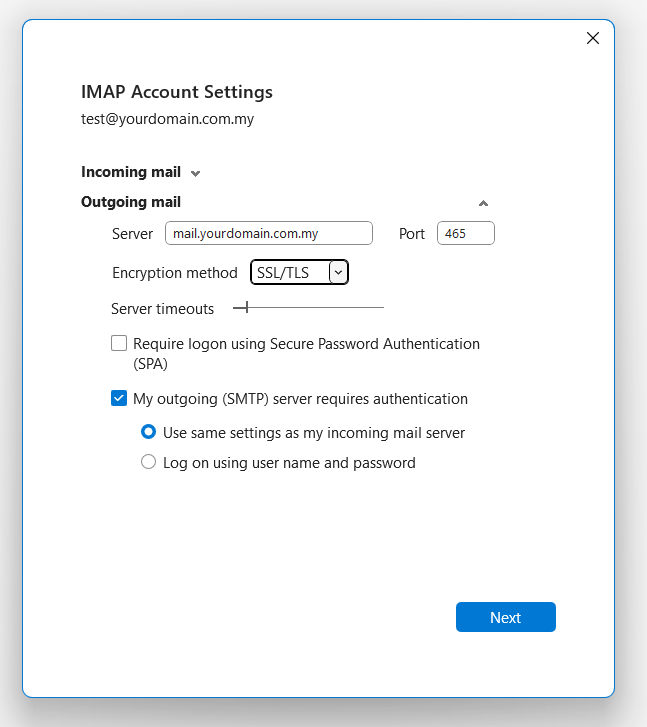
Check My outgoing (SMTP) server requires authentication and select Use same settings as my incoming mail server.
Step 9: Finalize Configuration
Click Next to test the connection.
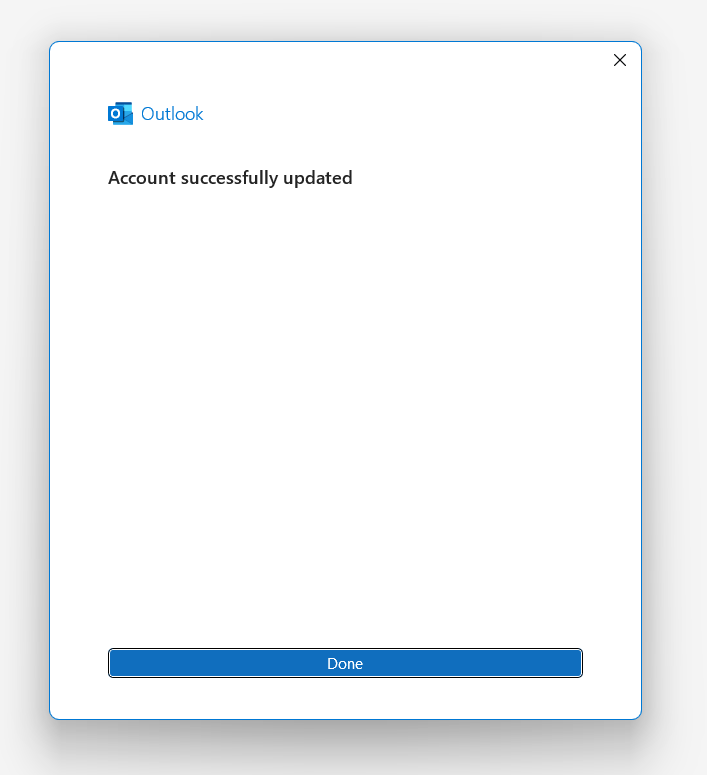
Step 10: Confirmation of Successful Setup
Once Outlook verifies the settings, a confirmation message should appear indicating successful configuration.
Conclusion
This guide has outlined the steps to set up an email account in Outlook 2019, including essential configurations for IMAP and POP protocols. With this setup, users can now enjoy a smooth email experience, whether accessing messages on multiple devices or using a single device.
Should you have any inquiries about the guidelines, please feel free to open a ticket through your portal account or contact us at support@ipserverone.com. We’ll be happy to assist you further.
Article posted on 14 July 2023 by Jackson