Search Our Database
How to Delete an Instance via Customer Portal
Introduction
This guide provides a step-by-step process for deleting an instance from your account in the IP ServerOne Customer Portal. Deleting an instance is a critical action that permanently removes the selected virtual server and all associated data. Before proceeding, ensure that you have backed up any necessary data.
Prerequisites
- An active account with IP ServerOne.
- Ensure you have any necessary data backed up from the instance you intend to delete.
Step-by-Step Guide
Step 1: Account Login
- Login into the IP ServerOne Customer Portal.

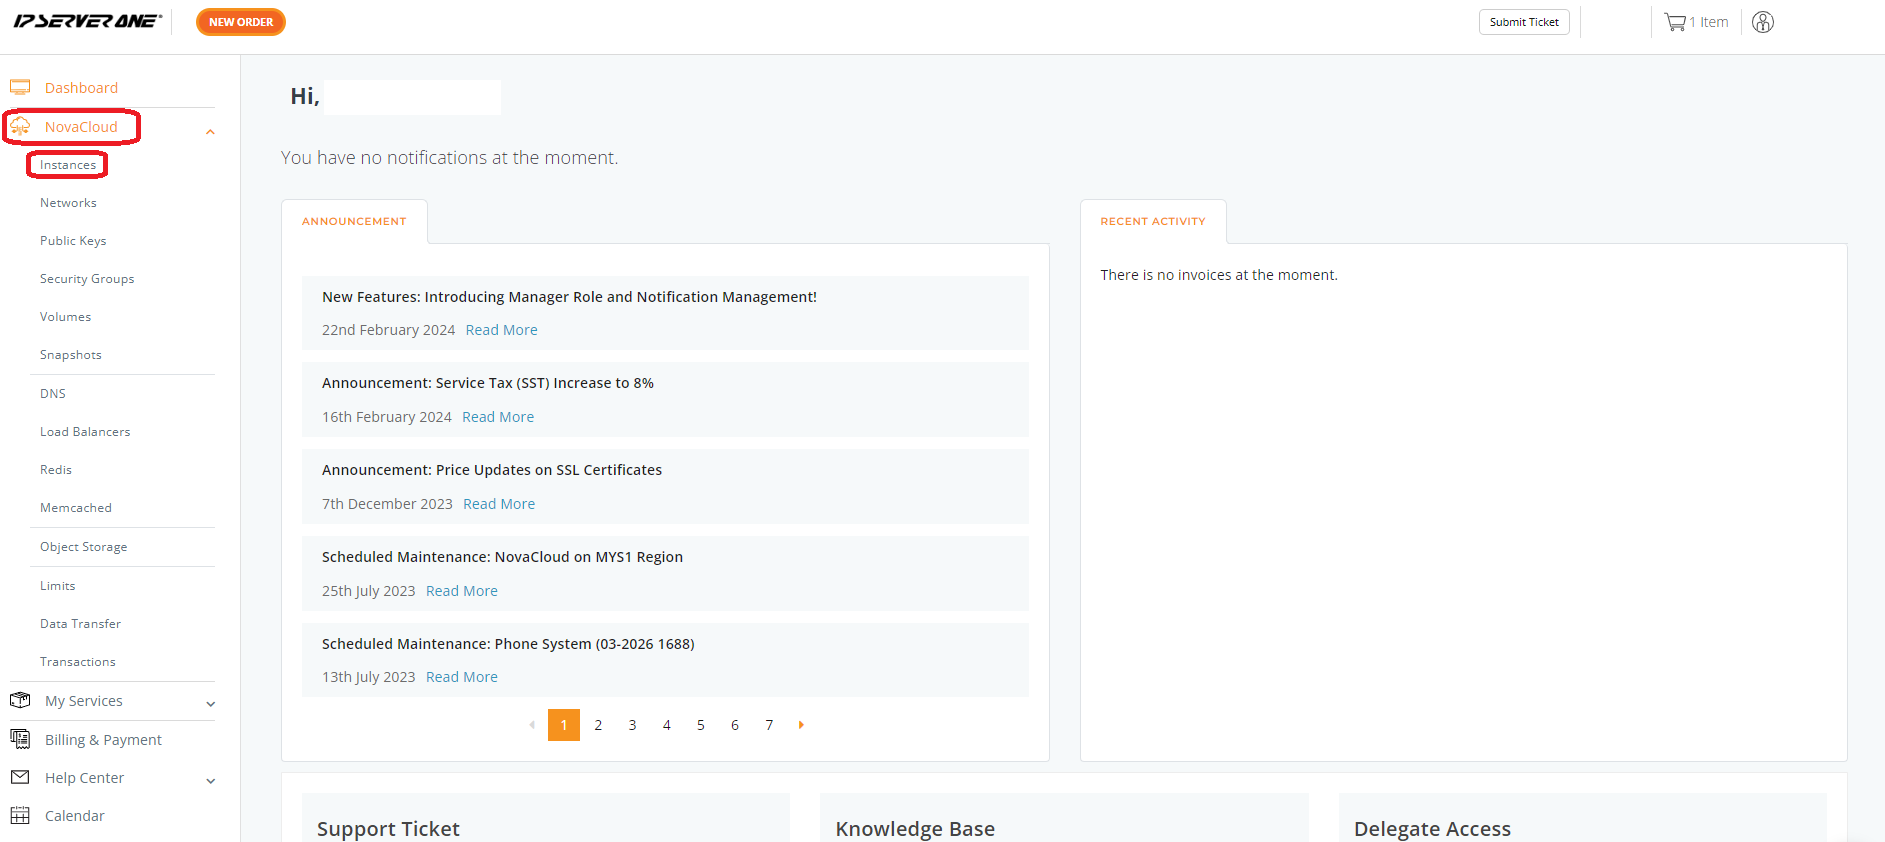
Step 2: Navigate to Instances
- Expand the NovaCloud Section at the left side of the portal, and click Instances.
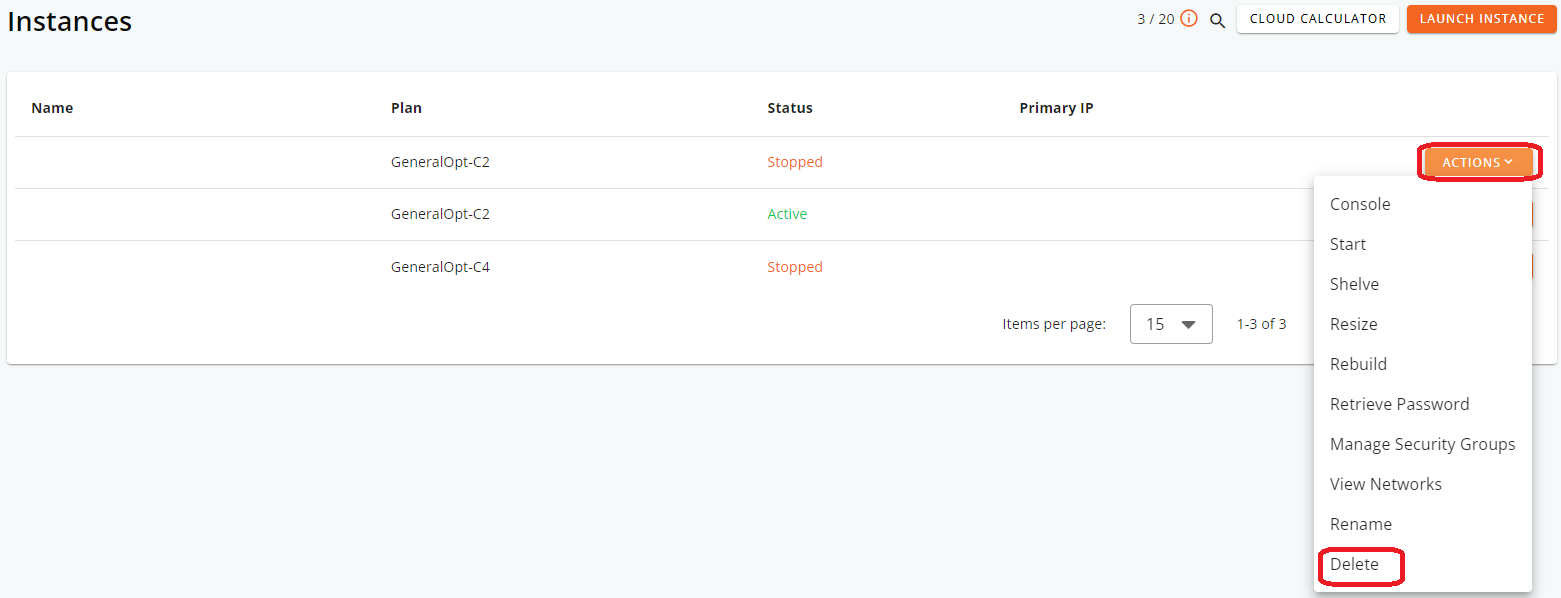
Step 3: Delete instances under the ACTIONS button.
- You’ll need to locate the specific instance you wish to manage. Each instance has an associated ACTIONS button.
- Find the instance of interest and click on the ACTIONS button to reveal a dropdown menu with various options. After that, click Delete.
Step 4: Action Confirmation
- Enter your user’s password in the password field. If you wish to delete the attached volume, tick the Delete Attached Volumes. After that, click Delete.
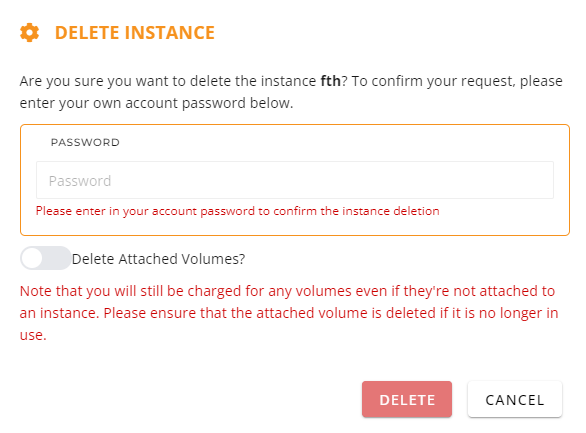
Important Note: If you didn’t delete the volume, the volume will still incur charges.
Conclusion
You have successfully deleted an instance from your IP ServerOne Customer Portal. Remember, this action is irreversible, and all data associated with the deleted instance cannot be recovered. Always ensure to back up necessary data before proceeding with deletion.
For additional assistance or if you encounter any issues, please contact our support team at support@ipserverone.com.