Search Our Database
How Configure Windows Built-in Client for L2TP/IPSEC VPN
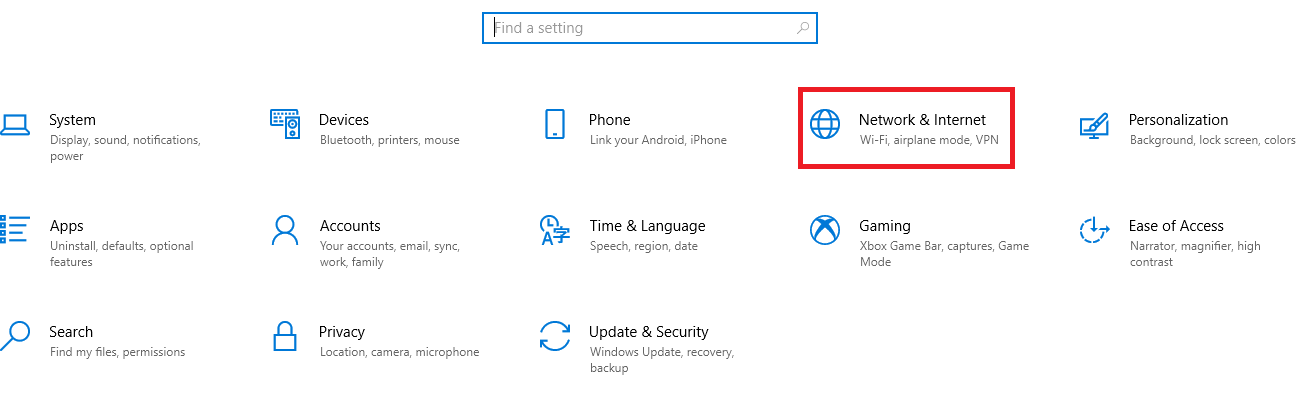
Step 1: On your Search bar, look for the Settings app.

Step 2: On the Settings page, click on Network & Internet.
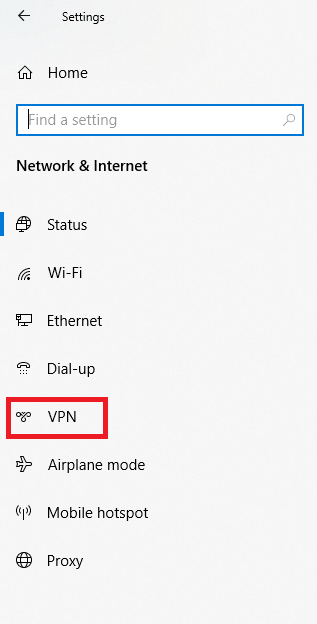
Step 3: Under Network & Internet, click on VPN.
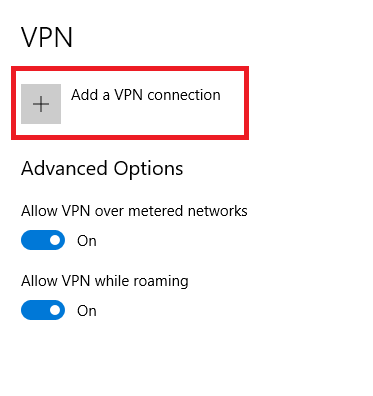
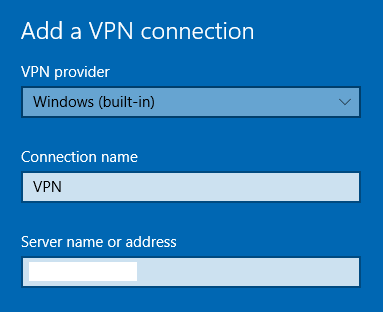
Step 4: Click on Add a VPN Connection.
Step 5: Select Windows (built-in) for VPN provider, input your Connection name, and input the IP address which you get from launching the VPN instance.
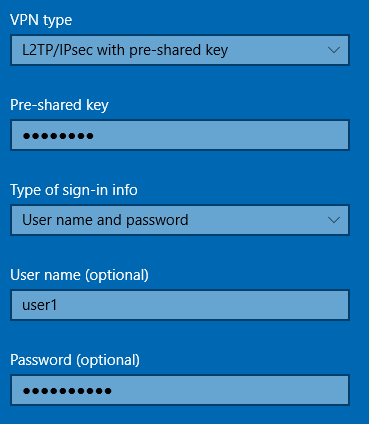
Step 6: Select L2TP/IPsec with pre-shared key for VPN type and input the Pre-shared key.
Step 7: Select User name and password for sign-in info, and input the User name and Password.
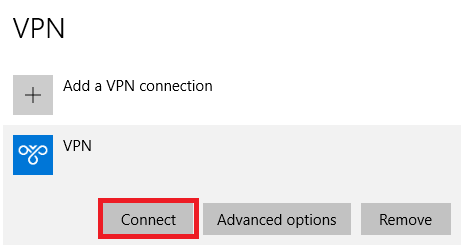
Step 8: Save the connection settings and click on Connect.
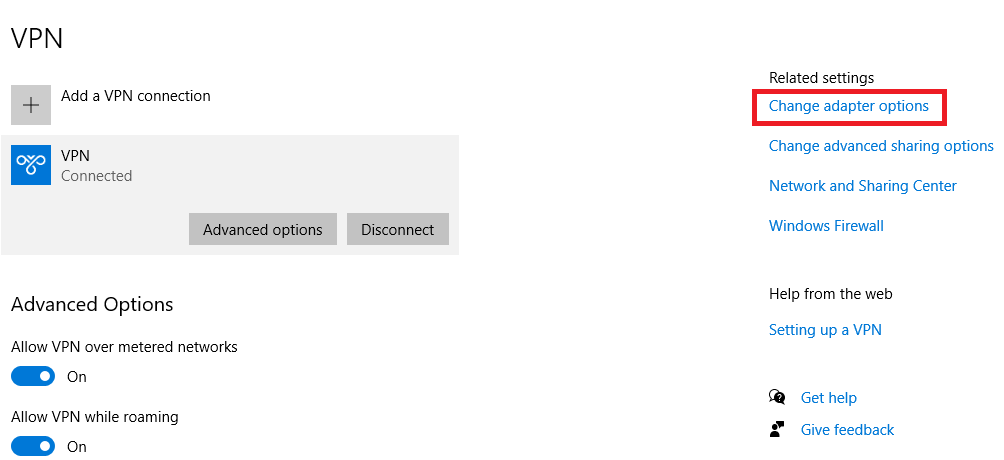
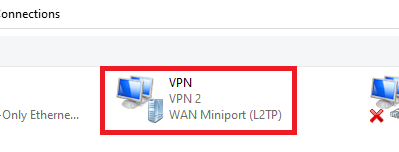
Step 9: To make sure that all traffic is going through your VPN, we have to check that the VPN gateway is used. Click on Change adapter options.
Step 10: Look for your VPN adapter and double click. The Adapter name will follow the name of your VPN connection that you have created previously.
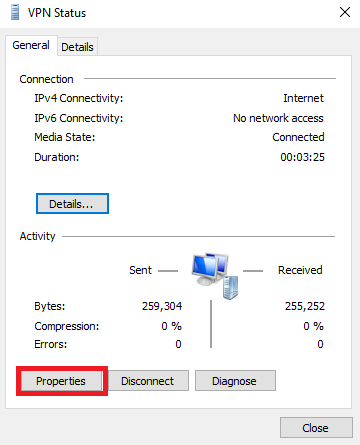
Step 11: Click on Properties.
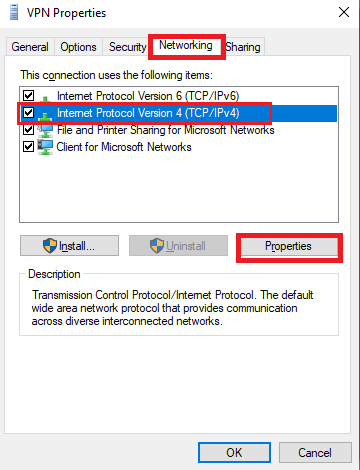
Step 12: Go to the Networking tab and select Internet Protocol Version (TCP/IPv4). Click on Properties.
Step 13: Click on Advanced.
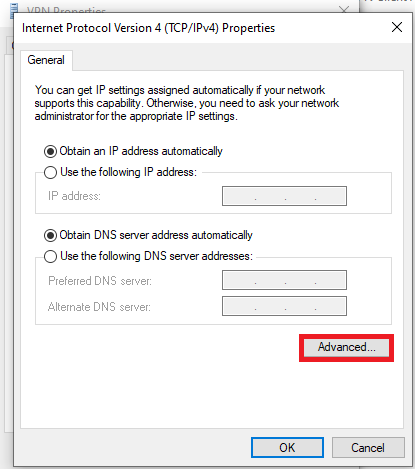
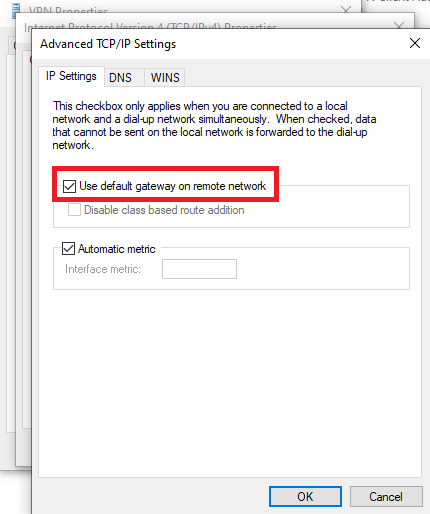
Step 14: Make sure the Use default gateway on remote network setting is ticked.