Search Our Database
Reconfigure Incoming and Outgoing for Existing Email Account on Iphone Mail
Introduction:
This article explains how to reconfigure an email account on an iPhone using the default Mail app. It is intended for iPhone users who want to reconfigure their email manually or through auto-setup for various email providers. This reconfiguration of the email account might be needed if there any issue on receiving and sending out email from iPhone.
Prerequisites:
- An iPhone running iOS 12 or later.
- Your email address and password.
- Incoming and outgoing mail server settings (if applicable, for custom domains).
Step-by-Step Guide:
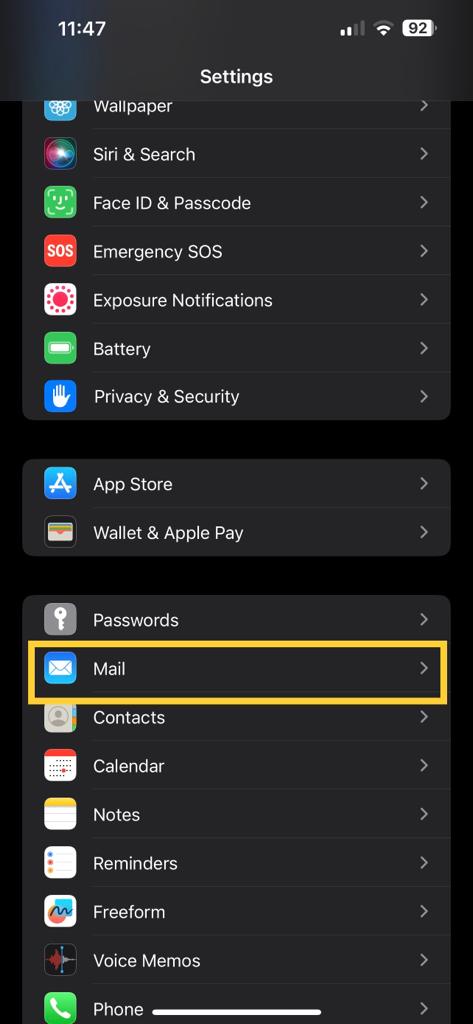
1. Go to settings and go to the “Mail” tab.
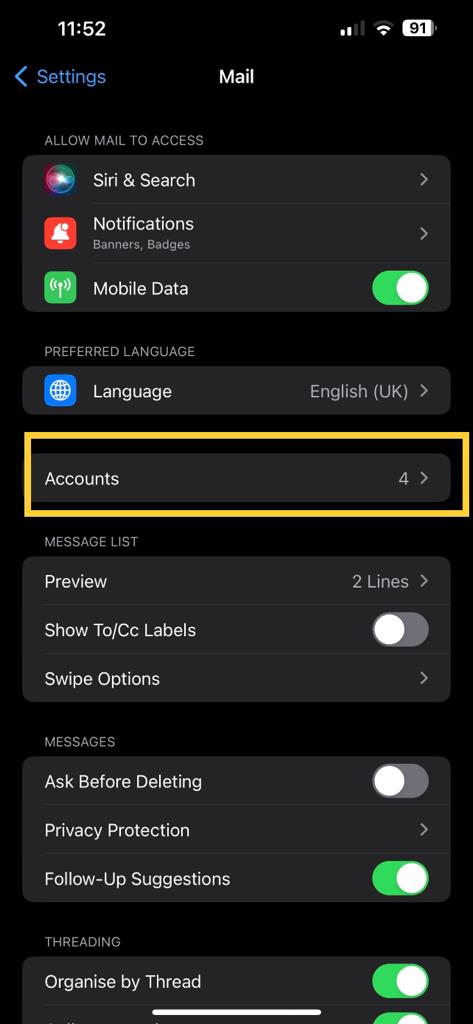
2. Once you accessed the “Mail” tab, find the “Accounts” tab and access it.
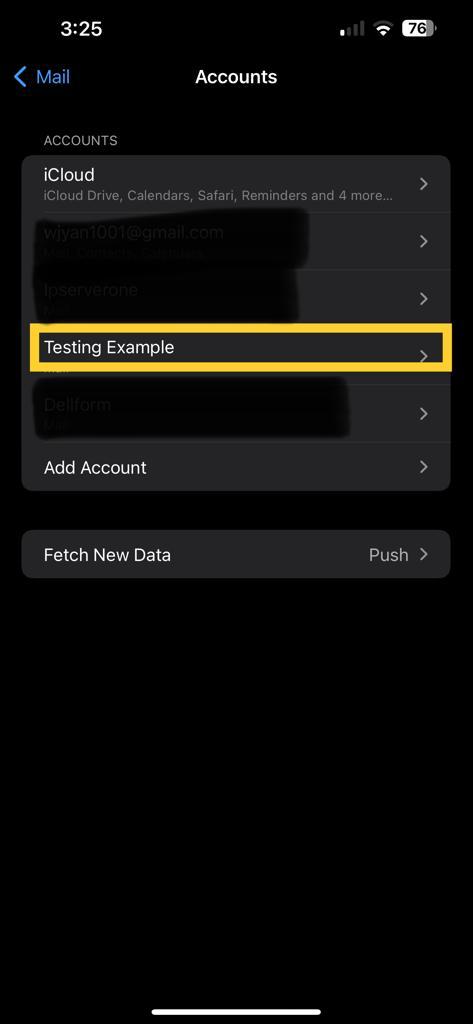
3. After you accessed the “Accounts”, it will display all the email accounts that you have added to your iPhone.
4. After that, select the account that you wish to edit the settings. For example below, I’m choosing the “Testing Example” account.
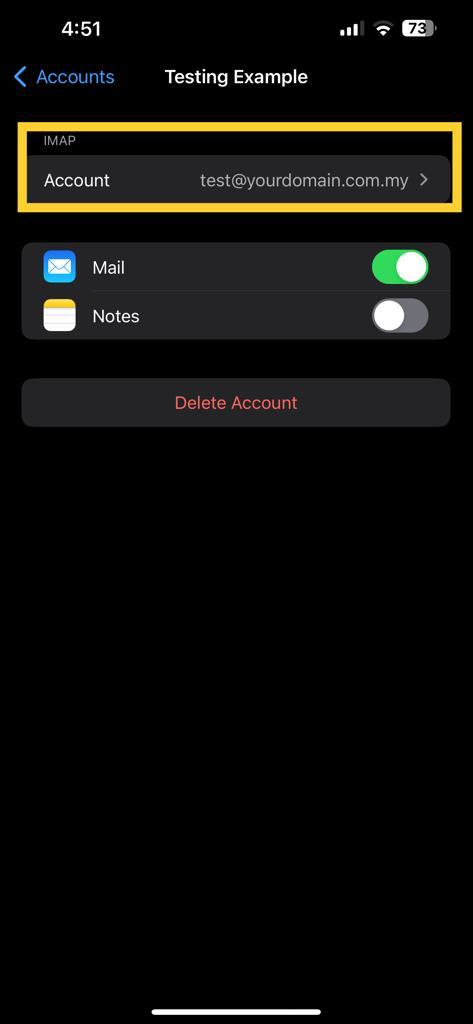
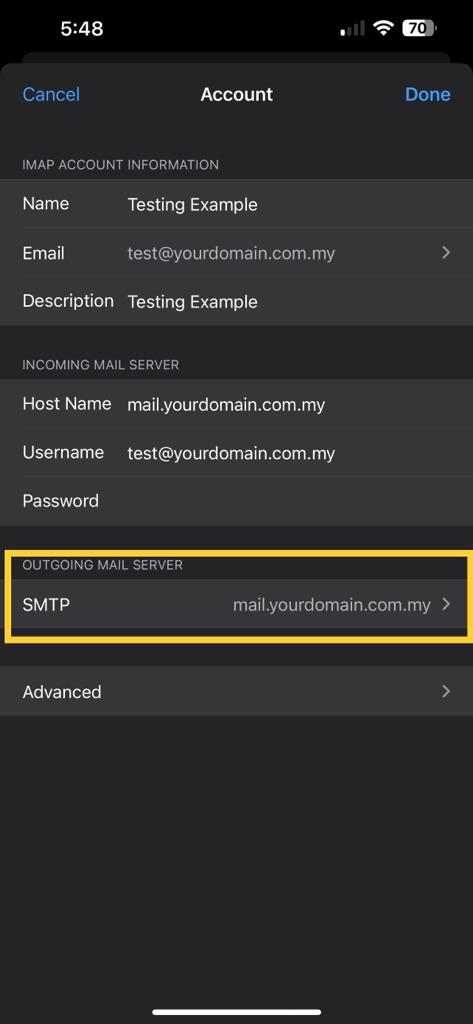
5. After accessing the account, click on the Account again to access the configuration page.
6. Inside the account page, fill in the name, email account, and description. Also, for the incoming mail server, fill in the hostname, username, and password.

7. After done fill in the incoming mail server, you may proceed to configure the outgoing mail server. Click on the SMTP as below.
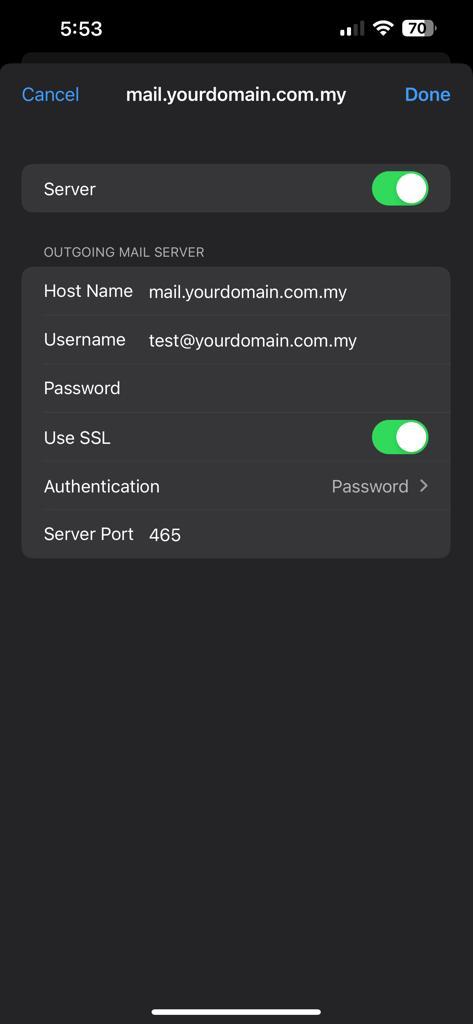
8. For the outgoing mail server, fill in the hostname, username, and password. Then, enable the Use SSL, and the authentication method choose “Password”, and input the server port.
For POP Acccount Settings
Incoming mail server POP port : 995
Outgoing mail server (SMTP) port : 465
For IMAP Account Settings
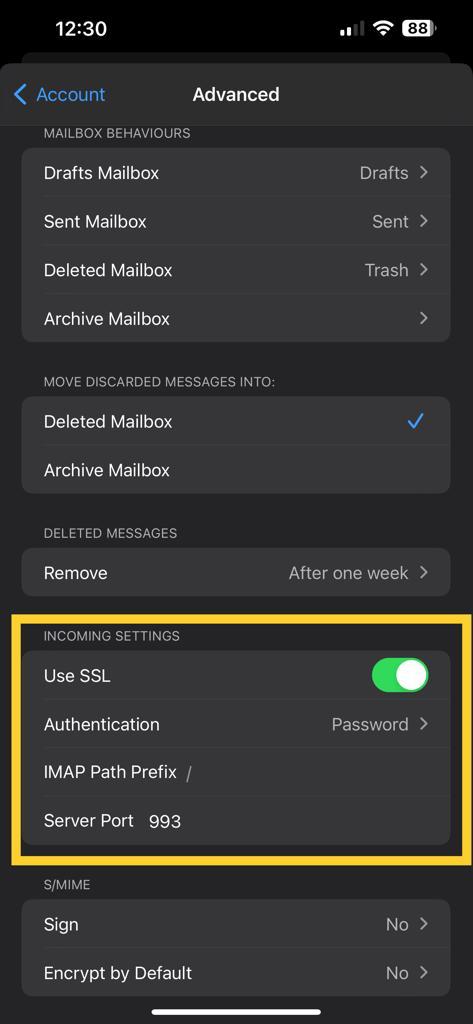
Incoming mail server IMAP port : 993
Outgoing mail server (SMTP) port : 465
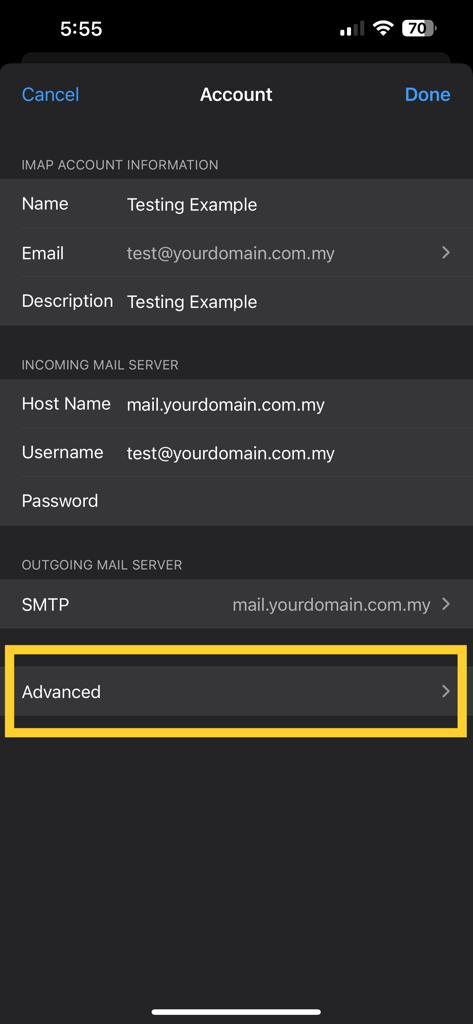
9. After done with the outgoing mail server, go back to the account tab, and go to the advanced tab to configure the Incoming email settings.
10. Then, enable the Use SSL, and the authentication change to Password, IMAP Path Prefix can leave it default and must fill in the server port.
11. After doing all the configuration above, the email account should be working fine now.
Conclusion:
You have successfully reconfigure email account on your iPhone. If you encounter any issues, double-check your email provider’s server settings or contact support.
For additional assistance or if you encounter any issues, please contact our support team at support@ipserverone.com.