Search Our Database
Mount IP ServerOne Object Storage in Linux (Ubuntu) using Rclone
Introduction
IPServerOne Object Storage provides a scalable and flexible cloud storage solution. However, to interact with it like a traditional filesystem, it must be mounted as a directory using a tool like Rclone.
This guide covers:
- Creating and configuring object storage in IPServerOne Portal.
- Installing and setting up Rclone on Linux (Ubuntu).
- Mounting the object storage as a directory for easy access.
Once mounted, files can be uploaded, edited, and managed seamlessly from your Linux system.
Prerequisites
Before proceeding, ensure you have:
- An IPServerOne portal account with access to Object Storage.
- A Linux (Ubuntu) system.
- Rclone installed for mounting the storage.
Step-by-Step Guide
Step 1: Enable Object Storage in IPServerOne Portal
- Log in to IPServerOne Customer Portal.
- In the left menu, navigate to NovaCloud > Object Storage.
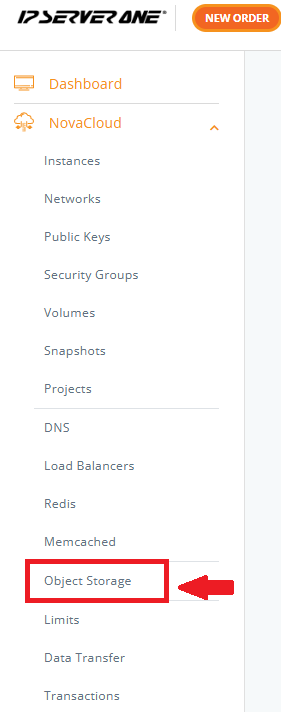
- Click Enable Object Storage to activate the service.
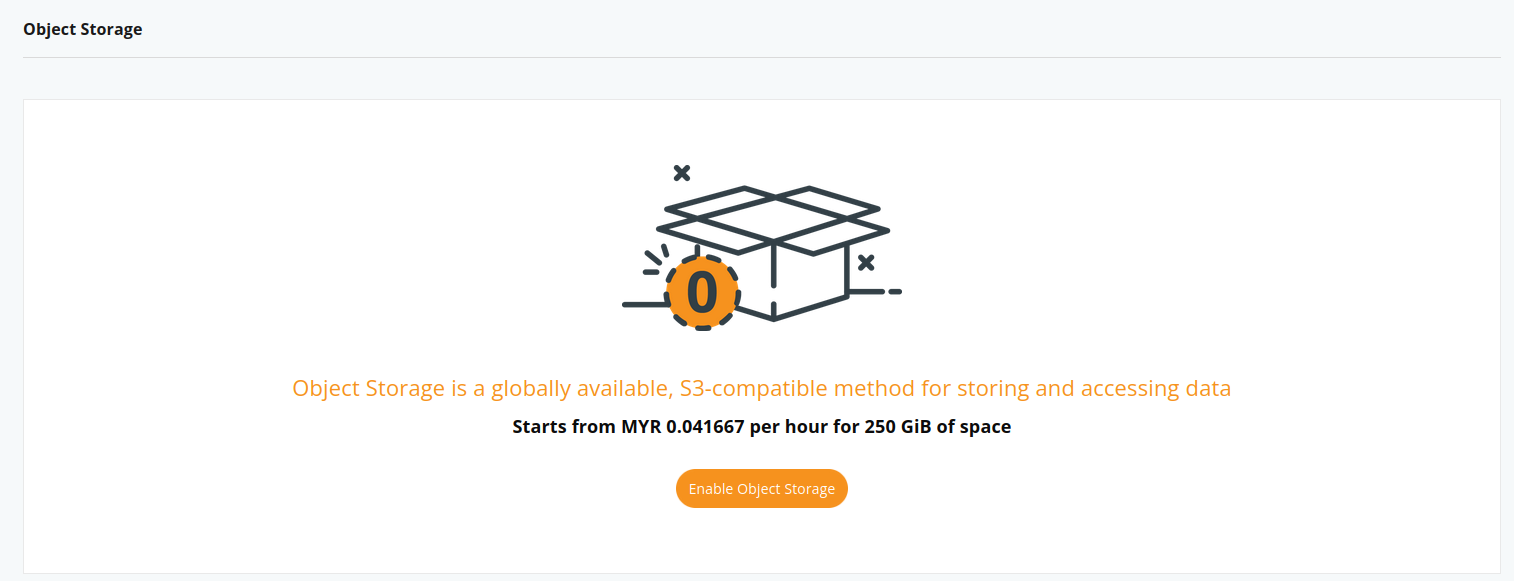
If no object storage exists, enabling it will allow you to create one.
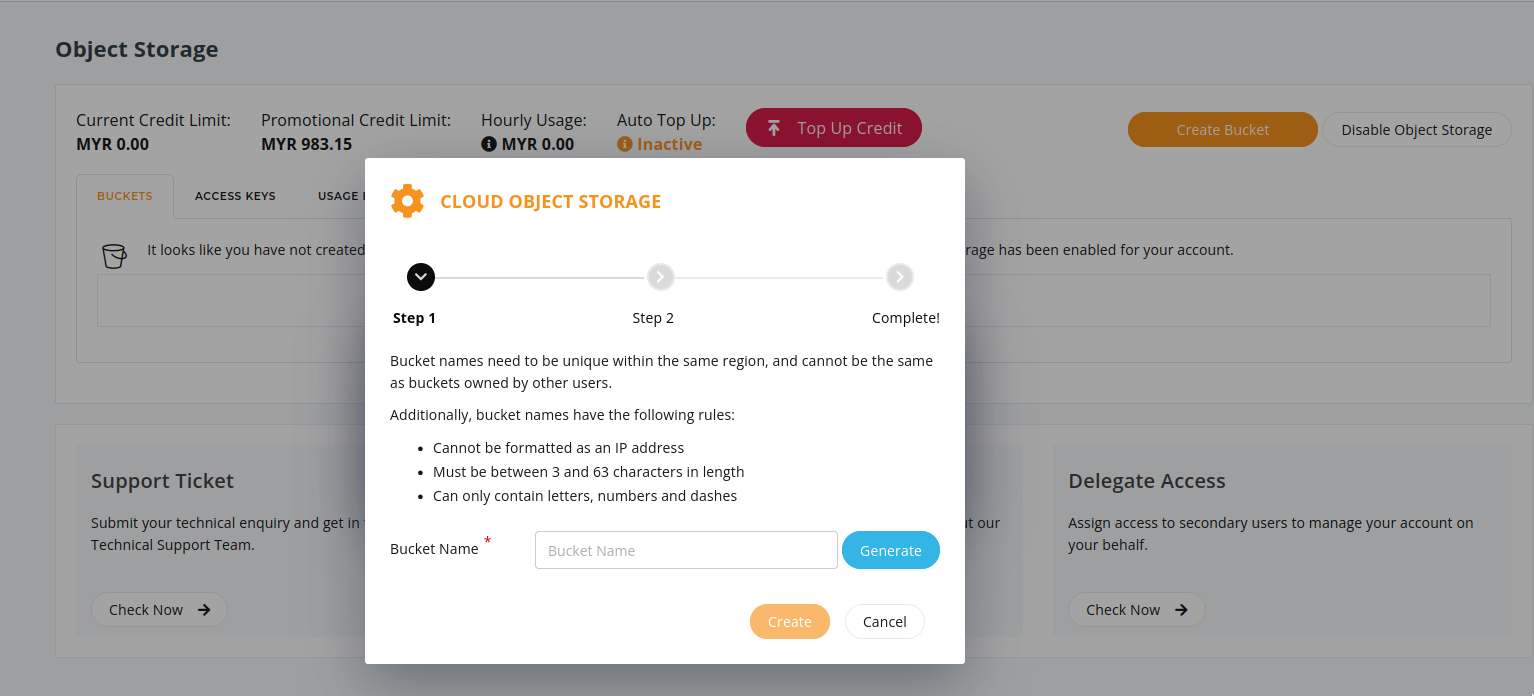
Step 2: Create Object Storage (Bucket)
- After enabling object storage, a Create Bucket prompt will appear.
- Enter a bucket name (or click Generate for a random one).
- Example: glass-wearer-001
- Click Create to proceed.
- Go to the Access Keys tab and click Create Access Key.
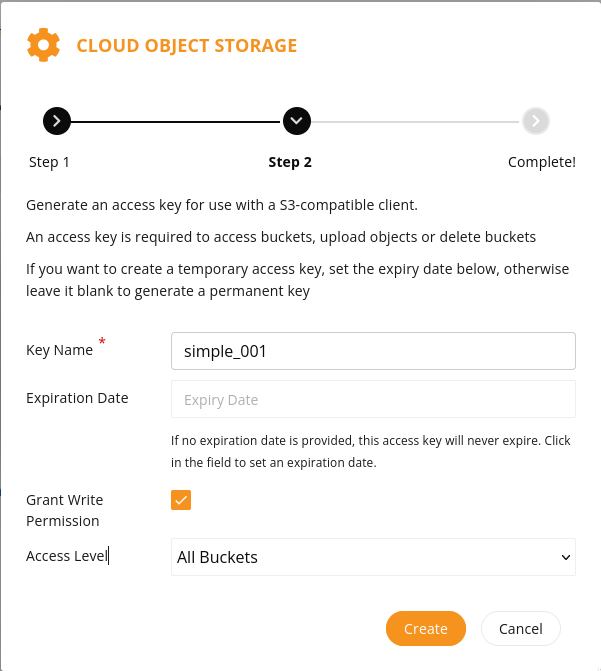
- Provide:
- Key Name
- Expiration Date (optional)
- Write Permission
- Access Level (select the created bucket)
- Click Generate and save the keys securely.

You would see that an object storage has now been created if you see it in the list:
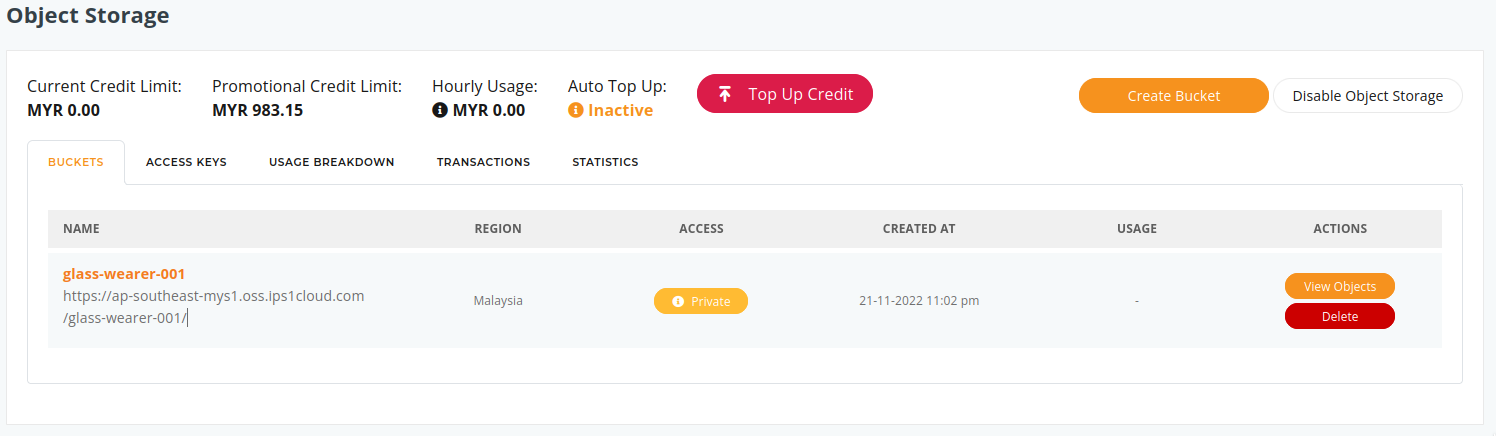
You managed to created an Object Storage in IP ServerOne! Now we’re going to mount the object storage via Linux (Ubuntu). In order to mount, you would first need to install rclone via terminal.
Step 3: Install Rclone on Linux (Ubuntu)
- Open the terminal and run:
sudo apt install rclone
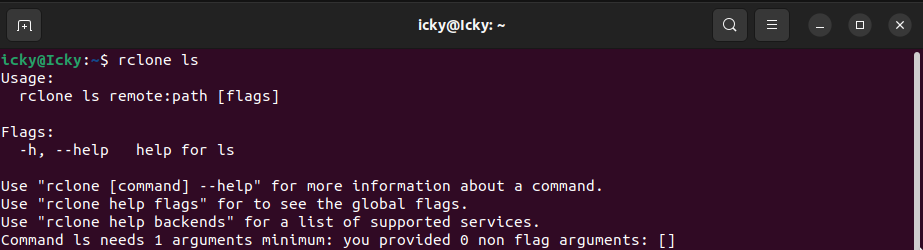
- Verify the installation:
rclone ls
Step 4: Configure Rclone for IPServerOne Object Storage
- Run the Rclone configuration command:
rclone config
Follow these steps:
-
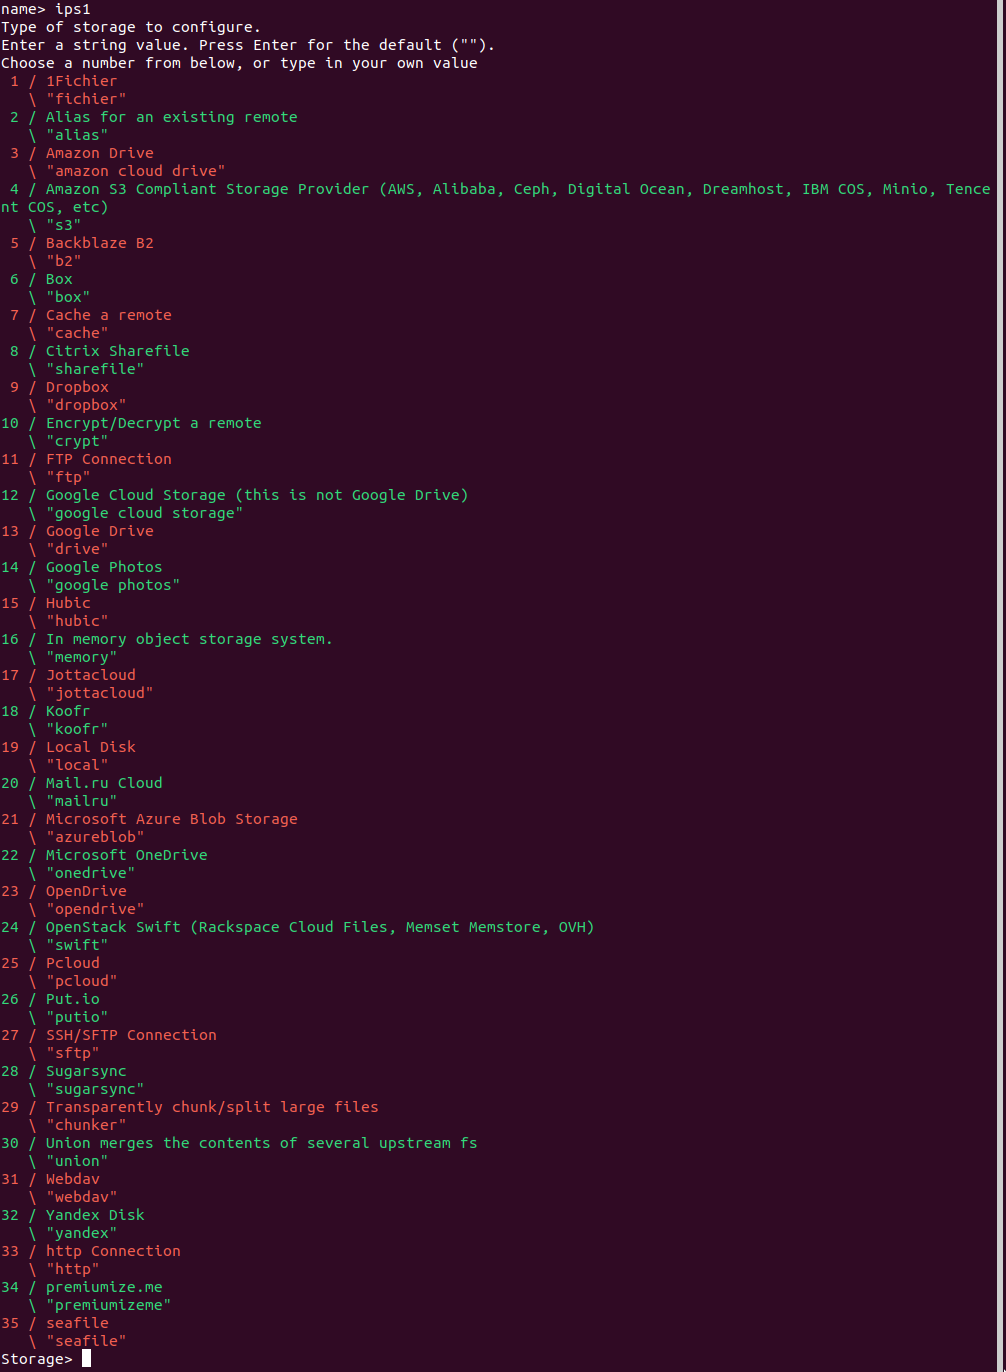
- Type n to create a new configuration.
- Enter a name for the remote, e.g., ips1.
- Select 4 for Storage Type.
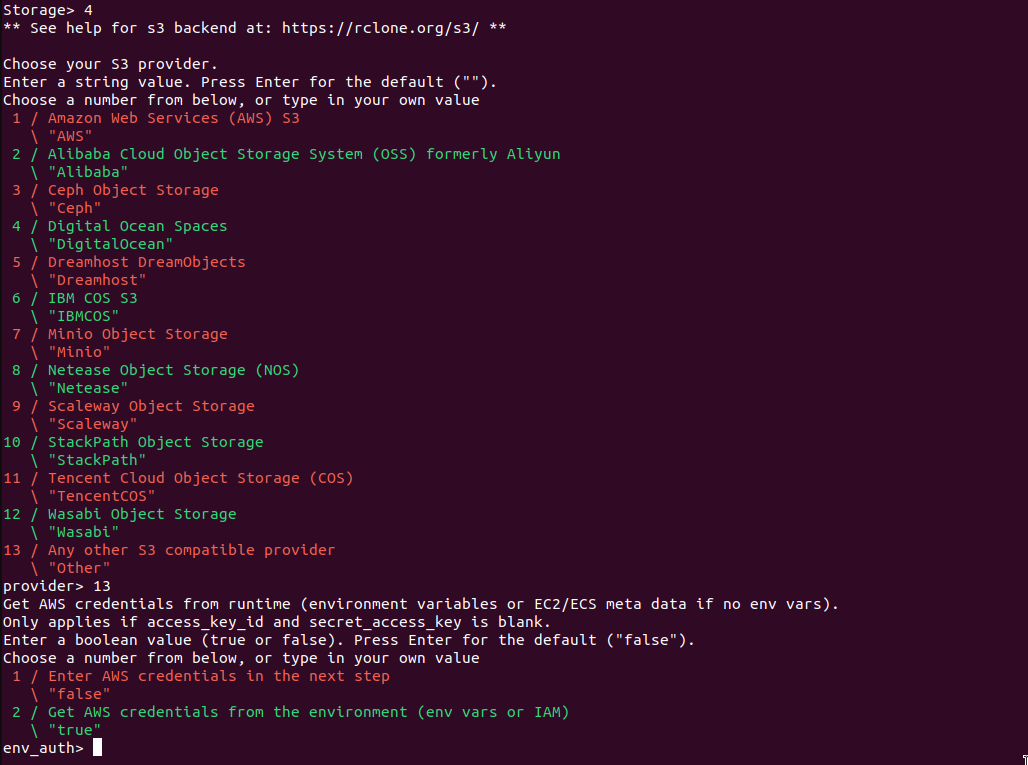
- Select 13 for Provider.

- Enter 1 for env_auth.
- Enter the Access Key and Secret Key obtained in Step 2.
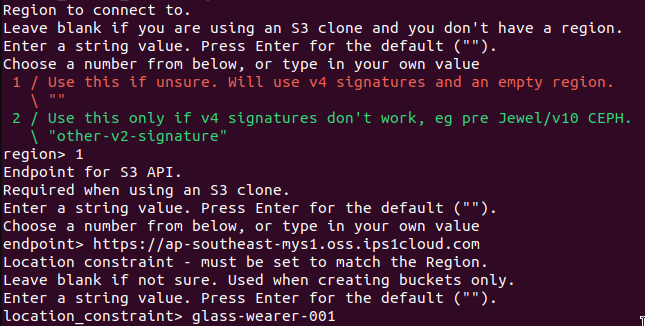
- Enter 1 for Region.
- Set the Endpoint URL:
https://ap-southeast-mys1.oss.ips1cloud.com
-
- Enter the Bucket Name from Step 2.
- Select 1 for ACL.
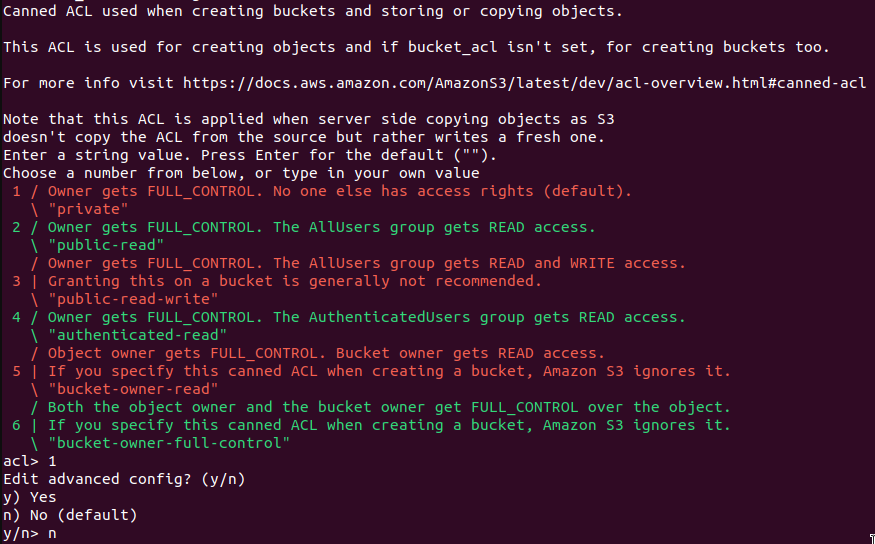
- Enter n for advanced configuration.
- Press y to confirm.
- Press q to exit.
Step 5: Mount IPServerOne Object Storage
- Create a Mount Directory
mkdir ~/object-storage-directory
(Replace ~/object-storage-directory/ with your preferred directory name.)
- Mount the Object Storage
Run:
rclone mount ips1:glass-wearer-001 ~/object-storage-directory/
-
- ips1 → The remote name from Step 4.
- glass-wearer-001 → The bucket name from Step 2.
- ~/object-storage-directory/ → The mount point.
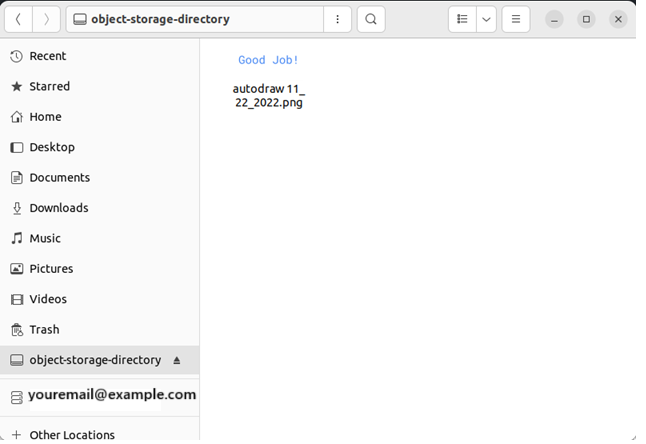
- Verify the Mount
-
- Open Files Manager and look for ~/object-storage-directory/.
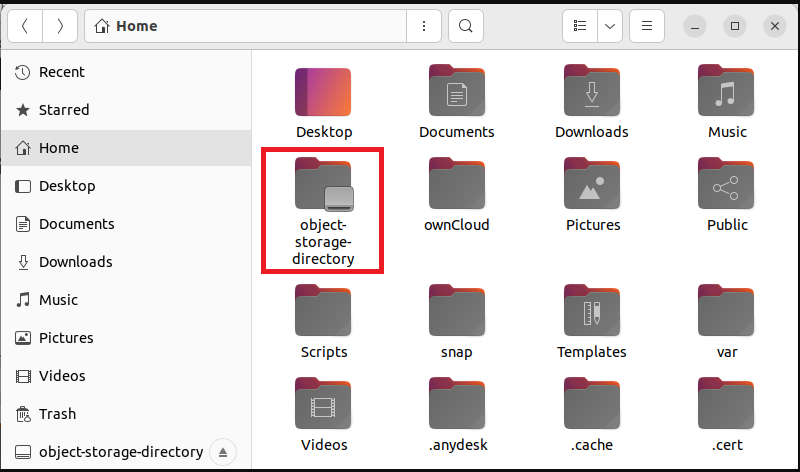
- Click the directory to access the mounted object storage.
- Open Files Manager and look for ~/object-storage-directory/.
Step 6: Upload and Verify Data Sync
- In the IPServerOne Portal, go to Object Storage.
- Click View Objects on the bucket.
- Click Upload File and select a file.

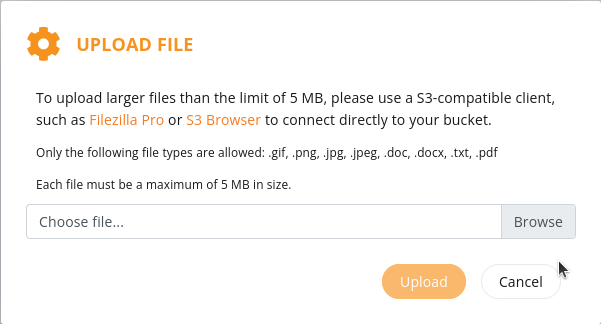
- Upload file(s) based on the types allowed. Press “Upload” once you’re done. You’ll be able to view the file upload as below:

- Check if the file appears in ~/object-storage-directory/.
If successful, any files uploaded via Portal or Linux will sync instantly.
Step 7: Unmount the Object Storage
To unmount, go to the terminal and press:
Ctrl + C
(Optional) Enable Auto-Mount on Startup
- Press Windows Key and search for Startup Applications Preferences.
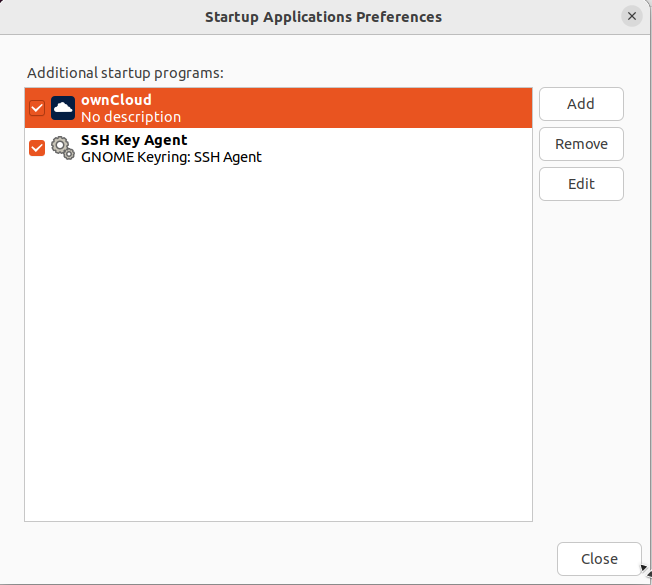
- Click Add and Set as below:
- Name: Any name (e.g., “Object Storage Mount”)
- Command:
sh -c "rclone mount ips1:glass-wearer-001 ~/object-storage-directory/"
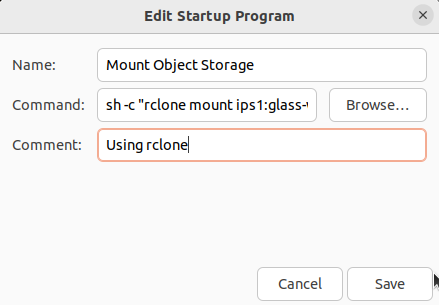
- Click Save.
Once you’ve saved, any time you open your Linux (Ubuntu), the object storage is automatically mounted.
Conclusion
🚀 Congratulations! You have successfully mounted IPServerOne Object Storage on Linux (Ubuntu) using Rclone. Now, you can seamlessly store, manage, and access your files just like a local drive.
With this setup, you can:
✅ Perform automated backups to Object Storage.
✅ Access files directly from your Linux file manager.
✅ Sync and transfer data effortlessly between your system and the cloud.
💡 Pro Tip: If you want your object storage to mount automatically on system startup, follow the auto-mount configuration in Step 7.
If you have any questions or need further assistance, feel free to reach out to IPServerOne Customer Support at support@ipserverone.com or +603-2026 1688. Happy cloud computing!
Article posted by fiqri on 22 November 2022