Search Our Database
How to shut down a Windows Server
Introduction
Shutting down a Windows Server involves powering off the server safely to prevent data loss or corruption, crucial for maintenance or updates. Knowing how to do this correctly ensures the integrity of server functions and stored data. This knowledge base article provides step-by-step instructions on how to safely shut down a Windows Server. Whether you’re performing routine maintenance, installing updates, or preparing for hardware changes, it’s crucial to shut down your server correctly to avoid data loss or corruption.
Prerequisites
- Ensure you have administrative access to the Windows Server you intend to shut down.
- Confirm all critical tasks and applications running on the server have been properly closed or migrated to avoid data loss.
- If the server is part of a larger network or cluster, verify that shutting it down will not adversely affect other systems or ongoing operations.
Step-by-Step Guide
Method 1: Using the Start Menu
- Log in to the Windows Server with an account that has administrative privileges.
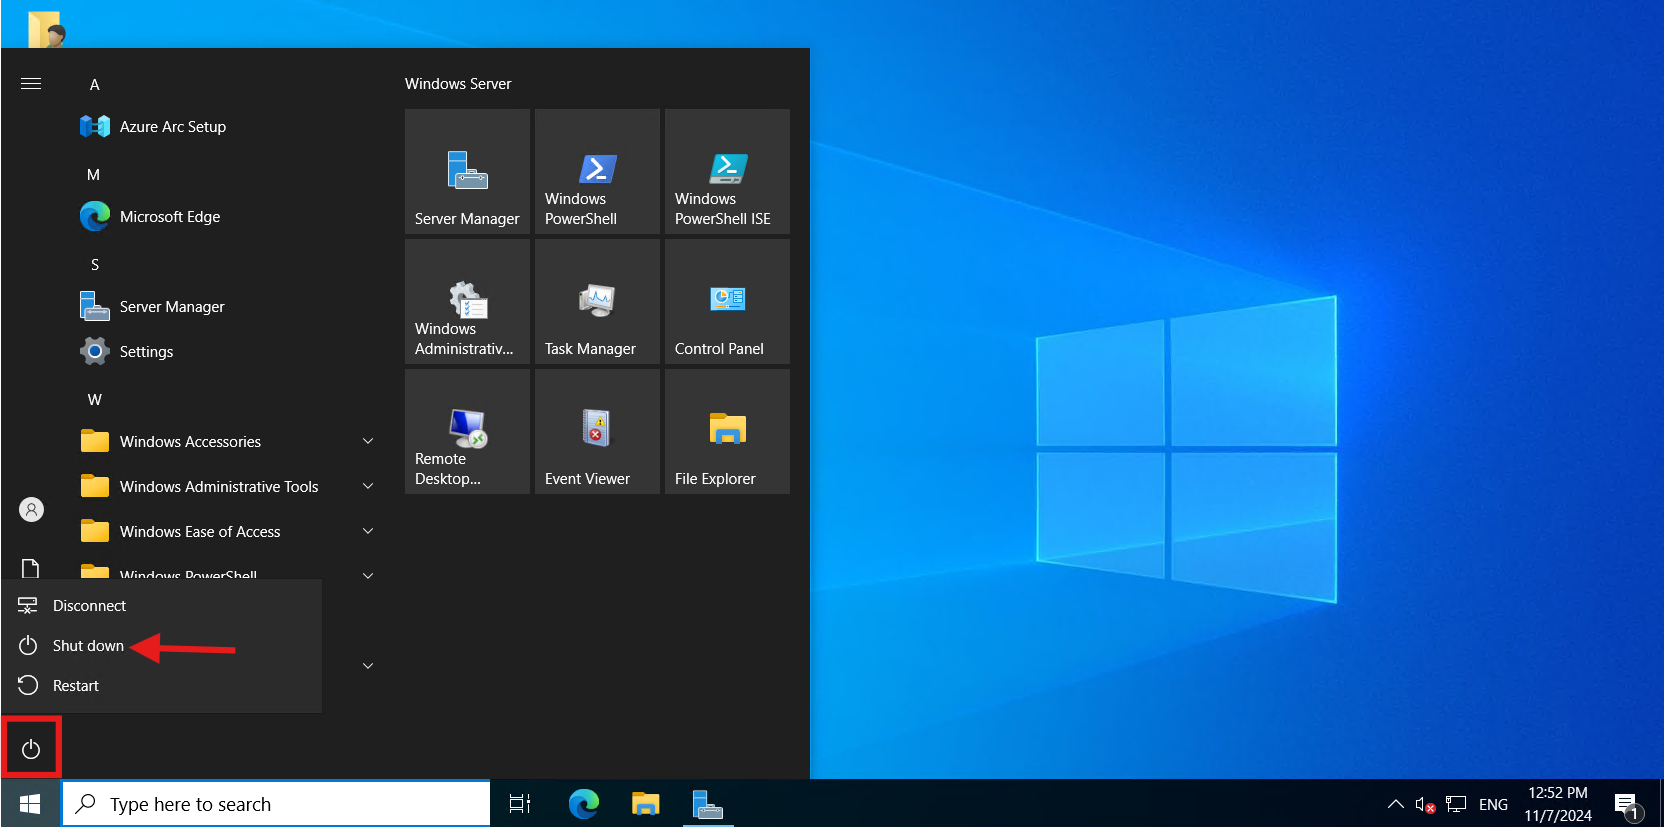
- Click on the Start or press the Windows key to open the Start Menu.
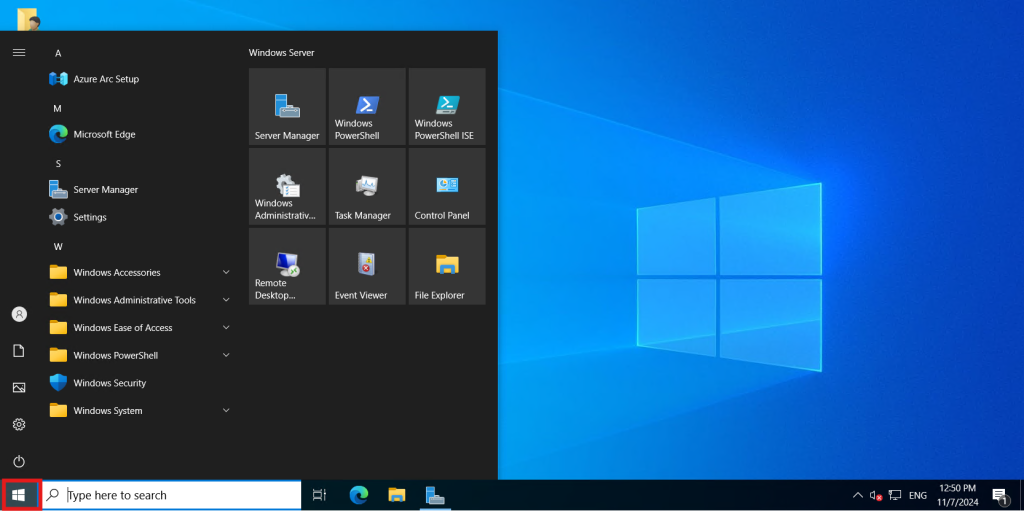
- Select Power options, then click on Shut down.


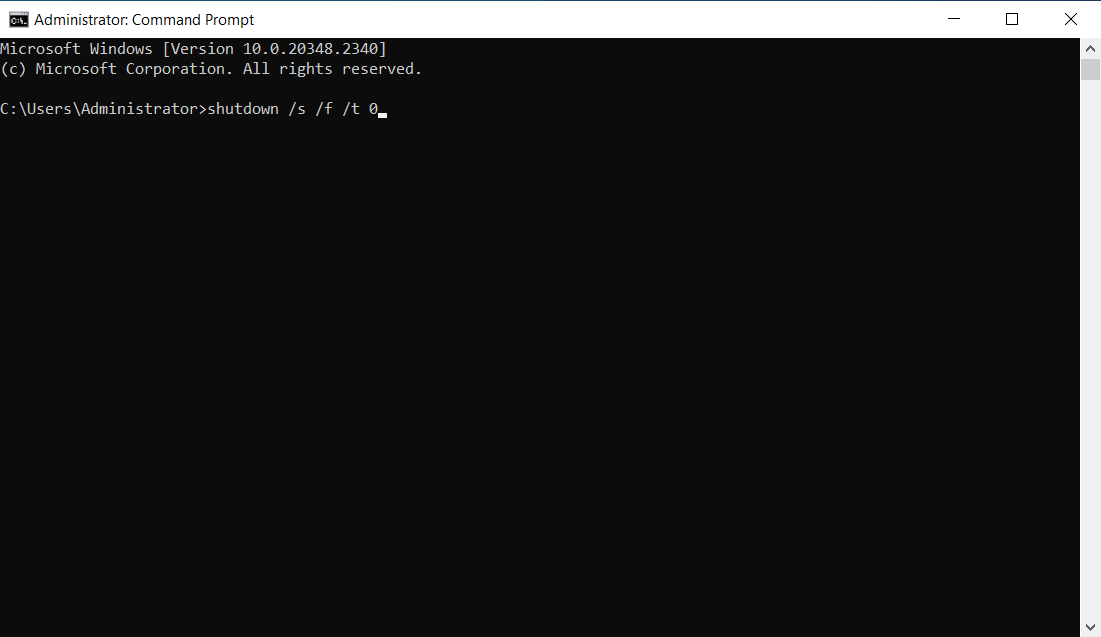
Method 2: Using Command Prompt in Windows
- Log in to the Windows Server with an account that has administrative privilege.
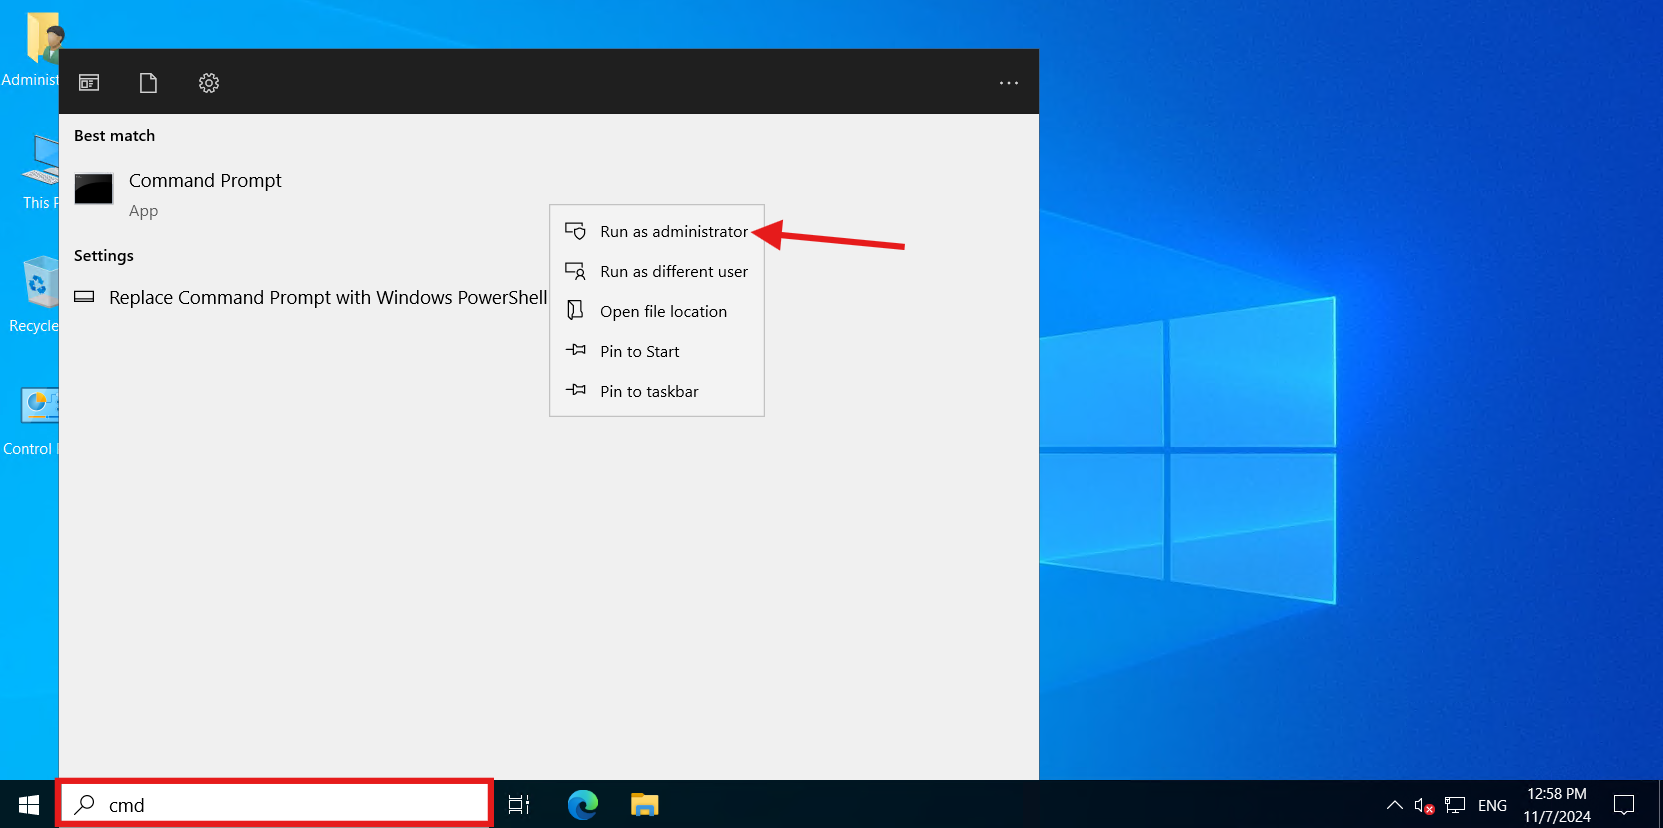
- Open Command Prompt as an administrator. You can do this by searching for ‘cmd’ in the Start menu, right-clicking on Command Prompt, and selecting Run as administrator.

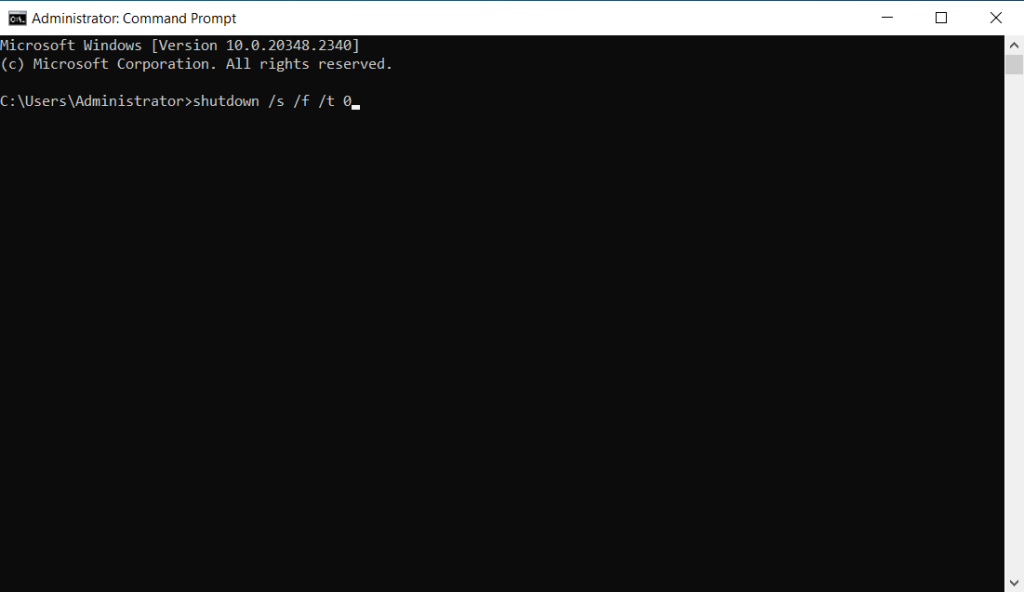
- In the Command Prompt window, type the following command and press Enter:
shutdown /s /f /t 0
Breakdown:
– /s initiates the shutdown.
– /f forces running applications to close.
– /t 0 sets the timer to 0 seconds, initiating an immediate shutdown.
Method 3: Using IPServerOne Customer Portal
- Login into IPServerOne Customer Portal.
- Click NovaCloud, and click Instances.
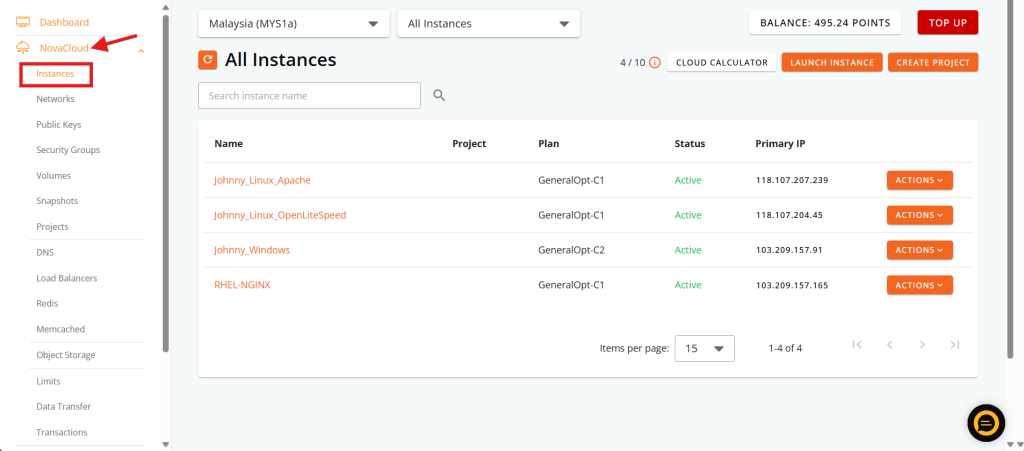
- Choose the instance you wish to shutdown, and click Action.
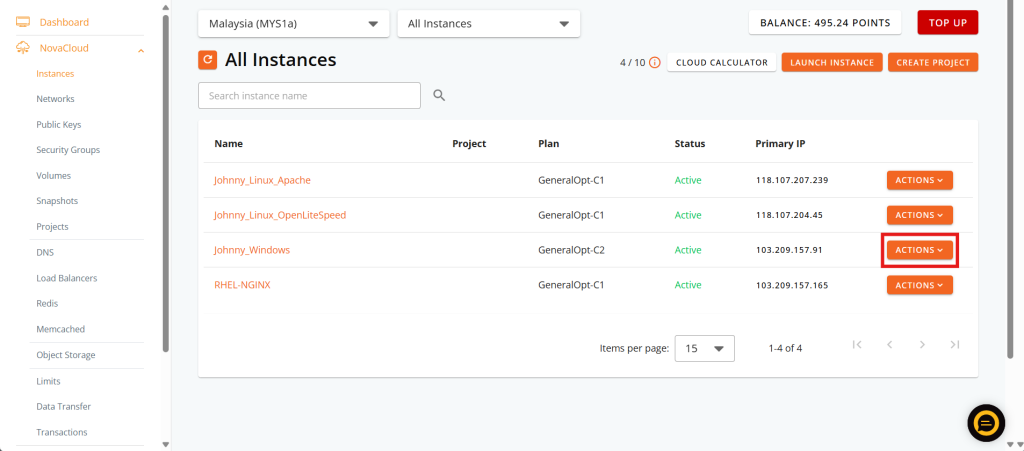
- Click Stop.


Conclusion
Following the steps above, you can safely shut down your Windows Server, whether through the Start menu, Command Prompt, or PowerShell. This ensures that all processes are properly terminated and the system is safely powered down, preventing any potential data loss or corruption.
For additional assistance or if you encounter any issues, please contact our support team at support@ipserverone.com.
Article posted on 15 March 2024 by Tze Hing.