Search Our Database
How to create additional Network for your Virtual Data Center
By default, IPServerOne will provide a virtual T1 Edge Gateway Router for each subscription of vCloud Director tenant account
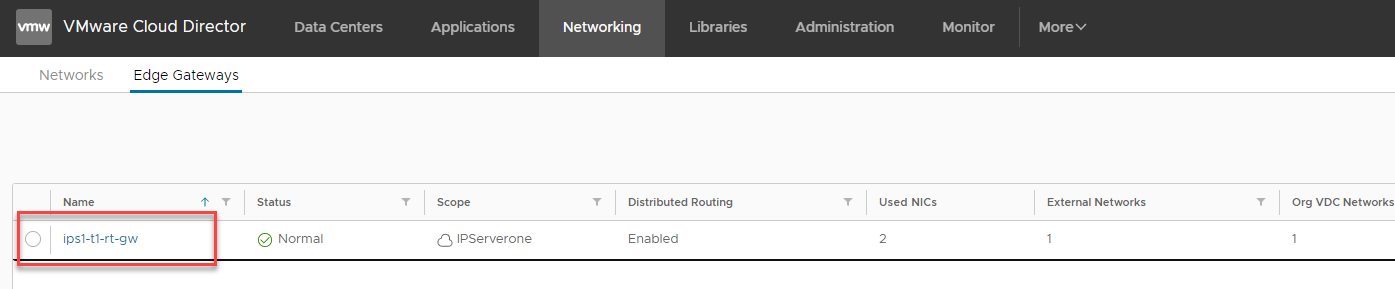
A T1 Router is capable to perform Firewall, NAT, Load Balancer and IPSec VPN service. You can also define security groups and Application port profiles to be save in the T1 Edge Gateway router.
To create additional network for your Virtual Data center:
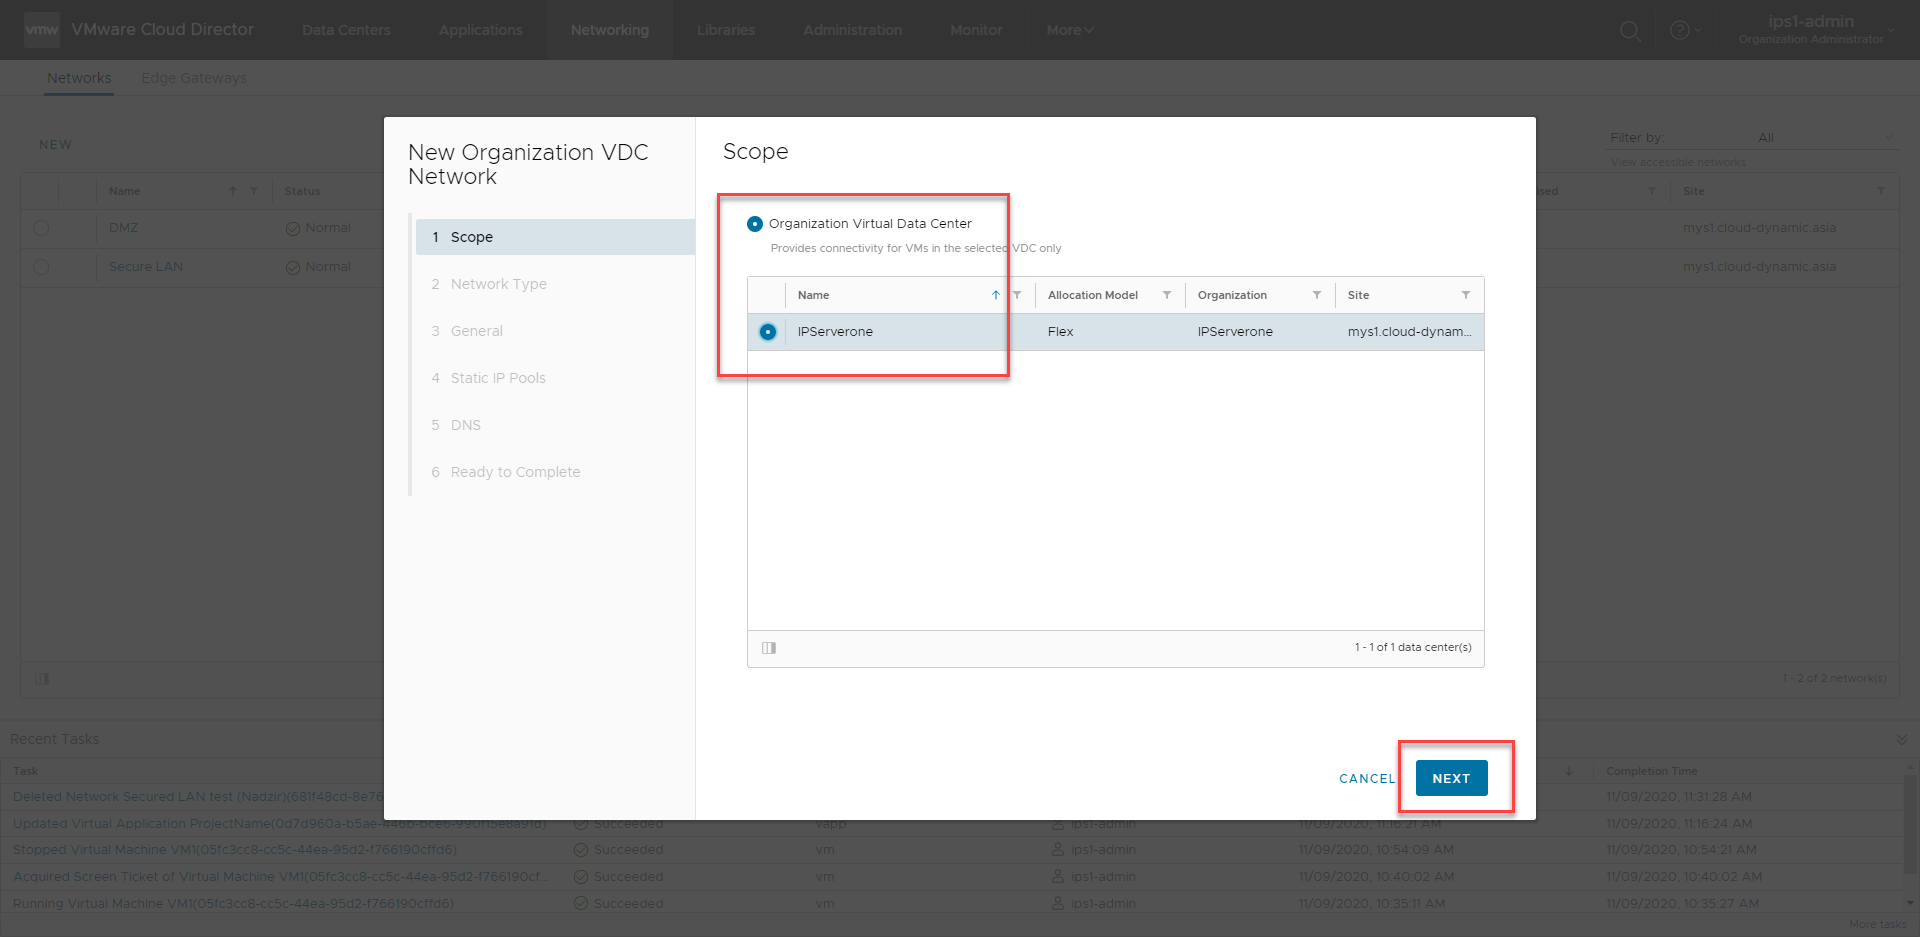
1.First navigate to ‘Networking’ at the top bar of the vCloud Director page. Under ‘Networks’ tab, click ‘NEW’ to create new network group.

2.Select on your organization virtual data center and click ‘Next’
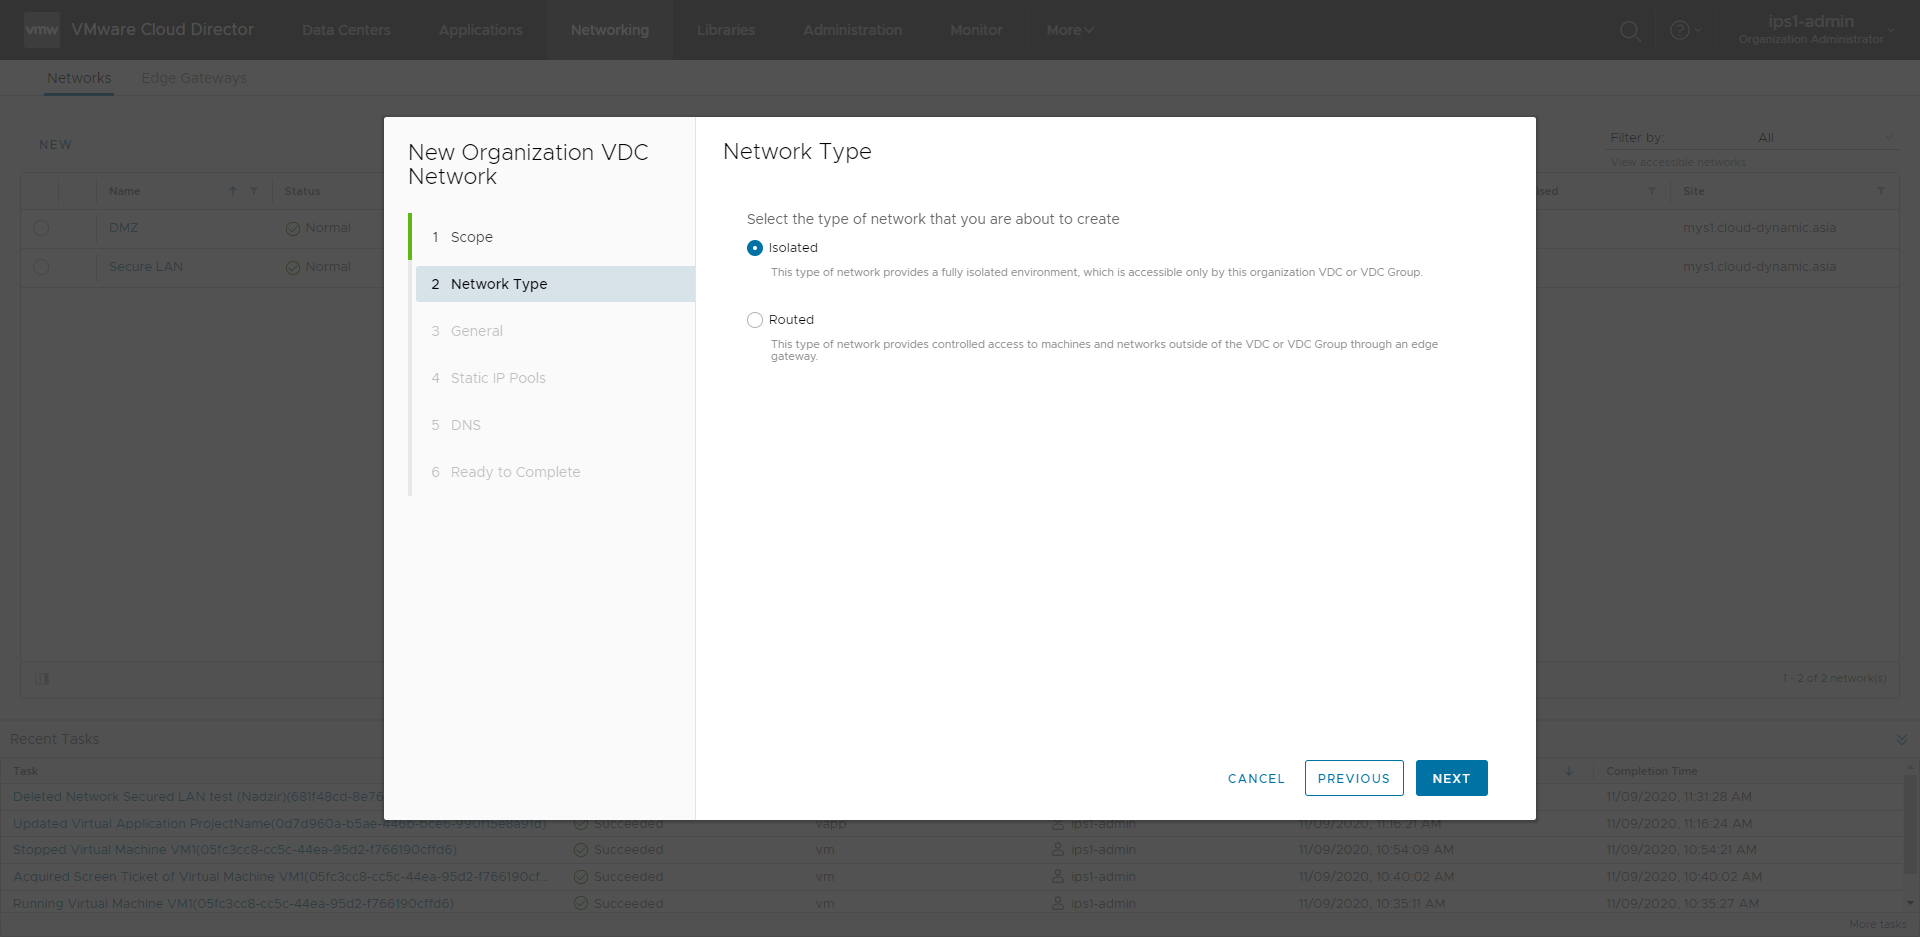
3.Choose to network to be either an Isolated network or Routed network.
- Routed network is the network that allow NAT, IPSec VPN, and Firewall features to be running on it
- Isolated network is the isolated network that allow each VM to communicate to each other without interference from the T1 Router
Imported network is the network that capable to import an existing VLAN group from external to this vCloud Director for expansion purpose, please contact IPServerone before proceed with this setup as it requires administrator level configuration for the Imported network to work as expected.
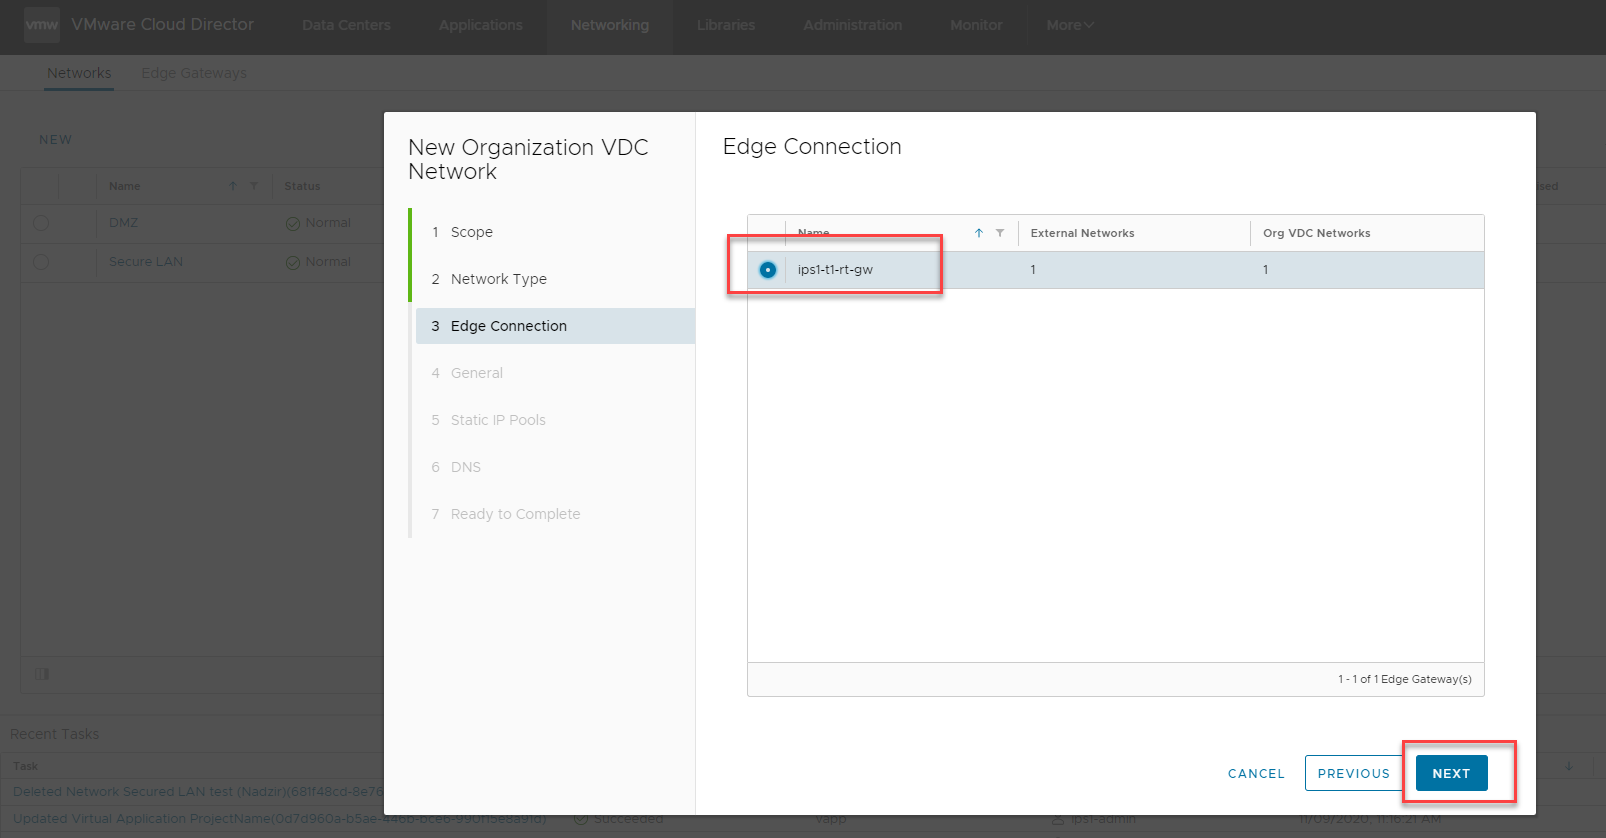
4.Choose a T1 Edge gateway to be connected to if you chose Routed network. None need to be chosen if you are adding Isolated network.
5.Define the name of your network and the GATEWAY IP of your network range and click Next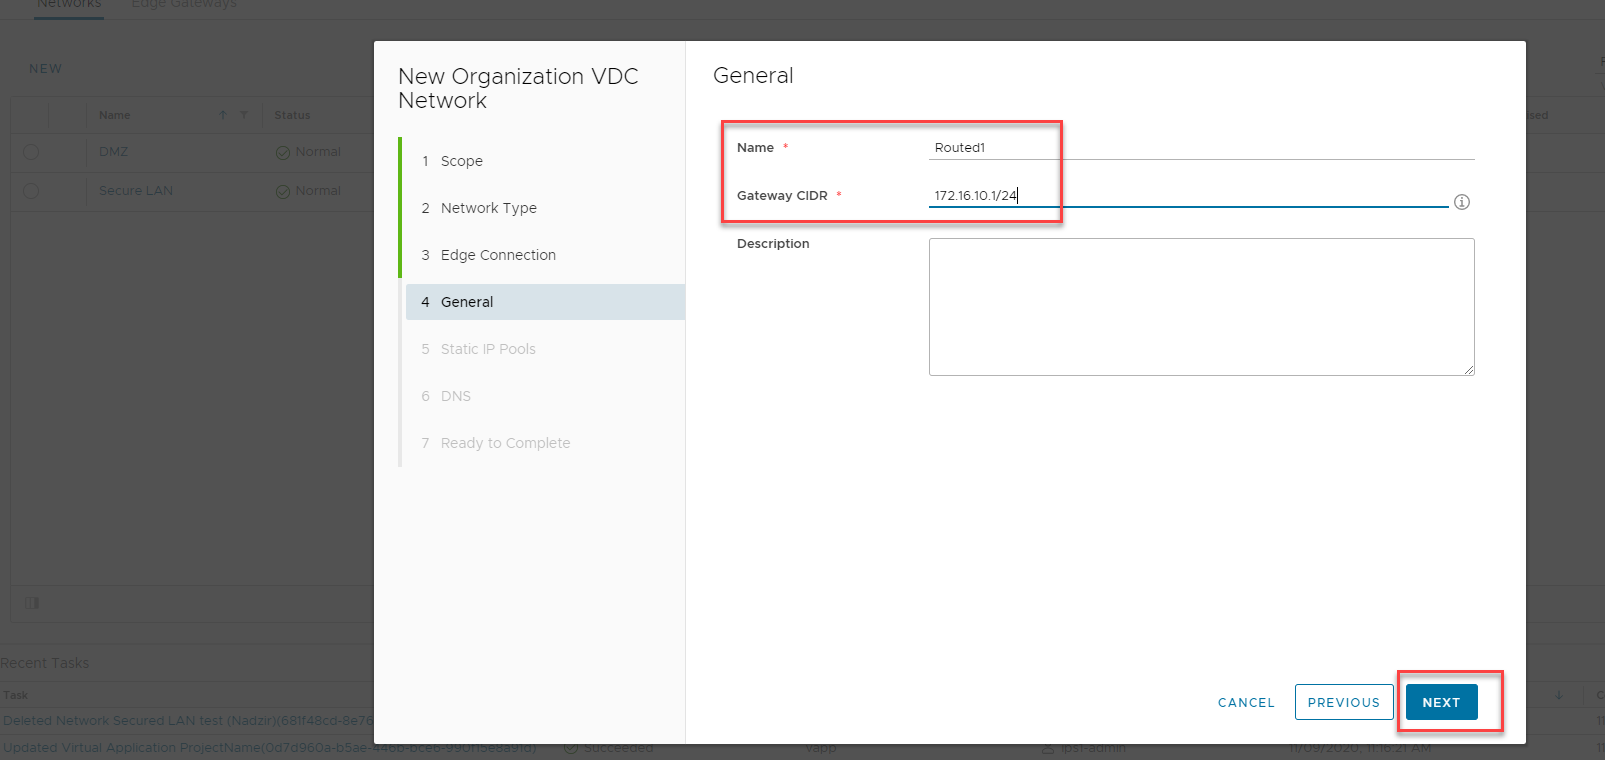
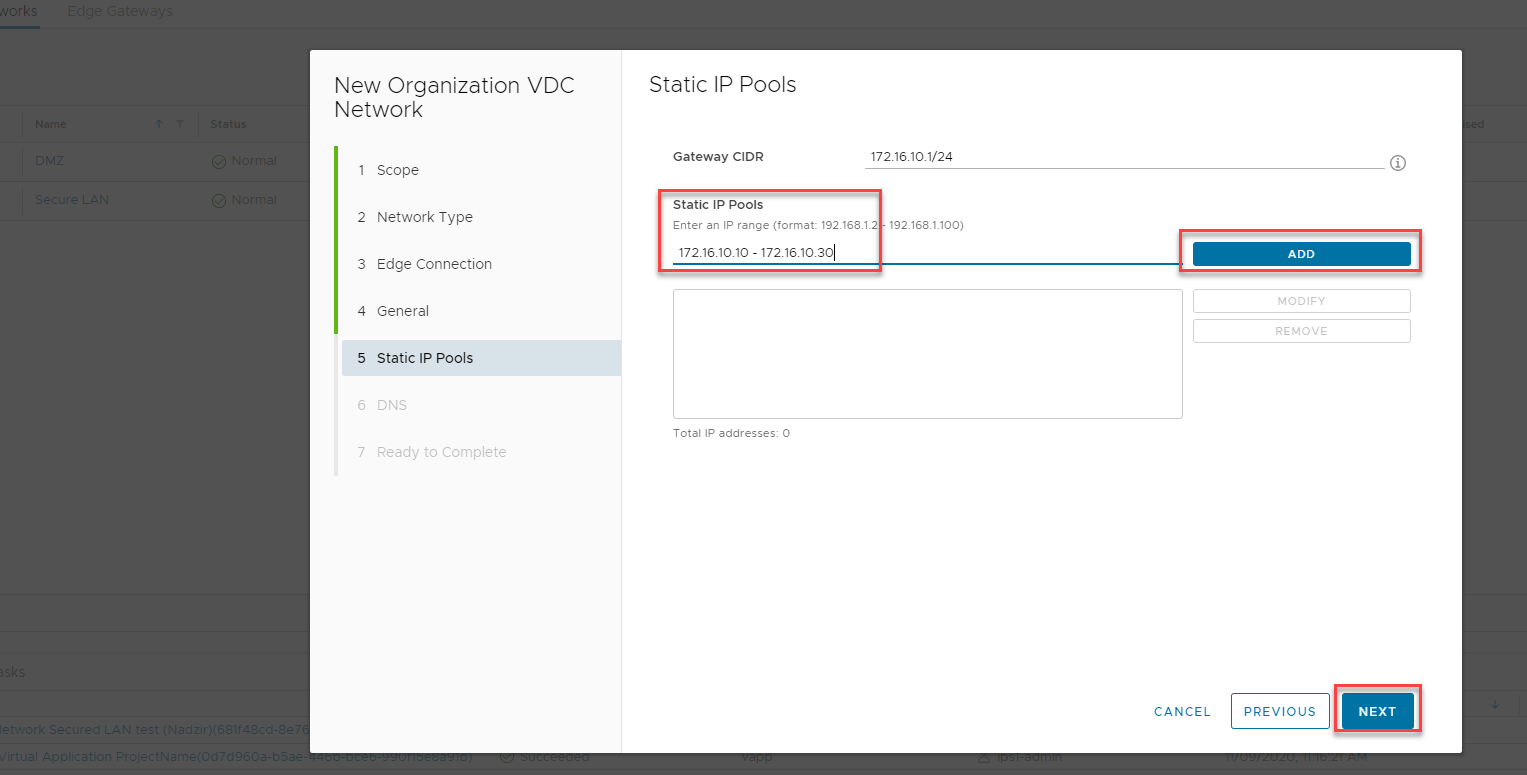
6.Define the Static IP pool of the network range. The IP is able to be assign to the VM NIC if you
– Chosen VMXNET3 as the network driver
– Selected the ‘Static IP Pool’ as the network assign of the VM NIC
– VM installed with latest VMware tools / open-vm-tools package.
Type the static IP pool of your favorable range and click add, and then click Next
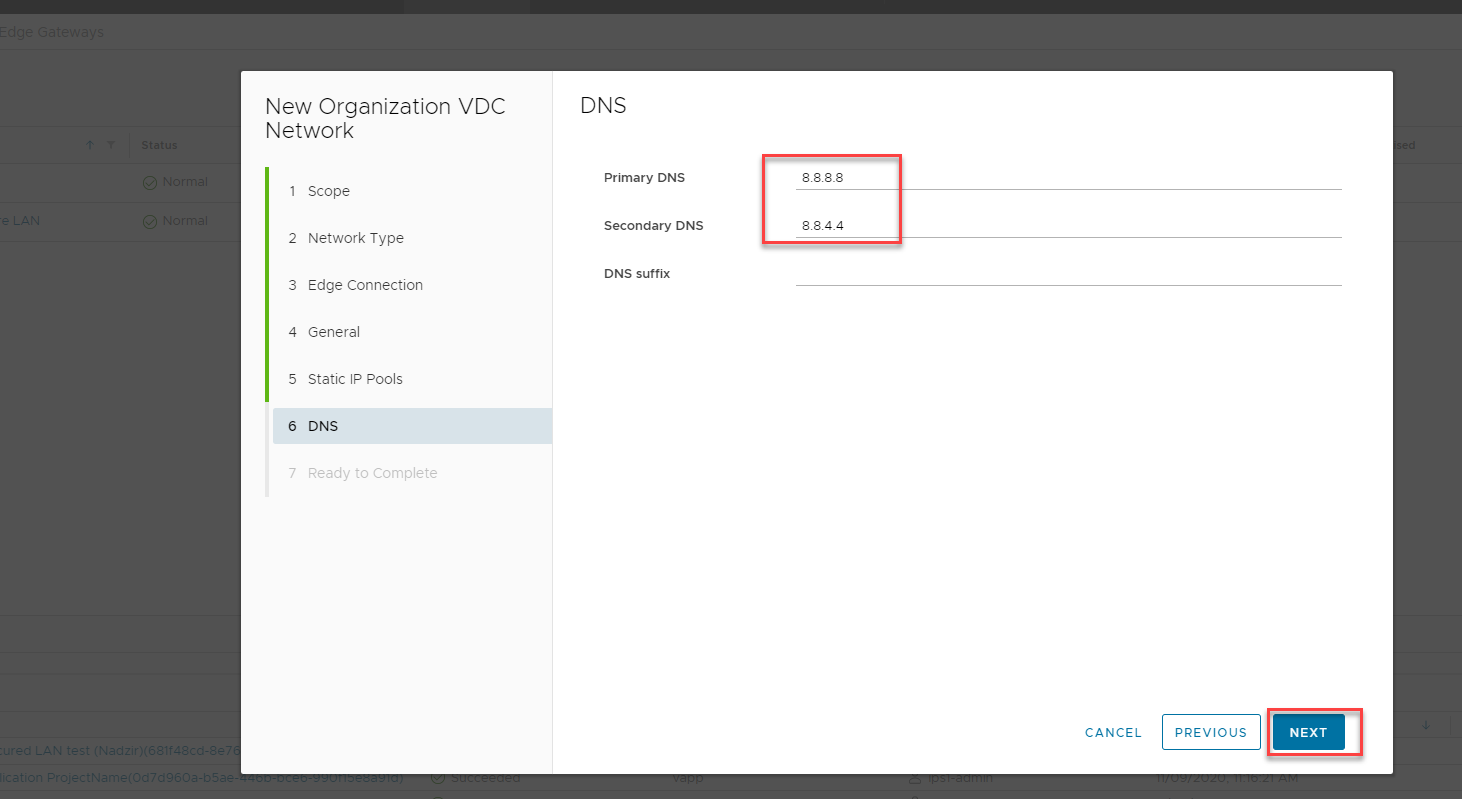
7.Enter your favorable DNS provider and click ‘Next’
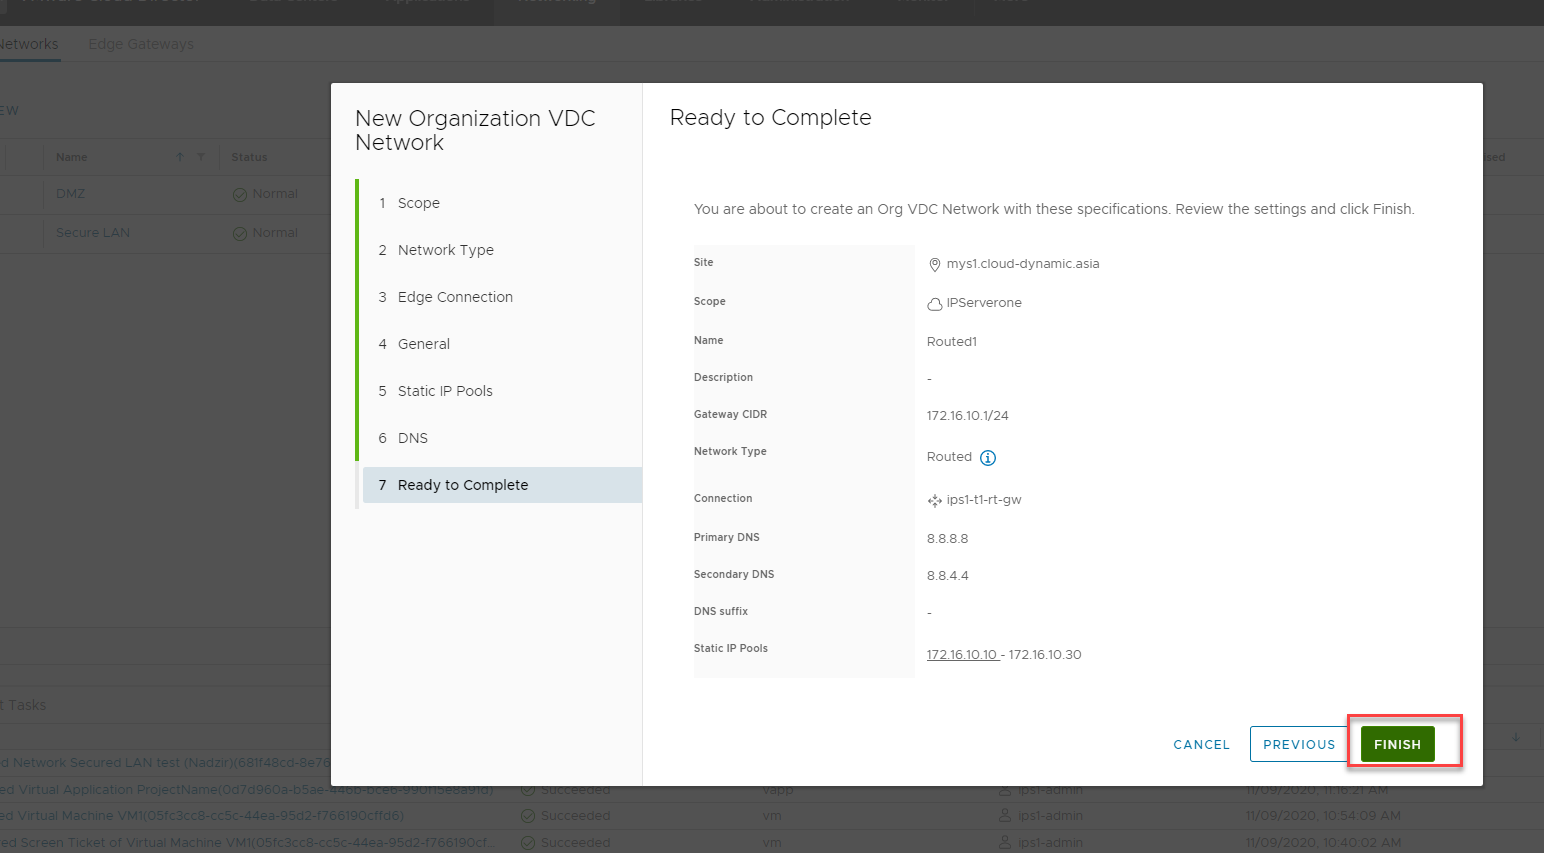
8.Review the details of your network and click ‘Finish’. The network will be created
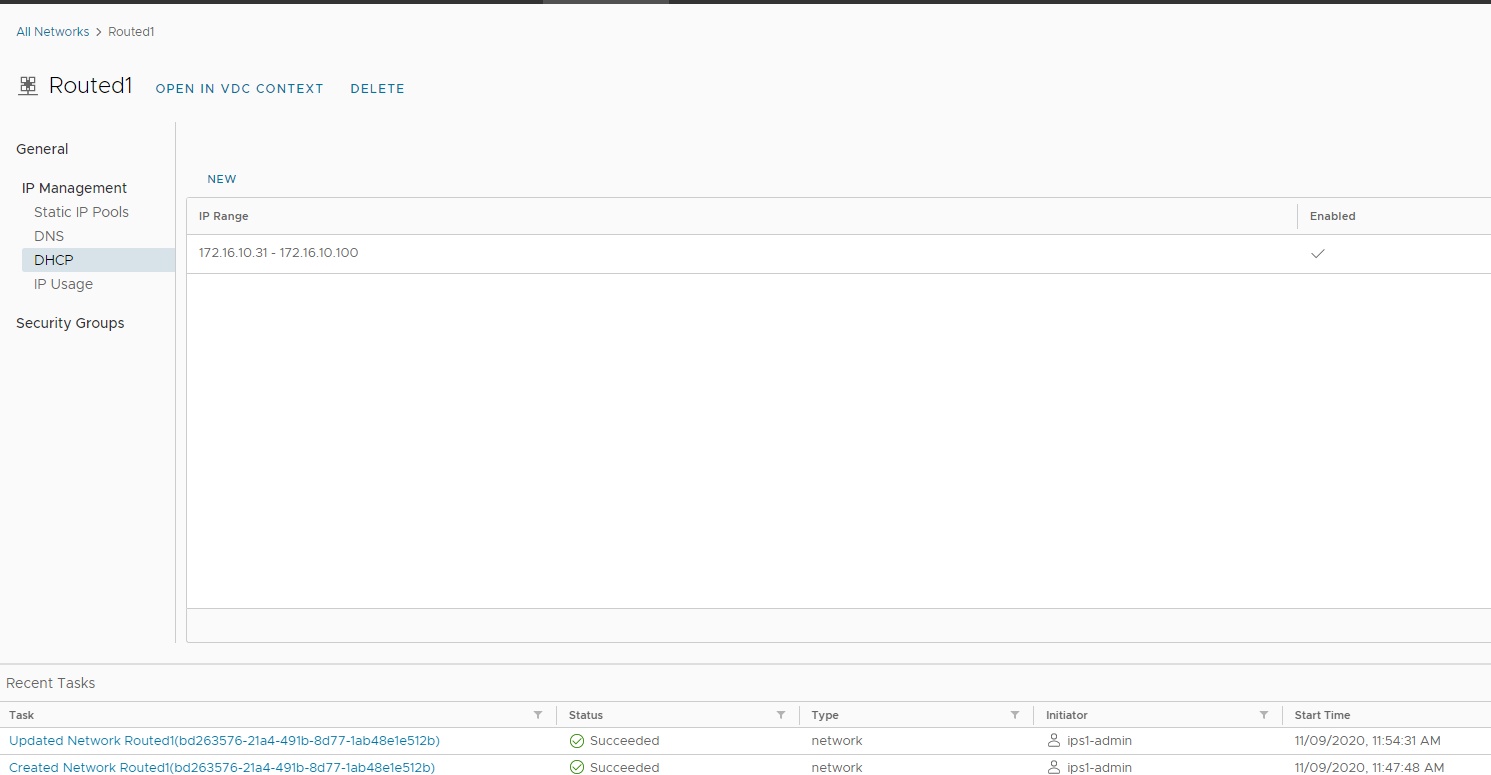
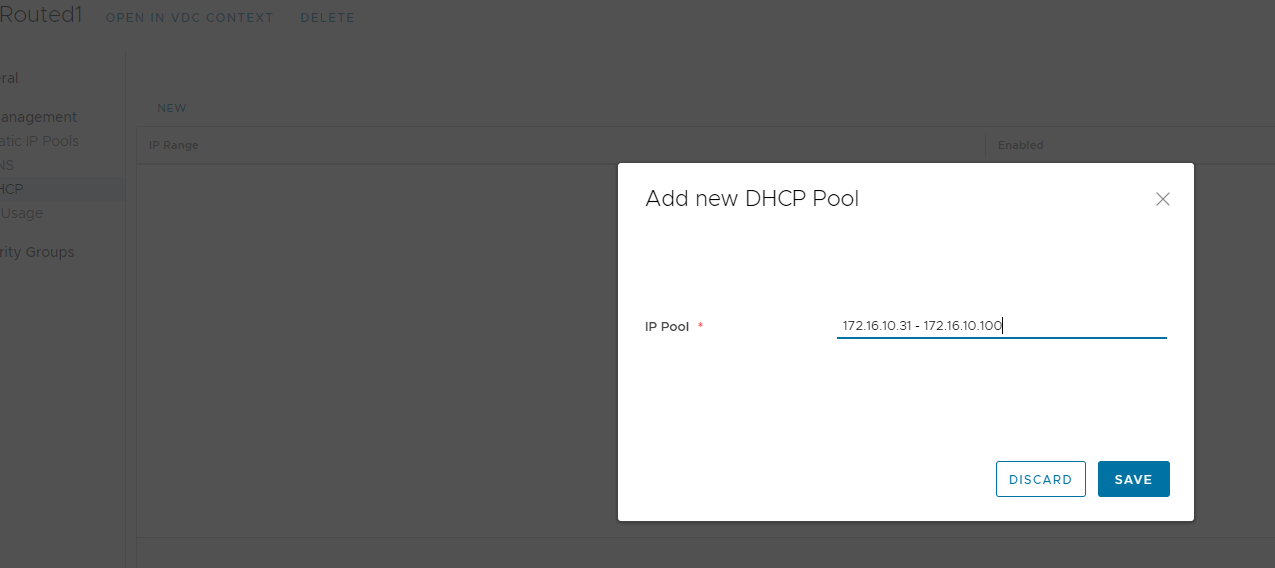
9.You can also add a DHCP pool in the network, but the DHCP features would only be available to the “Routed Network Type”. To add DHCP pool click on the network you created in ‘Networks’ List.

10.Click on ‘DHCP’ at the left panel and click on ‘NEW’

11.Enter the DHCP IP pool range for your network. And click ‘Save’
12.DHCP IP Pool created and you will now be able to assign the DHCP network mode to your VM.