Search Our Database
Installing HetrixTools in Linux – Monitoring Port
Introduction
The HetrixTools Server Monitoring Agent is a powerful tool that allows you to monitor resource usage on your VPS or dedicated server continuously. By using HetrixTools, administrators can keep track of server metrics, monitor specific ports, and receive notifications on the status of essential applications and services. This guide outlines the installation and setup of the HetrixTools monitoring agent, enabling you to configure monitoring for custom applications and ports on your server
Prerequisites
- HetrixTools Account: Sign up for an account on HetrixTools if you do not already have one.
- Linux Server with Root Access: Access to the server on which you will install the HetrixTools monitoring agent.
- Basic Knowledge of Linux Commands: Familiarity with using SSH and executing commands in the Linux CLI.
Step-by-Step Guide
Step 1: Create a HetrixTools Account
- Go to HetrixTools and sign up for an account.
- After signing up, check your email for a verification link to activate your account.

Step 2: Access the Uptime Monitor
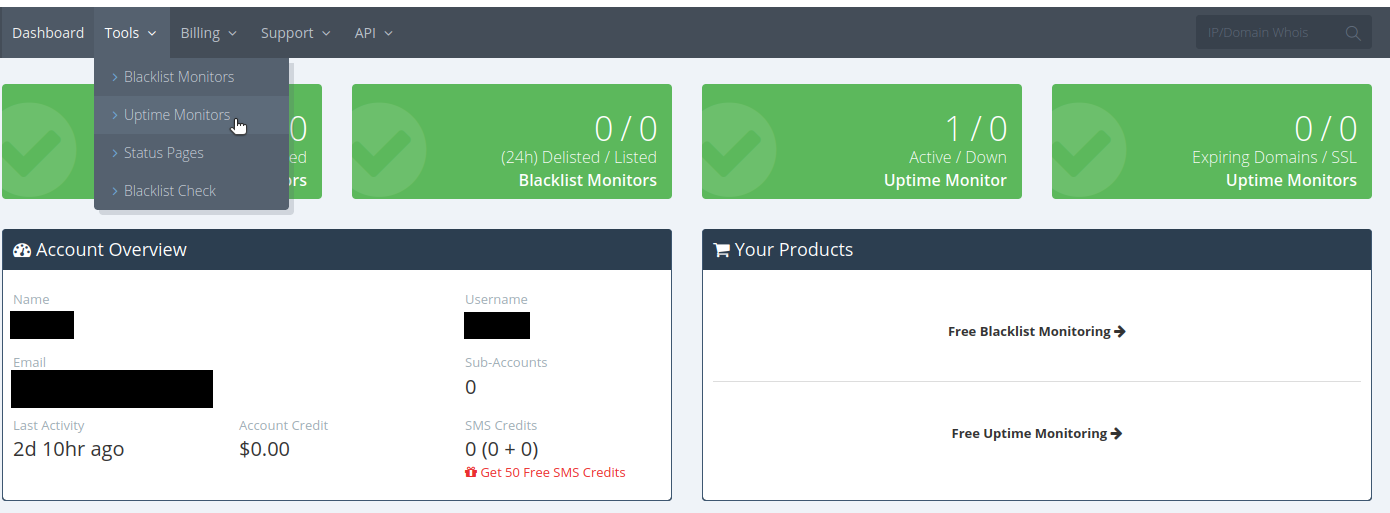
- Once your account is verified, log in and hover over the Tools menu.
- Select Uptime Monitor from the dropdown menu.
Step 3: Add a Monitor
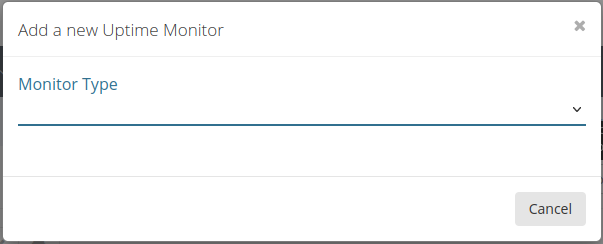
- If you do not have any monitors set up, a prompt will appear to add your first monitor.
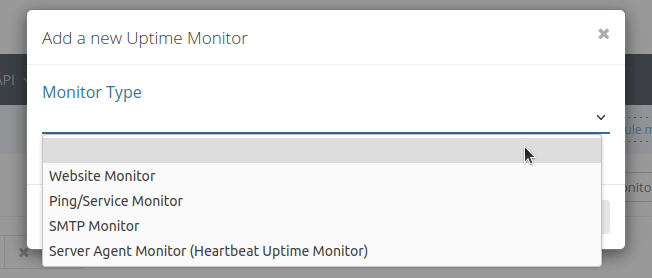
- Select Ping/Service Monitor to proceed with monitoring your server’s uptime and resource usage.
Step 4: Access Monitor Settings
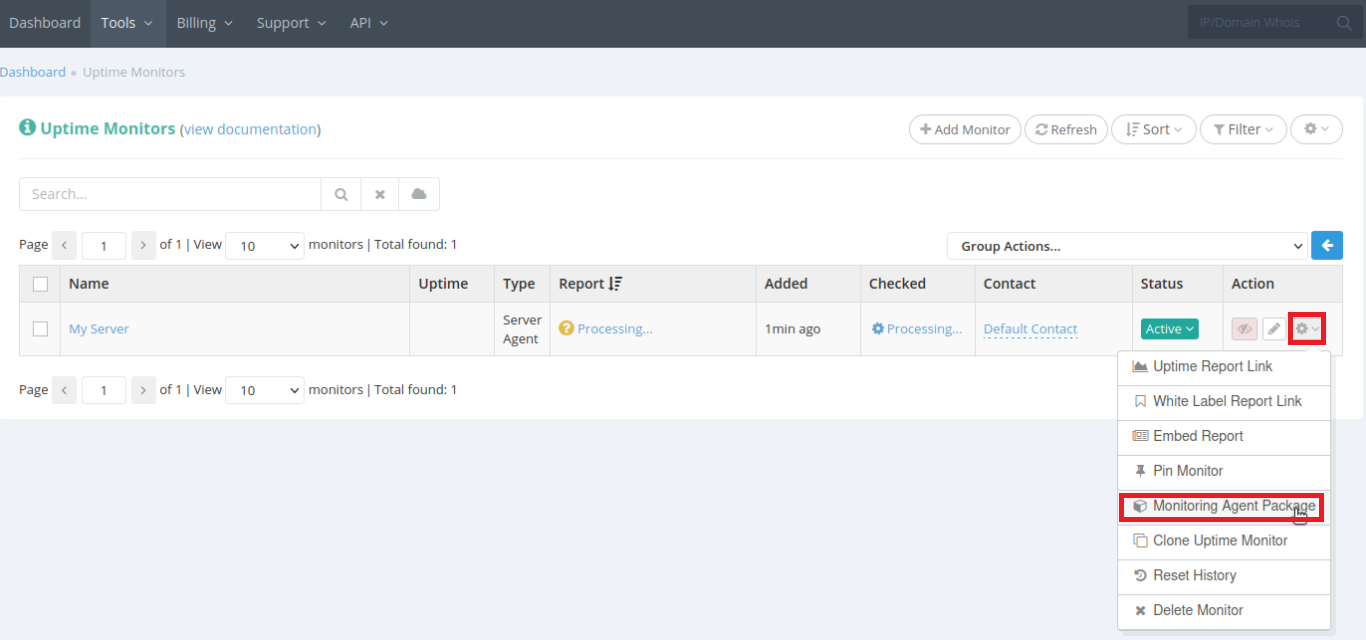
- Once the monitor is created, locate it in your list of monitors and click the Settings button on the right.
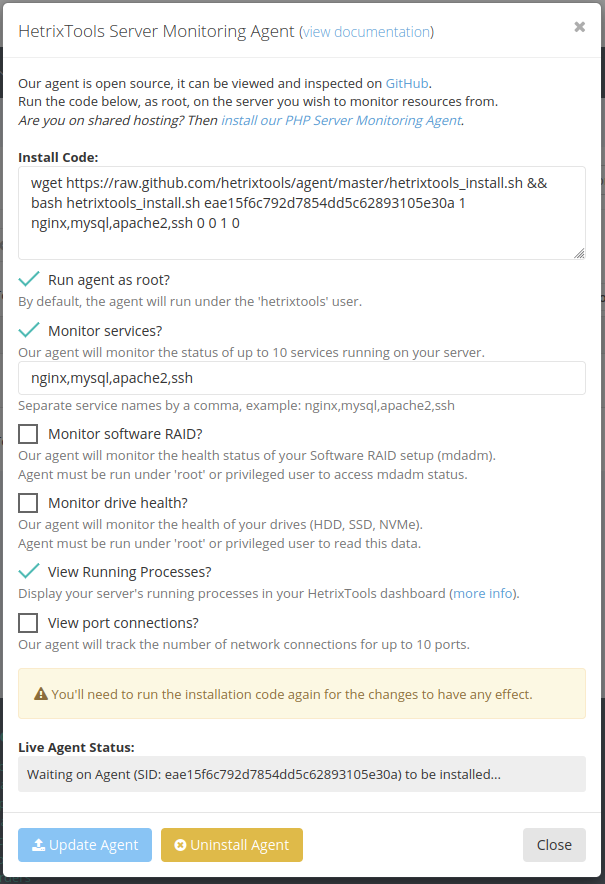
- Under Settings, choose the Monitoring Agent Package option.
Step 5: Configure Monitoring Preferences
- In the Monitoring Agent Package settings, choose the specific metrics and services you want to monitor on your server.
- For Monitor Services?, enter any applications or ports you would like to be monitored. This allows HetrixTools to track these services in real-time.
Step 6: Install the Monitoring Agent on Your Server
- After setting your monitoring preferences, an installation command will be provided by HetrixTools.
- Copy the installation command, then access your Linux server via SSH.
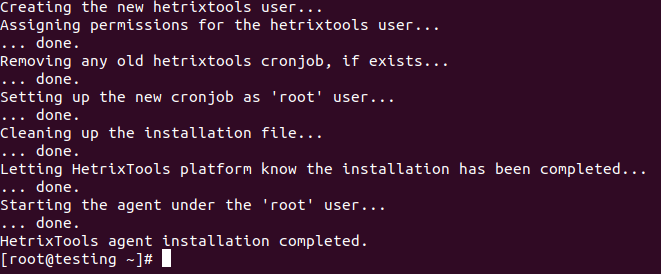
- Run the command on your server’s command line to install the monitoring agent.
wget https://raw.github.com/hetrixtools/agent/master/hetrixtools_install.sh && bash hetrixtools_install.sh eae15f6c792d7854dd5c6289310e30a 1 nginx,mysql,apache2,ssh 0 0 1 0
Upon successful installation, you should see a message indicating that the agent has been installed and configured.
Step 7: Verify Installation
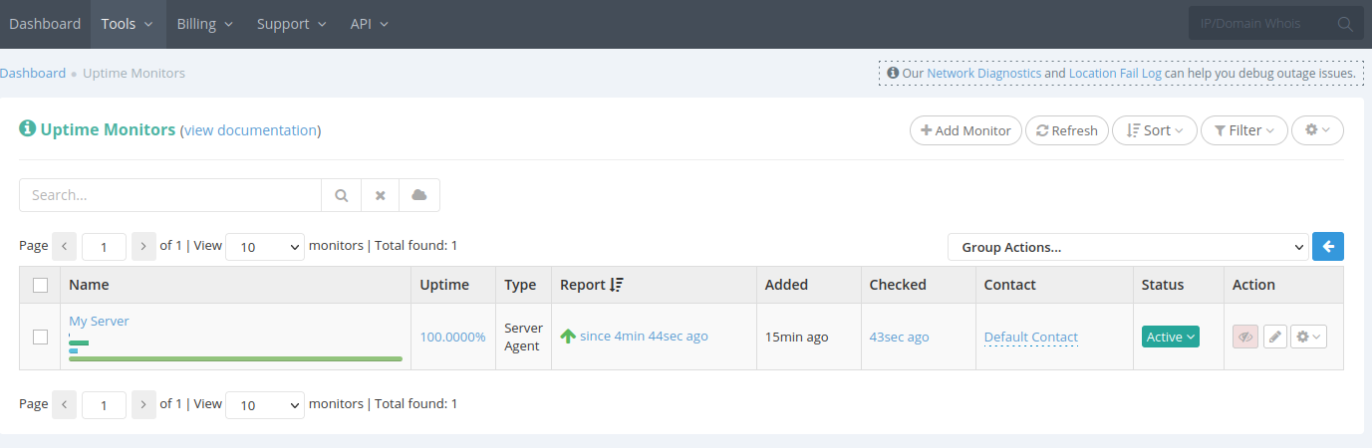
- Wait approximately 2 minutes for the monitoring agent to synchronize with the HetrixTools dashboard.

- Once synchronized, your HetrixTools dashboard will display real-time data and status updates for the configured services and ports.
Conclusion
Congratulations! HetrixTools is now successfully installed and configured on your Linux server, enabling you to monitor server resource usage, track critical services, and receive timely notifications for any issues. With this setup, you can better maintain server health and promptly address potential issues.
For further assistance or troubleshooting, please contact support@ipserverone.com.
Article posted on 10 July 2022