Search Our Database
Install LEMP on CentOS 7
Introduction
LEMP is a popular software stack used for hosting dynamic websites and web applications. The acronym stands for Linux, Nginx (pronounced “Engine-X”), MySQL (or MariaDB), and PHP. It is widely used for running content management systems (CMS) such as WordPress and Joomla, as it provides all the essential components required to serve dynamic web content.
While LEMP is similar to the more commonly known LAMP stack, which uses Apache instead of Nginx as the web server, Nginx is often preferred for its high performance and ability to handle a large number of simultaneous connections efficiently. This makes LEMP an ideal choice for websites that expect heavy traffic loads.
This guide walks through the steps to install and configure LEMP on CentOS 7, ensuring a smooth setup process. By the end, the server will be ready to host PHP-based web applications.
Prerequisites
- A CentOS 7 server.
- SSH access to the server with root or sudo privileges.
- Basic knowledge of the Linux command line.
- An FTP client, such as FileZilla, to transfer files to your server (if needed).
Step-by-step Guide
Step 1: Install Repositories and Dependencies
Start by connecting to your CentOS 7 server via SSH. Once connected, install the EPEL repository, which provides additional packages for CentOS:
yum install epel-release
Next, download the necessary RPM file for the libunwind package and upload it to your server using an FTP client. Once uploaded, move it to the /opt directory, and run the following command to install it:
rpm -Uvh /opt/libunwind-1.1-94.3.x86_64.rpm
Step 2: Install MySQL (MariaDB)
CentOS 7 comes with MariaDB as the default database package, a drop-in replacement for MySQL. Install MariaDB using the following command:
yum install mariadb-server mariadb
After the installation, start and enable MariaDB to automatically run on system boot:
systemctl start mariadb.service
systemctl enable mariadb.service
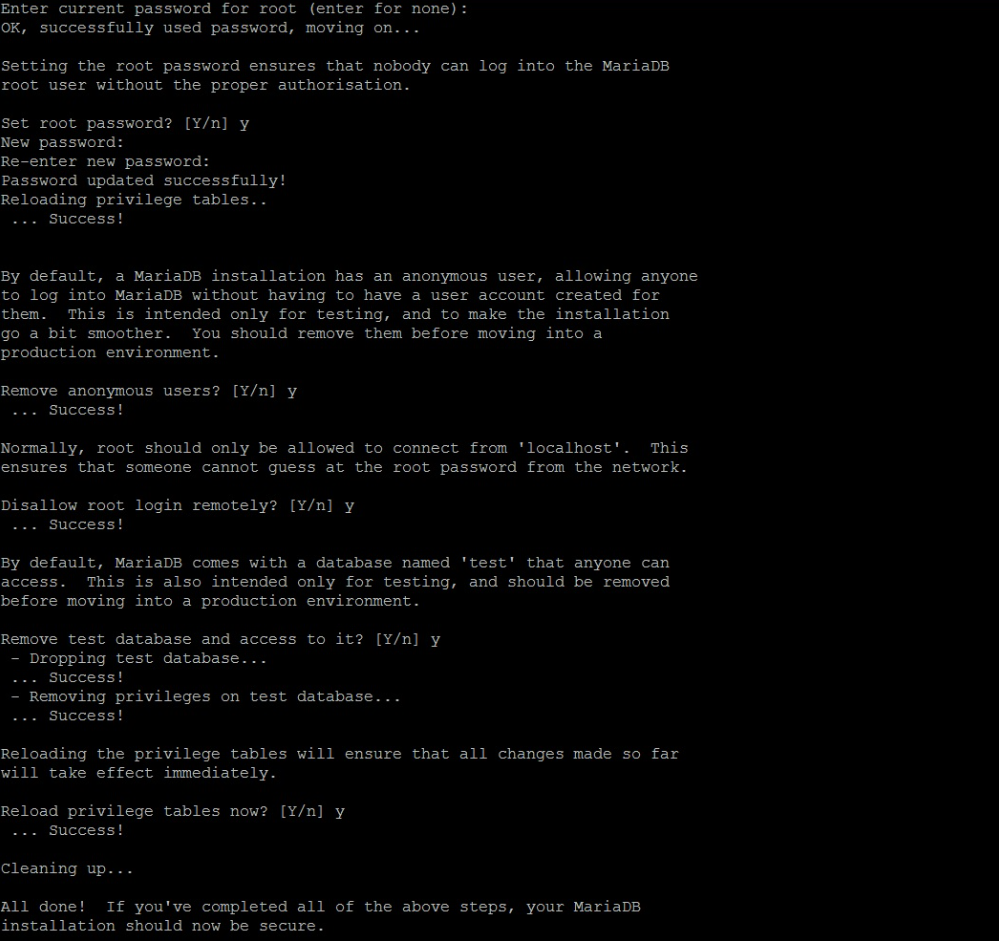
For security purposes, it’s important to secure your MariaDB installation. Run the following command:
mysql_secure_installation
During the process, you will be prompted to set a root password and configure other security options (e.g., removing test databases and disallowing remote root login). Follow the prompts and choose the recommended options by typing “y” when prompted.
To access MariaDB, use the following command:
mysql -u root -p
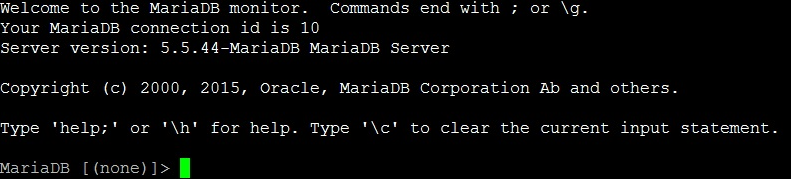
Enter your root password when prompted. Once you’re logged in, you can manage your database. Exit MariaDB by typing:
exit
Step 3: Install Nginx
To install Nginx, use the yum package manager:
yum install nginx
After the installation, start Nginx and enable it to start automatically upon boot:
systemctl start nginx.service
systemctl enable nginx.service
Before testing Nginx, it’s recommended to stop the default firewall service in CentOS 7 to avoid connection issues:
systemctl stop firewalld.service
Next, configure Nginx to process PHP files. Open the Nginx configuration file:
vi /etc/nginx/nginx.conf
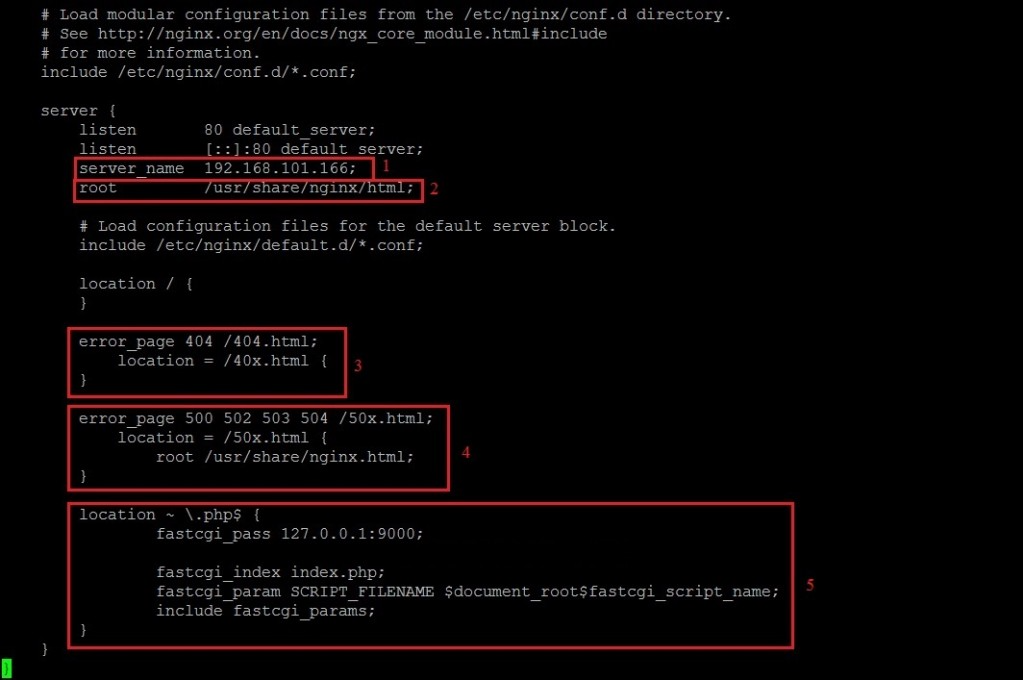
Make the following changes:
- Set the server_name directive to your server’s IP address.
- Set all root paths to /usr/share/nginx/html.
- Uncomment the location ~ \.php$ section and update fastcgi_pass to 127.0.0.1:9000.
- Ensure that fastcgi_param SCRIPT_FILENAME is set to $document_root$fastcgi_script_name.
Save and exit the file after making these changes.
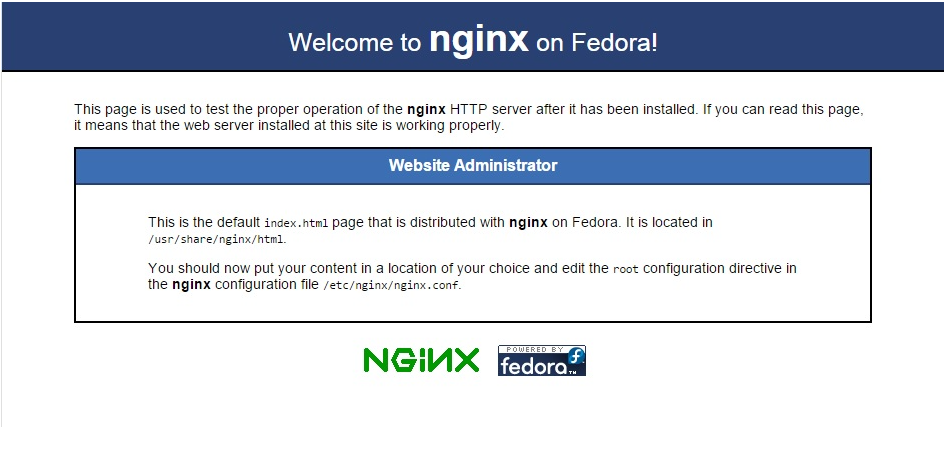
Finally, open a web browser and navigate to your server’s IP address to verify that Nginx is running.
Step 4: Install PHP
To install PHP and the necessary PHP modules, run the following command:
yum install php-fpm php-mysql
Create a PHP info file to verify that PHP is working correctly. Open a new file called info.php in the web root directory:
vi /usr/share/nginx/html/info.php
Insert the following PHP code:
<?php
phpinfo();
?>
Save and close the file. Next, configure PHP-FPM by editing the configuration file:
vi /etc/php-fpm.d/www.conf
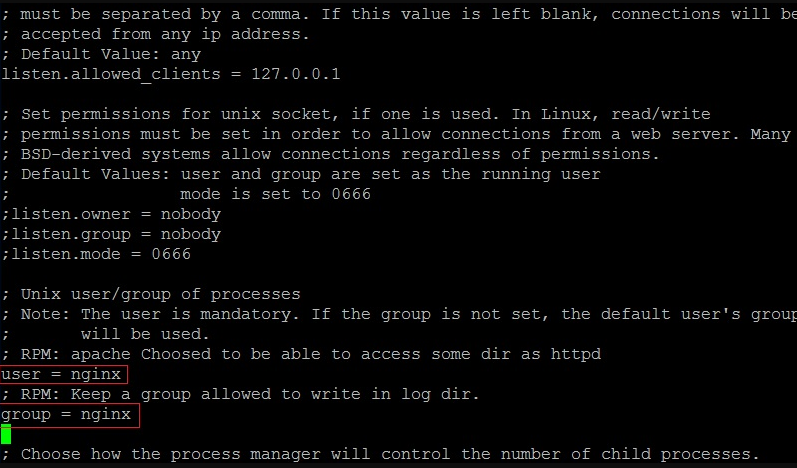
Locate the user and group settings and change both values from apache to nginx:
user = nginx
group = nginx
Save and exit the file. Start the PHP-FPM service and restart Nginx:
systemctl start php-fpm.service
systemctl restart nginx.service
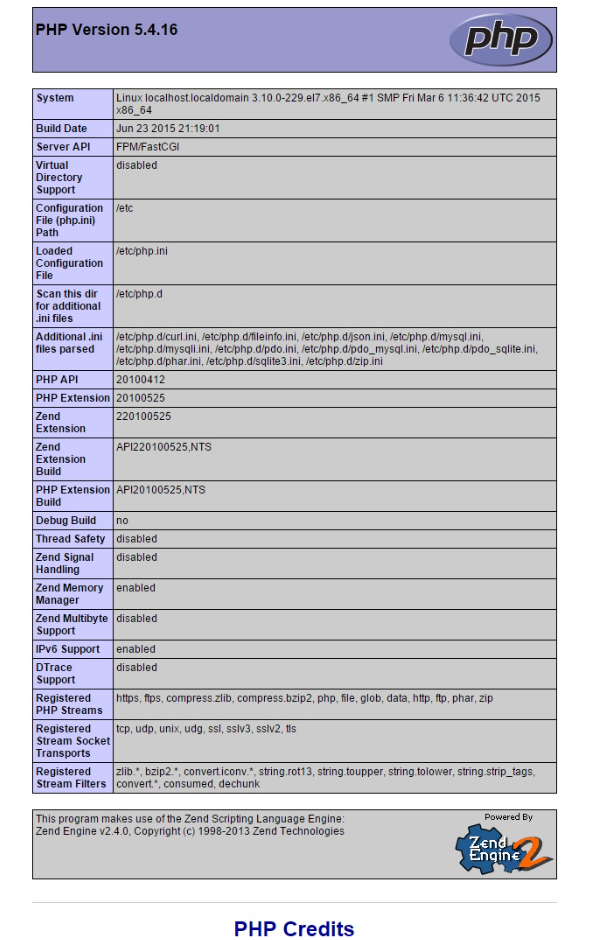
To verify the PHP installation, open your web browser and navigate to http://your-server-ip/info.php. This should display a PHP info page.
Conclusion
Congratulations! You have successfully installed and configured the LEMP stack on CentOS 7. Your server is now ready to host dynamic web applications such as WordPress or Joomla. Ensure that you follow security best practices and configure your firewall before deploying your website to production.
Should you have any inquiries about the guidelines, please feel free to open a ticket through your portal account or contact us at support@ipserverone.com. We’ll be happy to assist you further.
Article posted on 20 April 2020 by Louis