Search Our Database
How to setup POP3 email account in Microsoft Outlook 2010
Introduction
This guide is designed for users of Microsoft Outlook 2010 who wish to configure their email accounts using the POP3 protocol to download and store emails locally on their hard drive. It provides a step-by-step approach for setting up email delivery from a web-based account into Outlook, making it accessible offline. This article is particularly useful for individuals who prefer local storage of their emails for backup, easy access, and management.
Prerequisites
- Microsoft Outlook 2010 installed on your device
- Your email address and password.
- POP3 server settings for incoming and outgoing mail from your email provider.
- Basic knowledge of navigating Microsoft Outlook.
Step-by-Step Guide
Step 1: Open Microsoft Outlook 2010
Launch Microsoft Outlook 2010 from your desktop or Start menu.
Step 2: Navigate to account settings
- Click on the File tab at the top left of the screen.
- In the menu, select Info and then click Add Account
Step 3: Manually configure server settings
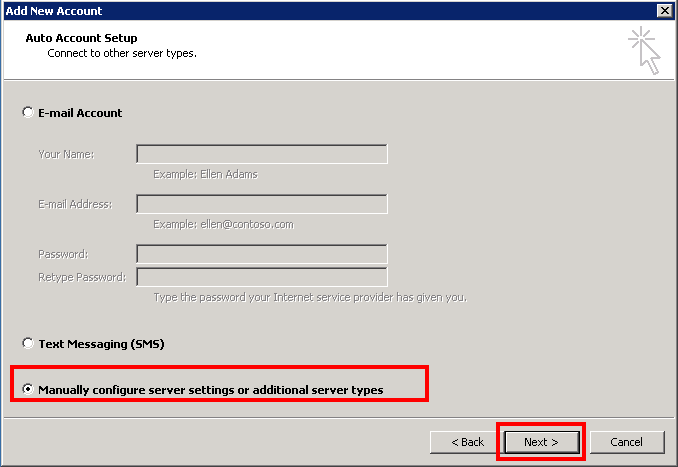
- In the Add New Account window, check the option for Manually configure server settings or additional server types.
- Click Next to proceed.
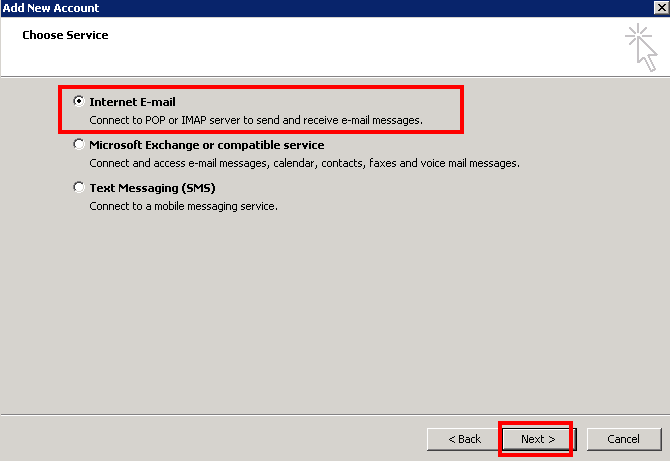
- Choose Internet E-mail and click Next
Step 4: Enter user and server information
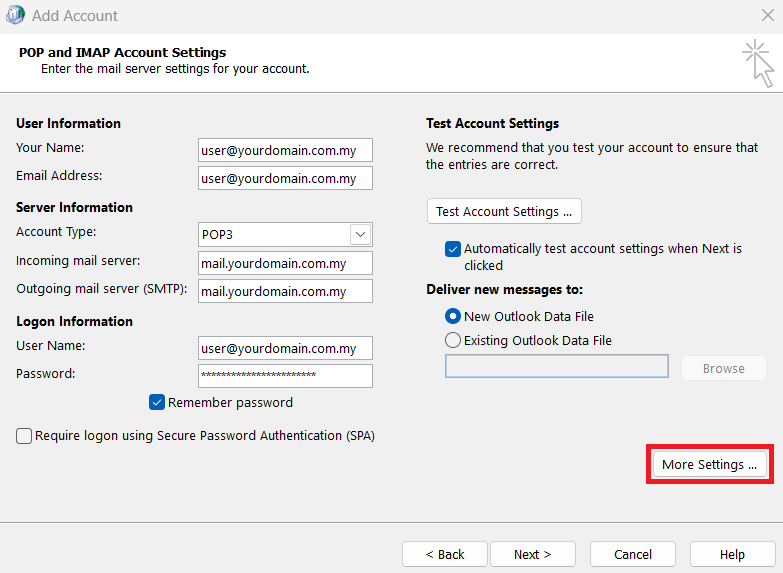
- In the Internet E-mail Settings window, fill in the required fields:
- Your Name: Enter your full name (this will appear as the sender’s name).
- E-mail Address: Enter your email address (e.g., user@yourdomain.com.my).
- Account Type: Select POP3 from the drop-down menu.
- Incoming & Outgoing mail server: Enter the incoming and outgoing mail server for POP3 (e.g., user@yourdomain.com.my).
- User Name: Enter your full email address as the username (e.g., user@yourdomain.com.my).
- Password: Enter the password for your email account.
- Once you have filled in all the details, click on the More Settings button.
Step 5: Configure outgoing server settings
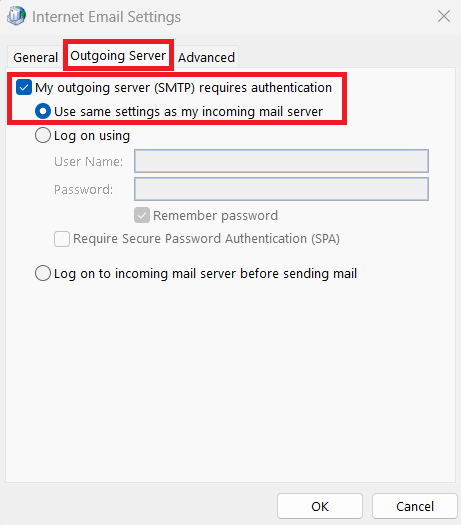
- In the More Settings window, navigate to the Outgoing Server tab.
- Check the box that says My outgoing server (SMTP) requires authentication.
- Ensure the option Use same settings as my incoming mail server is selected.
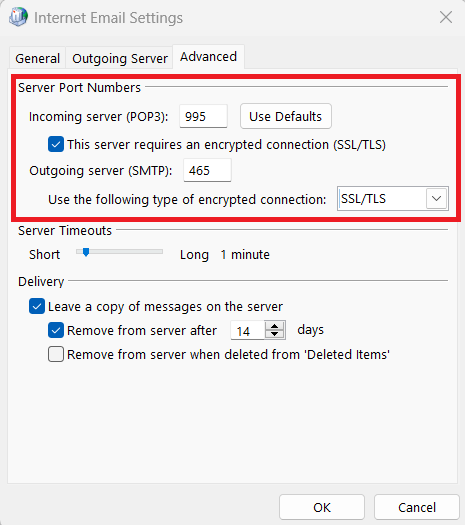
Step 6: Configure advanced settings
- Click on the Advanced tab in the same More Settings window.
- Enter the following information for the server ports:
- Incoming server (POP3): Port 995 and tick “This server requires an encryption connection (SSL/TLS)”
- Outgoing server (SMTP): Port 465 and chose “SSL/TLS”
- Click OK to close the More Settings window.
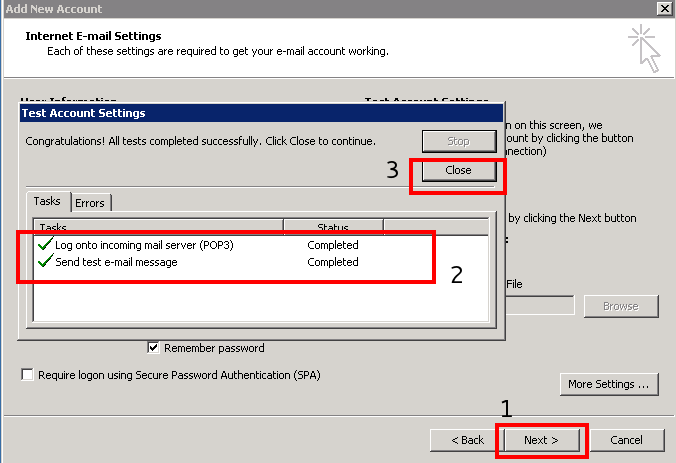
Step 8: Finalize the account setup
- Click “Next” on the “Add Account” page. A “Test Account Setting” window will appear, confirming that your setup is complete. Once the test is successful, click “Next” and then “Close”
- You can now start using your newly configured POP3 email account in Microsoft Outlook 2010.
Conclusion
By following these steps, you have successfully configured a POP3 email account in Microsoft Outlook 2010. Your email will now be downloaded to your computer, allowing you to manage your messages even when offline. If you encounter any issues or need further assistance, please contact your email hosting provider for support.
For additional assistance or if you encounter any issues, please contact our support team at support@ipserverone.com.