Search Our Database
How to Register my own DNS Nameserver in my Directadmin
Introduction
Registering a custom DNS nameserver allows you to manage DNS records for domains hosted on your own server. This is commonly used by web hosting providers and server administrators to maintain control over domain resolution.
This guide explains the steps to register and configure your own DNS nameserver on a DirectAdmin server. The process involves setting up the DNS zone, assigning dedicated IPs, and registering your nameservers with a domain registrar.
Prerequisites
- A domain name to be used as the DNS hostname (you need at least two).
- Example:
- ns1.myhosting.com
- ns2.myhosting.com
- Example:
- At least two dedicated IP addresses in your cloud or dedicated hosting subscription to assign unique IPs to each nameserver.
- Administrator access to your hosting control panel.
Step-by-Step Guide
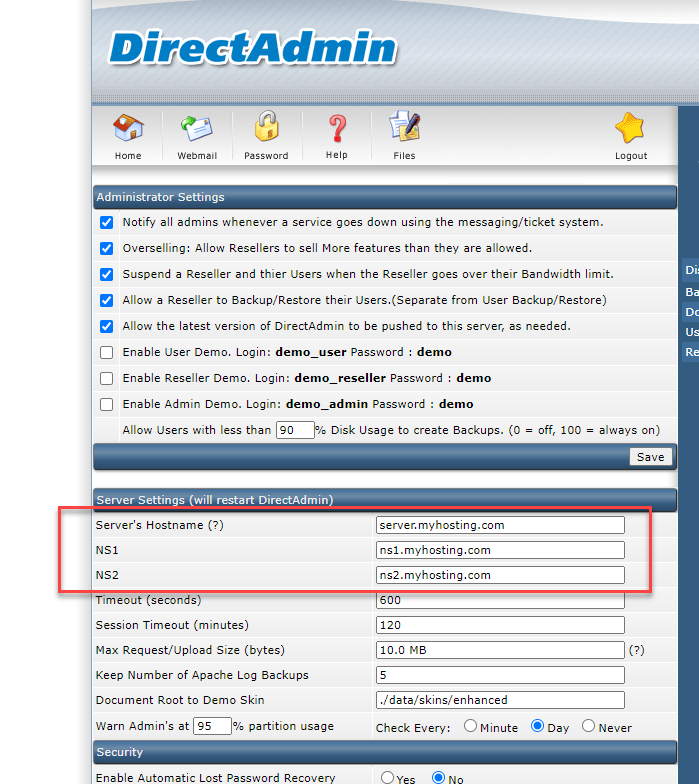
Step 1: Configure the DNS Nameserver in DirectAdmin
- Log in to your DirectAdmin server as an administrator.
- Set up the server’s DNS Nameserver to handle DNS resolution.
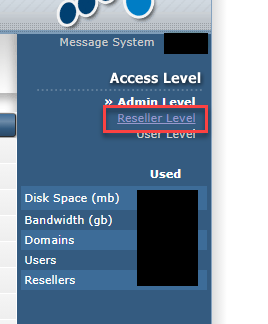
- Ensure that your domain name (e.g., myhosting.com) is added to DirectAdmin.
- If the domain is not added, navigate to the Reseller Level in DirectAdmin.
- Refer to this guide for adding a hosting account in DirectAdmin.
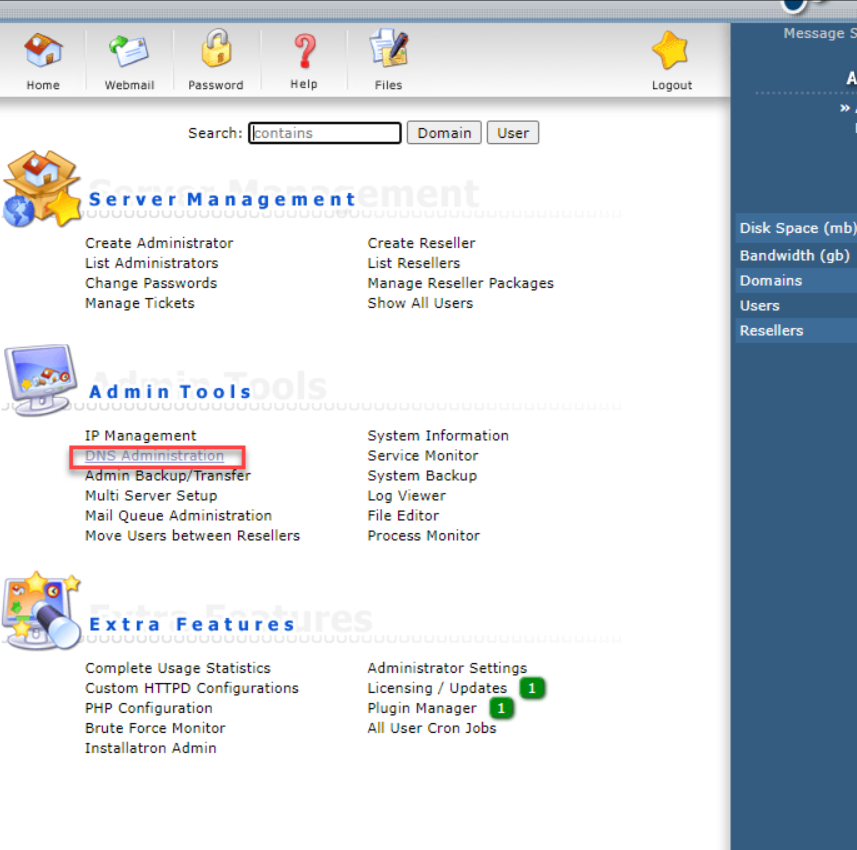
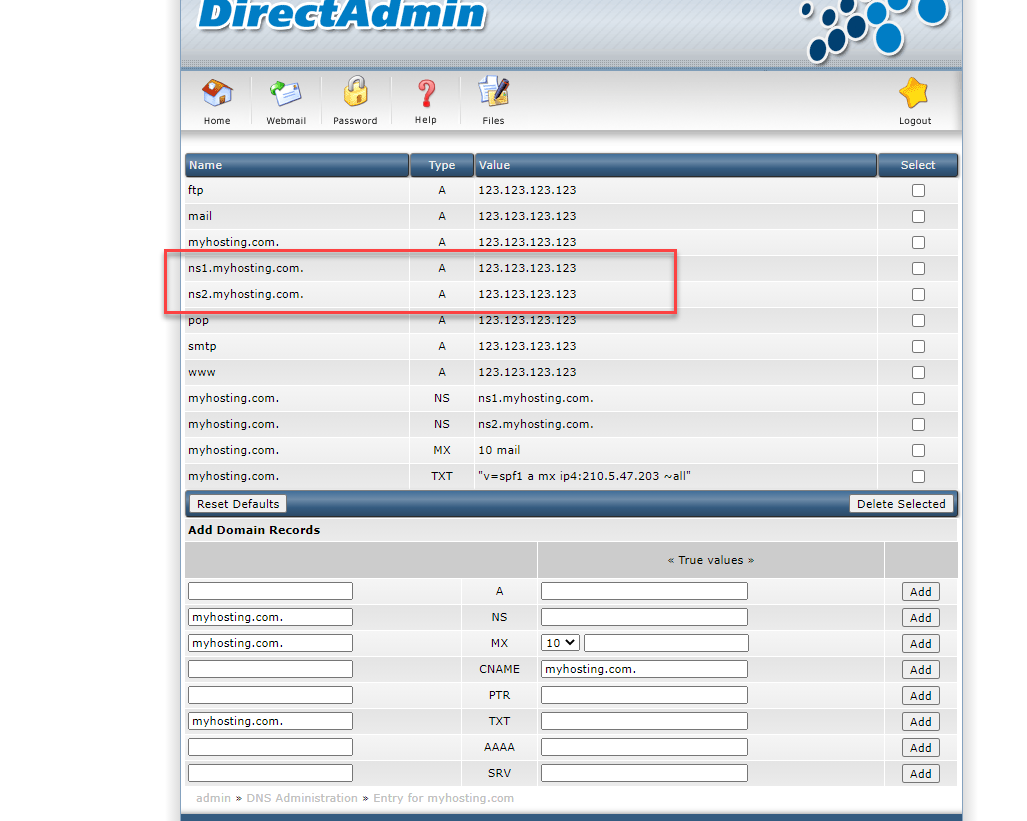
Step 2: Verify the DNS Zone Configuration
- Once the hosting account is added, go to DNS Administration in DirectAdmin.
- Click on the main domain (e.g., myhosting.com) to manage its DNS settings.
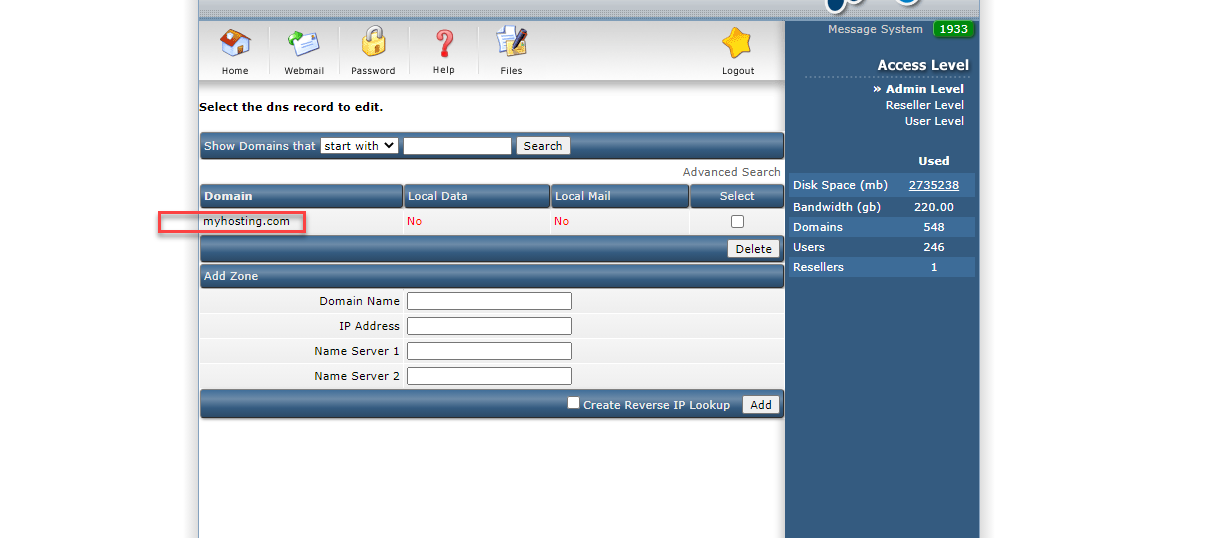
- Ensure the A records for ns1 and ns2 are correctly assigned to their respective IPs.
Step 3: Register Your DNS Hostnames with Your Domain Registrar
- To make the nameservers publicly recognizable, register ns1 and ns2 with your domain registrar.
-
If your domain is registered with IPServerOne, contact Customer Support at:
- Email: cs@ipserverone.com
- Phone: +603-2026 1688
-
Provide the exact hostname and corresponding IP addresses:
ns1.myhosting.com → 123.123.123.123
ns2.myhosting.com → 123.123.123.124
Step 4: Verify Your DNS Hostname Registration
- Use a DNS lookup tool such as this website to check if your nameservers are publicly recognized.
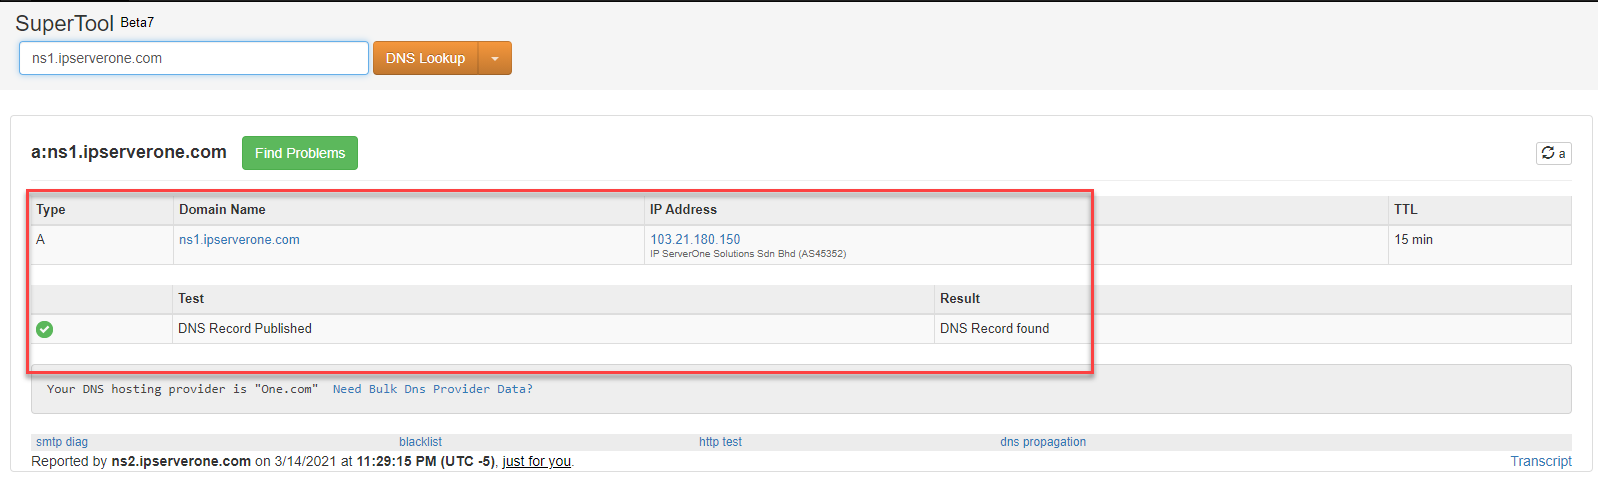
- If the setup is correct, the result should confirm that ns1.myhosting.com and ns2.myhosting.com are active and resolving correctly.
Step 5: Assign Your Domain to Your Custom DNS Hostname
- Update your domain’s nameserver settings to point to:
- ns1.myhosting.com
- ns2.myhosting.com
- This will ensure that all DNS requests for your domain are handled by your server.
Conclusion
You have now successfully registered and configured a custom DNS nameserver for your hosting environment. Your domain is now resolving through your own nameservers, giving you full control over DNS management.
If you need further assistance, please submit a support ticket or contact IPServerOne Customer Support at cs@ipserverone.com or +603-2026 1688.
Article posted by yccheong on 21 March 2021