Search Our Database
How to purchase/register a domain name through Customer Portal
Introduction
A domain name is your unique identity on the internet, essential for establishing your website, email, brand, or overall online presence. Through the IP ServerOne Customer Portal, anyone with an account, whether an individual or business, can easily register a domain name at any time. It is highly recommended to register early to secure your preferred name before someone else does.
IP ServerOne offers competitive pricing, local customer support, and a user-friendly platform to make the domain registration process simple and convenient. With step-by-step guidance and clear instructions, your domain will be instantly registered once payment is successfully completed.
Prerequisite
- You must have an active IP ServerOne Customer Portal account.
Need help signing up? Please refer to this guide: How to Register and Login to Customer Portal
Steps to register or purchase a new domain name:
1. Log in to the IPServerOne Customer Portal
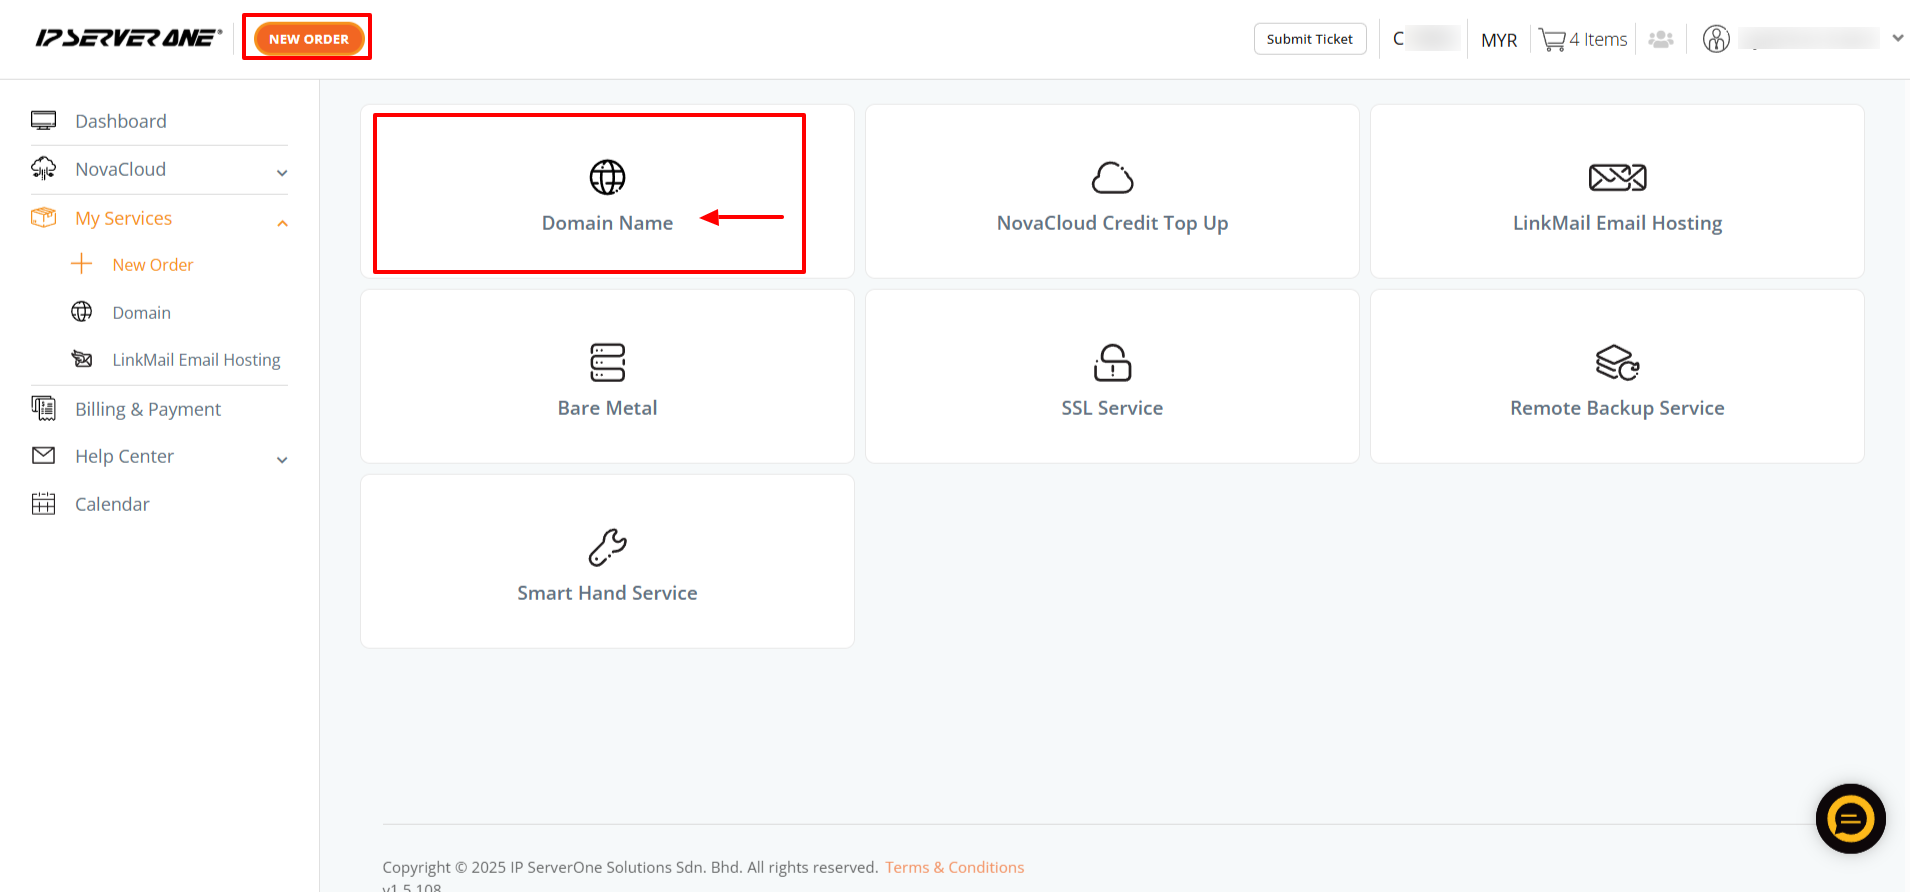
2. Navigate to the top left corner and click New Order, then select Domain Name.
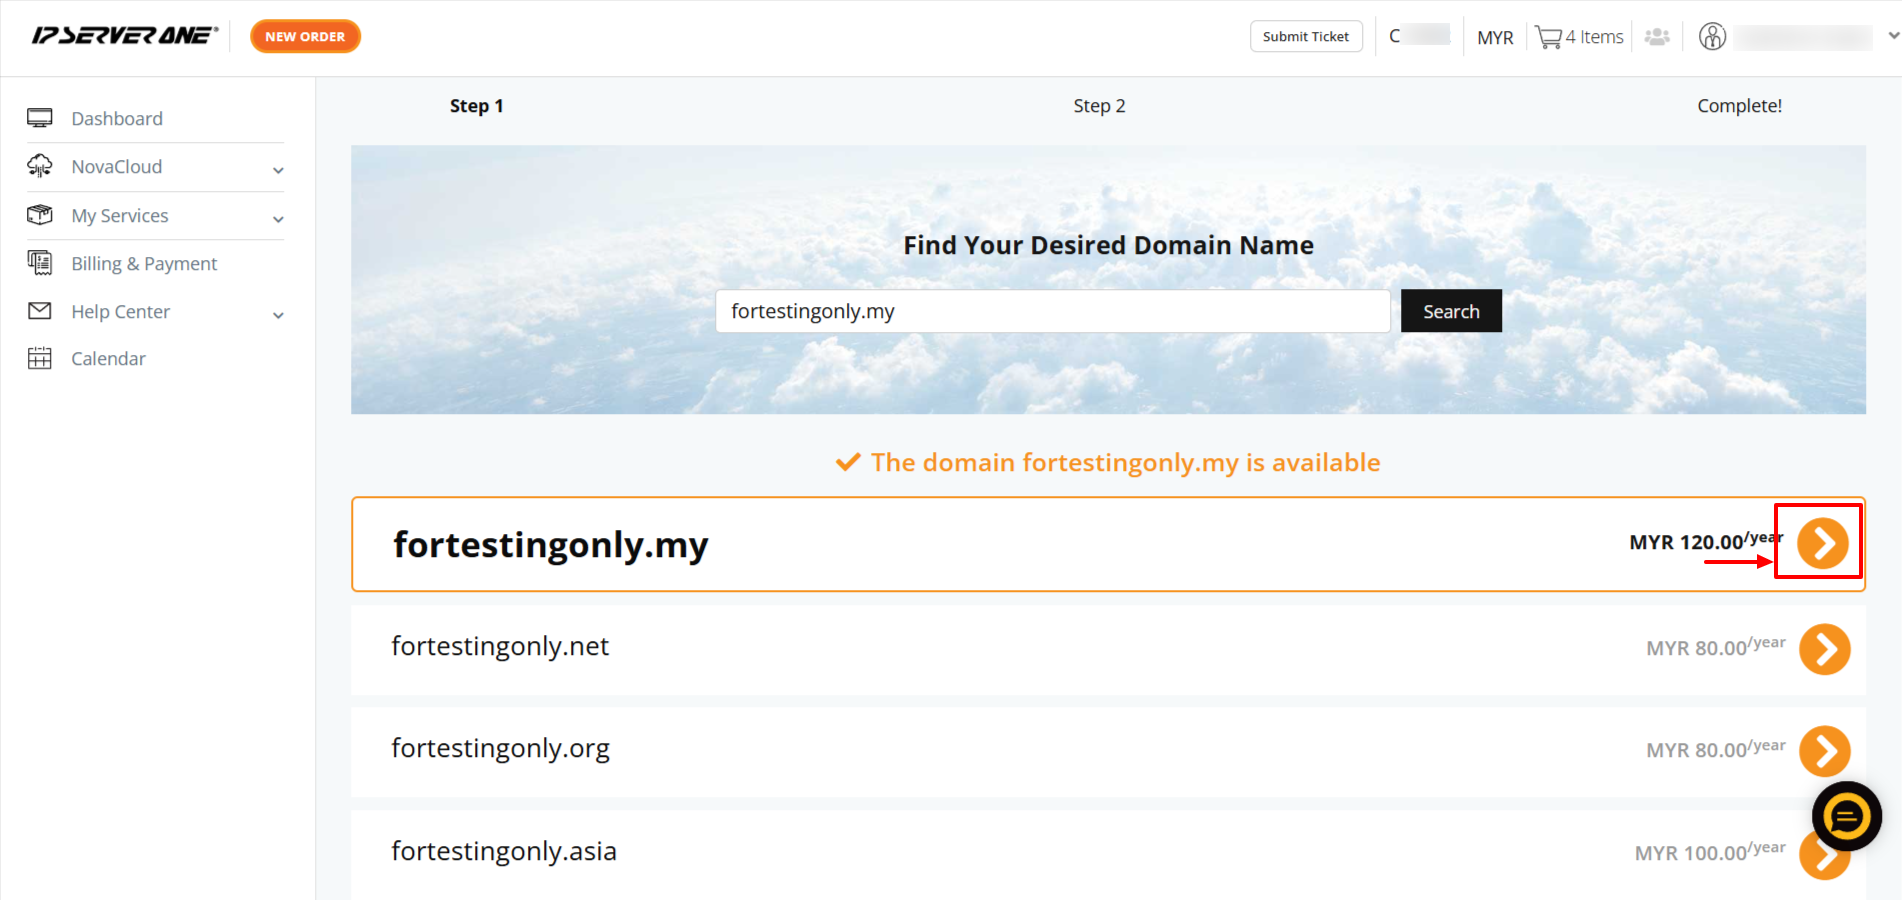
3. Check Domain Availability.
-
Enter your desired domain name into the search bar and click Search.
-
If the domain is available, click the “>” button next to the result to proceed with selection.
Note: If a domain name appears as available in WHOIS but cannot be registered through our Customer Portal, it may fall under the Premium Domain or Restricted Domain category. For further assistance, please contact our Customer Support team.
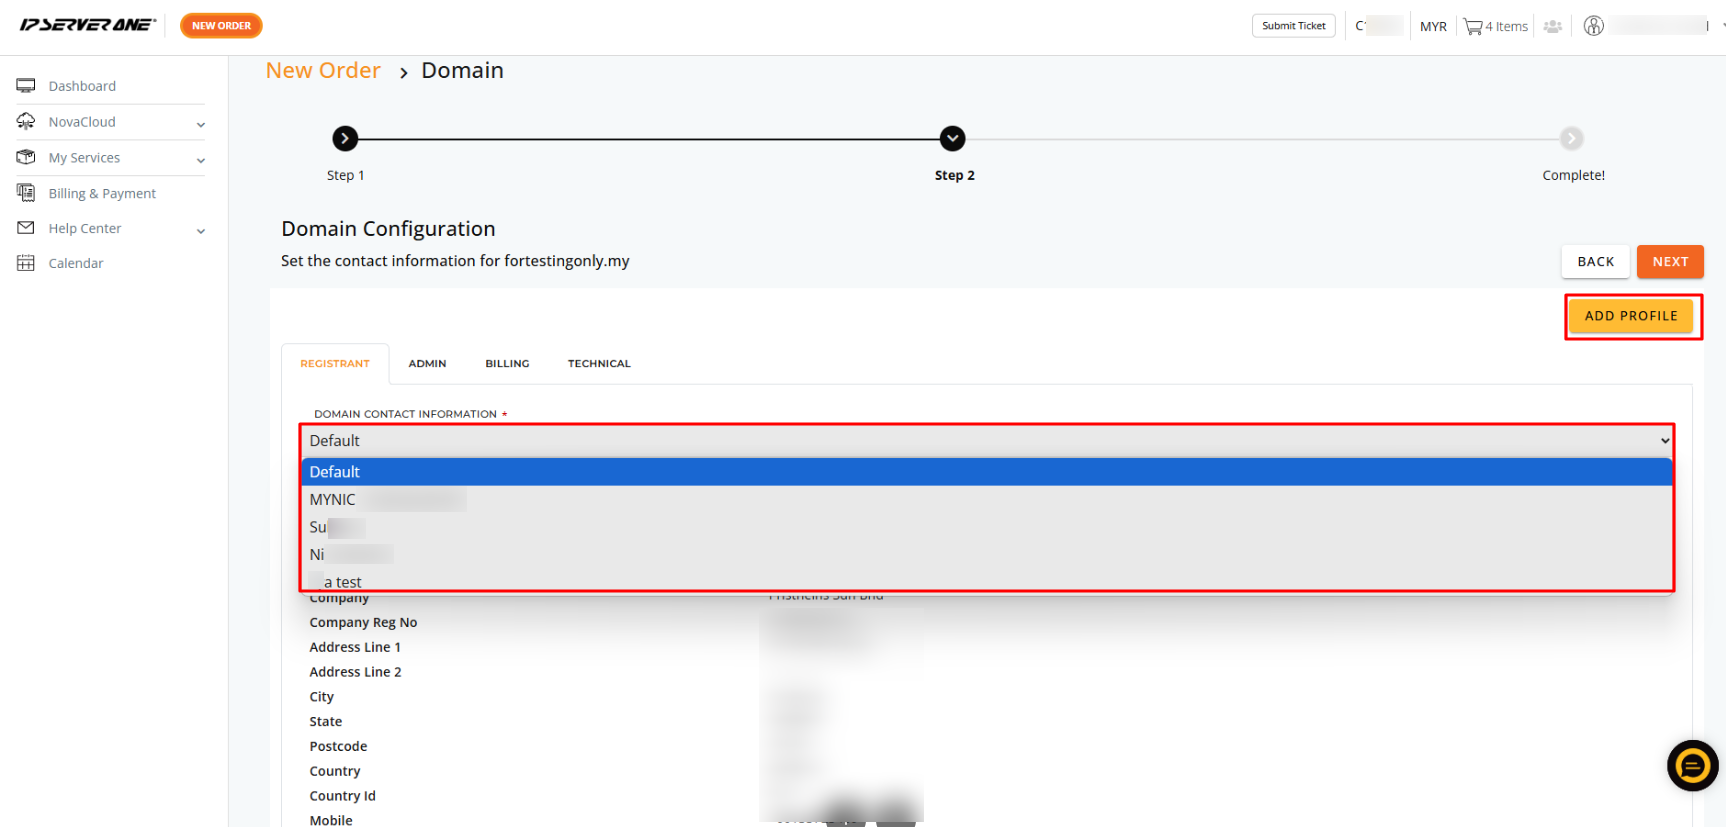
4. Set up the domain contact information (WHOIS)
-
By default, the contact info uses your Customer Portal profile.
-
To use different contact details, click “Add Profile” on the top right, fill in the form, and click Save Changes.
-
The saved profile name will appear in the dropdown. Select it for the Registrant contact.

-
For Admin, Billing, and Technical contacts, you can either tick the checkbox to reuse the same details or choose a different profile.
-
Once completed, click Next to proceed.

5. Select Domain Addon and DNS Hosting
i. WHOIS Privacy Protection (Optional)
-
Purpose: Keeps your contact information (name, phone number, email) hidden from the public WHOIS database, protecting you from spam, identity theft, and unwanted messages.
-
Fee: RM12/year per domain.
-
How to Enable: Click the toggle switch to turn it on.
Note: WHOIS Privacy Protection is not available for certain country-code domains, including .MY, due to registry policies.
ii. Choose a DNS Hosting Plan (Compulsory)
-
Purpose: DNS hosting translates your domain into the correct server address, enabling your website and email to work properly.
-
Choose the plan according to your needs. You can view additional details by selecting the ‘i’ icon next to each option.
-
Once selected, click Confirm to proceed.

6. Top Up Cloud Credit (If Required)
-
For free DNS hosting, after clicking Confirm, a pop-up will appear confirming the item has been added to your cart. Click Checkout to continue to payment.

-
For paid DNS plans (Standard / Premium / Premium Plus), you’ll be prompted to top up your cloud credit.
-
Choose the top-up amount needed to cover your selected DNS plan.
-
If your cloud credit is already sufficient, click Skip to move directly to the payment page.
-

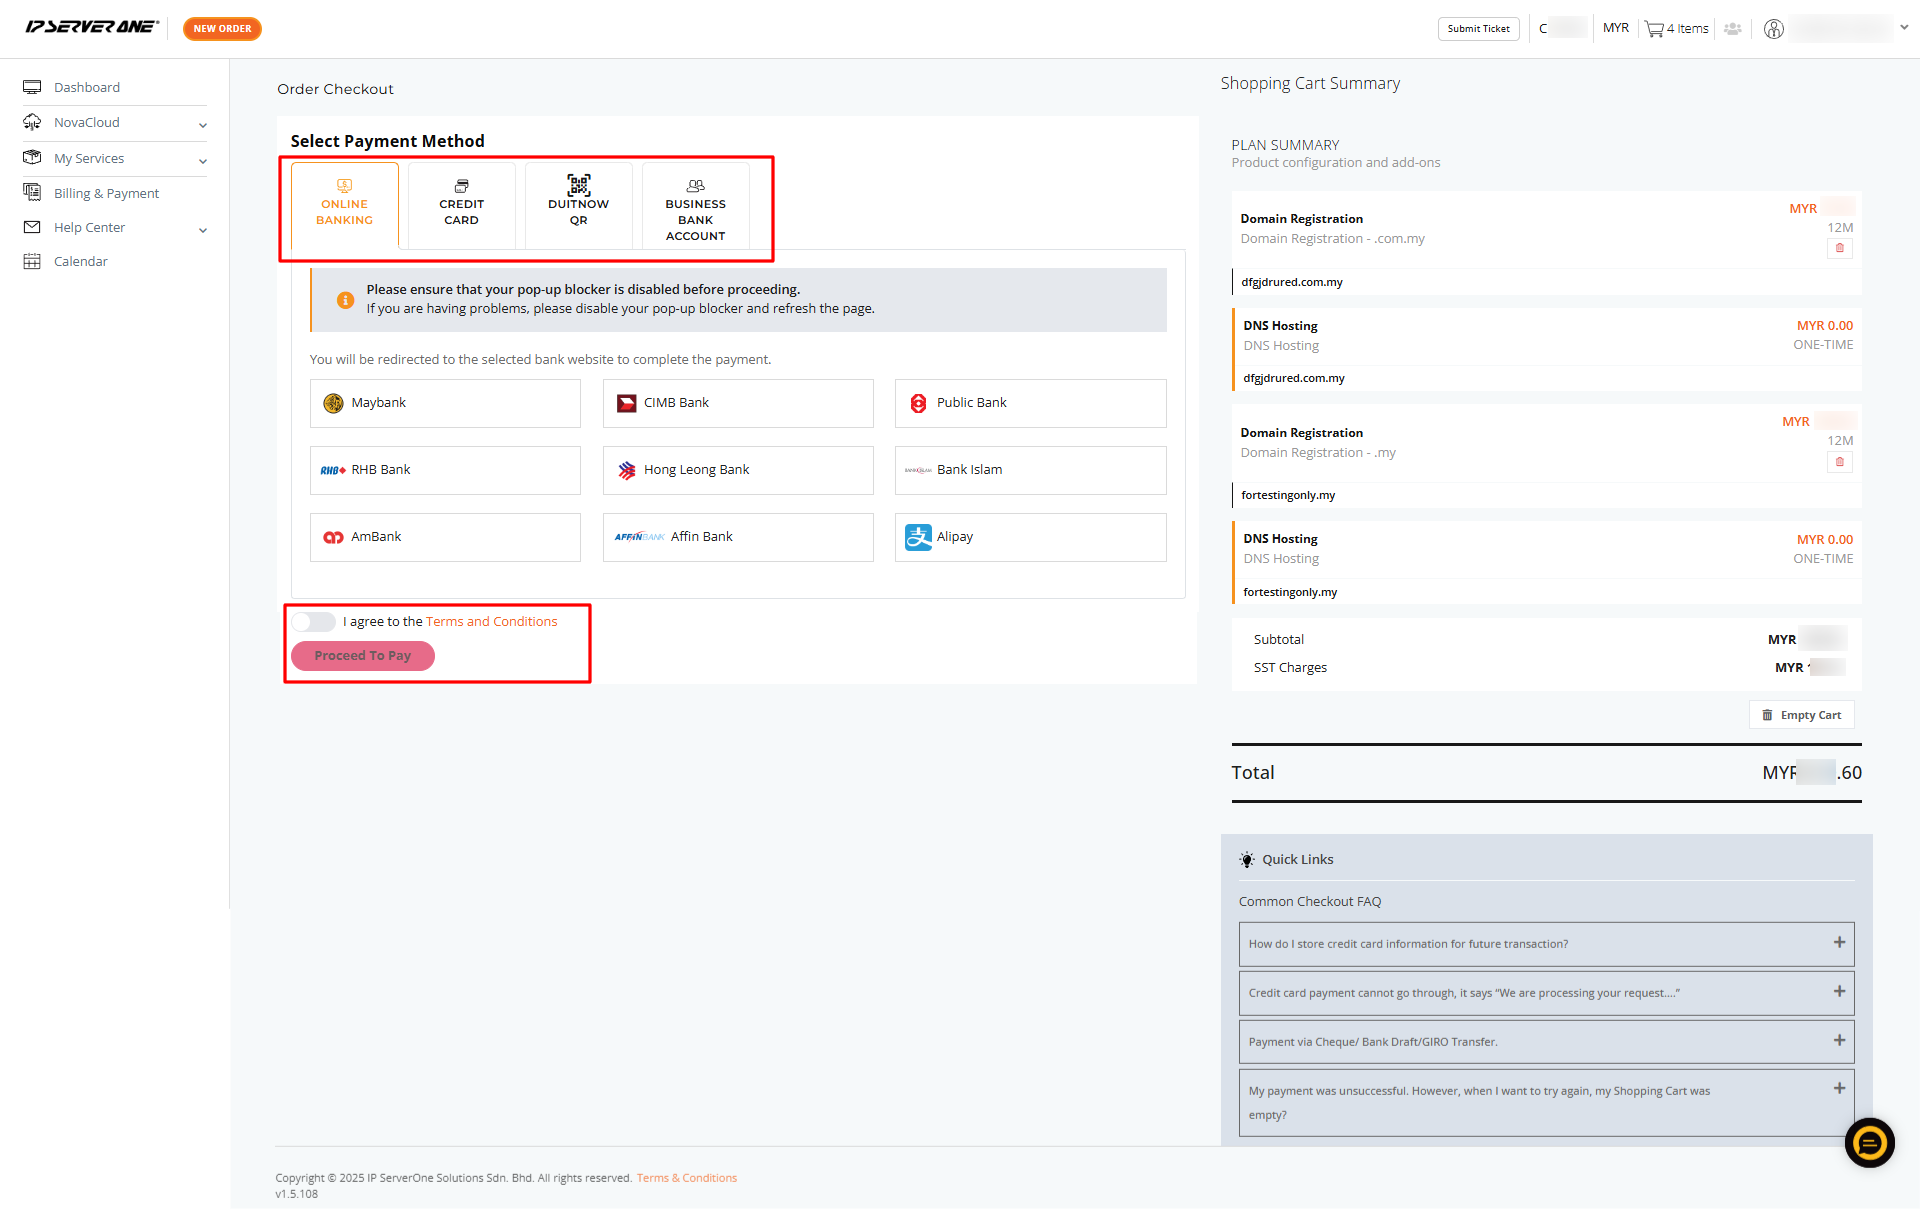
7. Select a Payment Method
Choose your preferred payment option:
-
Online Banking – redirects to your bank login.
-
Credit Card – enter your card details securely.
-
Business Bank Account – redirects to your business banking page.
8. Receive Order Notification
After successful payment, you will receive an email confirming your order and payment summary.
9. Domain Registration Submission
Your domain registration will be submitted automatically. Completion time depends on the domain type:
-
.MY domains: Completed within 1 hour (may require supporting documents as per MYNIC).
-
.COM.MY / .NET.MY / .ORG.MY / .BIZ.MY: May require verification and documents.
-
Top-level domains (.COM, .NET, .ORG, .ASIA, .BIZ): Automatically registered after successful payment.
10. Verify Domain Registration via WHOIS
Check your domain’s registration status using:
-
.MY domains: https://mynic.my/whois
-
Other extensions: https://iwhois.webnic.cc/jsp/whois_captcha.jsp
Note: If you require a quotation or invoice prior to domain registration, please contact our Customer Support by submitting a ticket through the Help Center in the Customer Portal or emailing cs@ipserverone.com.
Domain availability is on a first-come, first-served basis, so early action is recommended.
Conclusion
Once you’ve completed the steps and made your payment, your domain registration will be processed automatically. You can track the status through WHOIS. If your domain requires extra verification or documents, our support team is available to assist. For any special requests like quotations, please reach out to us early as domain availability is based on a first-come, first-served basis.
Last updated by Su on April 19, 2024