Search Our Database
How to install SSL Certificates in cPanel
Introduction
SSL certificates are crucial for ensuring the security and credibility of your website. If you’ve received an SSL invitation link and a PIN code, you’re already on the right track. This guide will walk you through each step of the SSL certificate installation process in cPanel, from generating the necessary keys to verifying the installation. Let’s enhance your website’s security together!
Prerequisites
Before beginning, confirm you have the following items to ensure a smooth installation process:
- Invitation Link and PIN: An email containing an invitation link and PIN should be on hand, as these will be required during the process.
- CSR and Key: A Certificate Signing Request (CSR) and a private key are needed. These can be generated in Step 2 of this guide.
- PEM File: After verification in Step 3, you’ll receive a PEM file necessary for the installation.
Step-by-step Guide
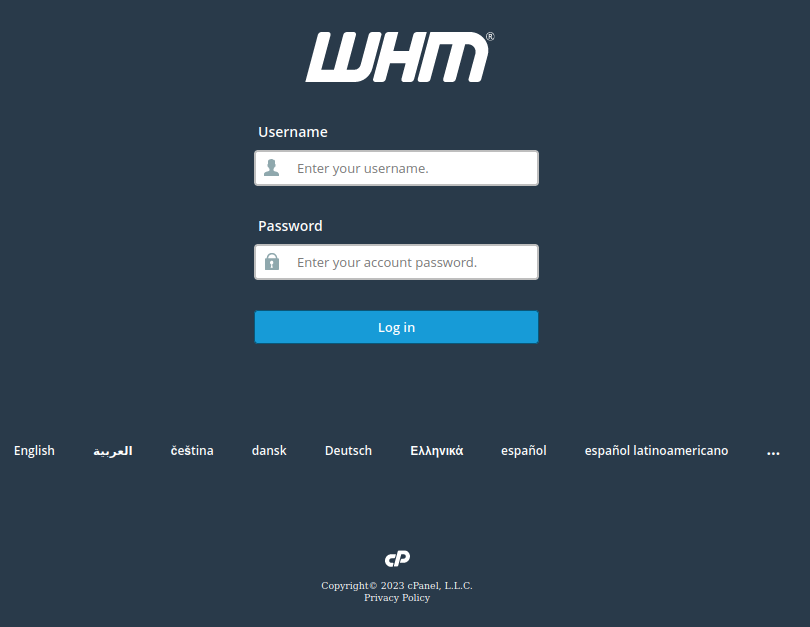
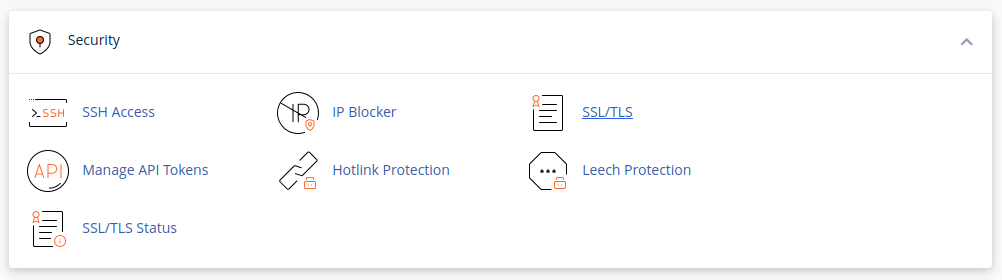
Step 1: Access cPanel
- Log in to your cPanel account with your username and password.
- Once logged in, scroll to the Security section and select SSL/TLS.
Step 2: Generate Key and CSR
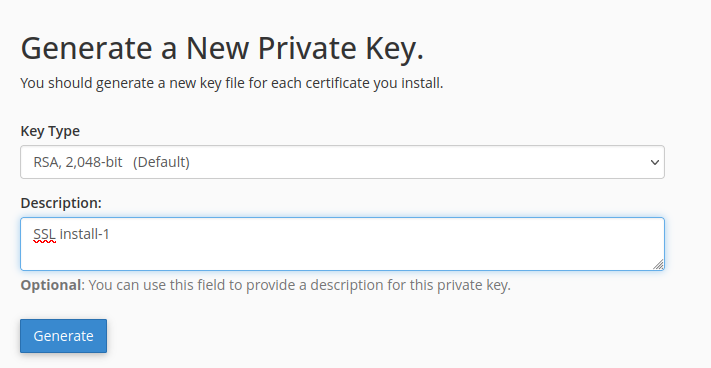
- In the SSL/TLS Manager, select Private Keys (Key).
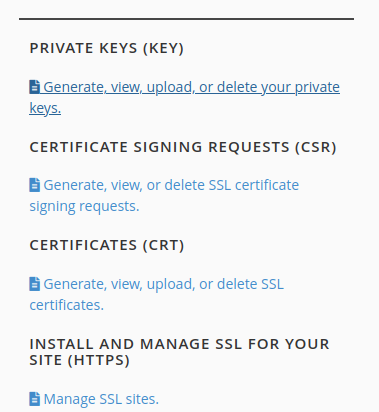
- Choose the Key Type (default: RSA, 2,048-bit), then click Generate.
- Return to the SSL/TLS Manager and select Certificate Signing Request (CSR).
- Select the key generated previously and fill in the required details:
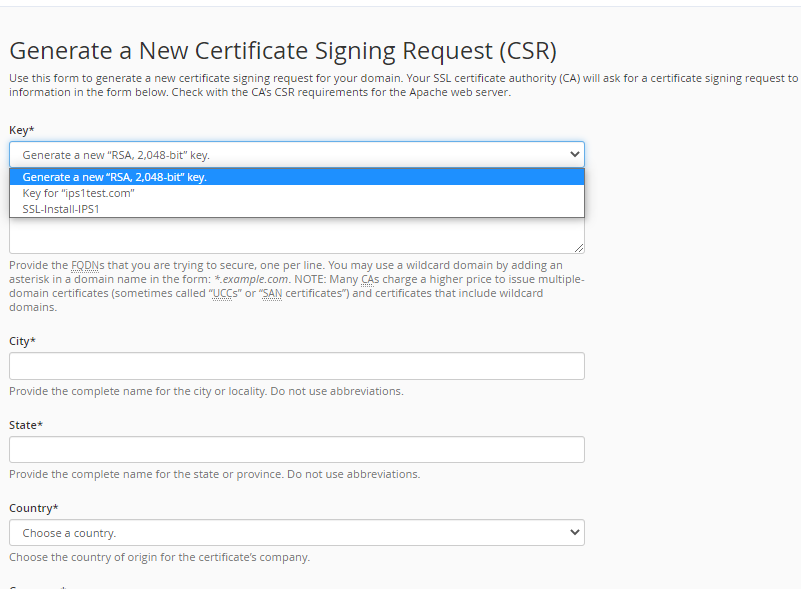
- Domain Name:
- Single domain: www.domain.com
- Subdomain: subdomain.domain.com
- Wildcard Domain: *.domain.com
- Additional Details: Complete fields such as City, State, Country, Company, Division (e.g., IT), and Email. Leave the passphrase field empty if desired.
- Domain Name:
- Click Generate. Copy the entire CSR code, including the —–BEGIN CERTIFICATE REQUEST—– and —–END CERTIFICATE REQUEST—– lines, and save it to a text file.
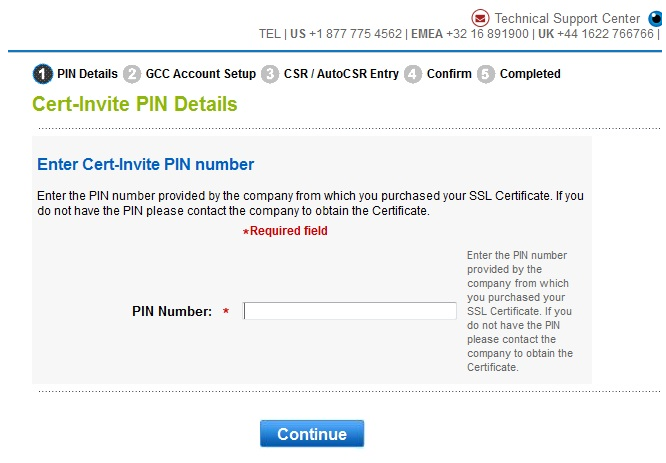
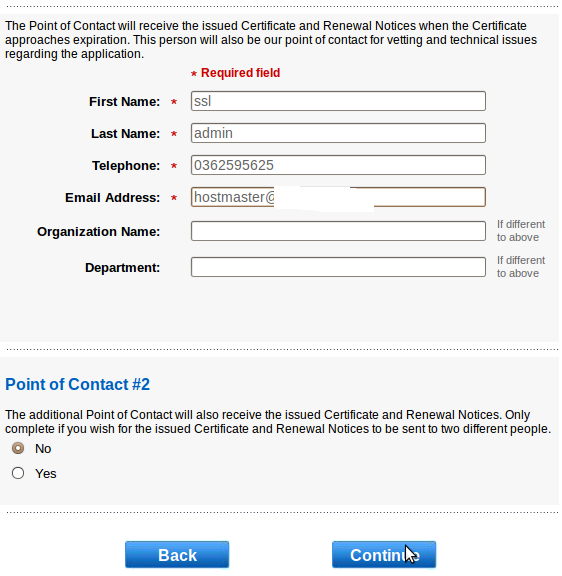
Step 3: Open the GlobalSign Certificate Link and Enter the PIN
- Open the SSL invitation link from GlobalSign and enter the PIN code.
- Complete the form and click Continue.
- Choose a Domain Verification method:
- Email Verification if you can access the email registered with GlobalSign.
- HTTP Verification if you can edit the website’s files.
- DNS Verification if you can access DNS records.
For more details, refer to:
- After verification, go back to GlobalSign, scroll to the Certificate (PEM Format) section, and copy the entire PEM certificate, including the —–BEGIN CERTIFICATE—– and —–END CERTIFICATE—– lines.
Step 4: Install the SSL Certificate in cPanel
- Return to SSL/TLS Manager in cPanel and select Certificates (CRT).
- Paste the PEM certificate code from Step 3 into the text box and click Save Certificate.

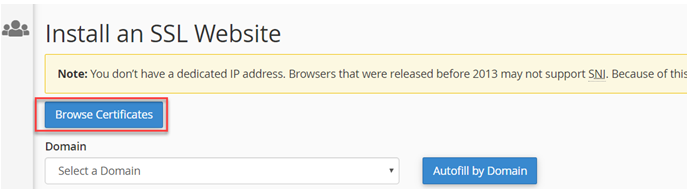
- Go back to SSL/TLS Manager and select Install and Manage SSL for your site.
- Click Browse Certificates, choose the certificate you just saved, and then click Use Certificate.
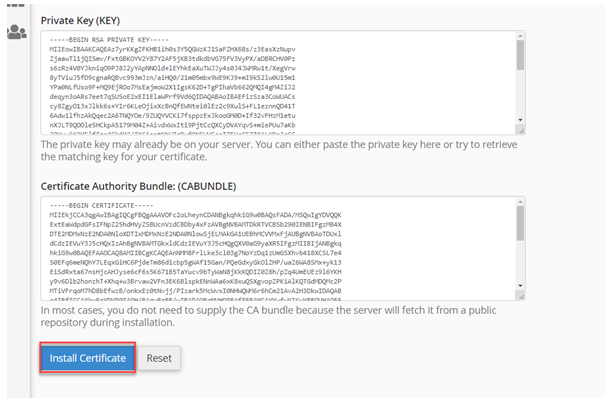
- The certificate details will auto-fill in the appropriate fields. Click Install Certificate.

Step 5: Verify SSL Installation
- To confirm the SSL installation, use an SSL Checker or try accessing your website with “https://” in the URL. A padlock icon in the browser’s address bar indicates successful SSL installation.
Conclusion
You have successfully installed an SSL certificate on your website using cPanel, providing encryption for data exchanged on your site and boosting visitor confidence. Regularly check your SSL certificate’s status to maintain security and trustworthiness.
For additional assistance, please contact support at support@ipserverone.com.
Article posted on 22 November 2021