Search Our Database
How to change company name in customer portal
Introduction
This guideline is designed for customers registered with IP ServerOne who have access to the customer portal. It provides a step-by-step process for changing the company name within the portal, which may be required during rebranding, mergers, or other business-related changes. The instructions below outline how to navigate the portal, access account settings, and update your company name. The process may also involve necessary verifications or approvals for the changes to be finalized.
Step-by-step guide
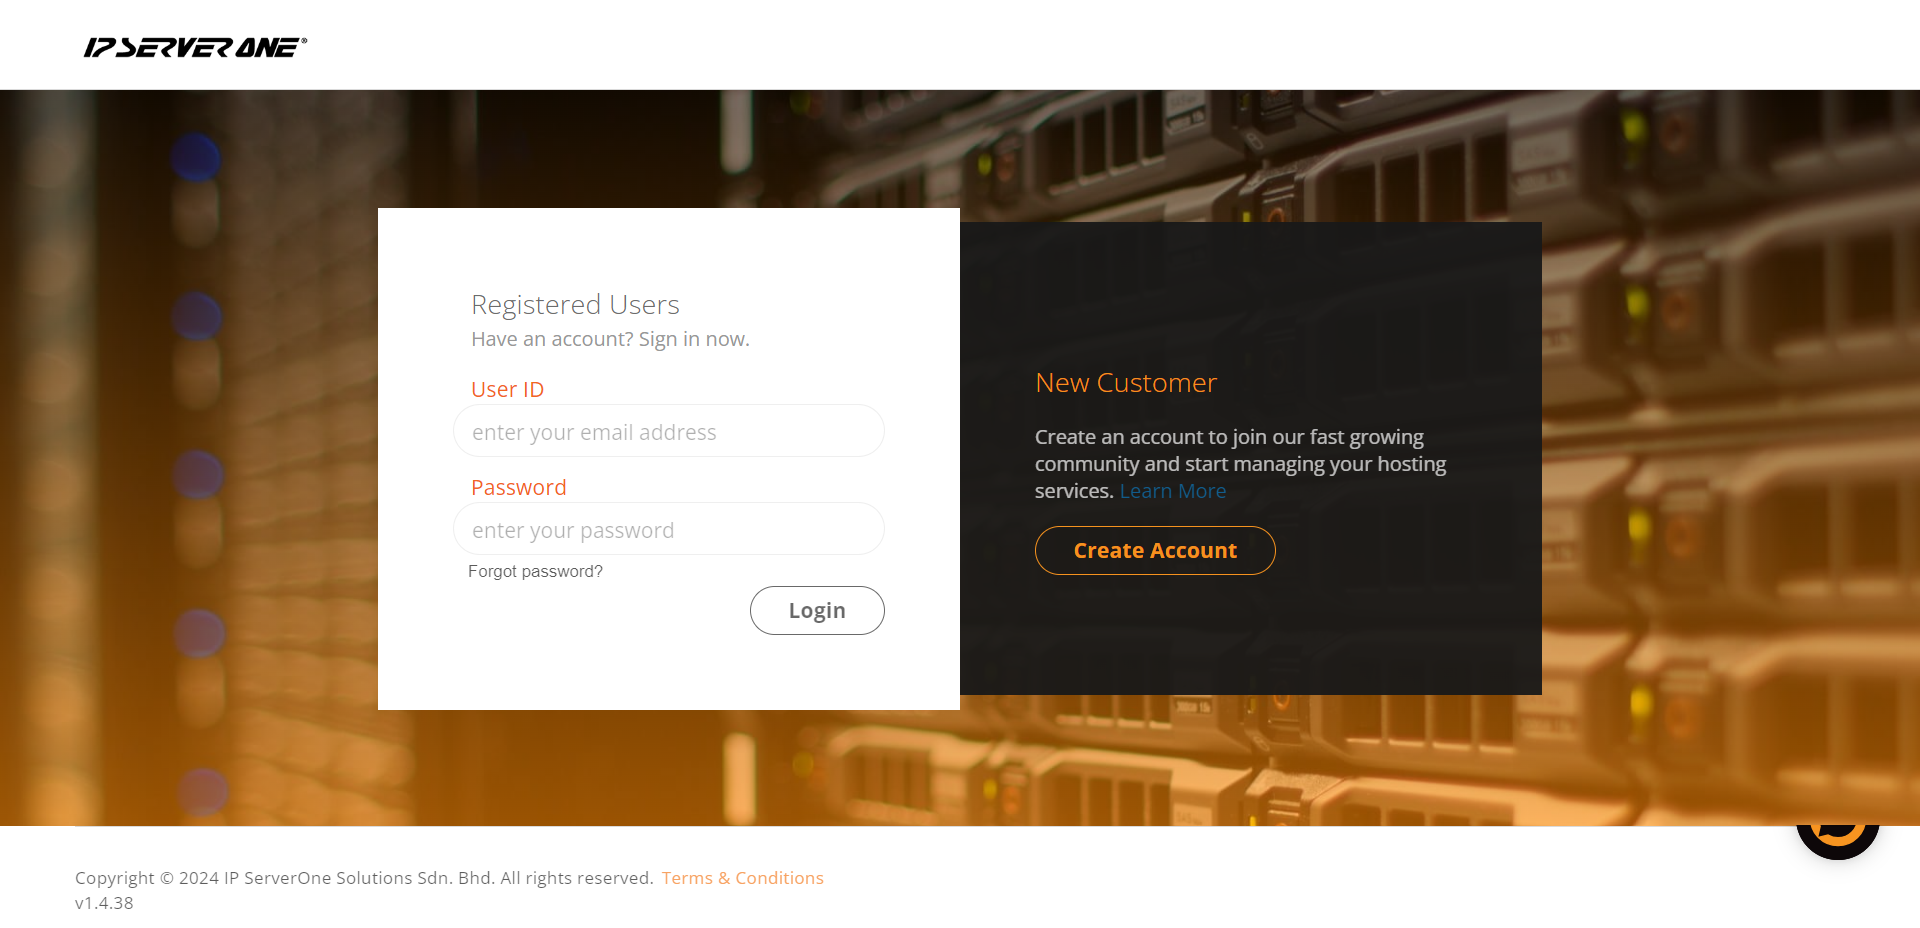
1. Log in to the portal
First, log in to the IP ServerOne Customer Portal.
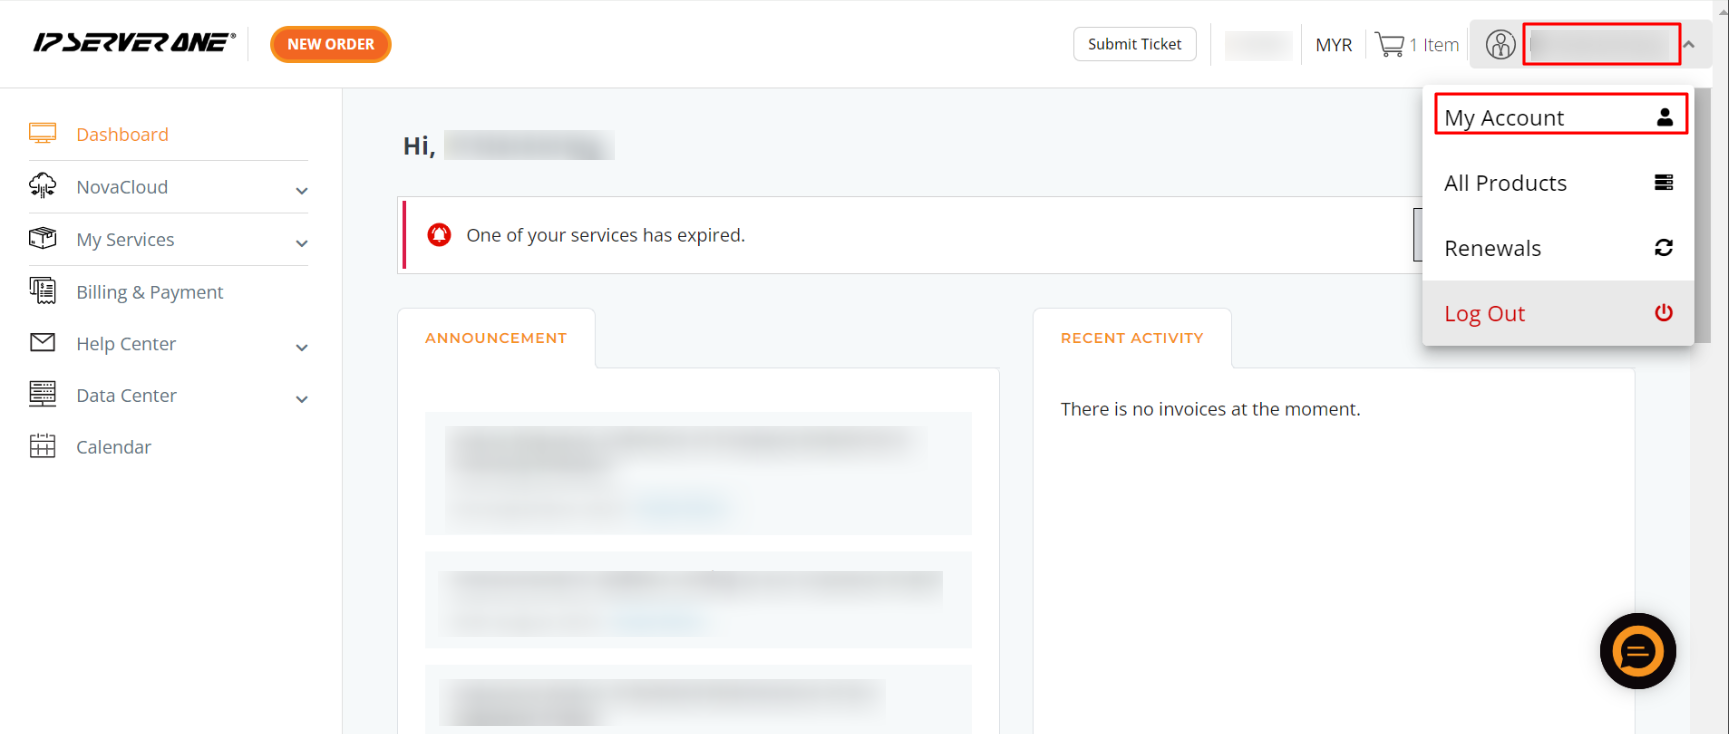
2. Access account settings
Once logged in, click on your Username located at the top right corner of the page, then select My Account from the dropdown menu.
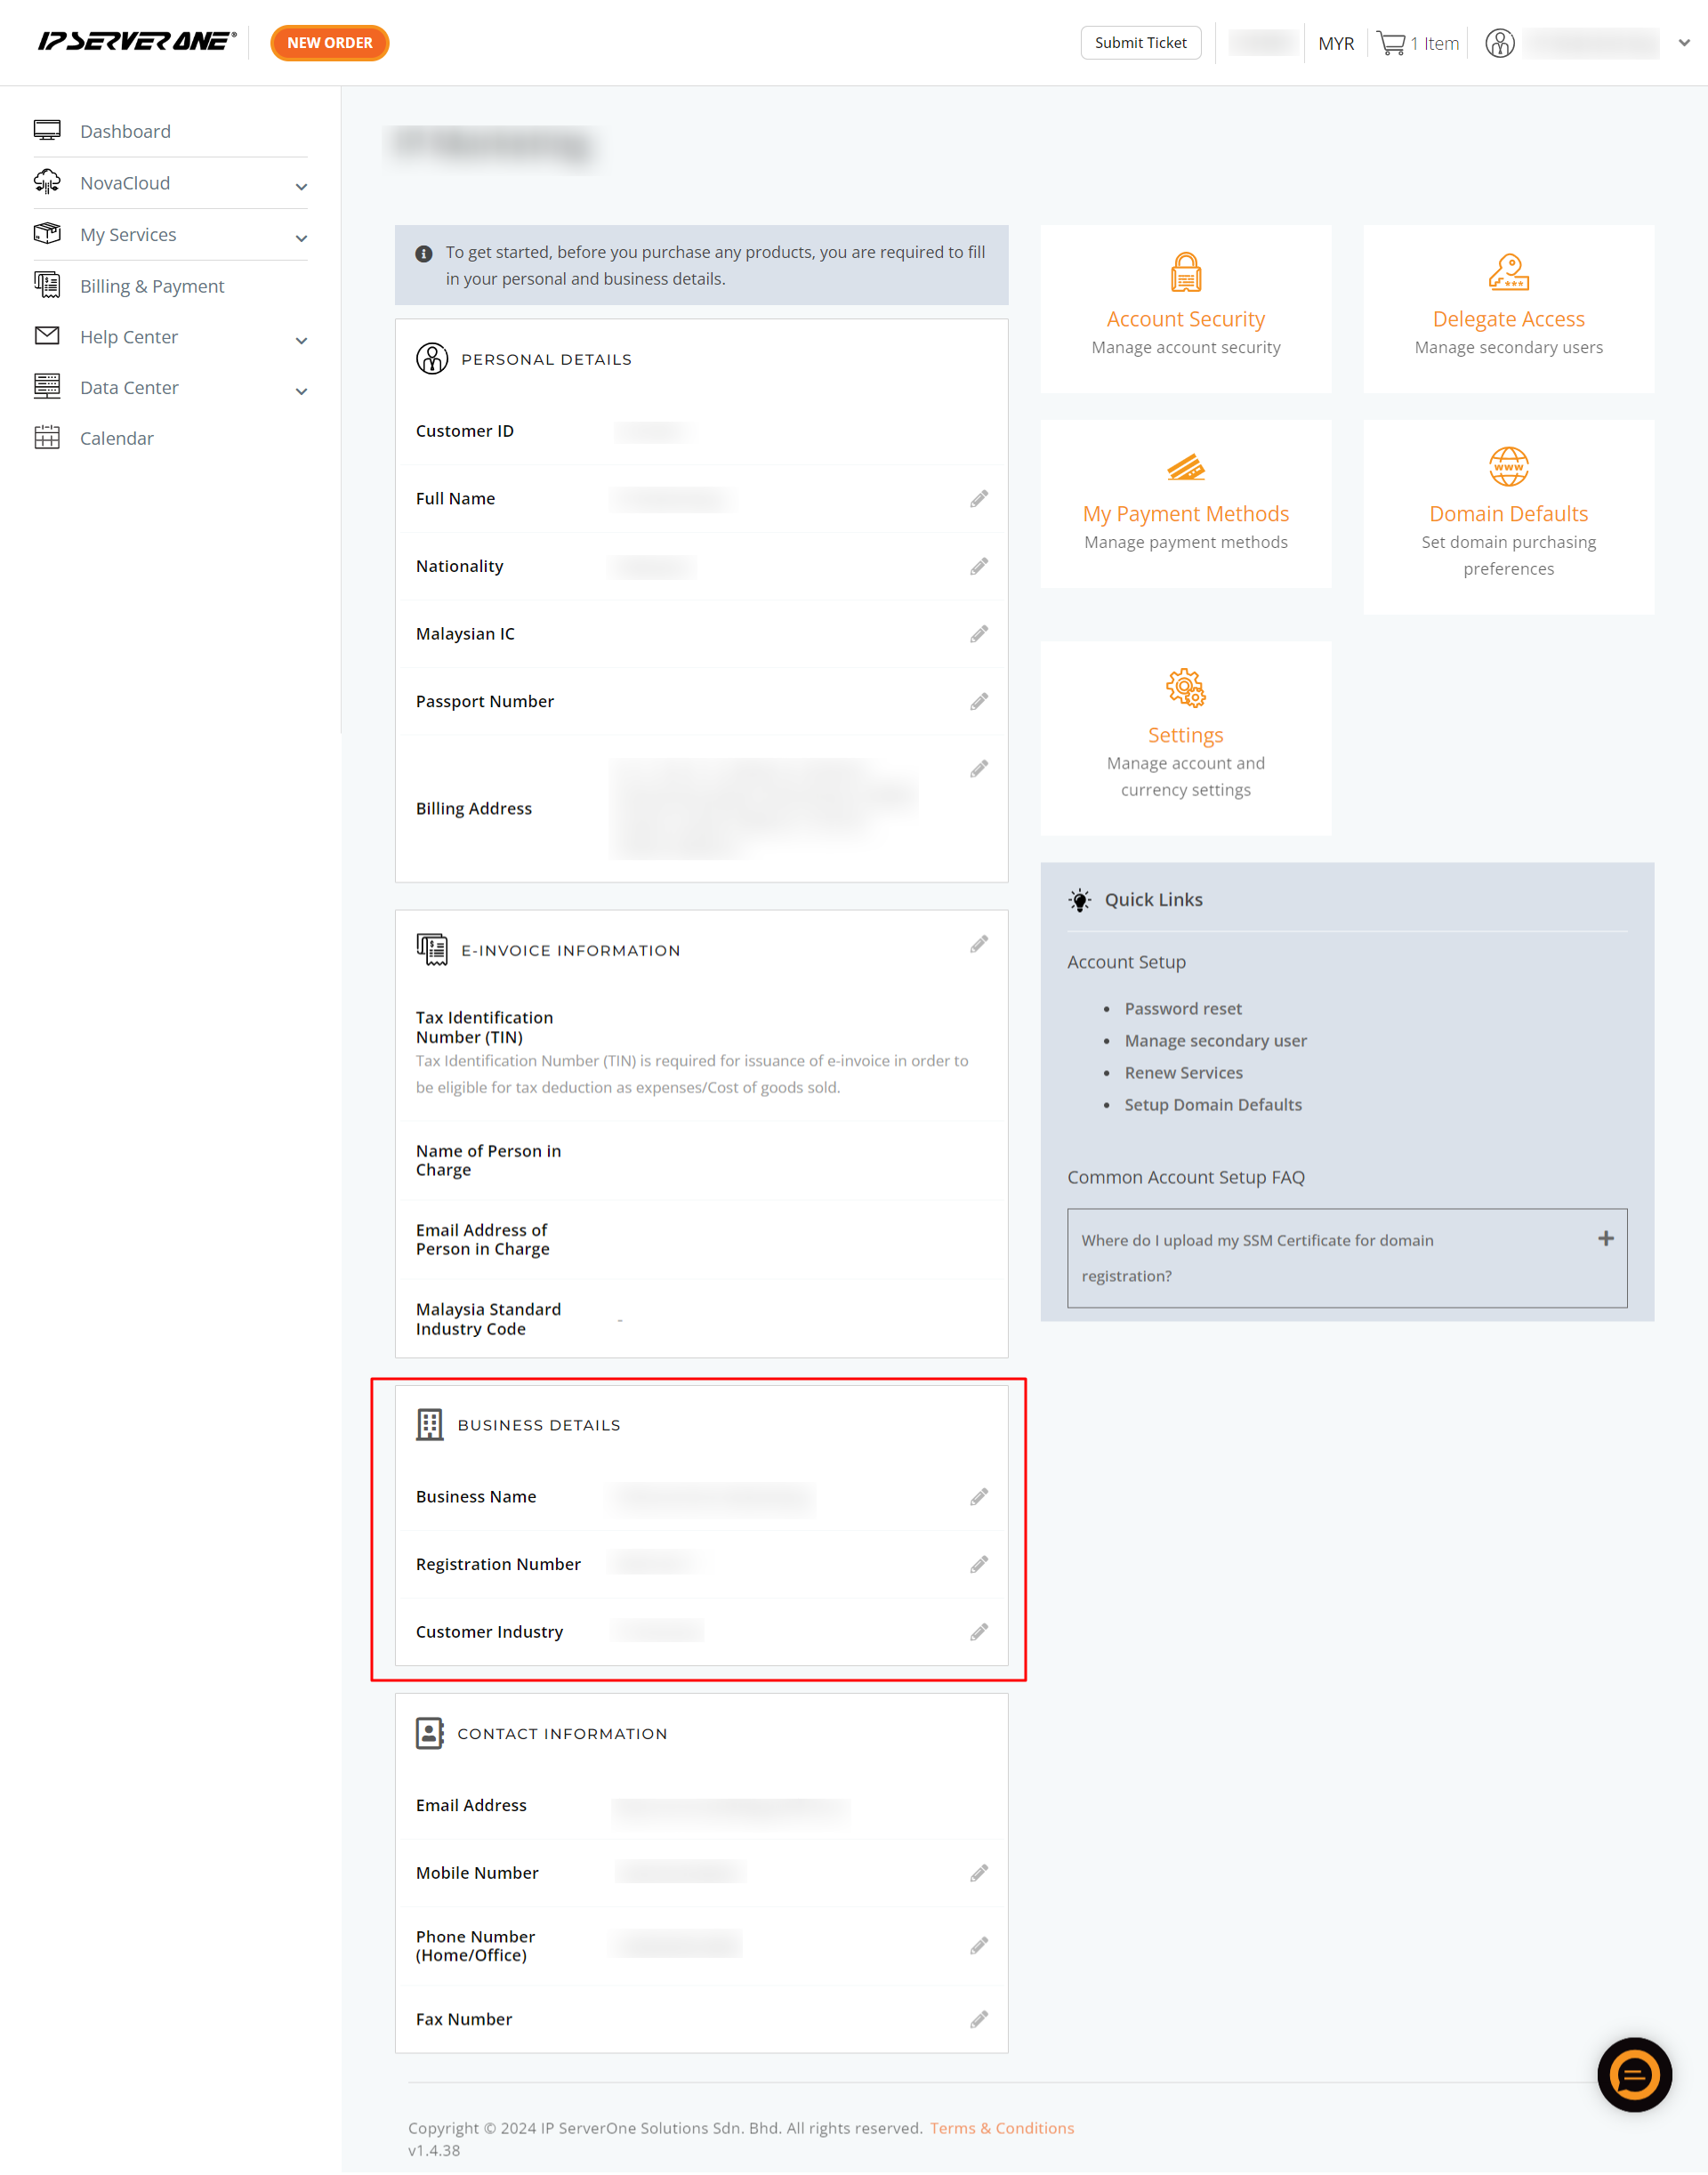
3. Scroll to business details
In the account settings, scroll down to locate the Business Details section.
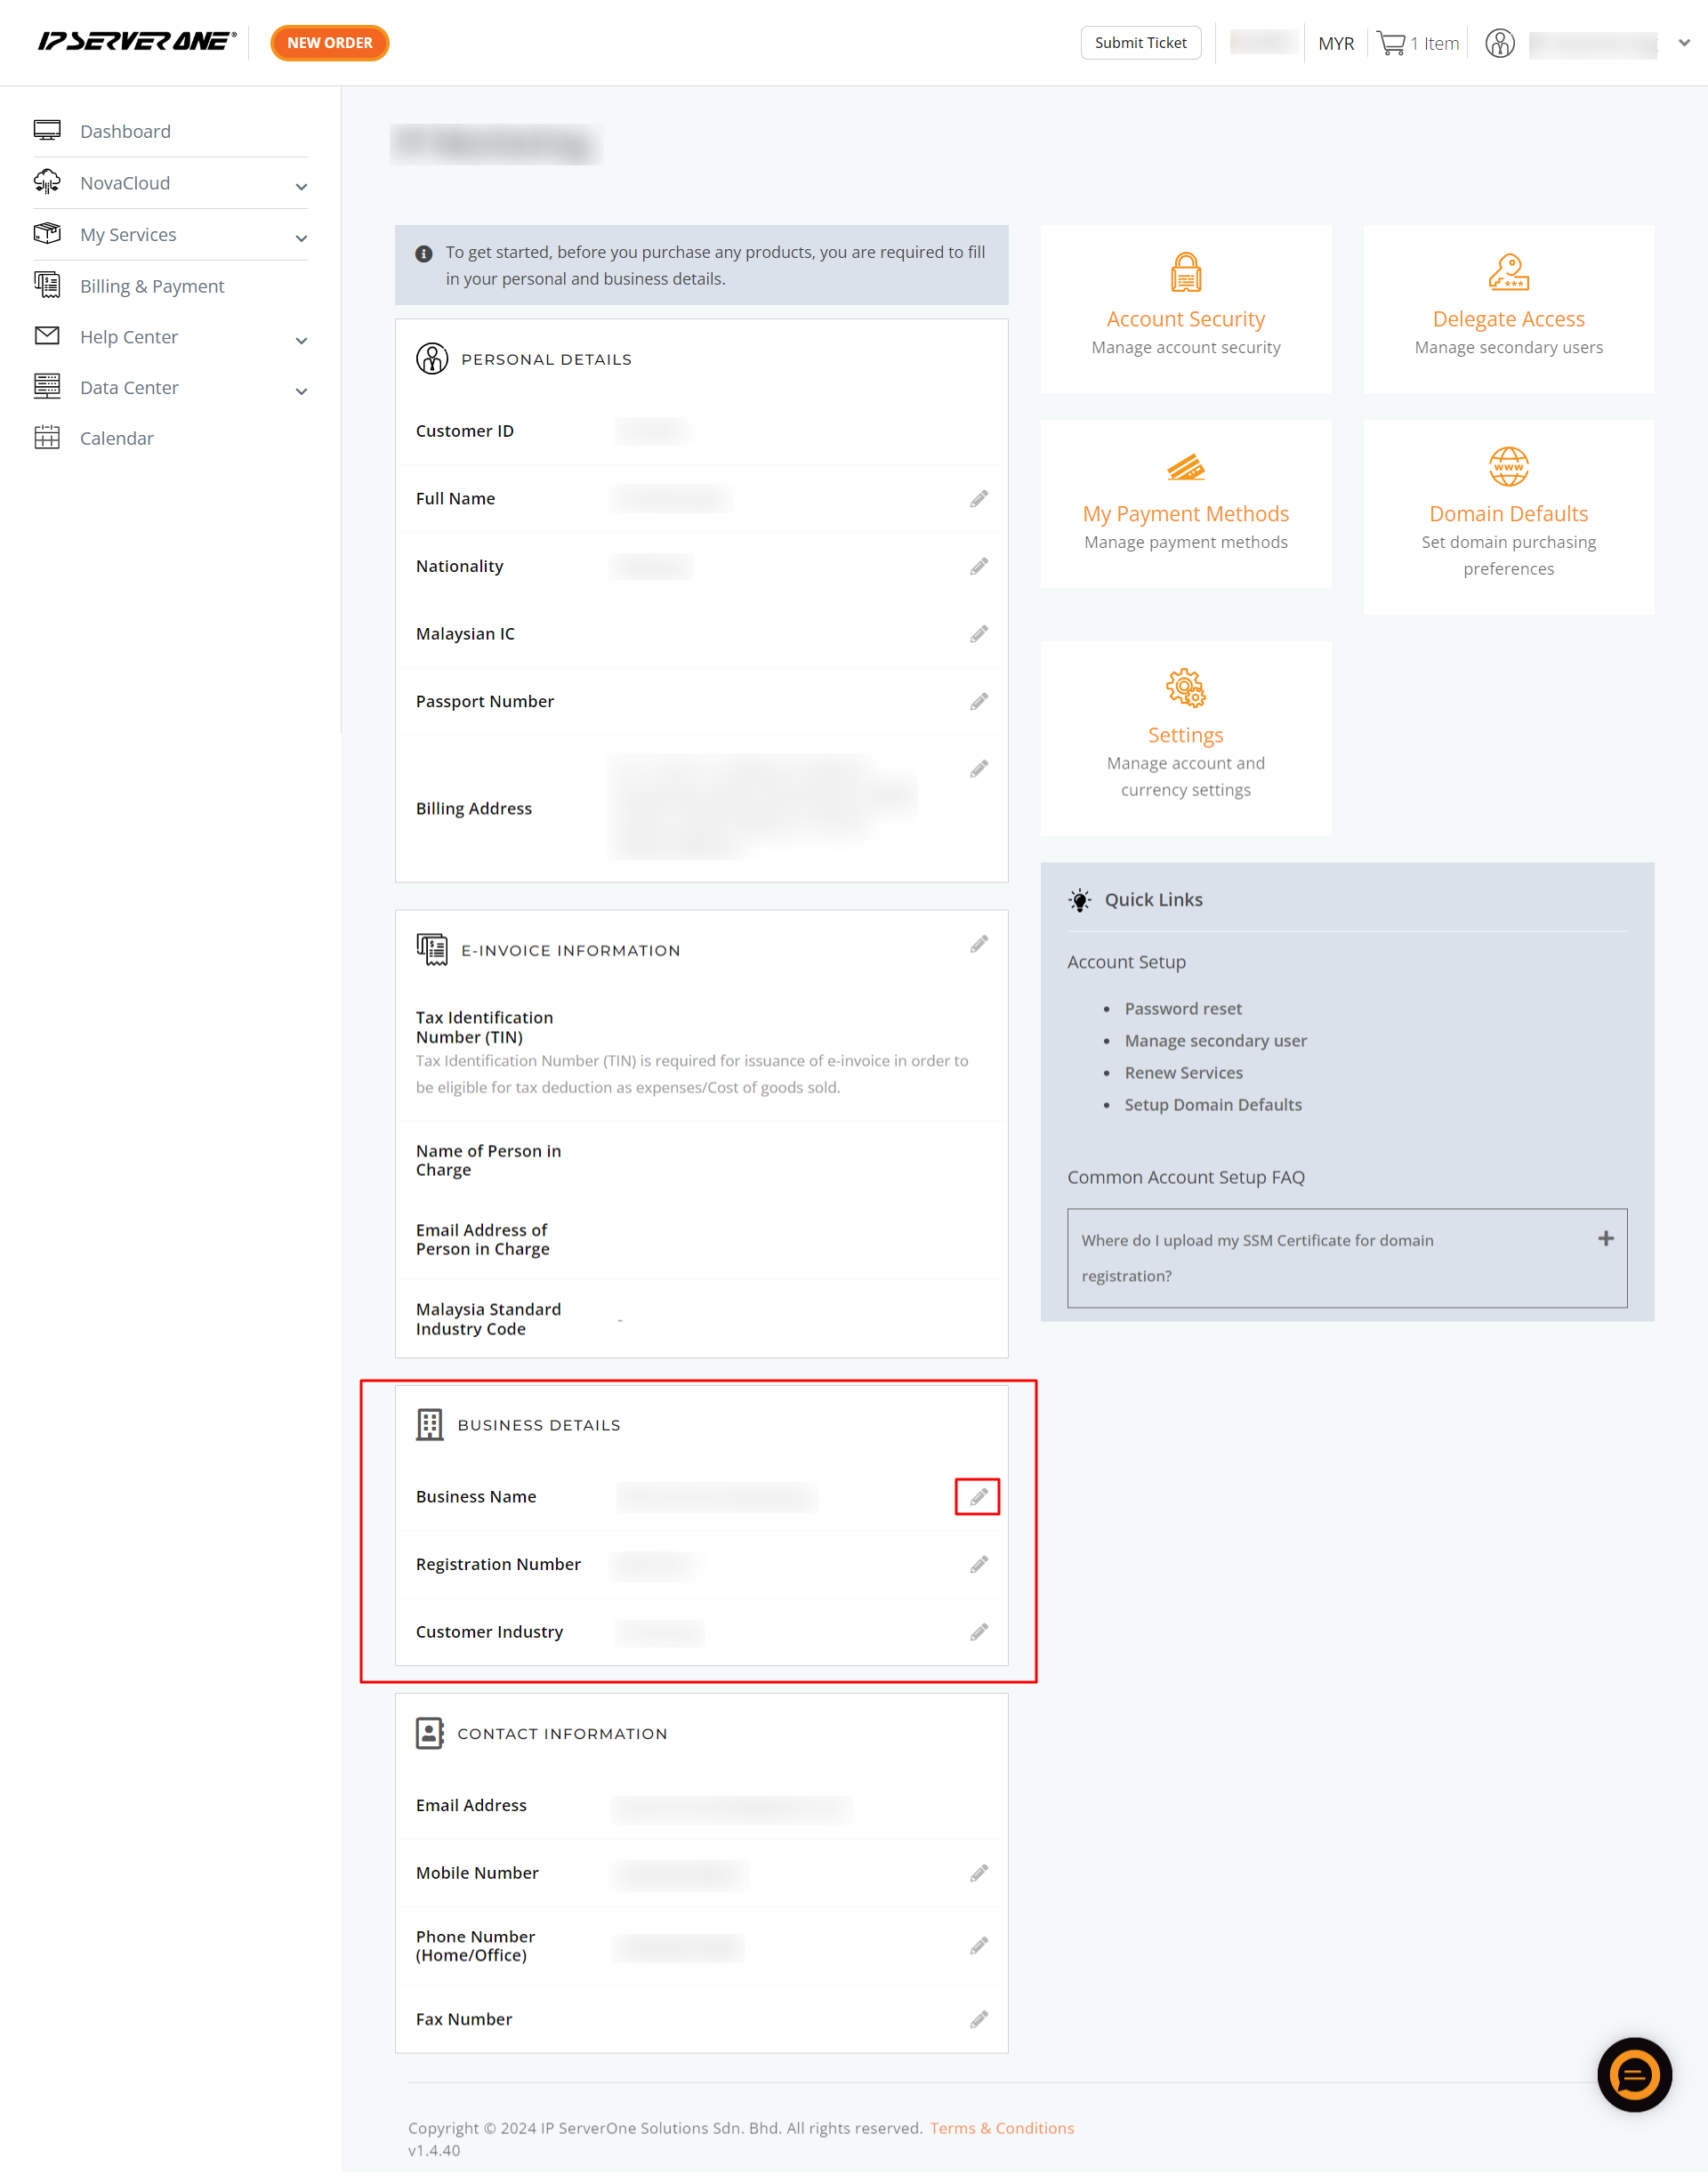
4. Edit company name
To modify your company name, click on the pen icon highlighted in the red box.
5. Save the changes
After making the necessary changes, save them by clicking the green tick. Your company name will changed immediately.

Conclusion
Ensuring your company information is up to date helps maintain smooth communication and service management within IP ServerOne. For any further assistance, feel free to reach out to billing@ipserverone.com or cs@ipserverone.com .
Article posted on 23 March 2021 by Louis.