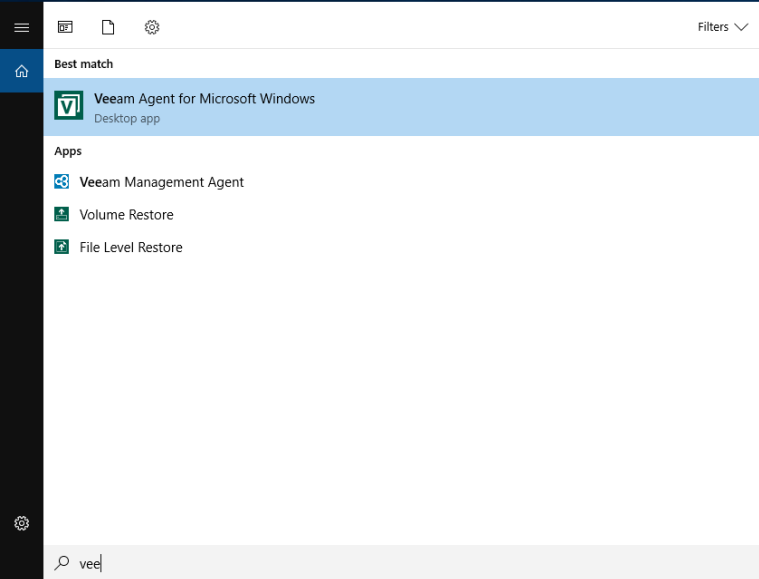
Search Our Database
Veeam Backup Job Configuration within Windows server
Overview
This guide provides a step-by-step process for configuring a backup job using Veeam Backup & Replication on a Windows Server. Before beginning, ensure that all prerequisites are fulfilled to ensure a smooth configuration and reliable backup.
Prerequisites
- Veeam Agent for Microsoft Windows installed on the server.
- Sufficient permissions to perform backup operations.
- Backup repository and storage are properly set up and accessible.
Configuration Steps
Step 1: Start the Backup Job Configuration
- Begin by launching the New Agent Backup Job wizard for Veeam Agent, or use the New Windows Server wizard for server-specific backups. These wizards will guide you through the configuration process.
Step 2: Name the Backup Job
- Provide a name for the backup job that helps identify its purpose or target system. This will make managing multiple backups easier in the future.

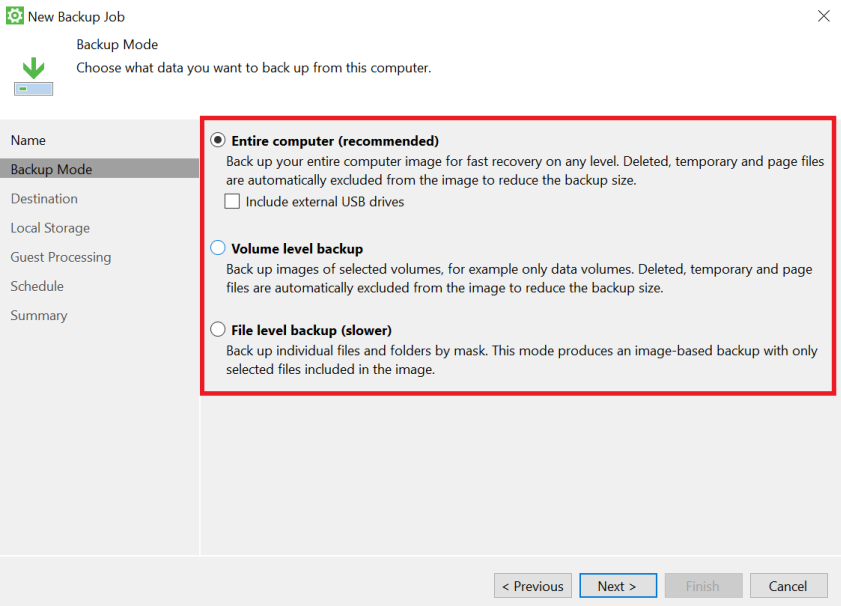
Step 3: Select the Backup Mode
- Choose the appropriate backup mode based on your requirements:
- Entire Machine: Backs up the entire server.
- Volume Level Backup: Backs up specific volumes.
- File Level Backup: Backs up individual files or folders.
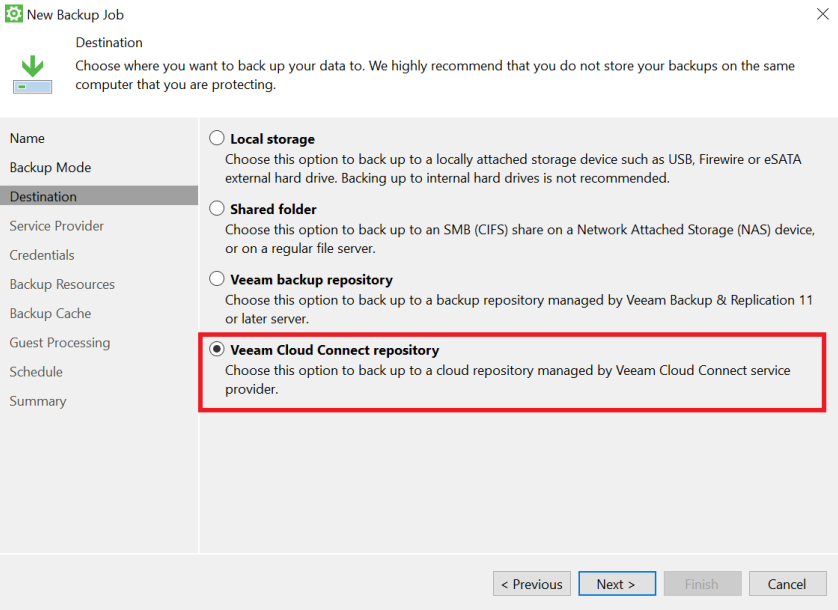
Step 4: Choose the Veeam Cloud Connect Repository
- Select the Veeam Cloud Connect repository where the backups will be stored.
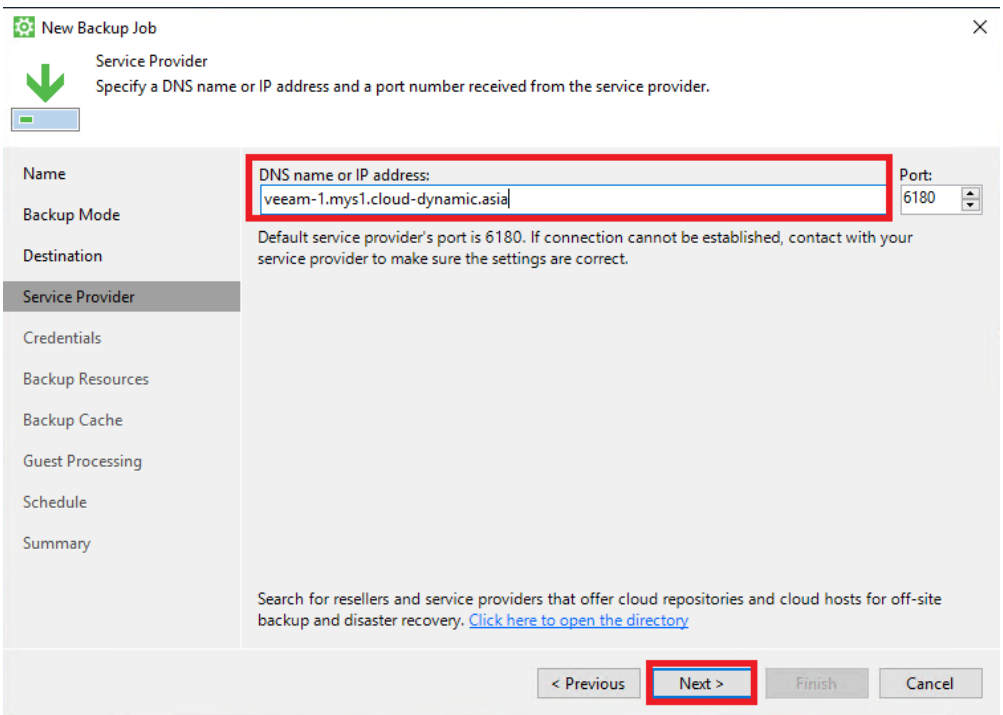
Step 5: Specify the Service Provider DNS Name
- Enter the DNS name provided by the service provider to locate the repository. If you’re unsure of the repository’s address, refer to the appendix for verification steps.
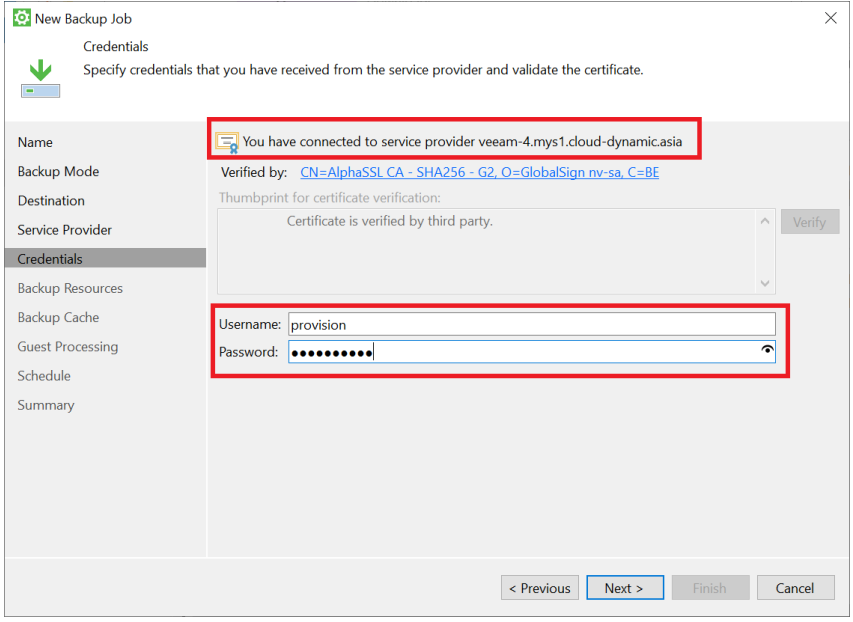
Step 6: Authenticate with Service Provider
- Upon successful connection to the service provider, you will see the message: “You have connected to service provider [Service Provider Address]”. Next, enter the Username and Password provided by the service provider. For the username, input the value after the slash (e.g., in provision-cloud\provision, the username is provision).
Step 7: Verify Available Storage
After authenticating, the available storage will be displayed. You can also configure the number of restore points (the number of backup copies) based on your backup policy. Use the default restore policy or modify it as needed.

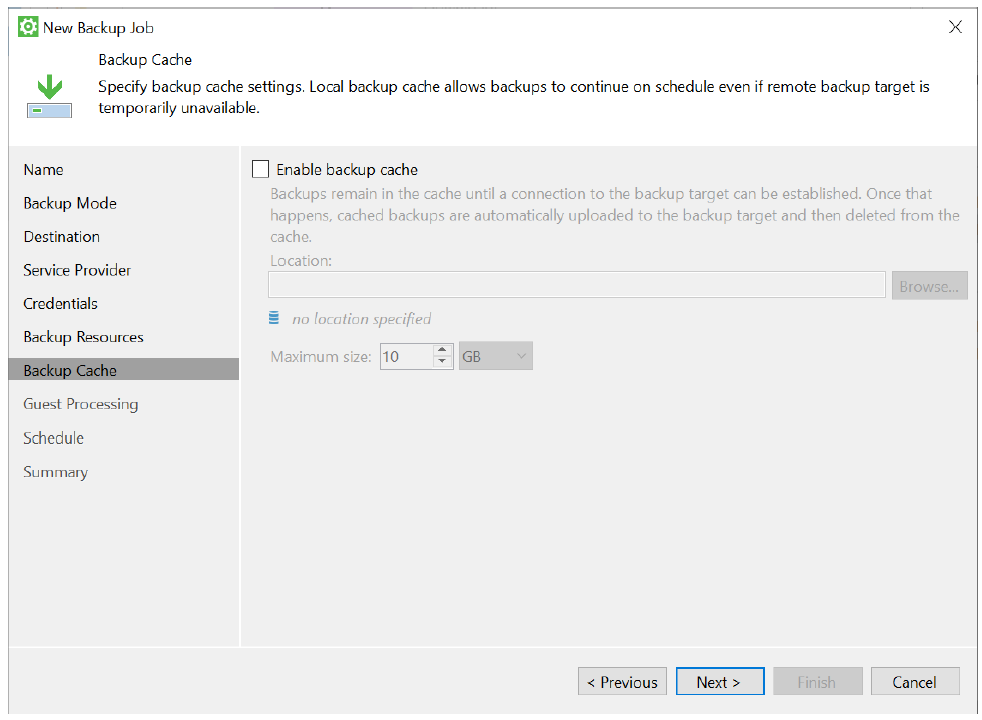
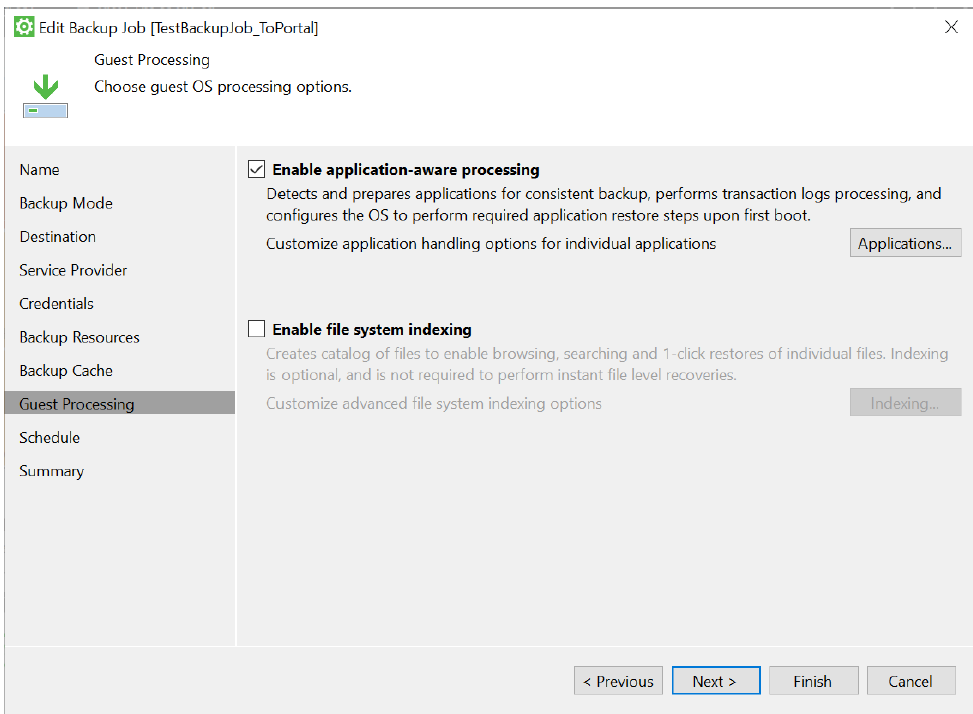
Step 8: Configure Backup Cache and Guest Processing
- Leave the Backup Cache and Guest Processing options at their default settings unless specific needs require changes. These settings manage temporary backup data and advanced guest-level processing.
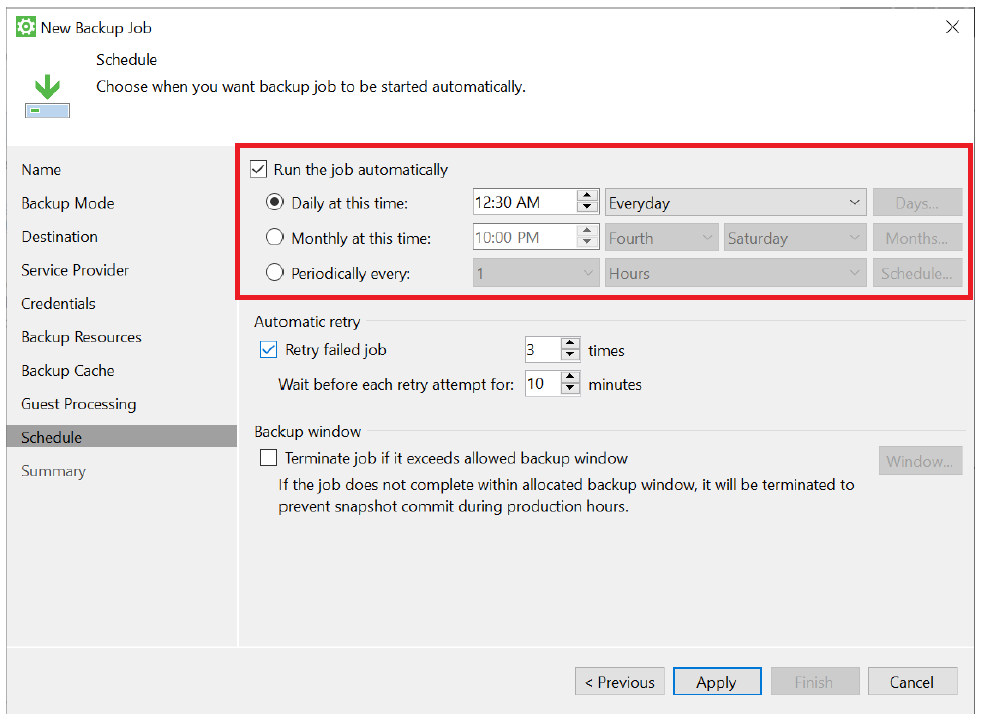
Step 9: Schedule the Backup Job
- Choose the preferred timing for the backup job to run. You can set the job to run at specific intervals or adjust the schedule based on your operational requirements.
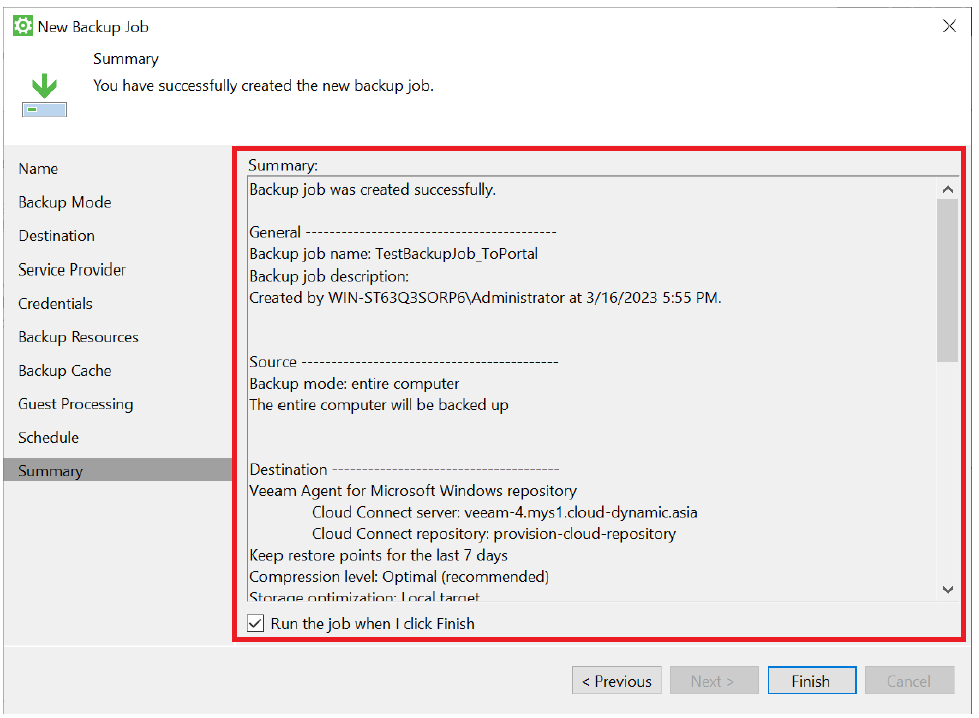
Step 10: Review the Job Configuration
- Review the summary of the backup job configuration. If you wish to start the backup immediately after configuration, check the box labeled “Run this job when I click Finish”.
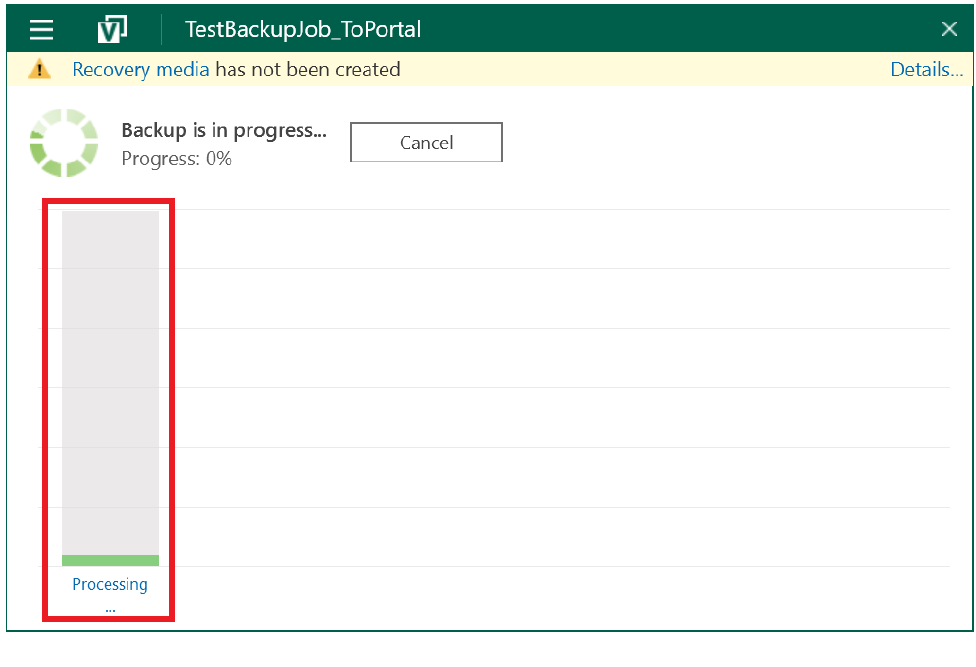
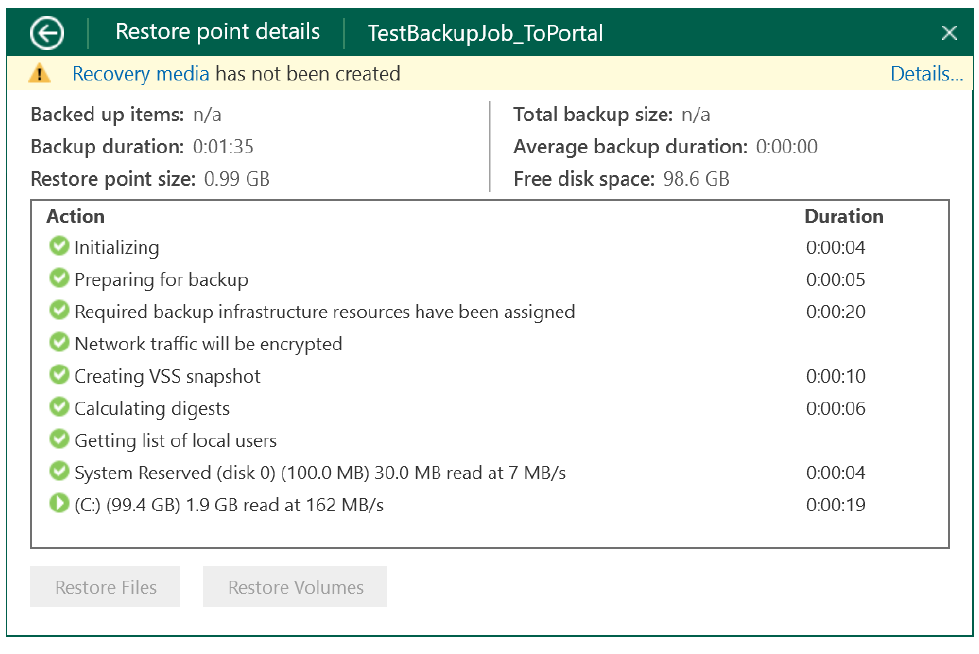
Step 11: Monitor Backup Progress
- Once the job starts, monitor the backup job’s progress by clicking on the progress bar to view detailed information about the process.
Conclusion
By following these steps, you will successfully configure a reliable backup job using Veeam Backup & Replication on a Windows Server. Always verify the configuration and ensure the integrity of your backups through periodic testing.
Should you have any inquiries about the guidelines, please feel free to open a ticket through your portal account or contact us at support@ipserverone.com. We’ll be happy to assist you further.