Search Our Database
How to purchase NovaGPU in customer portal?
How to purchase NovaGPU in Customer Portal.
Introduction
This guide walks you through the step-by-step guide to purchase and launch a NovaGPU instance using the IP ServerOne Customer Portal. NovaGPU is a GPU as a Service (GPUaaS) offers a range of GPU options allow you to run AI/ML workloads, graphics-intensive applications, high-performance compute tasks, and more.
Prerequisites
-
An active account in the IP ServerOne Customer Portal
-
Sufficient Cloud Points available in your account
Step-by-step guidelines:
1. Log in to the Customer Portal
Access the portal at https://portal.ipserverone.com using your credentials.

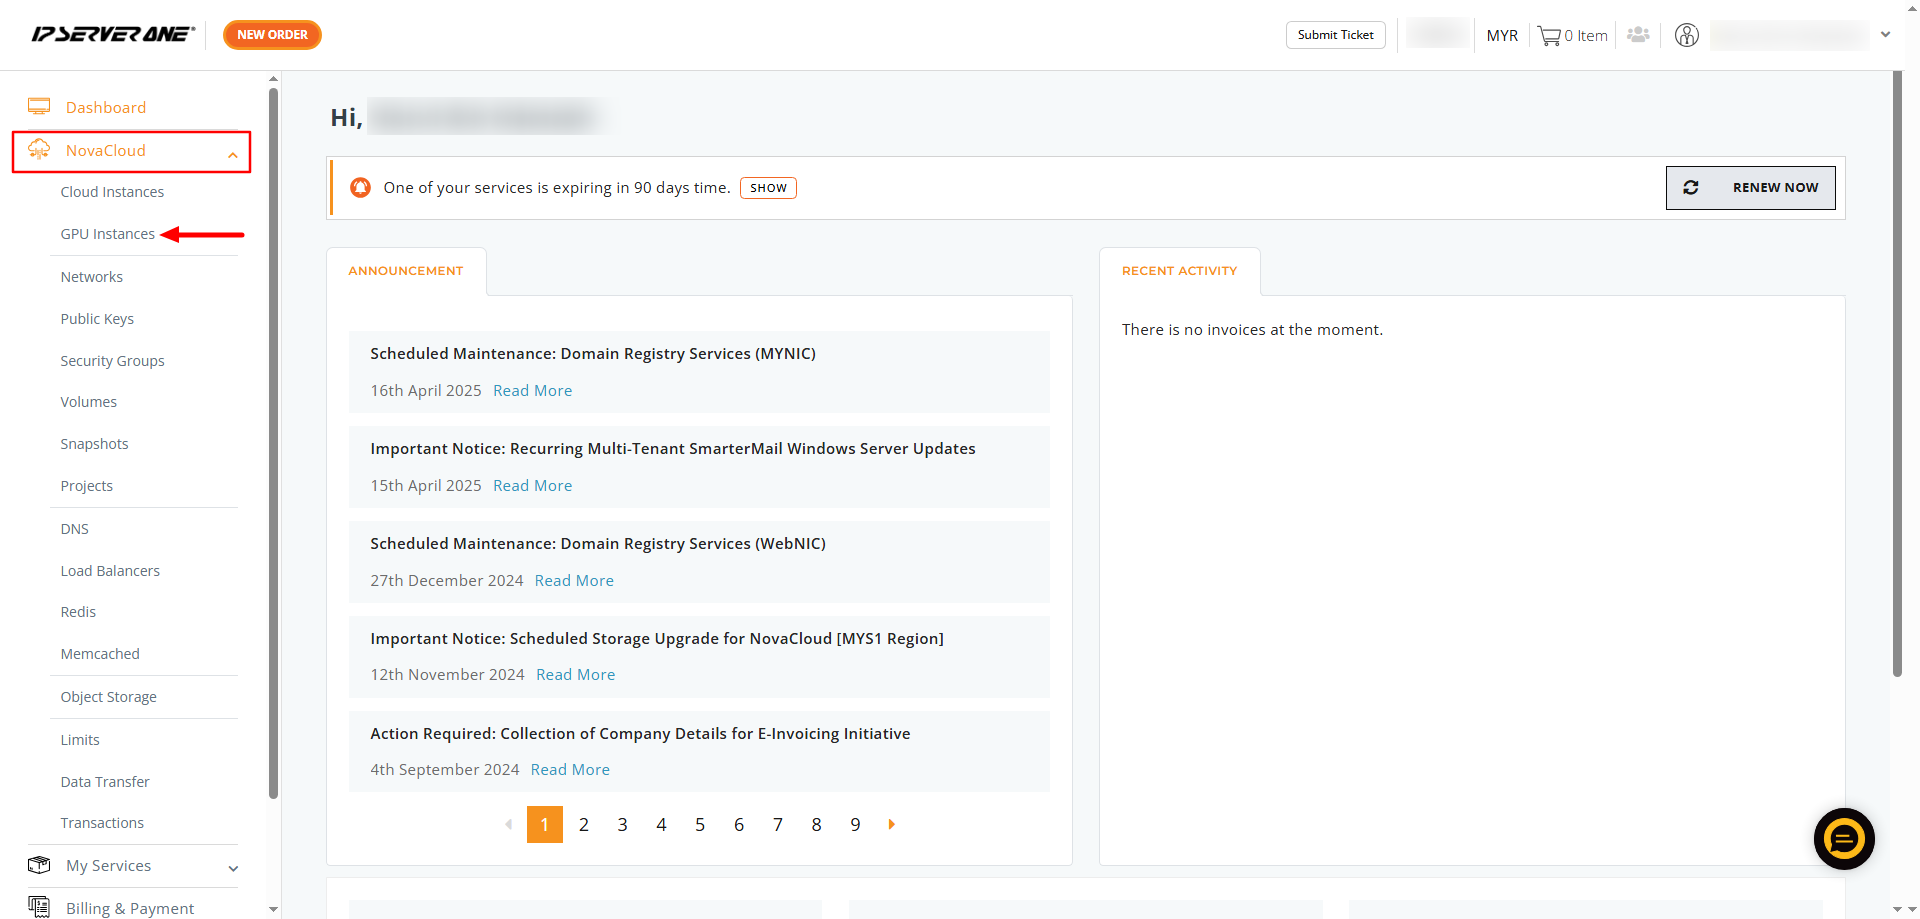
2. Navigate to NovaGPU
On the left-hand menu, click on NovaCloud, then select GPU Instances.
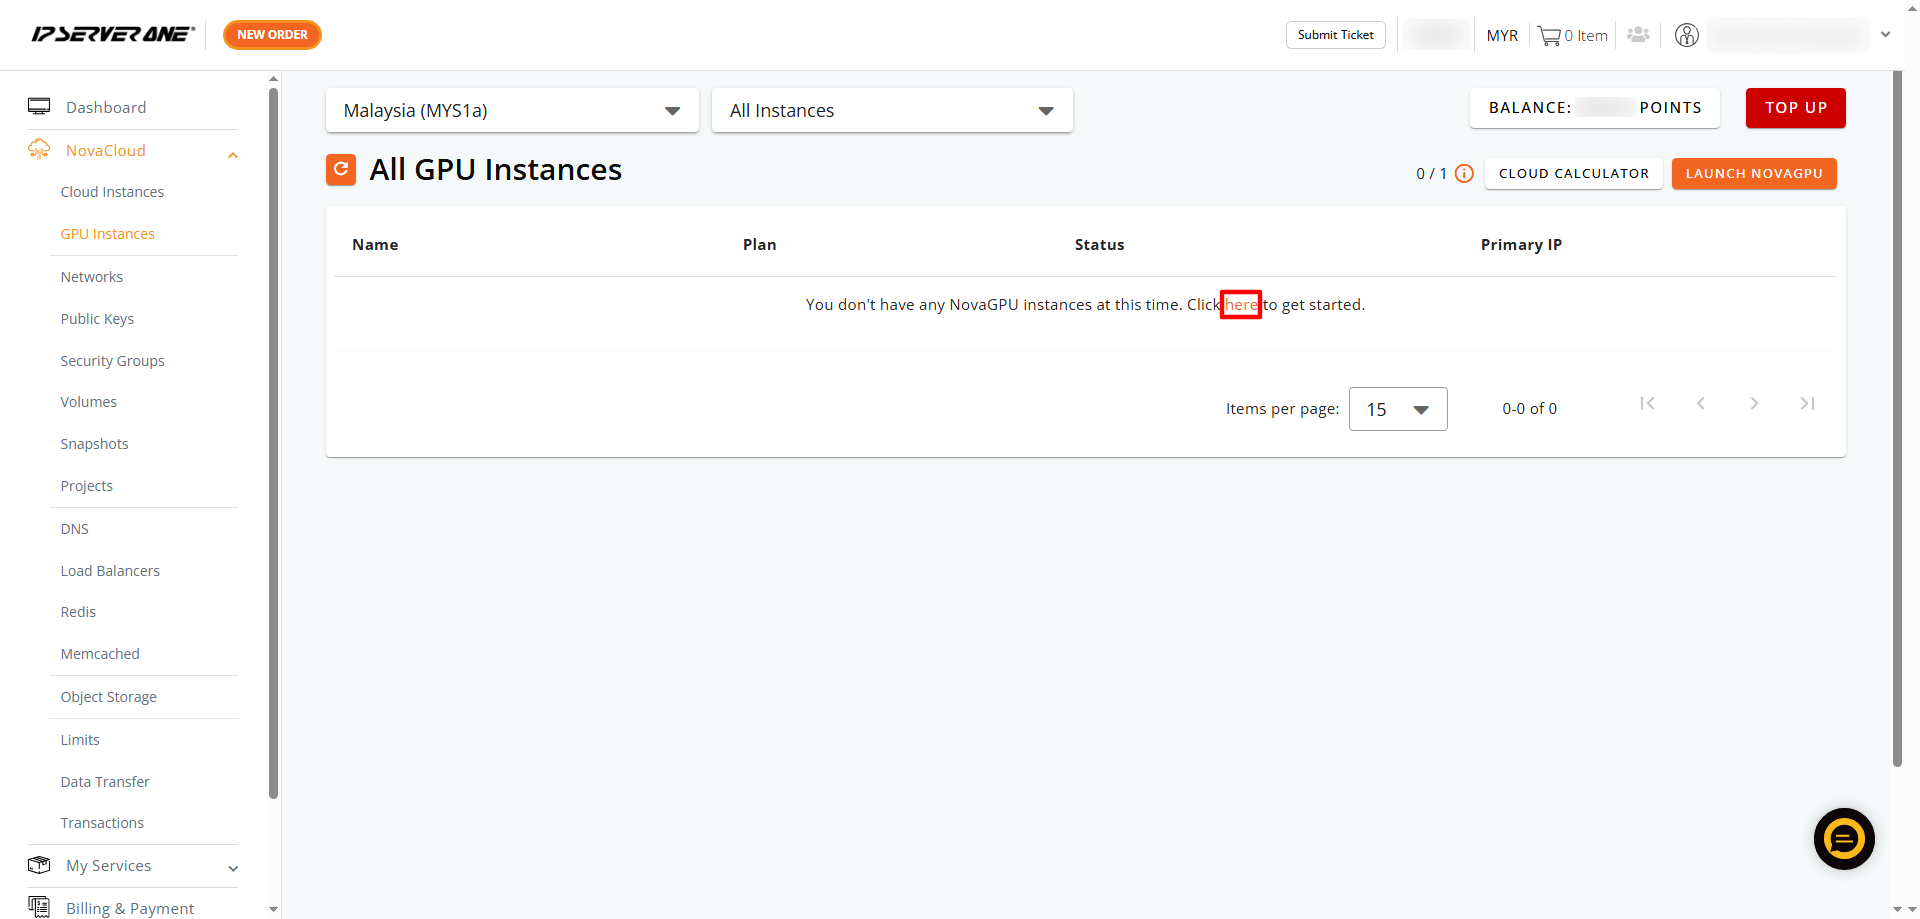
3. Start the NovaGPU Setup
Click on the highlighted here, or click the Launch NovaGPU to get started.
4. Choose Your Launch Method
Select Create NovaGPU from Image.

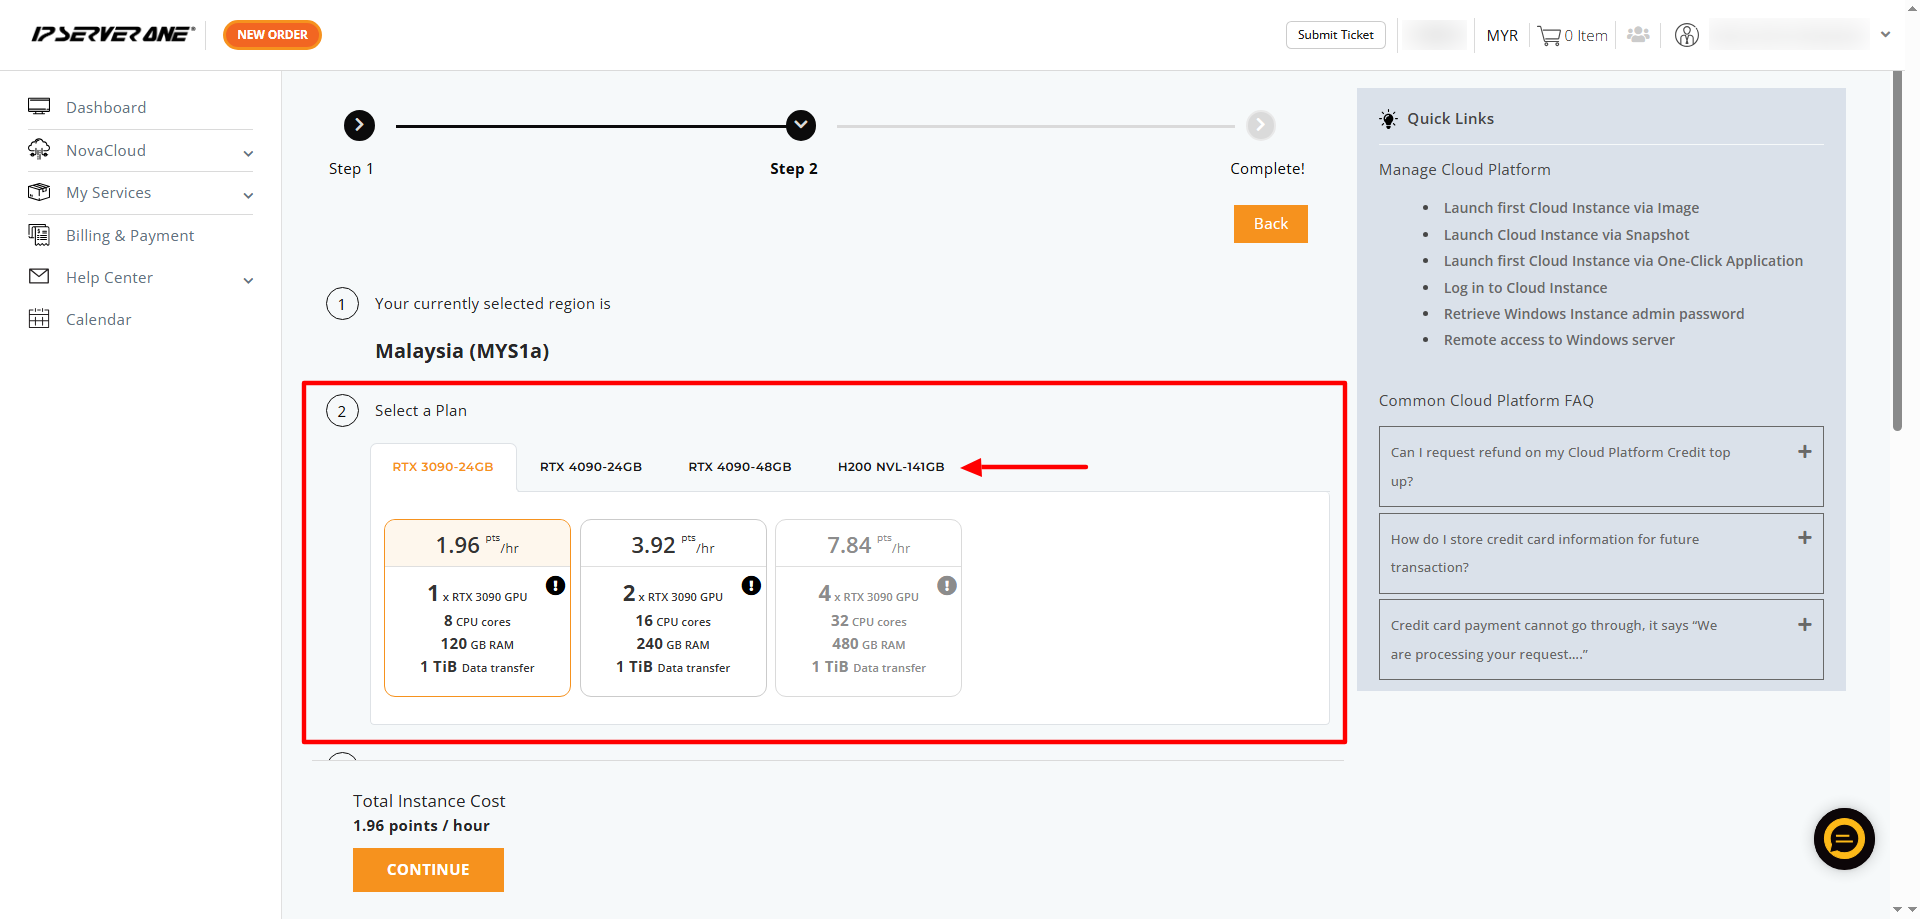
5. Select a GPU Plan
Choose a GPU plan that suits your requirements. The following options are available:
-
RTX 3090 GPU – 24GB
-
RTX 4090 GPU – 24GB
-
RTX 4090 GPU – 48GB (Please join the waitlist to be notified when available.)
-
H200 NVL GPU – 141GB (Requires a compliance check. Click on Compliance Check and submit the form. Our Sales team will follow up.)
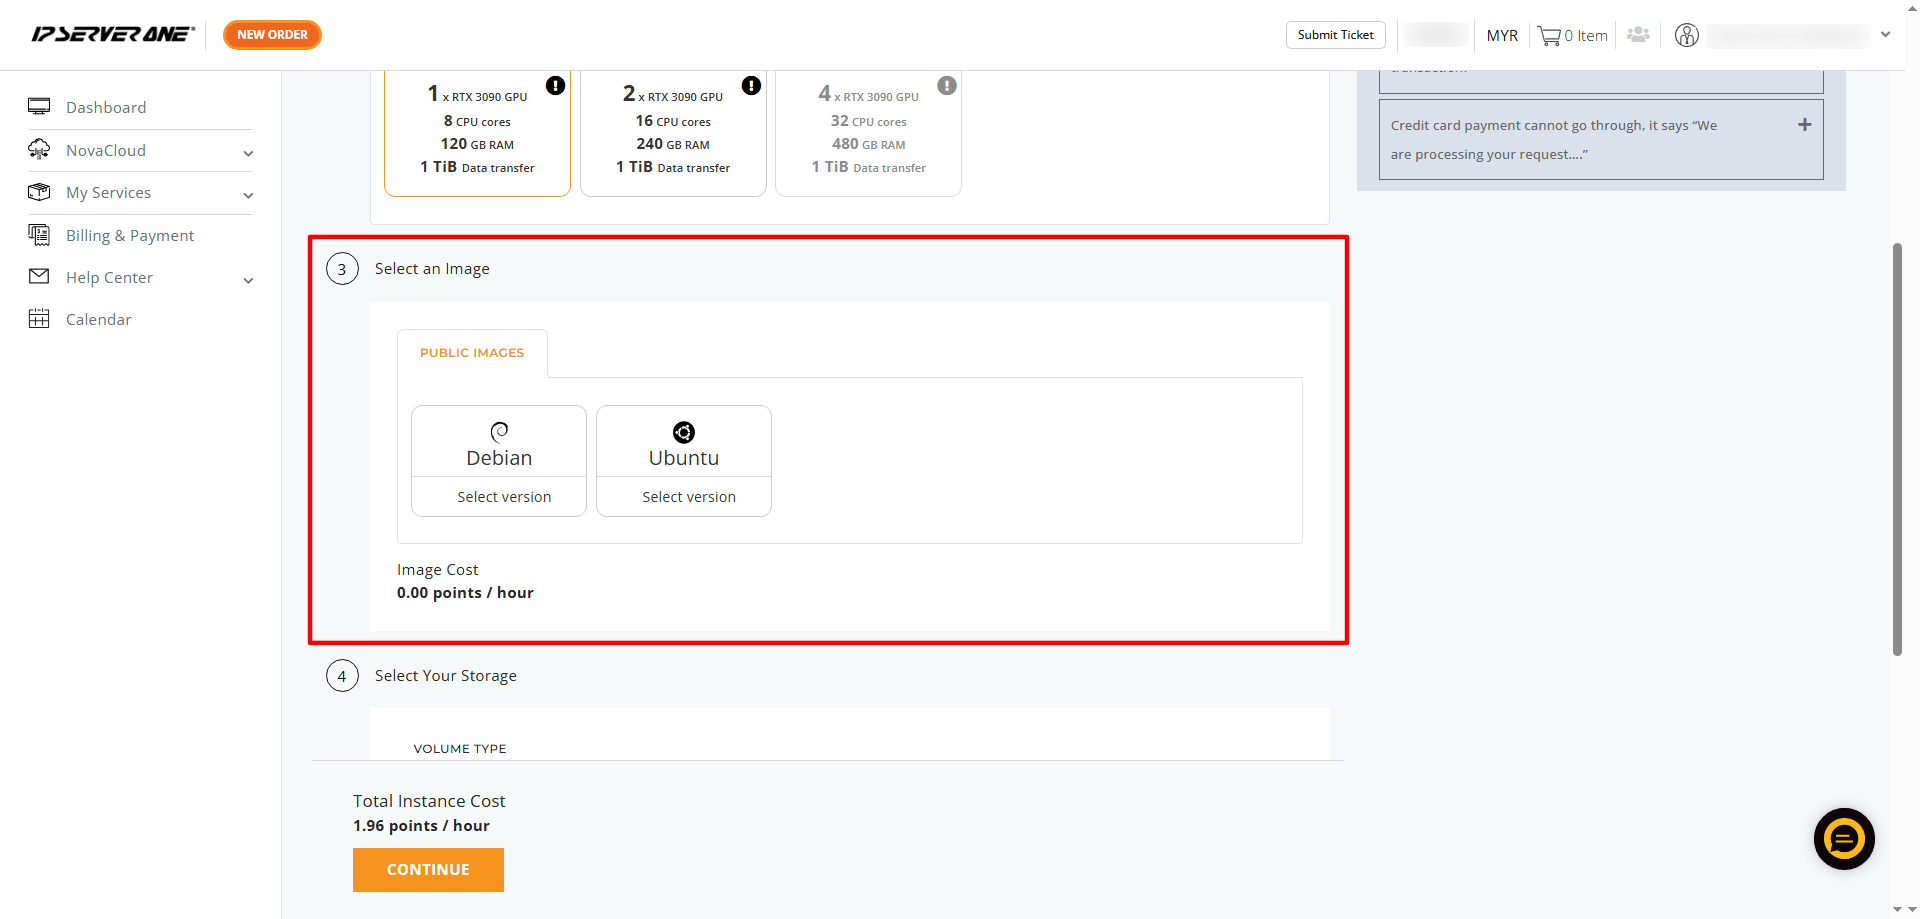
6. Choose an Image
Select the desired image and click Select Version to view available versions.
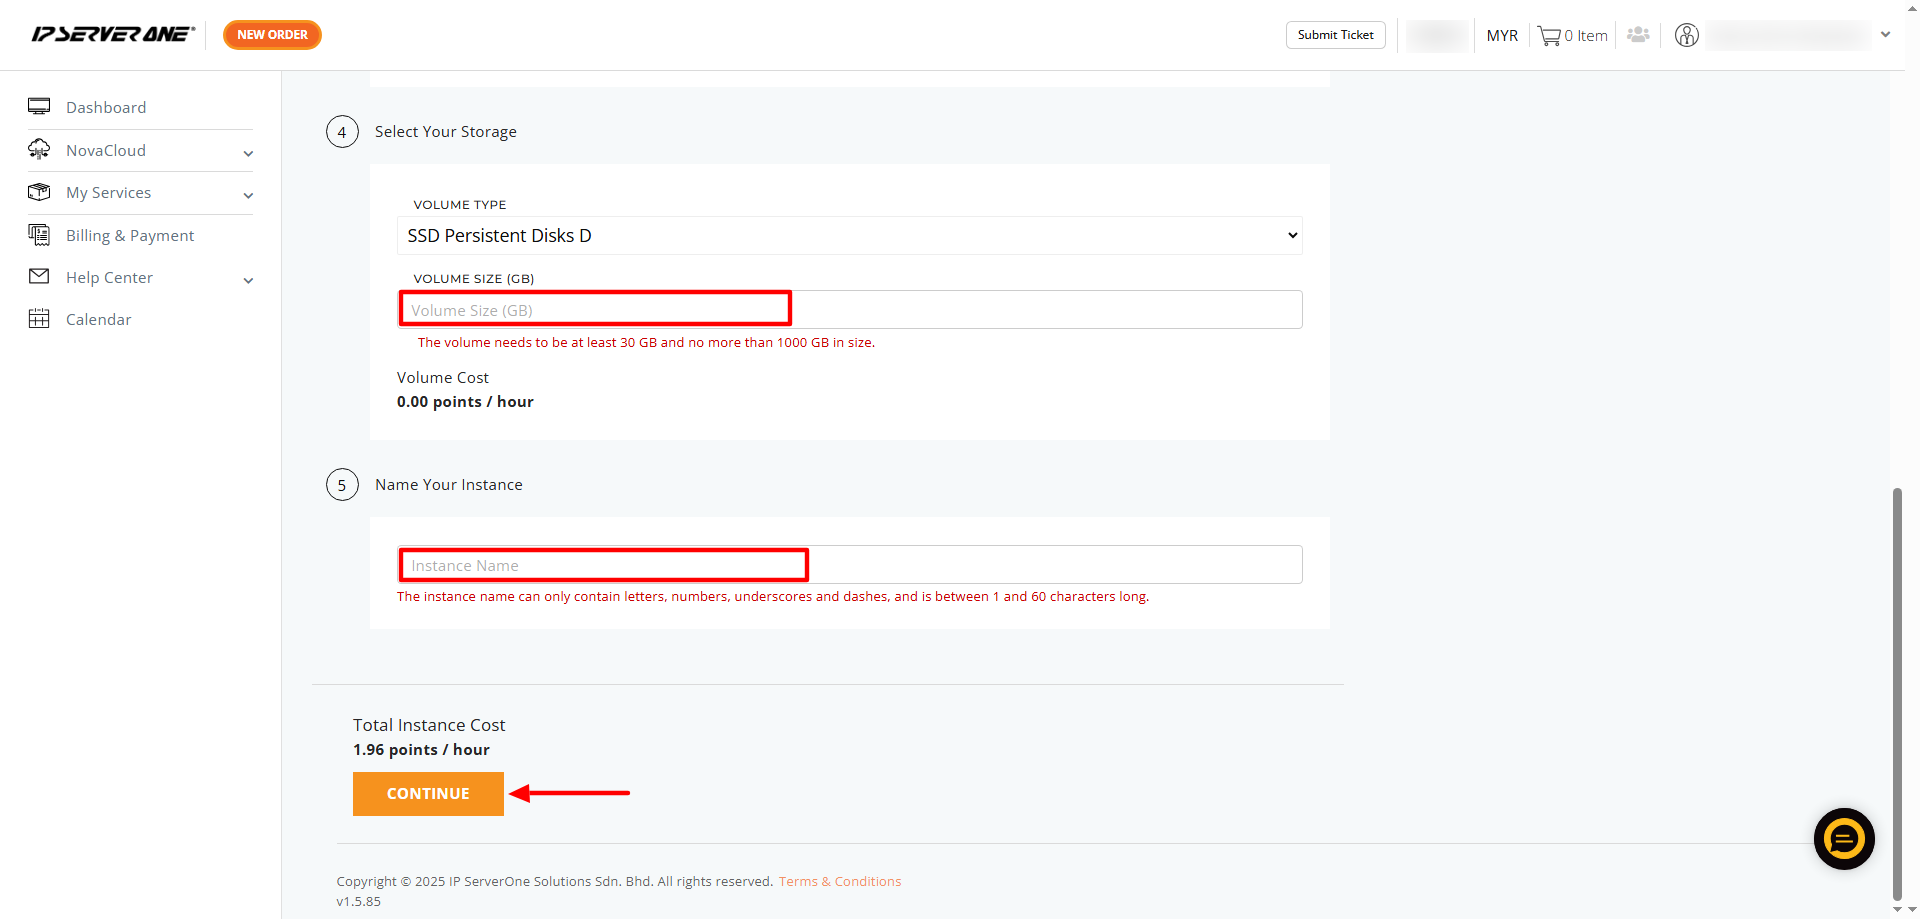
7. Configure Volume and Continue.
Enter your desired volume size (minimum 30GB) in the Volume Size (GB) field. Once you are satisfied, you may name your GPU instance, then click Continue.
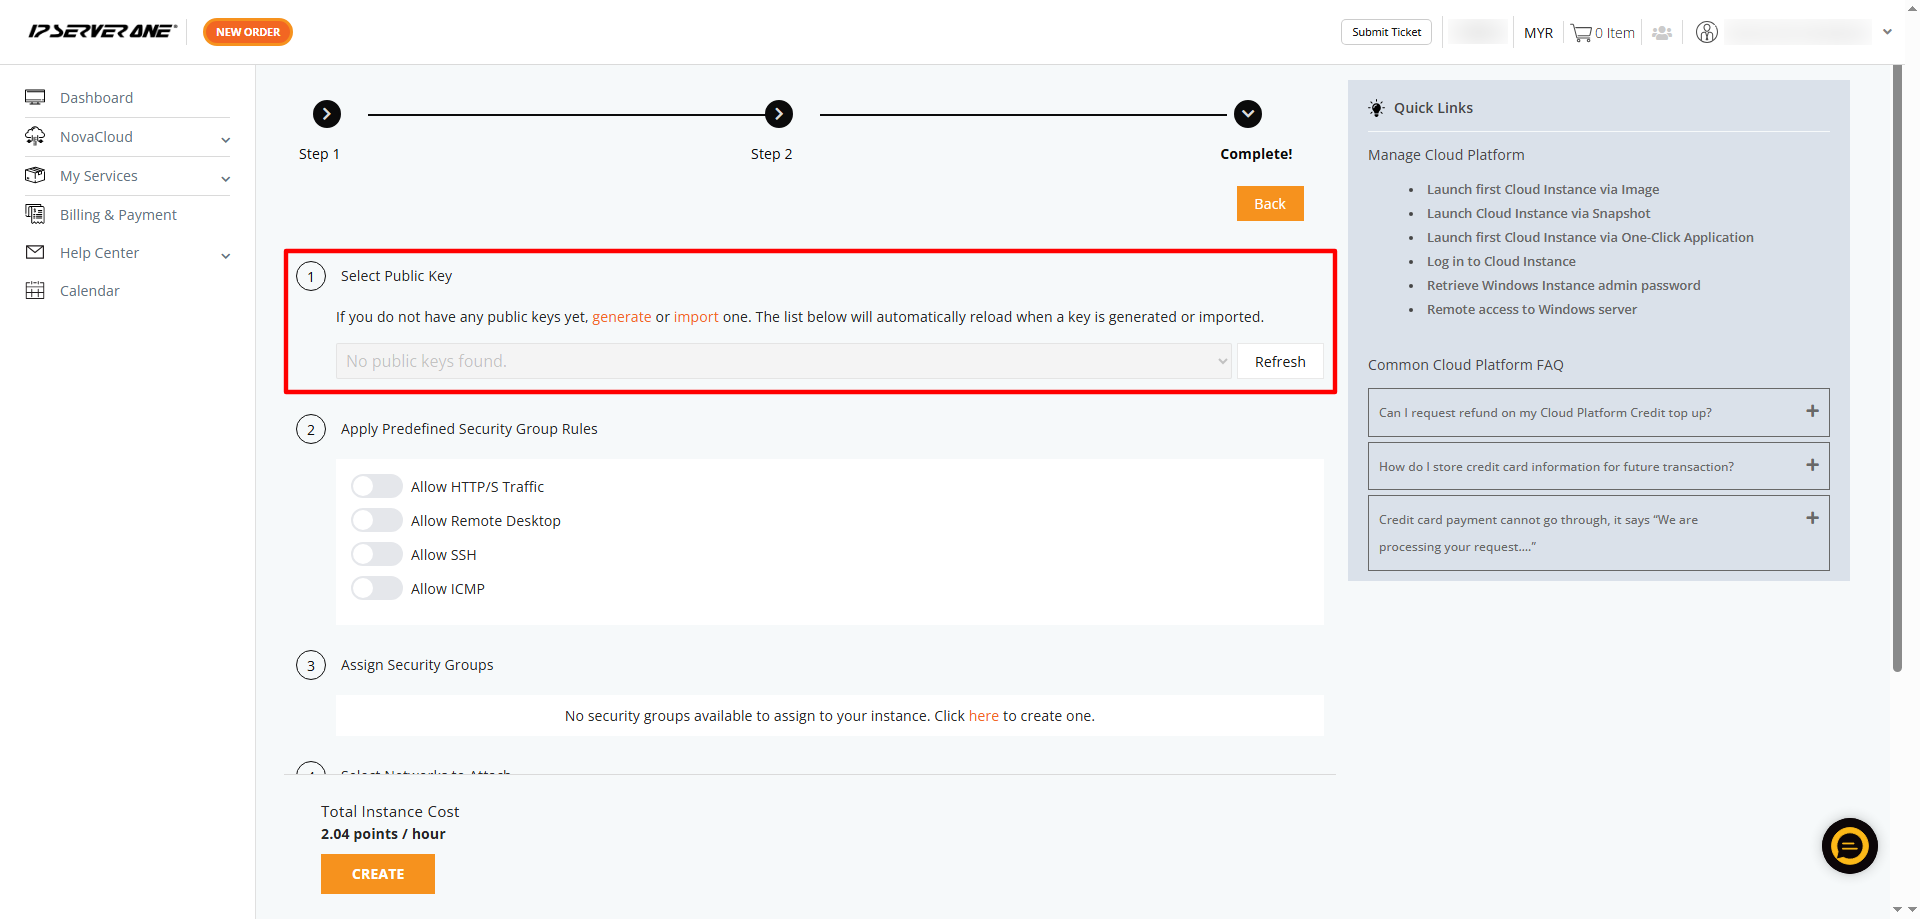
8. Select a Public Key
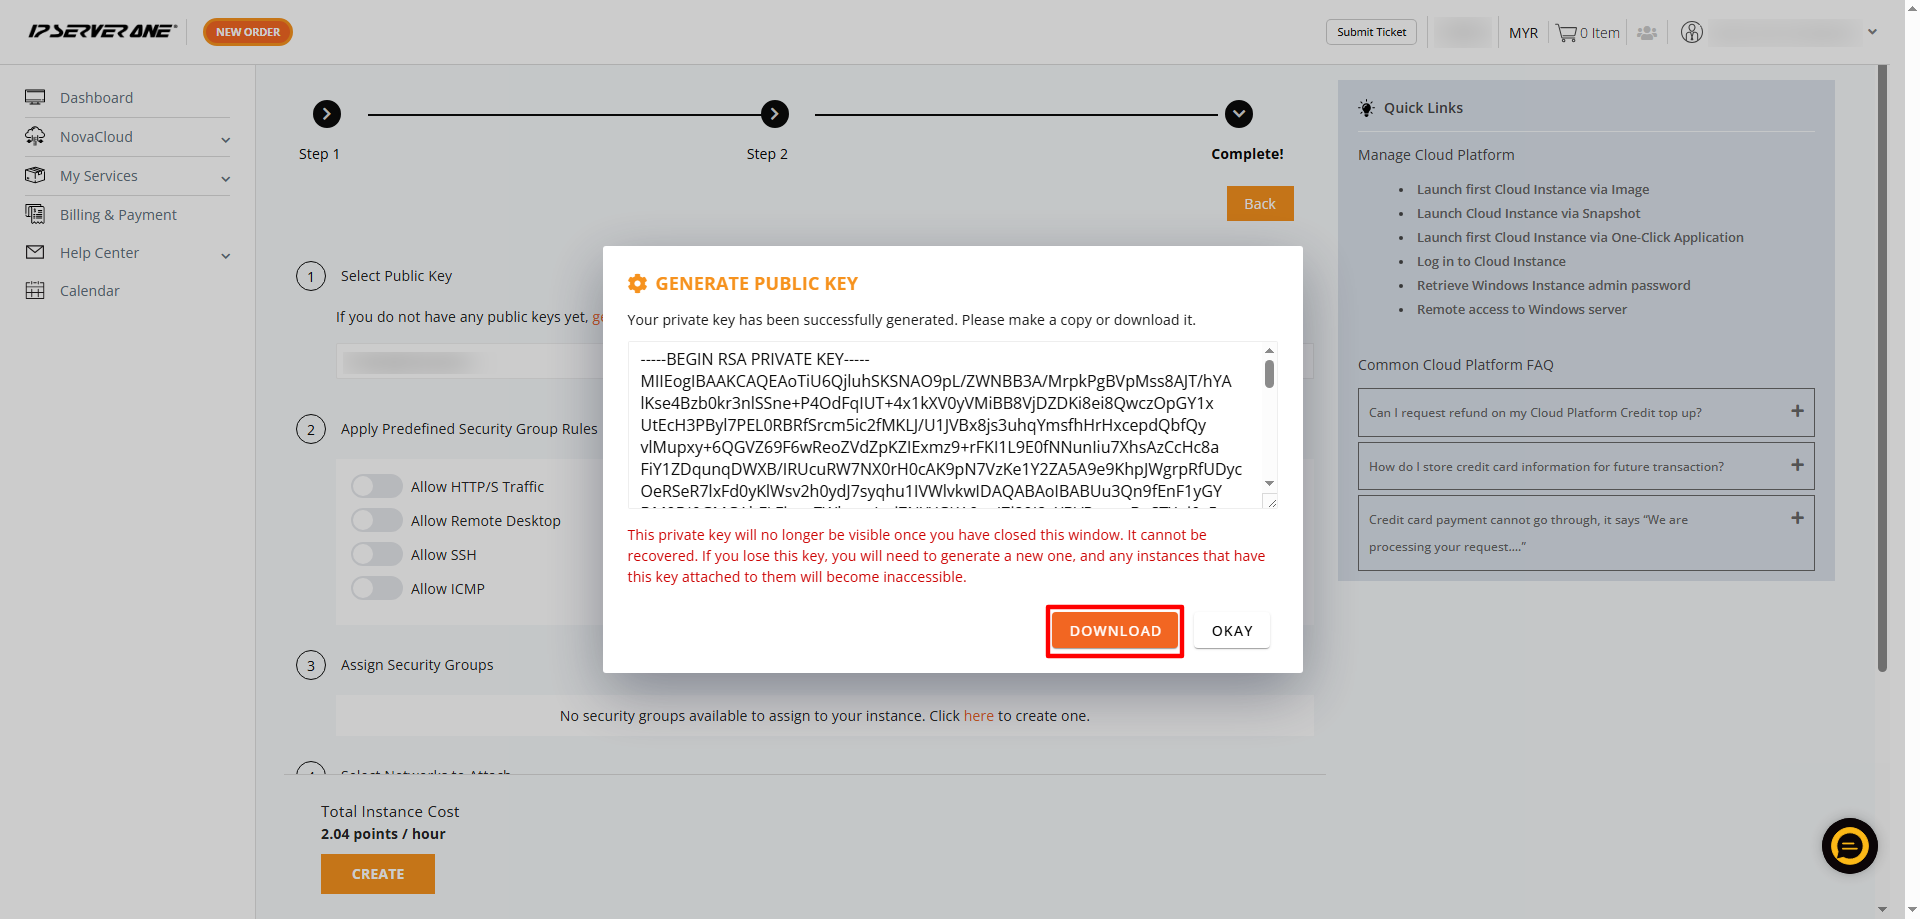
Select a Public Key. If you don’t have an existing key, you can generate a new one or import an existing key.
Note: If generating a new key, download and securely store your private key (.pem file). This key cannot be retrieved later, and losing it may result in loss of access to your instance.
9. Set Up Security Group Rules
Select Predefined Security Group Rules, name your security group, and click Create. The default setting allows all outgoing traffic and blocks all incoming traffic.
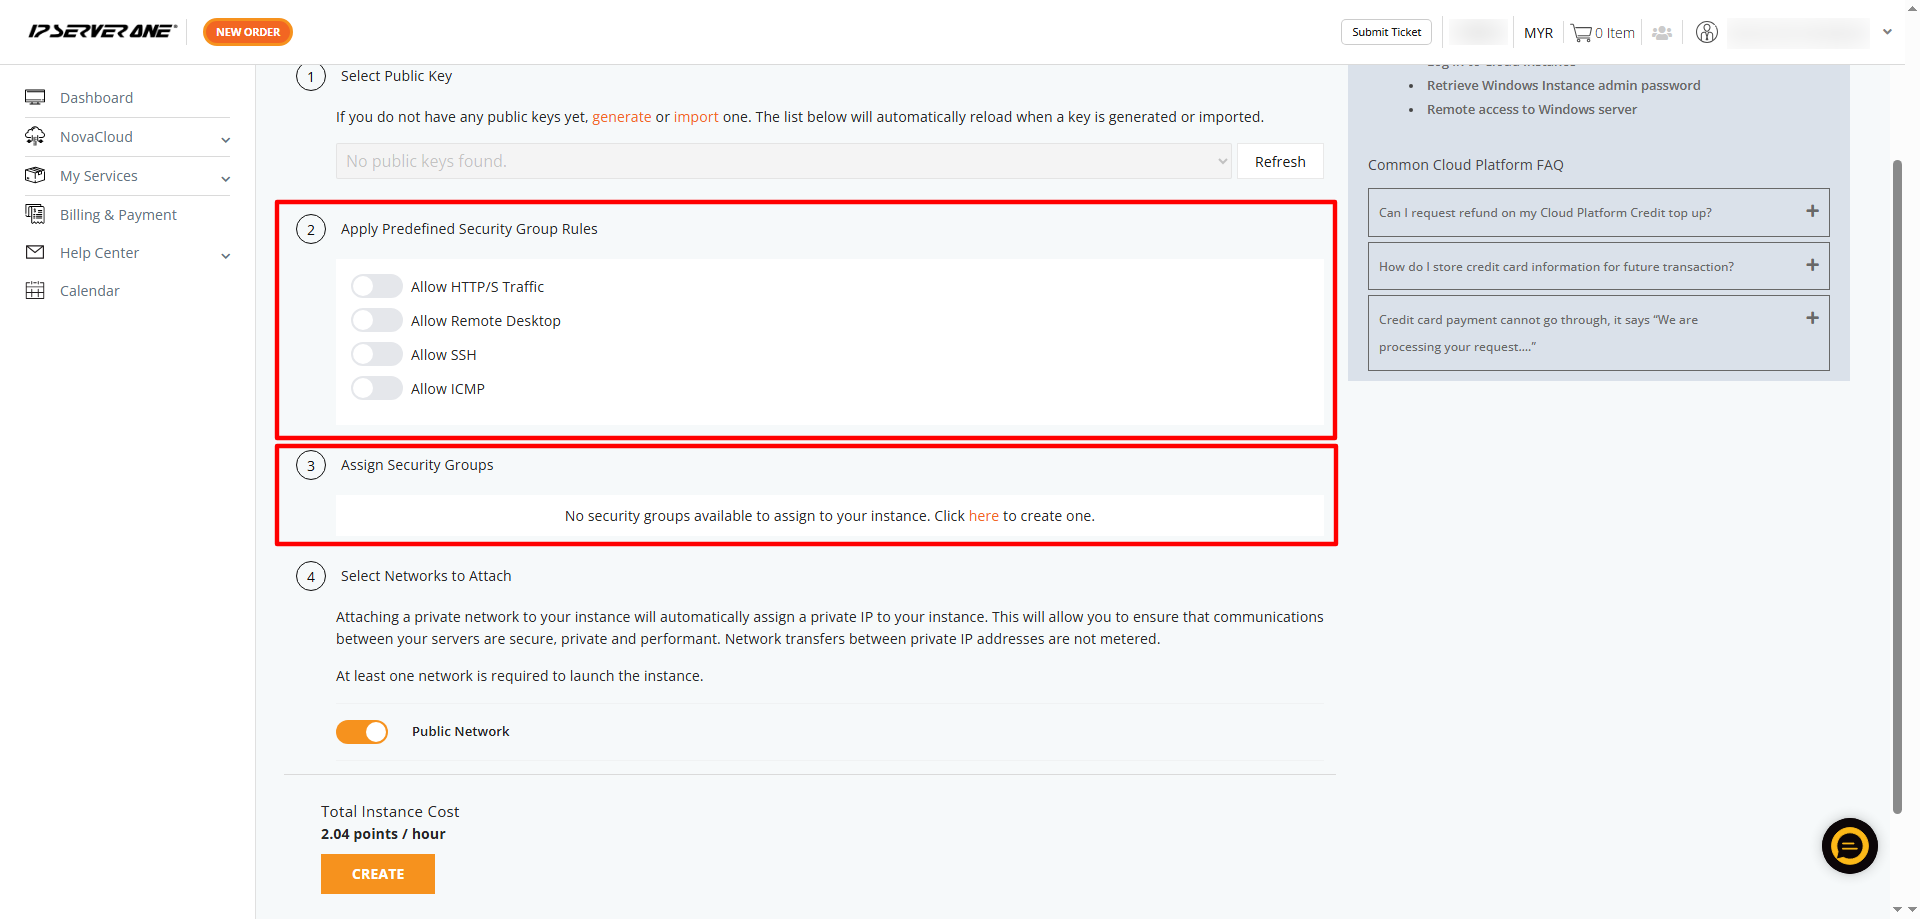
10. Enable Public Network
Ensure Public Network is enabled before clicking Create.
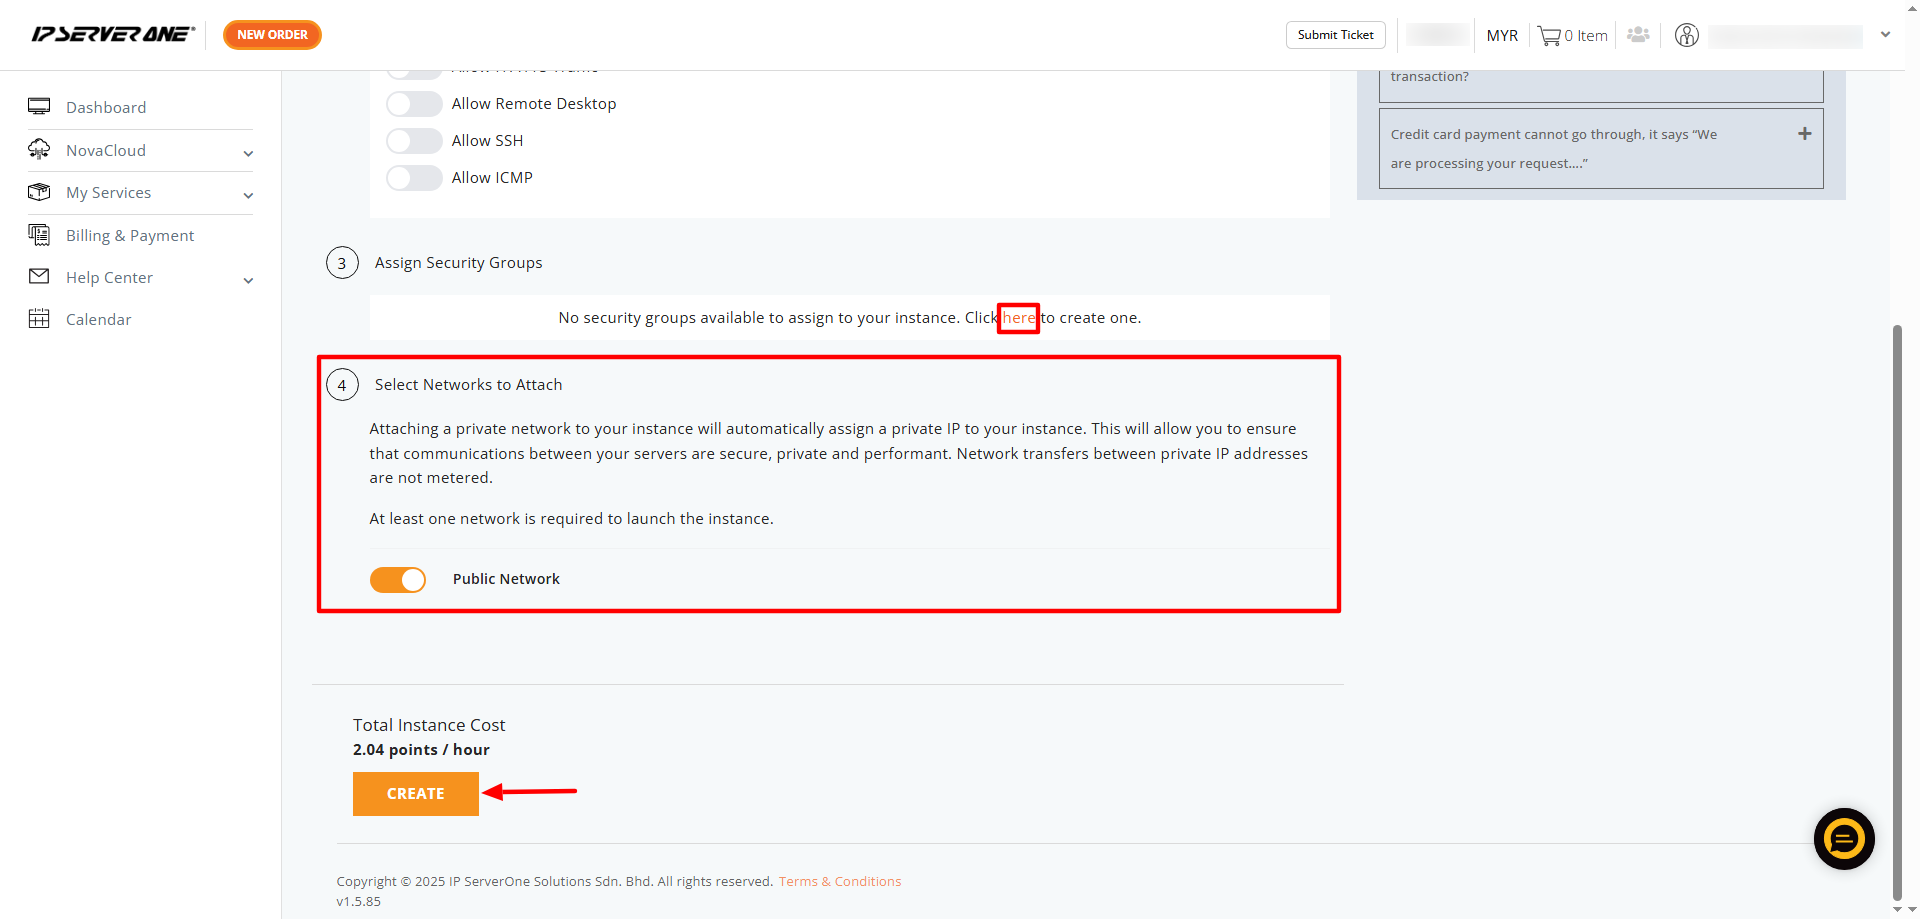
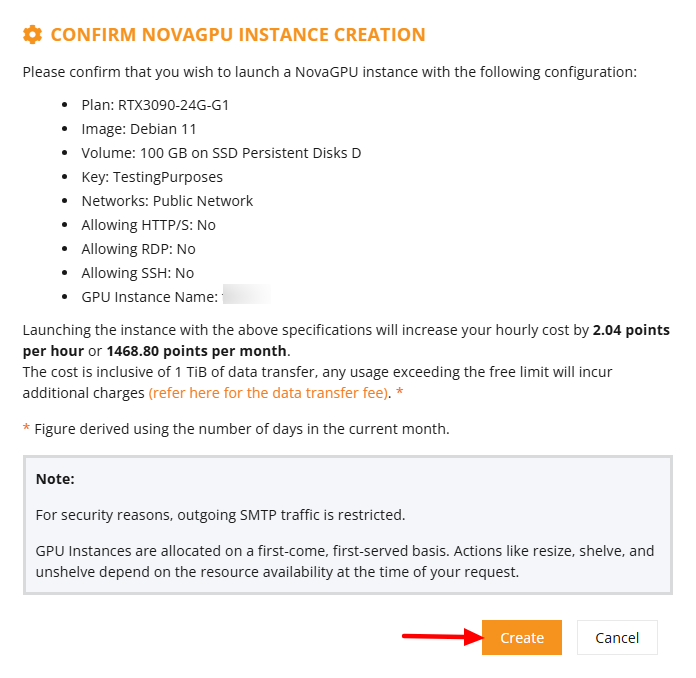
11. Final Review & Launch
Review the instance details. Click Create to launch the instance if you have sufficient credits.
Note: If your Cloud Points is not sufficient, you may refer to this guideline on how to top-up your Cloud points: https://www.ipserverone.info/knowledge-base/how-to-topup-points-for-cloud-credit/
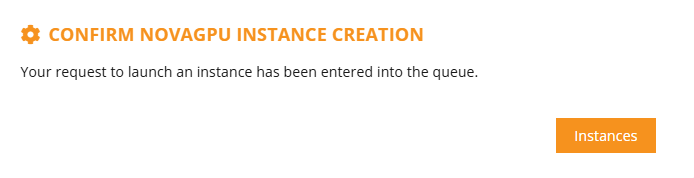
12. Monitor Instance Creation
Click on Instances to view your new instance. You may refresh the page to monitor its status.
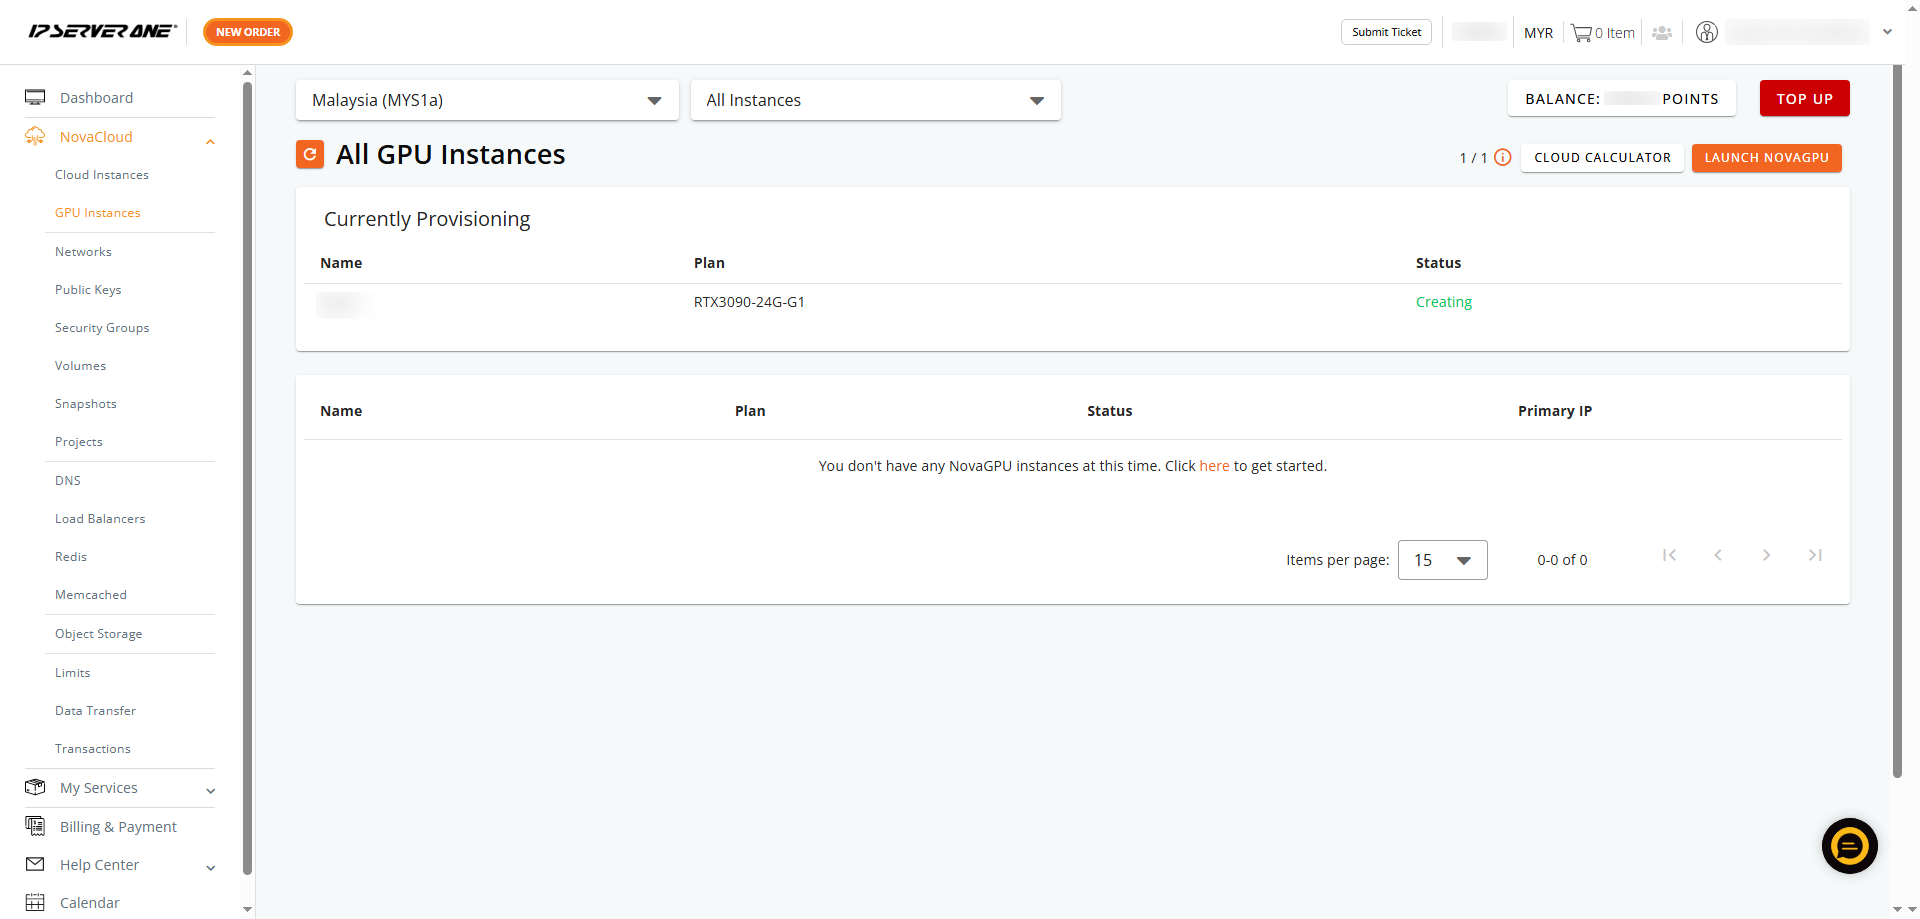
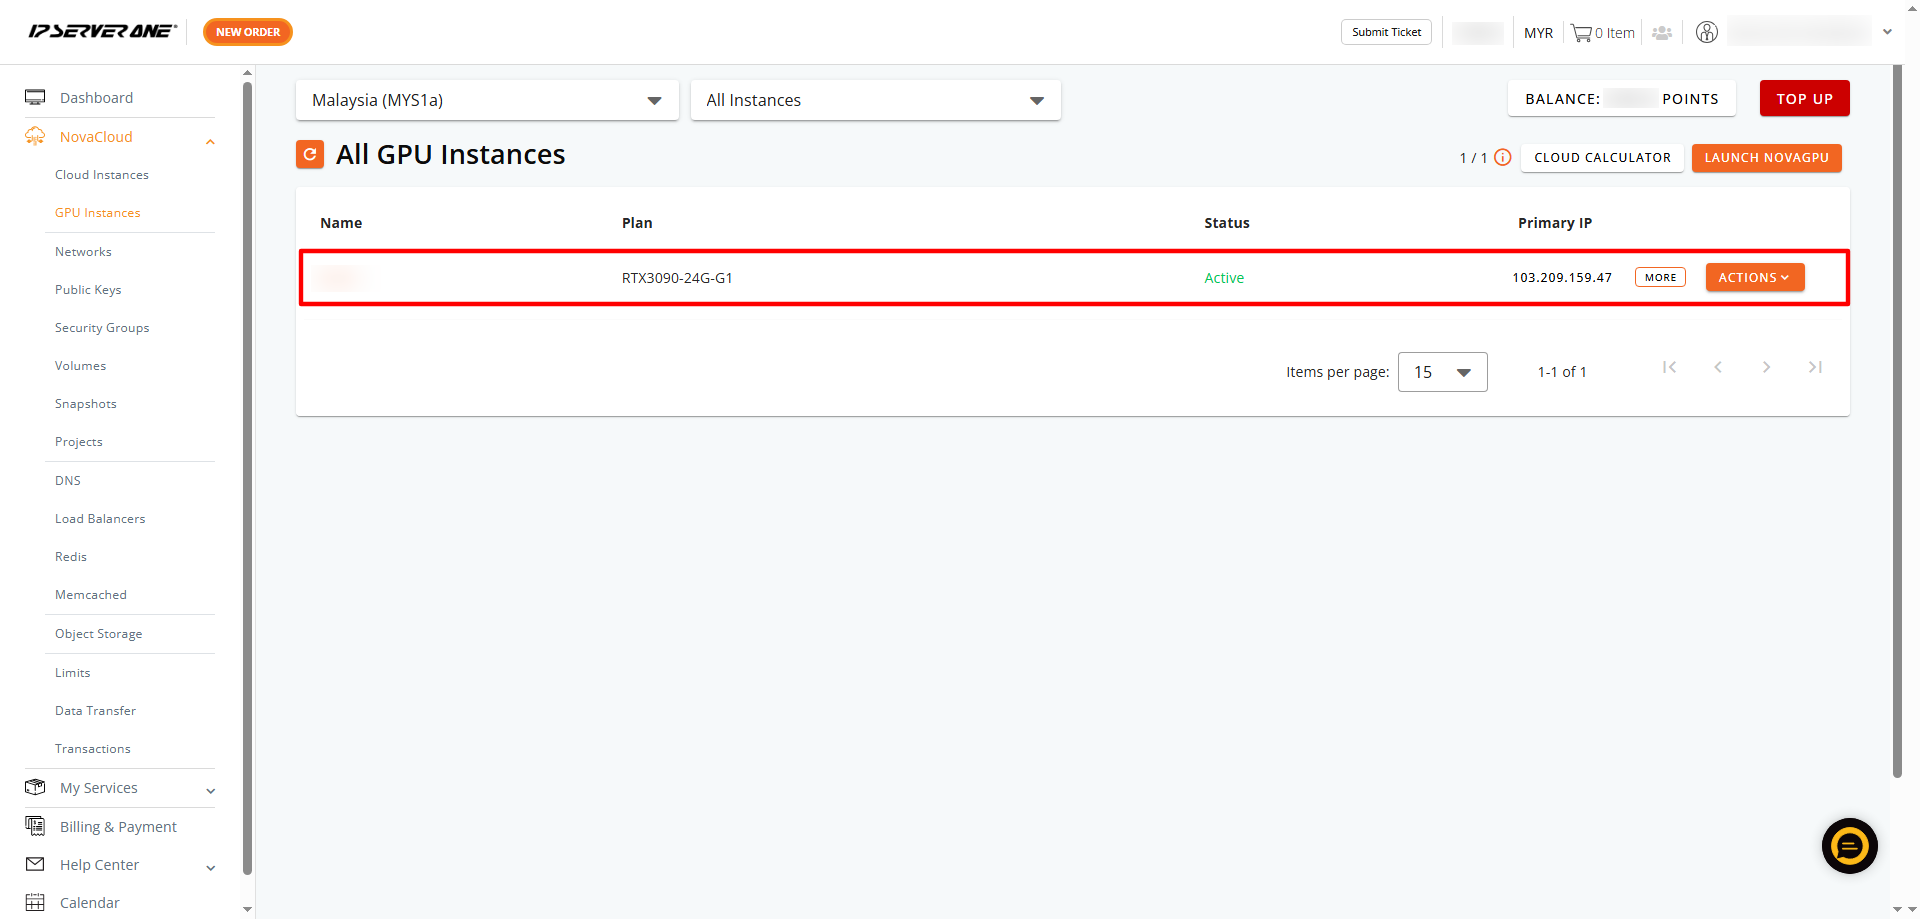
13. Confirm Successful Launch
Once the instance is ready, its status will appear as Active. Tip: Take note of the assigned IP addresses for connection and configuration.
Conclusion
If you’ve followed the steps above, your NovaGPU instance should now be up and running. Feel free to explore its capabilities and reach out if you need any assistance along the way.