Search Our Database
Jaring: How to configure email in iPhone
Introduction
Setting up your Jaring email account on an iPhone allows you to stay connected and manage your emails on the go. Whether you’re using your email for personal or business communication, configuring it correctly ensures smooth syncing, sending, and receiving of messages directly from your device.
This guide walks you through the step-by-step process to configure your Jaring email account on an iPhone using the built-in Mail app.
Prerequisite
- Your full Jaring email address and password
- Basic understanding of email protocols (IMAP/POP/SMTP)
- iPhone running iOS with the Mail app installed
- A working internet connection on your iPhone
Step-by-step guide
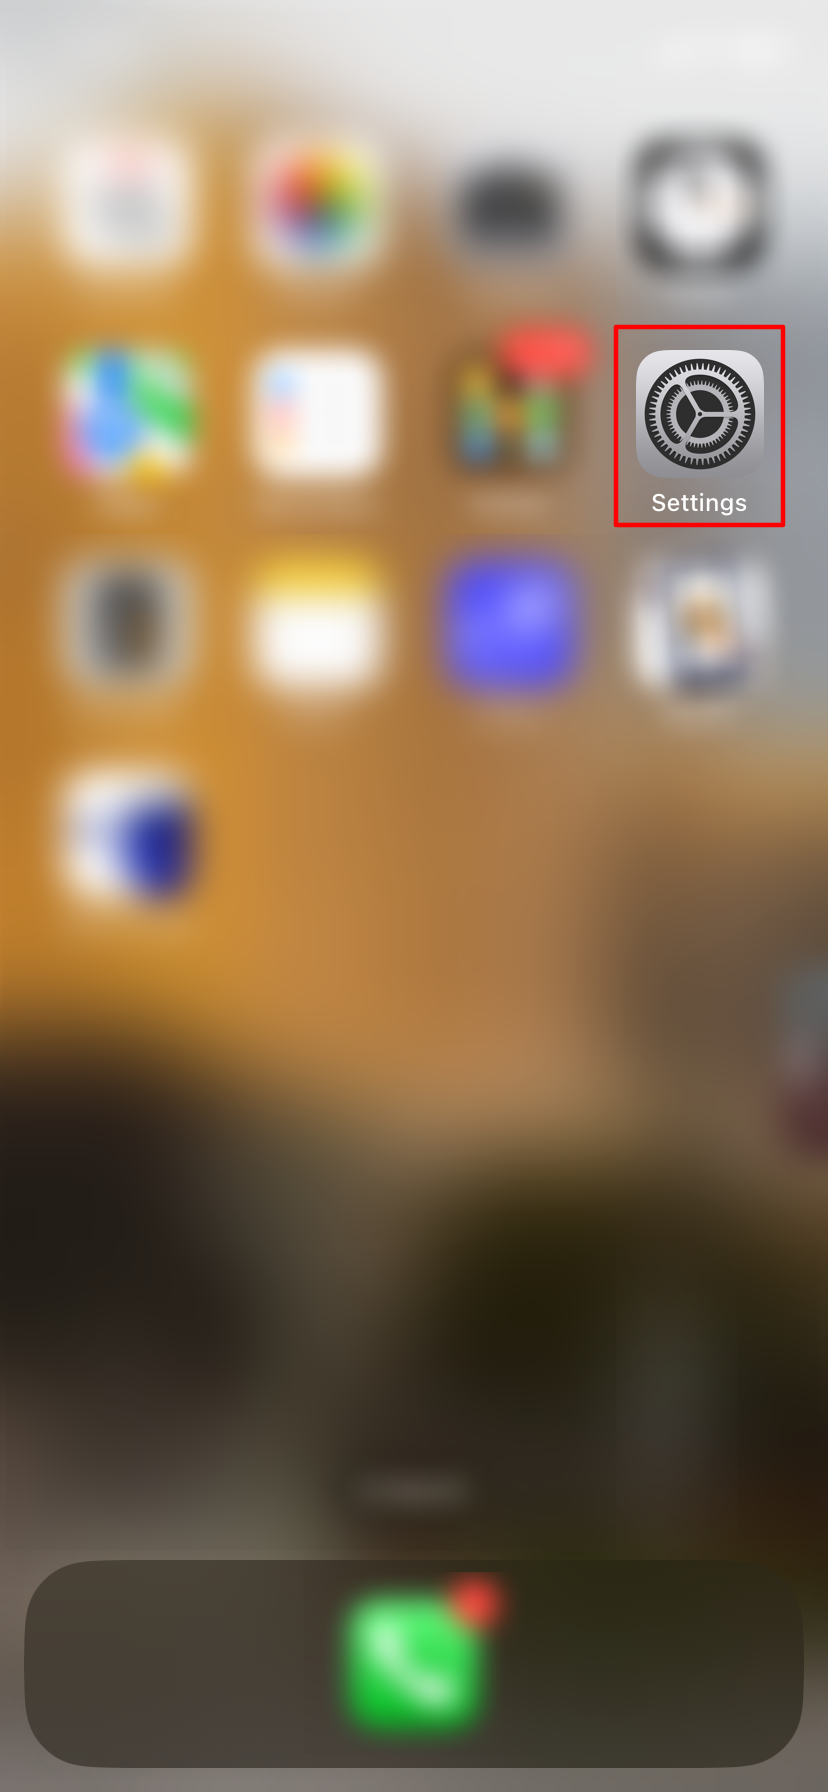
Step 1: Open Settings
- On your iPhone’s home screen, locate and tap the Settings app.
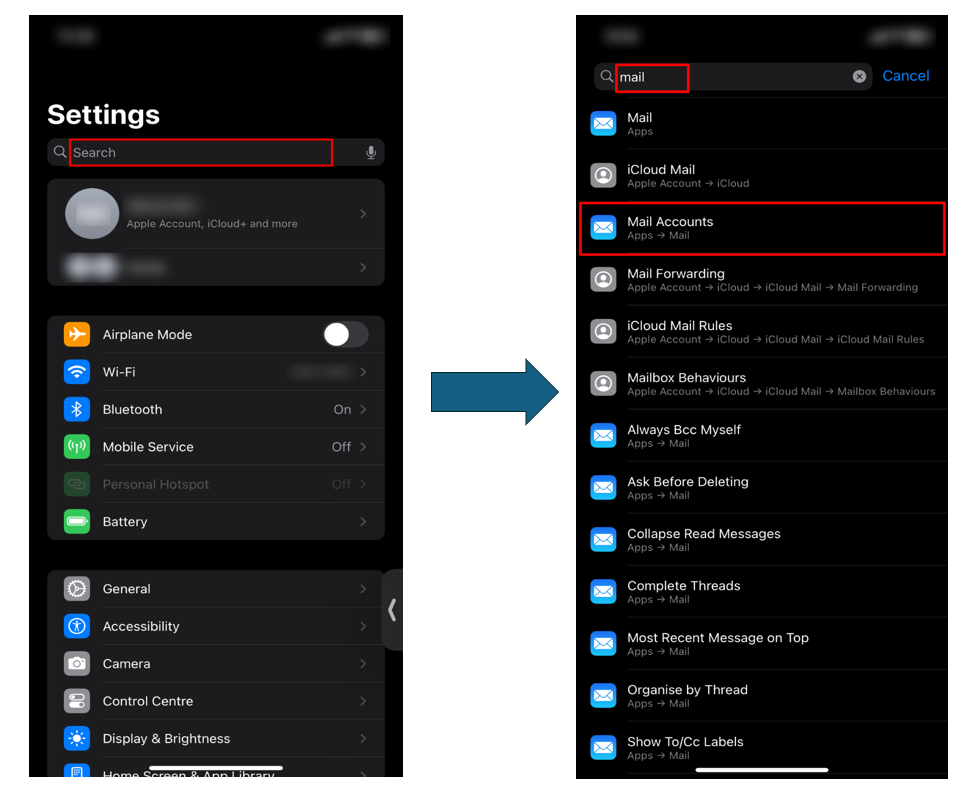
Step 2: Search for “Mail” in Settings
- In the Settings app, use the Search bar to type “Mail”, then select Mail Accounts from the results.
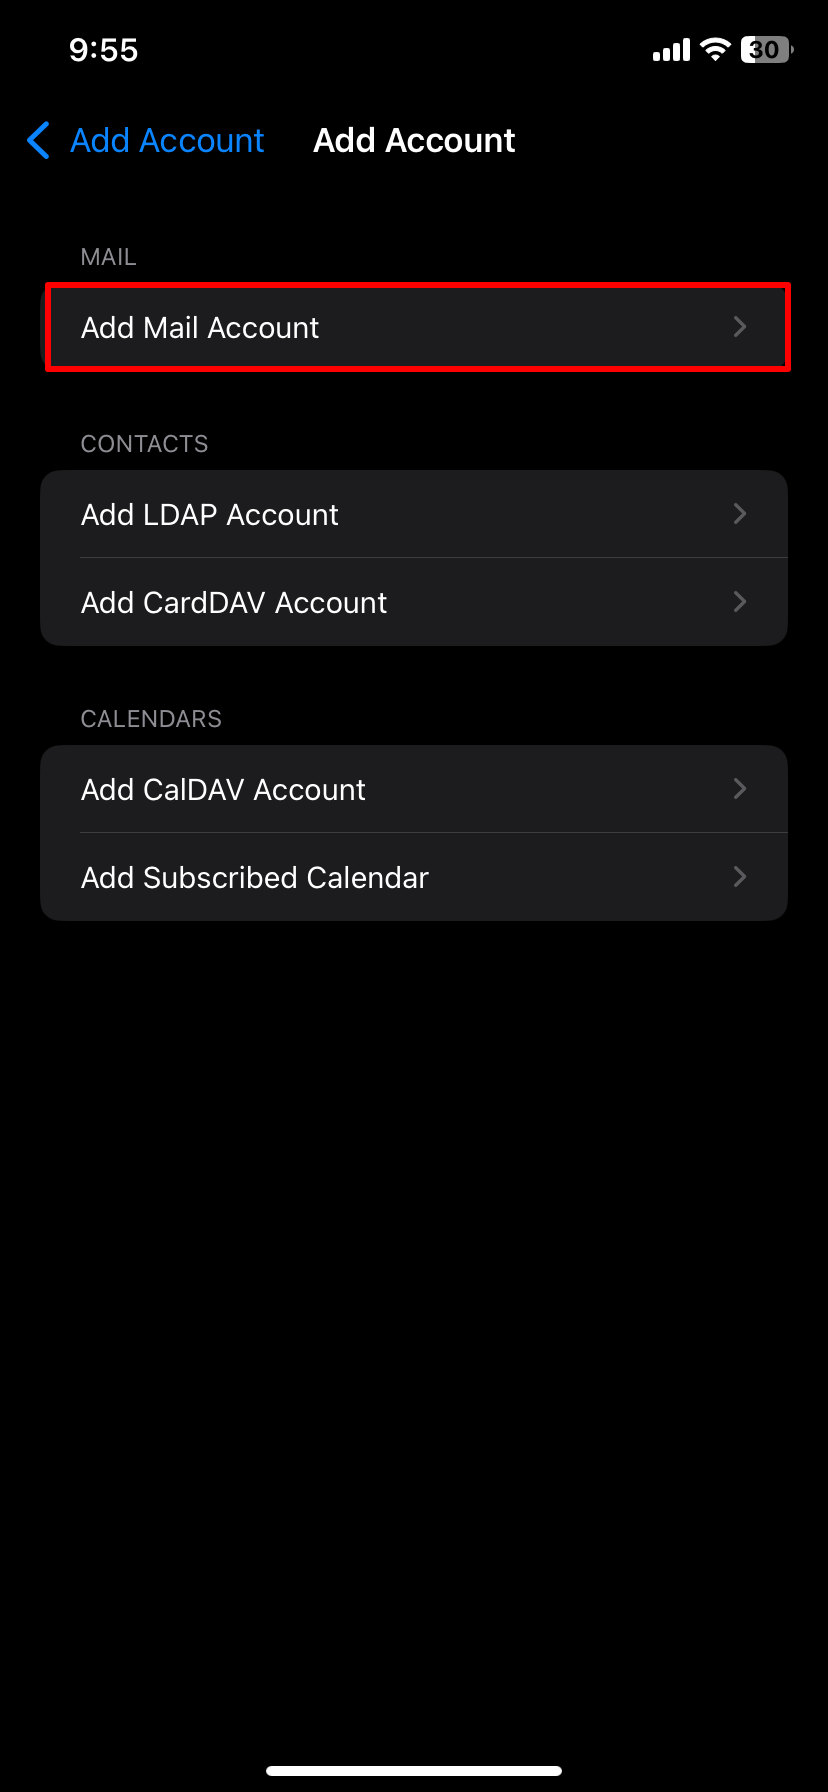
Step 3: Add a Mail Account
- Tap on Add Mail Account to start configuring your email manually.
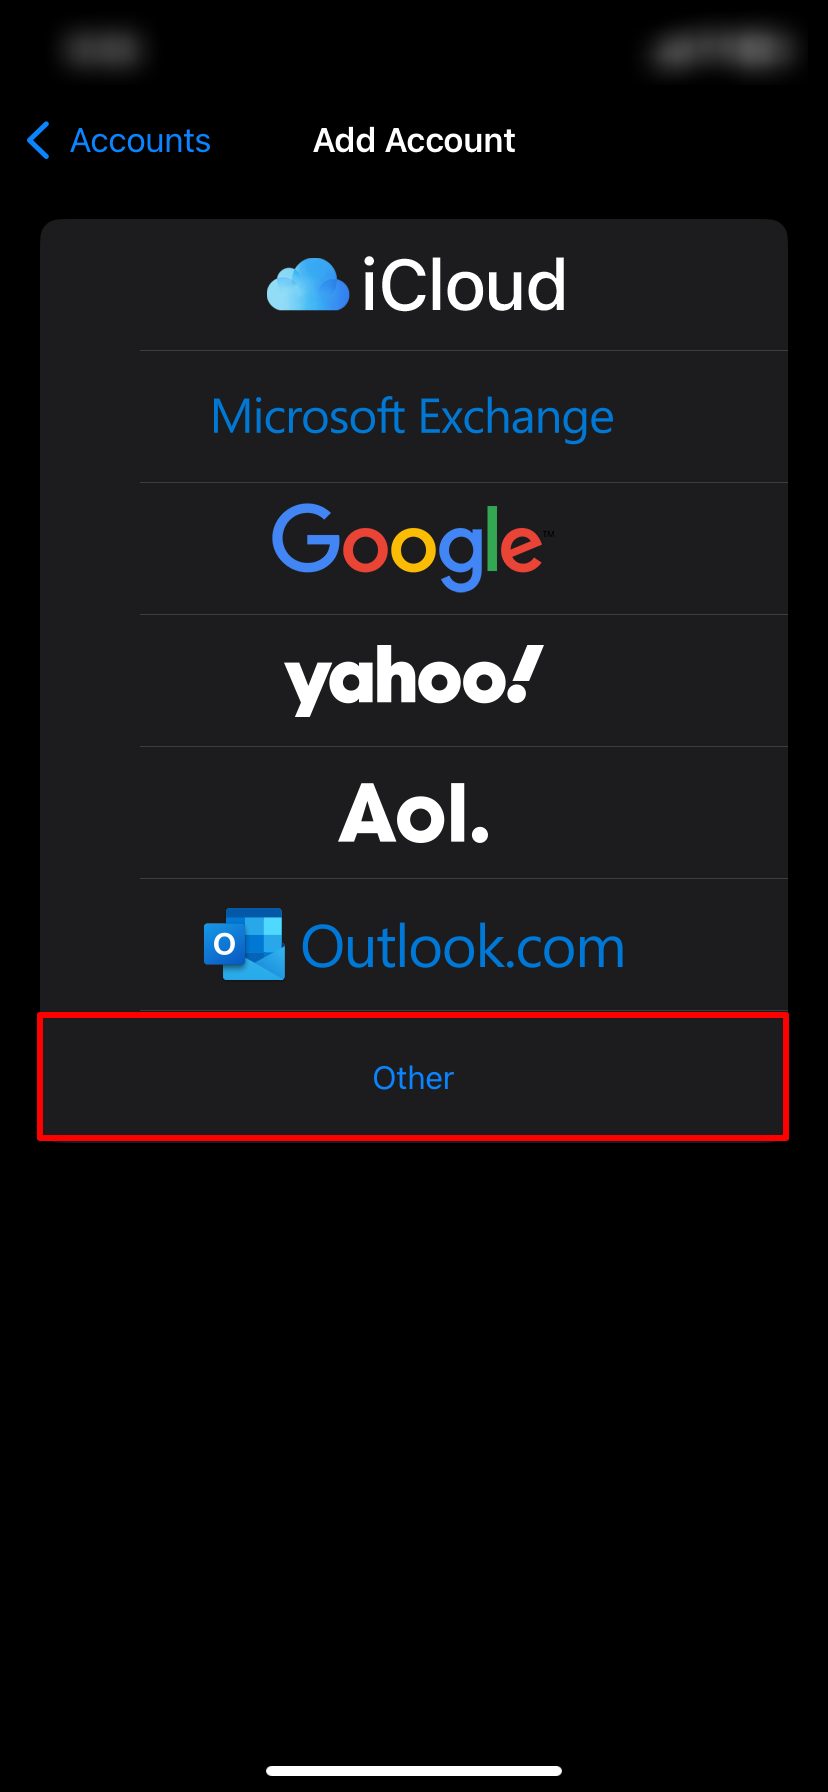
Step 4: Choose Account Type
- Scroll down and tap on Other to configure your email manually.
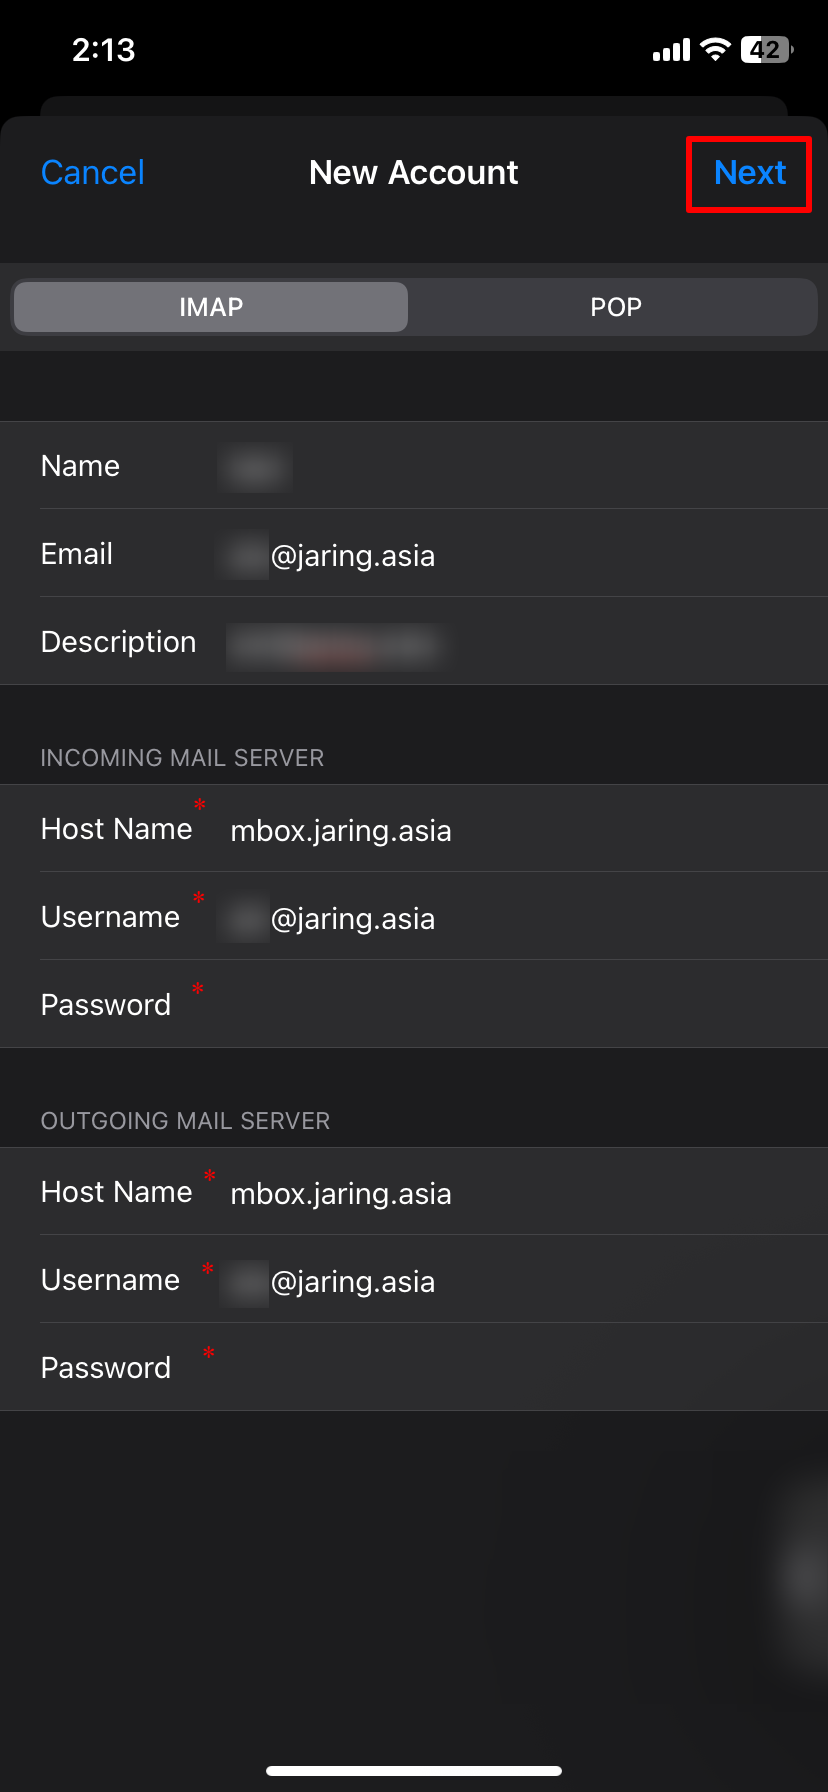
Step 5: Enter Account Information
Fill in the required details:
- Name: Your display name (e.g., IP ServerOne)
- Email: Your full Jaring email address (e.g., user@jaring.asia)
- Password: Your Jaring email password
- Description: A label for this account (e.g., Jaring)
Then tap Next to continue.

Step 6: Configure Incoming & Outgoing Mail Server
You may select between IMAP or POP3 depending on how you’d like your email to work:
- IMAP: Synchronizes emails between the mail server and your phone, keeping everything in sync across devices.
- POP3: Downloads emails to your phone and removes them from the mail server.
After choosing your preferred protocol, enter the following mail server settings:
- Host Name: mbox.jaring.asia
- Username: Your full email address
- Password: Your email password
Once completed, tap Next to verify and proceed.
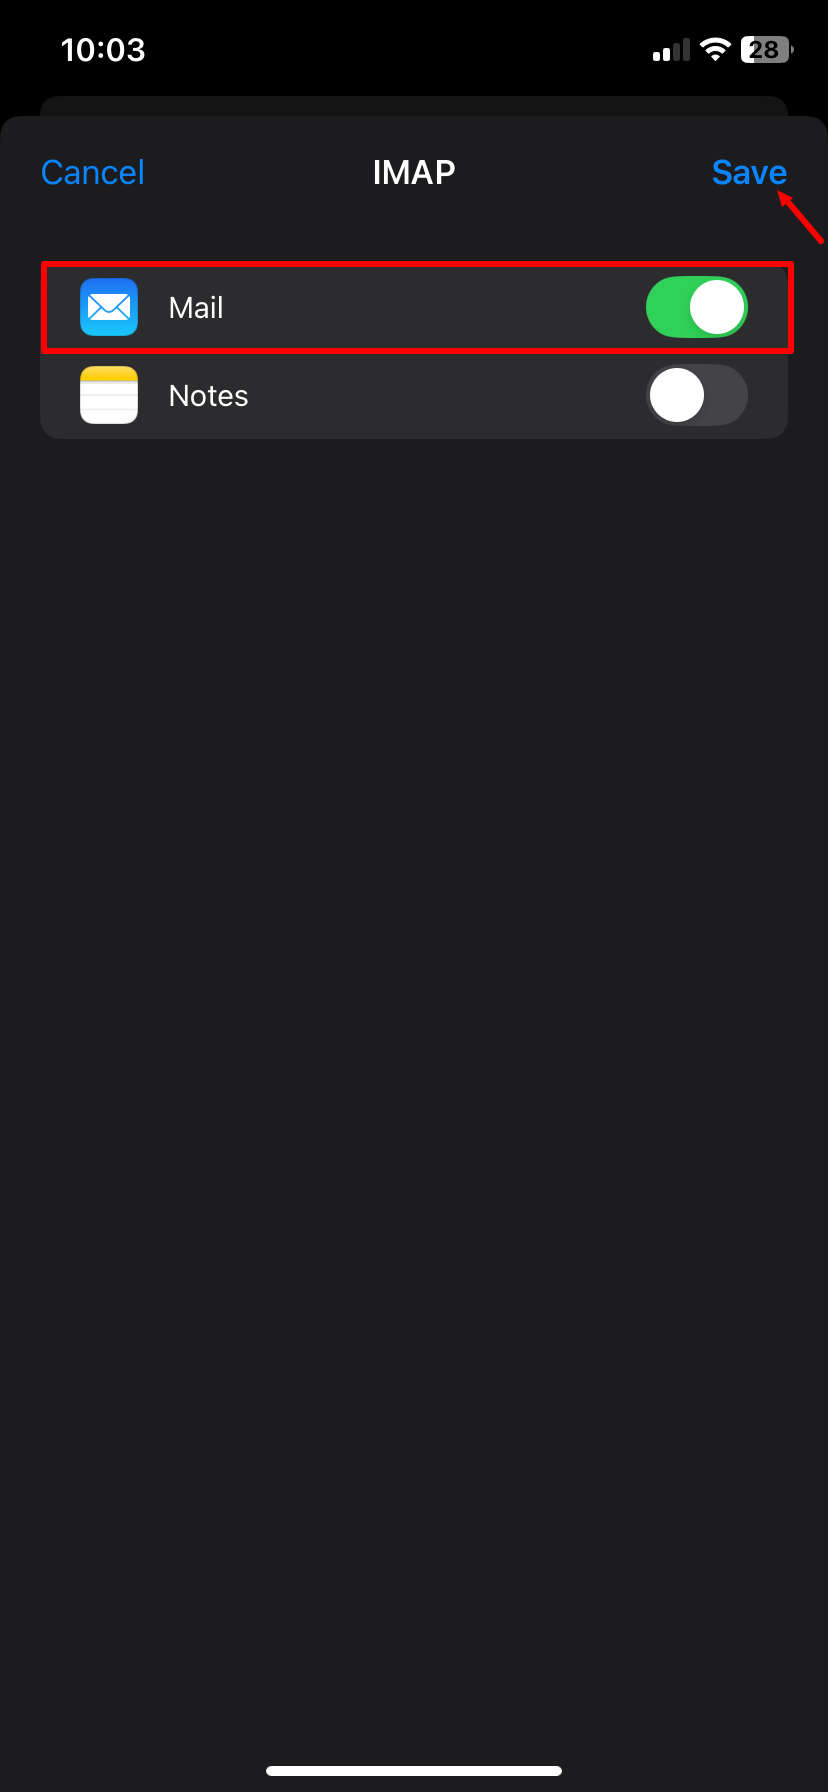
Step 7: Select Apps to Sync
- The Mail option can remain enabled. If you’d like to sync other apps (such as Notes), make sure to toggle them on (green). Once ready, tap Save to complete the setup.
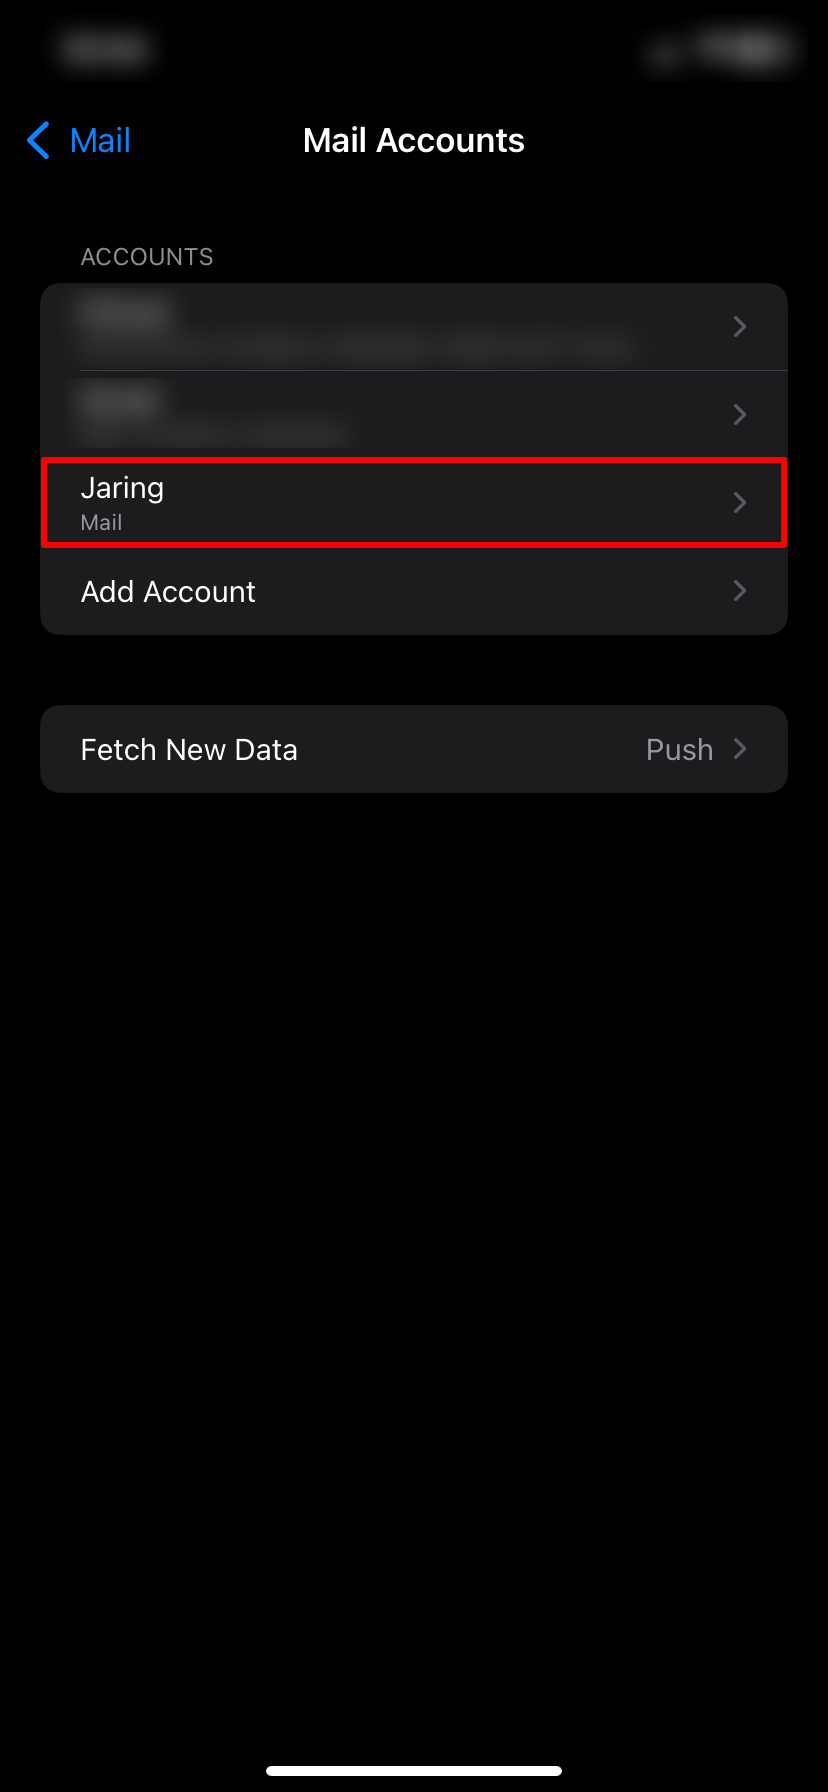
Step 8: Confirm Email Account Setup
- Once saved, your newly added account (Jaring) will appear under the Mail Accounts list, indicating that the setup was successful.
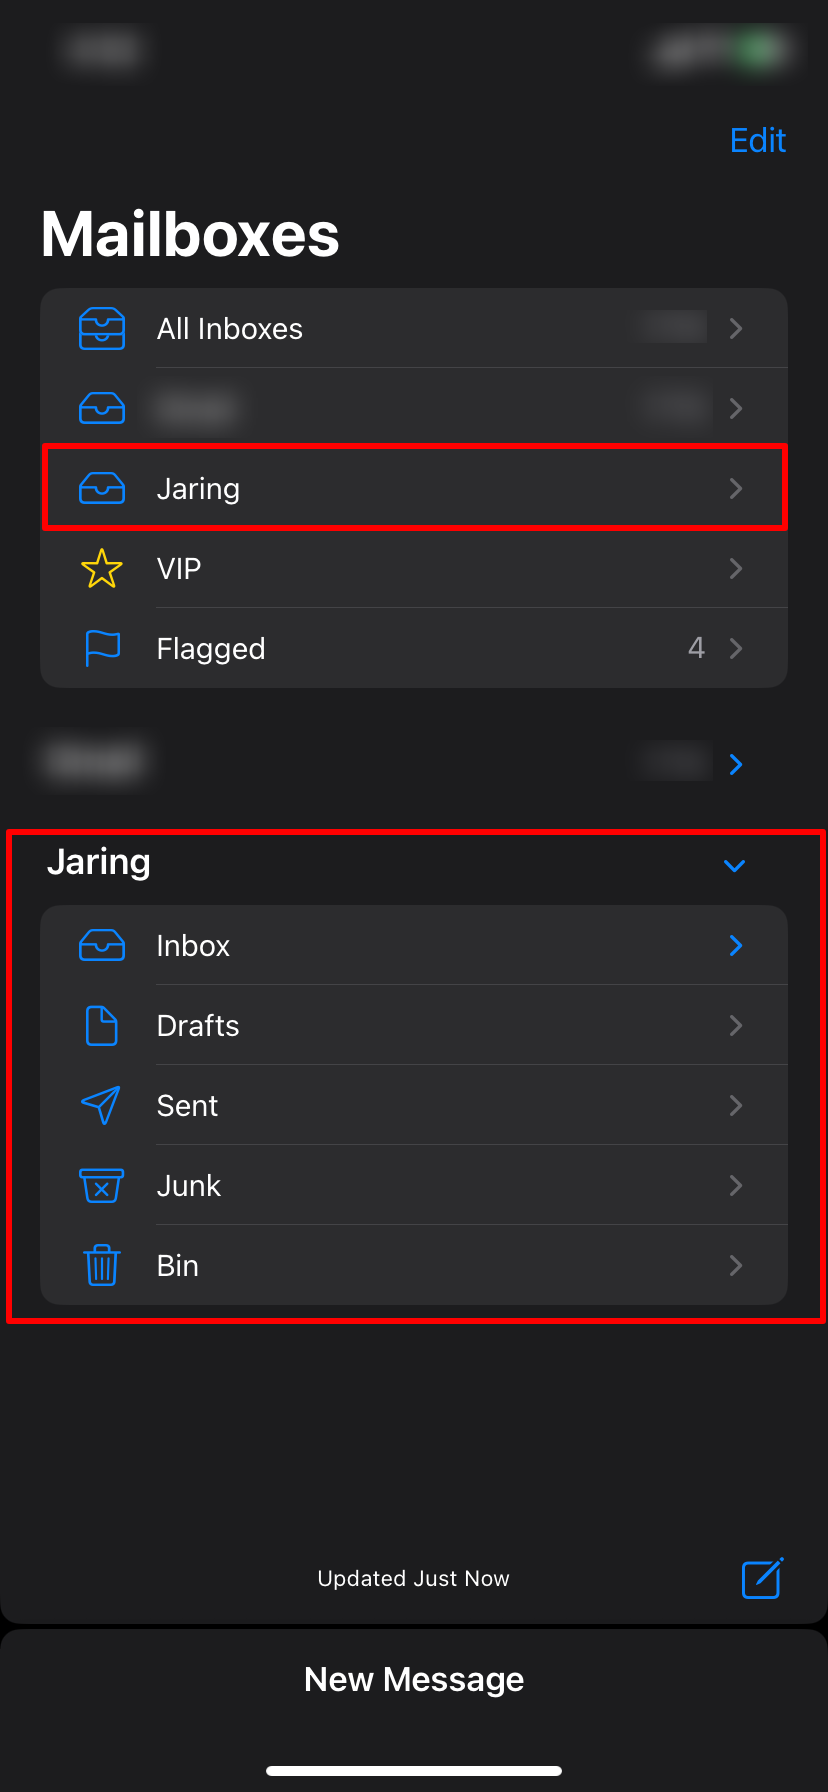
Step 9: Access Your Mailbox
- Open the Mail app and tap on your newly added account (Jaring) from the Mailboxes list. You will see folders such as Inbox, Sent, Drafts, Junk, and Bin ready to use.
Conclusion
You have now successfully configured your Jaring email account on your iPhone. You can send and receive emails directly through the Mail app.
To manage or troubleshoot your settings later, navigate to Settings > Mail > Accounts.
If you encounter any issues, feel free to reach out to our support team for further assistance.