Search Our Database
How to upload and delete files in buckets using JavaScript
Introduction
Using JavaScript to manage files in a storage bucket is an efficient way to programmatically upload and delete files. This guide provides detailed steps for configuring a Node.js environment and using JavaScript to securely manage files in your storage bucket with SSL. This guide demonstrates the setup process using Node.js version 18, covering both Debian-based and Red Hat-based distributions. After setting up Node.js, follow the steps to download, configure, and run sample code for file management tasks.
Prerequisites
- Node.js version 18 installed on your environment.
- Access credentials for your storage bucket, including access key, secret key, endpoint, and region.
- Basic knowledge of command-line interface and text editor usage.
Step-by-Step Guide
Step 1: Install Node.js (Version 18)
For Debian-based Distributions
Update the system and install the necessary components:
sudo apt-get update && sudo apt-get install -y ca-certificates curl gnupg
Add NodeSource’s GPG key and repository:
sudo apt-get update && sudo apt-get install -y ca-certificates curl gnupg
curl -fsSL https://deb.nodesource.com/gpgkey/nodesource-repo.gpg.key | sudo gpg --dearmor -o /etc/apt/keyrings/nodesource.gpg
NODE_MAJOR=18
echo "deb [signed-by=/etc/apt/keyrings/nodesource.gpg] https://deb.nodesource.com/node_$NODE_MAJOR.x nodistro main" | sudo tee /etc/apt/sources.list.d/nodesource.list
sudo apt-get update && sudo apt-get install nodejs -y
For Red Hat-based Distributions
Use the following command:
sudo dnf module install nodejs:18
Step 2: Download Sample Code and Install Dependencies
Download the sample code provided for uploading and deleting files in a bucket:
wget https://www.ipserverone.info/wp-content/uploads/2023/10/javascript.tar.gz
tar -xf javascript.tar.gz
cd javascript
npm install
Step 3: Configure Access Credentials and Endpoint
To manage files, configure the access credentials and endpoint information. Open client.js in a text editor:
vim client.js
Edit the following lines to include your access key, secret key, endpoint, and region information:
accessKeyId: 'ACCESS_KEY',
secretAccessKey: 'SECRET_KEY',
endpoint: 'https://ap-southeast-mys1.oss.ips1cloud.com',
region: 'ap-southeast-mys1'
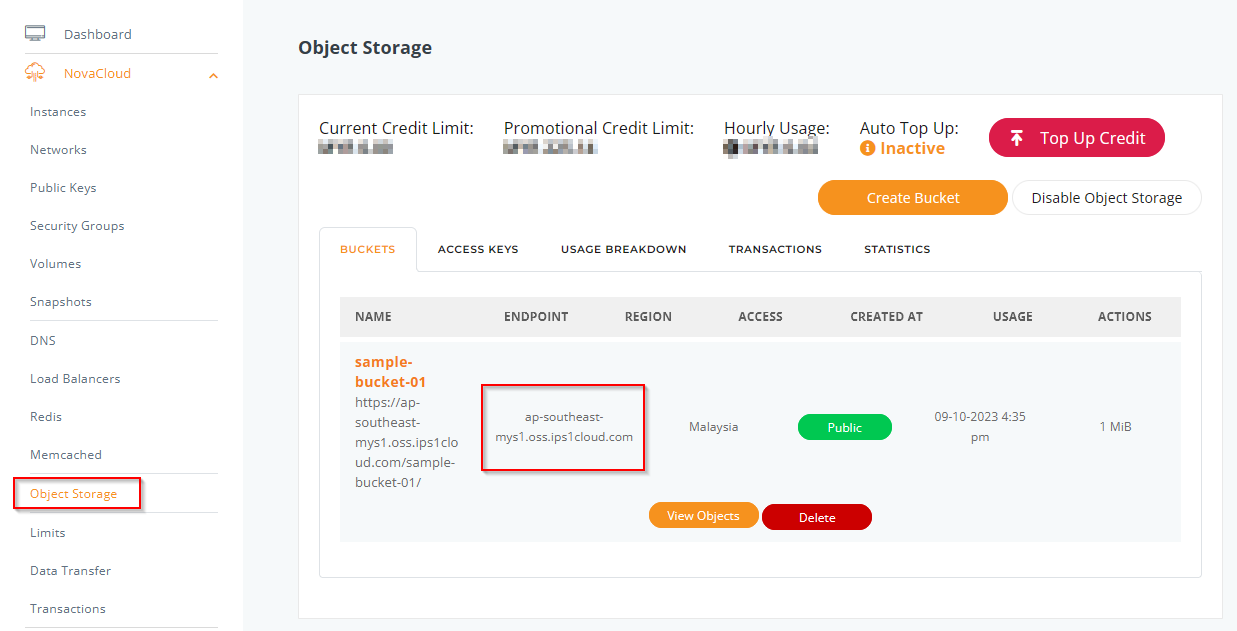
Configure your endpoint and region accordingly:
endpoint: 'https://ap-southeast-mys1.oss.ips1cloud.com',
region: 'ap-southeast-mys1'
Step 4: Set Up package.json
Open package.json to specify the main module to run:
vim package.json
To upload files, set the main field to “uploadFile.js” :
For deleting files, set the main field to “deleteFile.js” :
Uploading Files
Step 1: Prepare Files for Upload
Create a directory for the assets you wish to upload and a sample file:
mkdir assets
echo "Hello world" > assets/sample_upload.txt
Step 2: Configure uploadFile.js
Open uploadFile.js in a text editor:
vim uploadFile.js
Update the following lines to specify the bucket name, file path, and file name in the bucket:
Bucket: 'sample-bucket-01',
Key: 'uploaded_text.txt',
Body: readFileSync('./assets/sample_upload.txt')
Step 3: Run the Upload Script
Ensure that package.json is set to run uploadFile.js and execute the upload command:
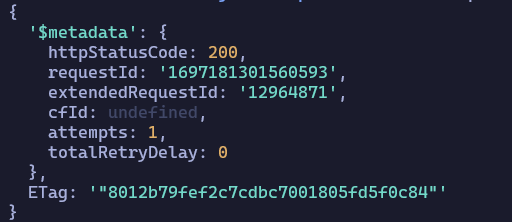
node uploadFile.js
If the upload is successful, you will receive an HTTP 200 status code, indicating that the file has been uploaded to the bucket.
Deleting Files
Step 1: Configure deleteFile.js
Open deleteFile.js in a text editor:
Edit the following lines to specify the bucket name and the file you want to delete:
Bucket: 'sample-bucket-01',
Key: 'uploaded_text.txt'
Step 2: Run the Delete Script
Ensure that package.json is set to run deleteFile.js and execute the delete command:
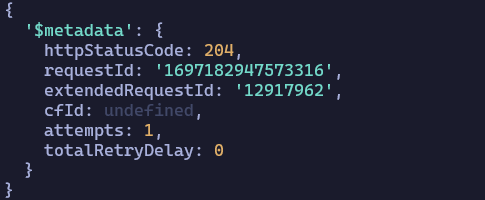
node deleteFile.js
If the deletion is successful, you will receive an HTTP 204 status code, confirming that the file has been removed from the bucket.
Conclusion
This guide has shown you how to programmatically upload and delete files in a bucket using JavaScript. For a guide on how to programmatically upload and delete files from buckets using PHP, refer to the following guide. Setting up the configuration correctly allows for secure and efficient management of bucket data.
Should you have any inquiries about the guidelines, please feel free to open a ticket through your portal account or contact us at support@ipserverone.com. We’ll be happy to assist you further.
Article posted on 15 October 2023 by Louis