Search Our Database
How to seamlessly migrate virtual machines between Proxmox hosts
Introduction
Migrating a Virtual Machine (VM) to a different Proxmox host is a common task for server administrators, allowing for load balancing, hardware upgrades, or disaster recovery. This guide will walk you through the various methods of migrating VMs, explaining when to use each and what preparations are necessary to ensure a smooth transition with minimal downtime. There are generally two main methods for migrating VMs in Proxmox.
Prerequisite
- Access to the Proxmox VE web interface on all involved hosts.
- Administrative privileges on the Proxmox cluster (if applicable).
- Basic understanding of networking concepts (IP addresses, subnets).
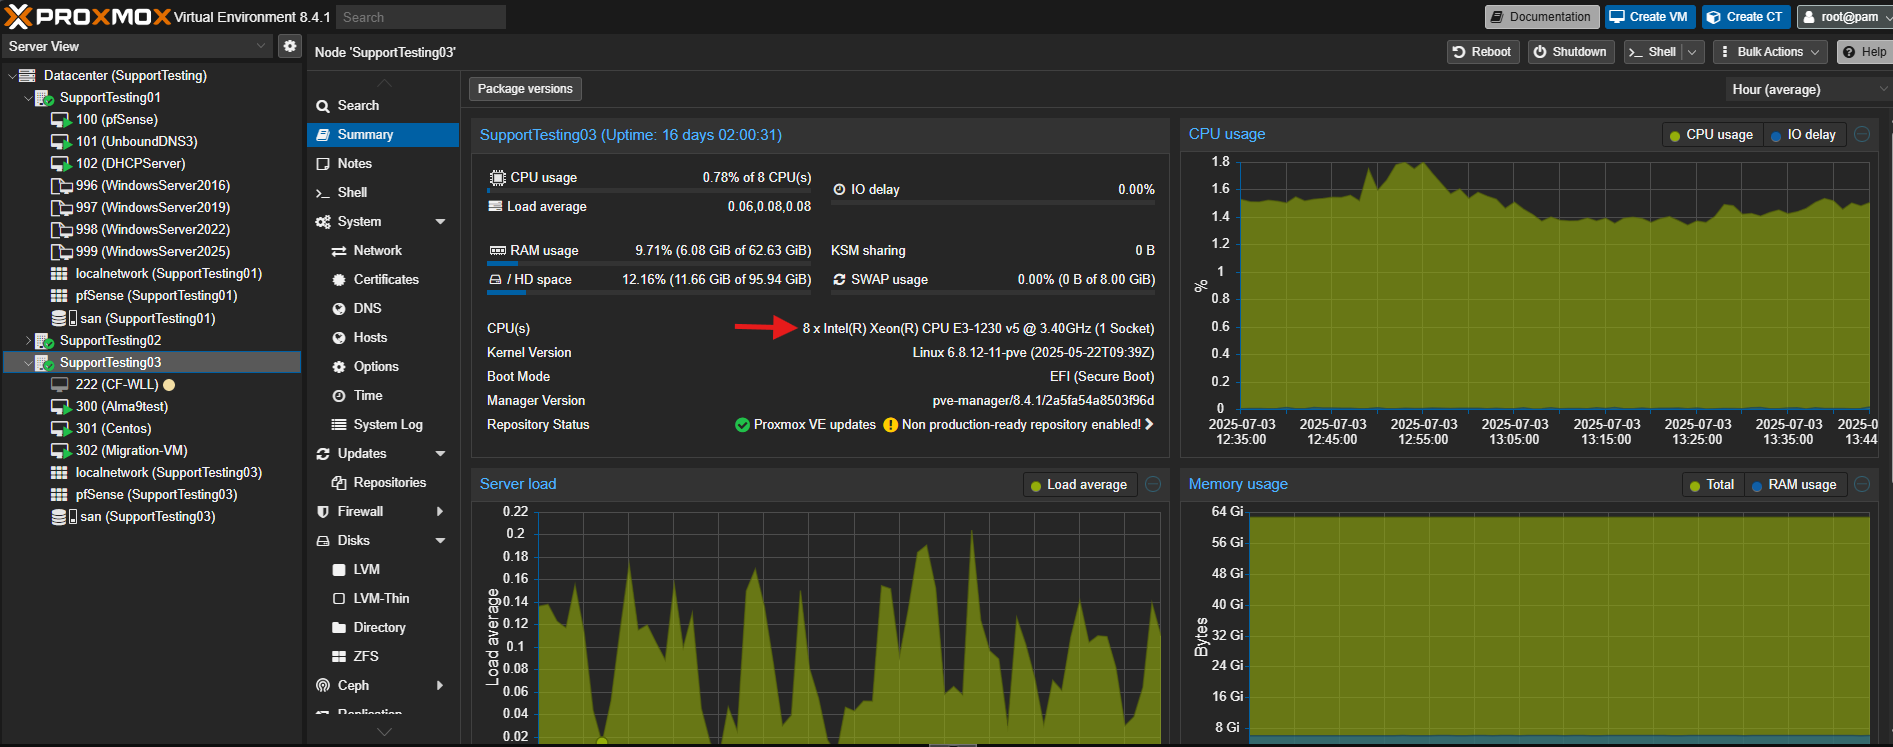
- Sufficient CPU, memory, and storage resources on the destination Proxmox host.
- Reliable network connectivity between the source and destination Proxmox hosts.
Step-by-step Guide
There are generally three main methods for migrating VMs in Proxmox:
Method 1: Live Migration within a Proxmox Cluster (Minimal Downtime)
This method is ideal for critical VMs where minimizing downtime is paramount. It allows you to move a running VM from one host to another without interrupting its operation.
Requirements for Live Migration:
- Both source and destination Proxmox hosts must be part of the same Proxmox VE cluster.
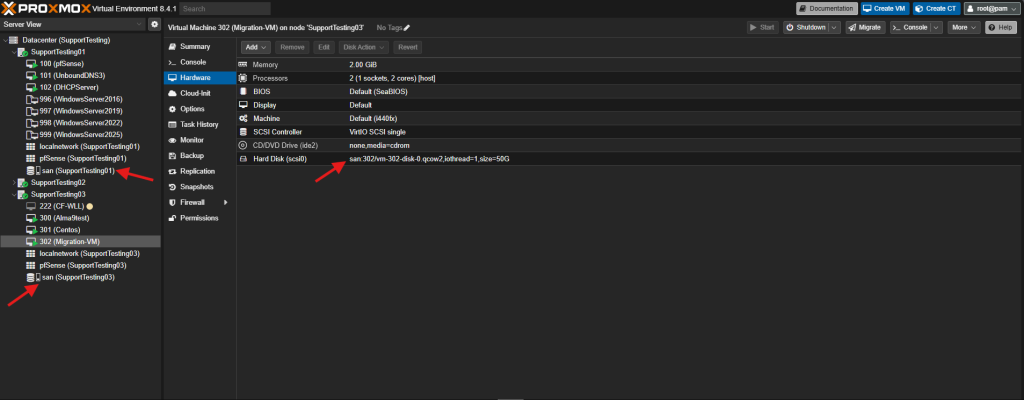
- Shared storage accessible by all cluster hosts (e.g., NFS, iSCSI, Ceph RBD). If using local storage, the disks will also be migrated, which will take longer.
- Compatible CPU architectures between the hosts, ideally having same CPU on both source host and destination host.
Source Host

Destination Host

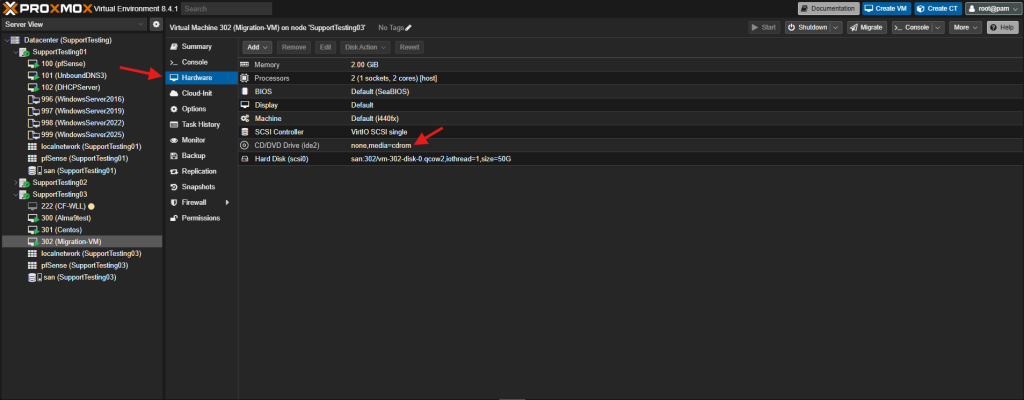
- No locally attached PCI or USB devices configured for the VM. These need to be detached before migration. CD/DVD drives should be detached from the VM.
- Sufficient resources on the destination host. Make sure the destination host wouldn’t overload after the Virtual Machine is migrated in.


Steps:
- Log in to the Proxmox VE web interface.
- Navigate to the Datacenter view.
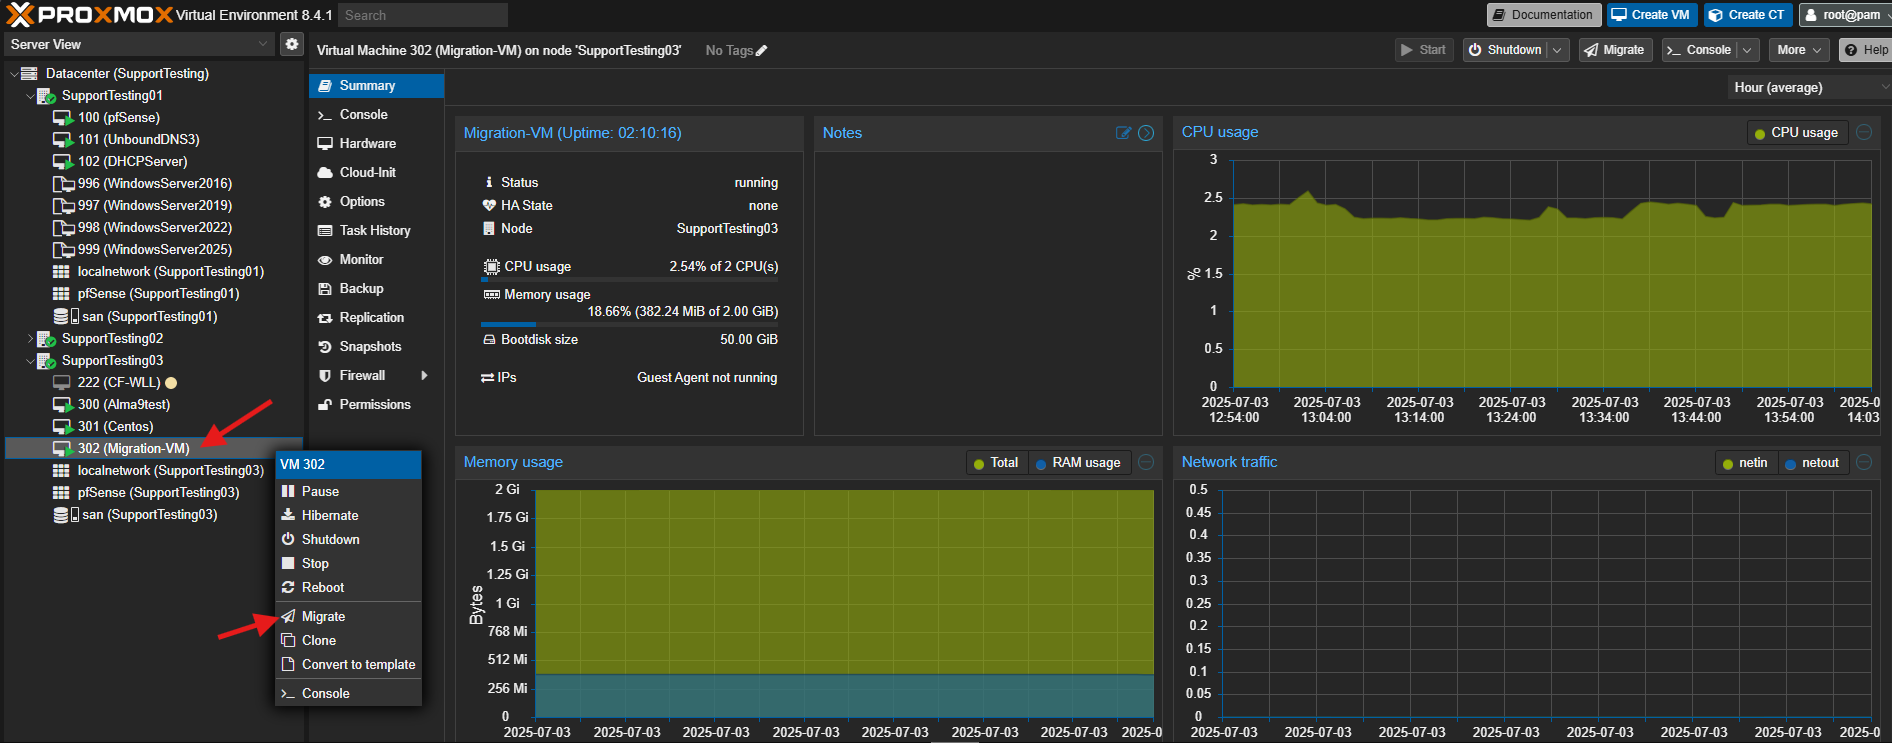
- Expand the host where the VM you want to migrate is currently running.
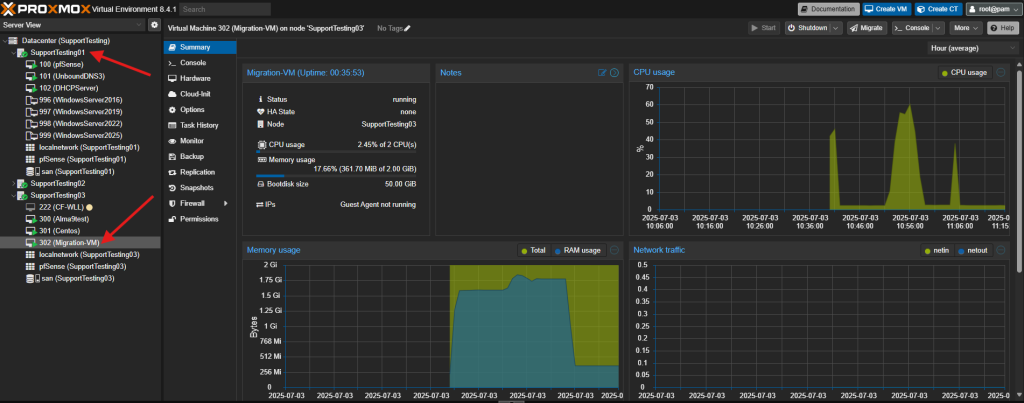
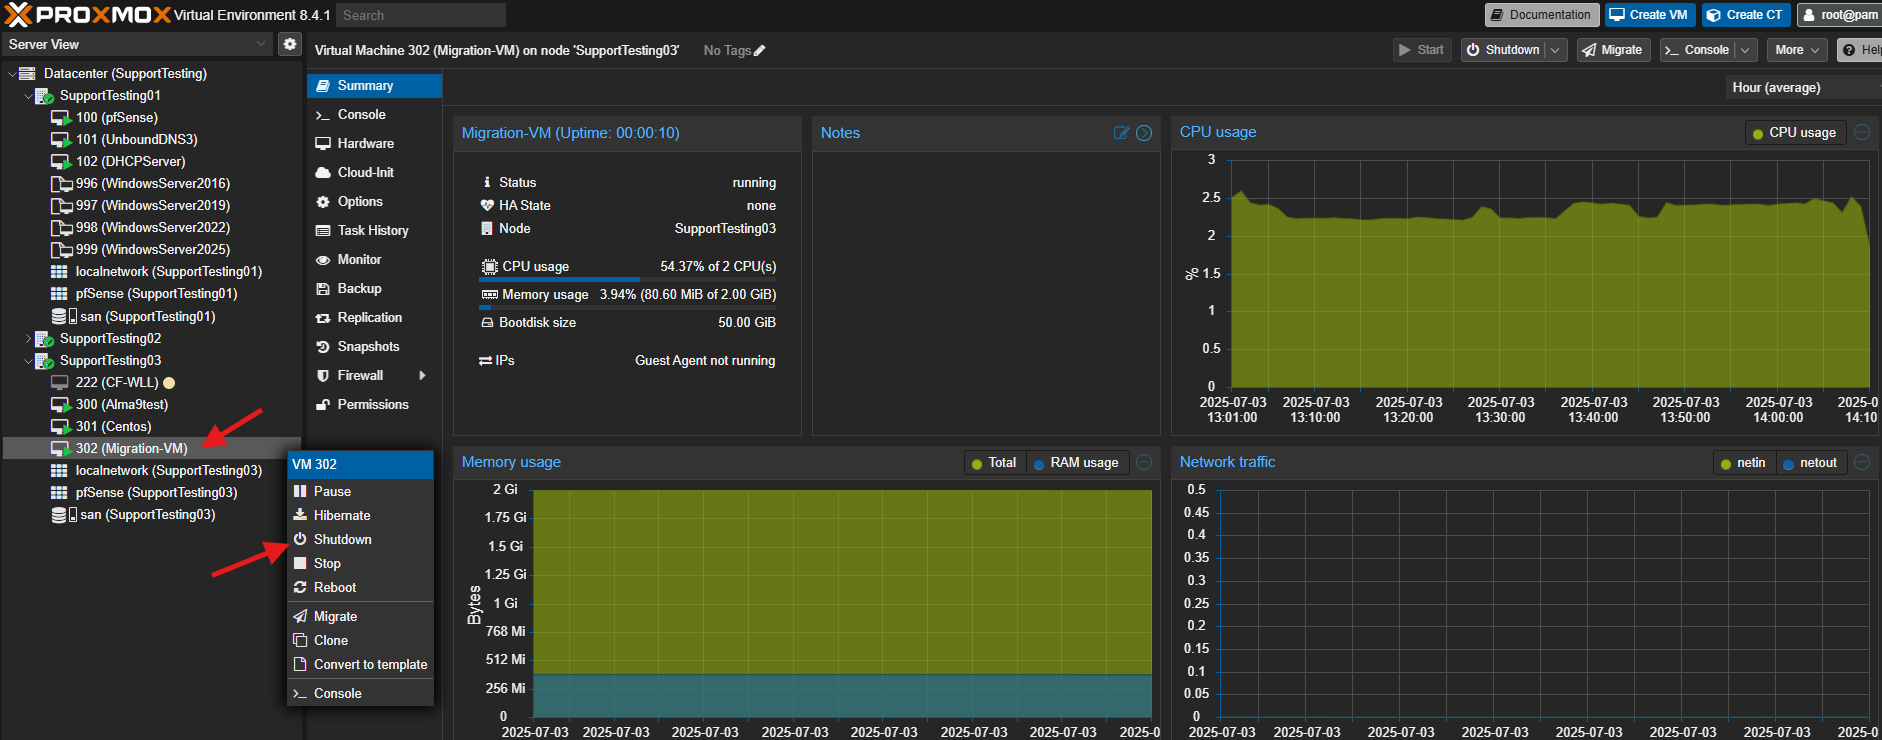
- Right-click on the Virtual Machine (VM) you wish to migrate and select Migrate.
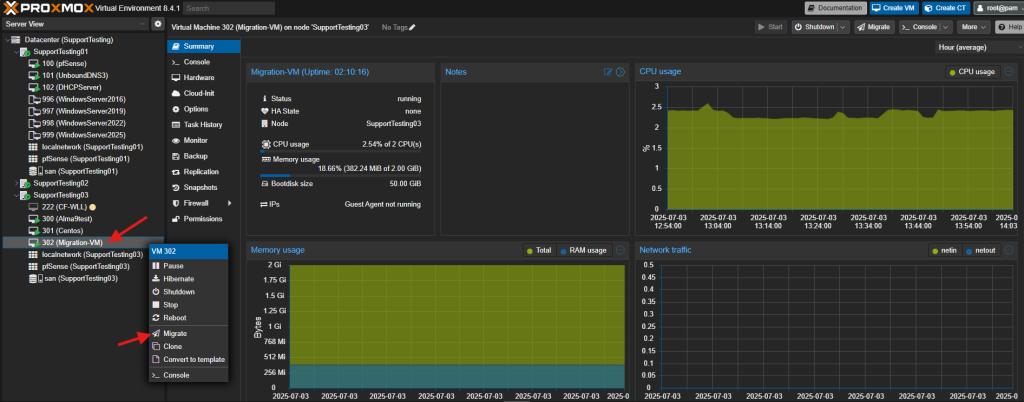
- Verify the migration dialog box and click Migrate.
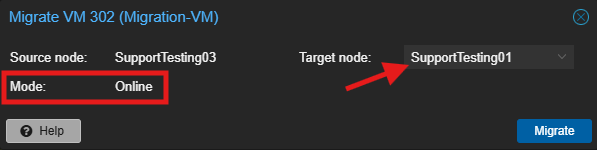
- Destination Host: Select the destination Proxmox host from the dropdown list.
- Migration Type: Ensure “Online” is selected (default for running VMs in a cluster with shared storage).
- Monitor the progress in the task viewer window. Once completed, it will display “TASK OK”.
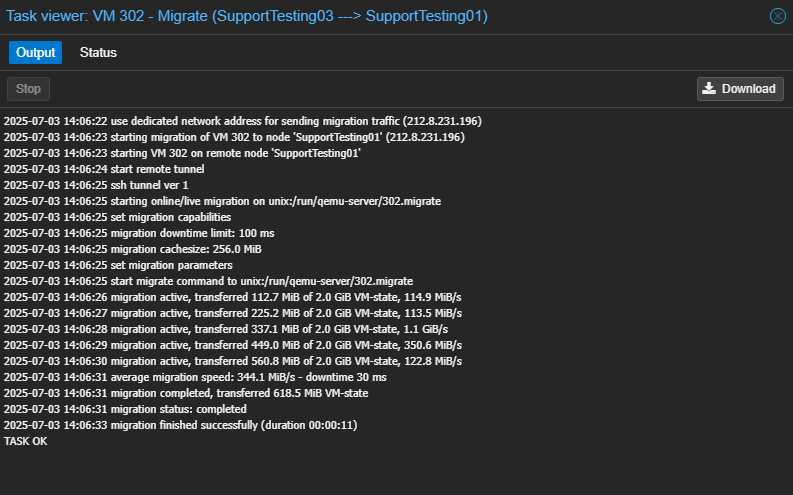
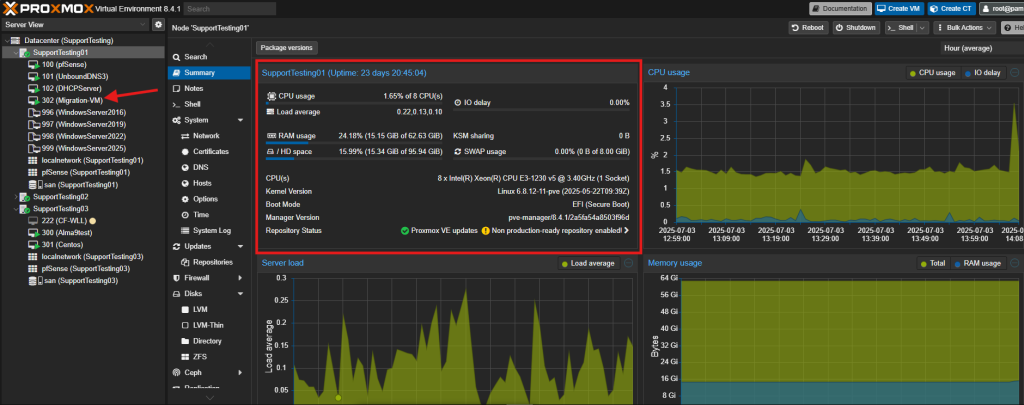
- Verify the VM is running on the new host by checking its status and resource usage.

Method 2: Offline Migration within a Proxmox Cluster (Planned Downtime)
This method involves shutting down the VM before migration and is suitable for less critical VMs or when live migration prerequisites are not met. It’s also used for moving VMs with local storage, as the disk data will be copied.
Requirements:
- Both source and destination Proxmox hosts must be part of the same Proxmox VE cluster.
- Shared storage accessible by all cluster hosts (e.g., NFS, iSCSI, Ceph RBD). If using local storage, the disks will also be migrated, which will take longer.
- No locally attached PCI or USB devices configured for the VM. These need to be detached before migration. CD/DVD drives should be detached from the VM.
- Sufficient resources on the destination host. Make sure the destination host wouldn’t overload after the Virtual Machine is migrated in.
Steps:
- Log in to the Proxmox VE web interface.
- Navigate to the Datacenter view.
- Expand the host where the VM you want to migrate is currently running.
- Select the Virtual Machine (VM).
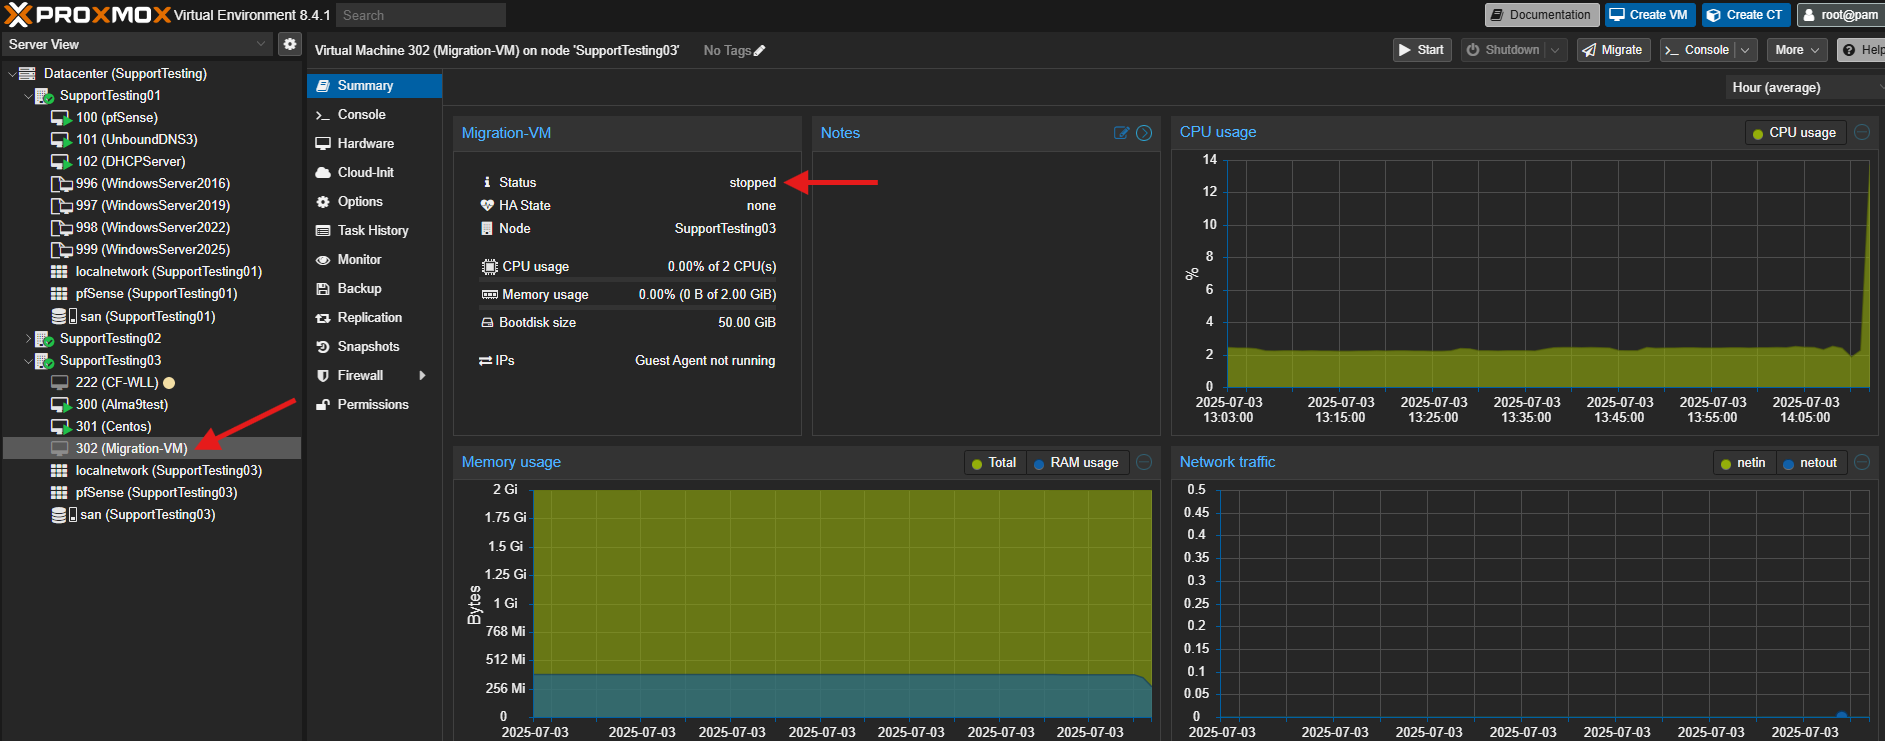
- Enter the server and shutdown or click on Shutdown to gracefully power off the VM in Proxmox.
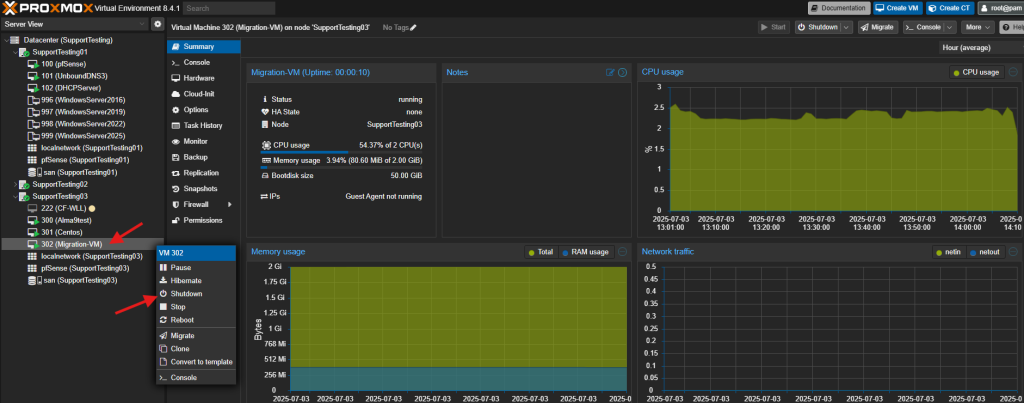
- Wait for the VM status to show “stopped” or the “green triangle” is gone.

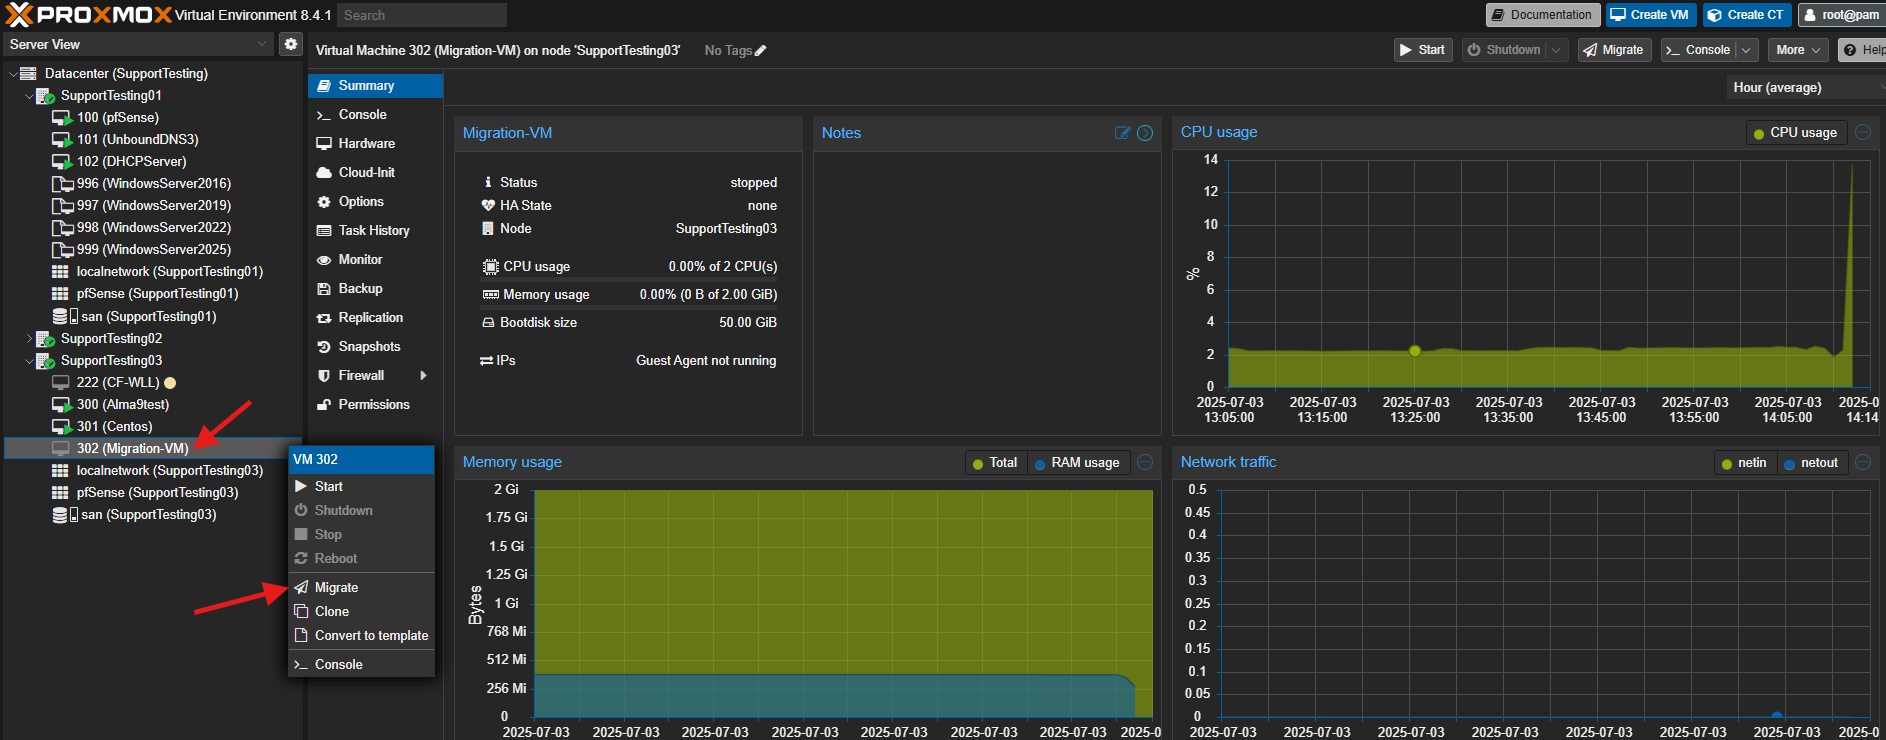
- Right-click on the stopped VM and select Migrate.
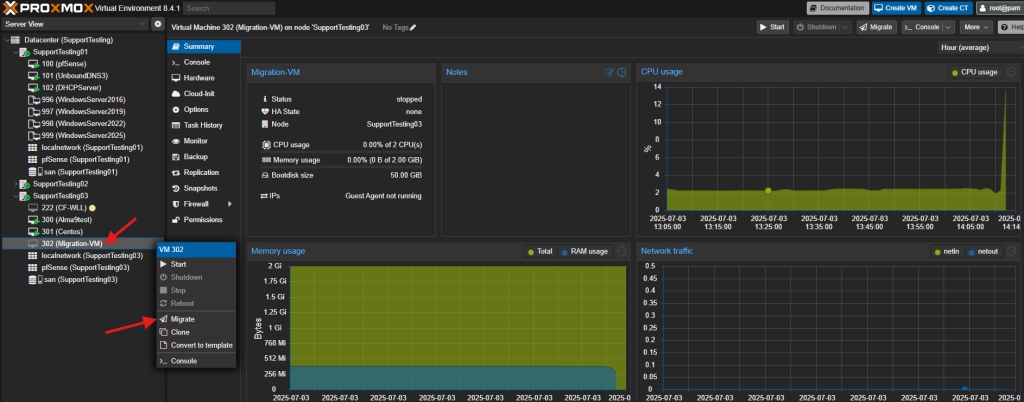
- Verify the migration dialog box and click Migrate.
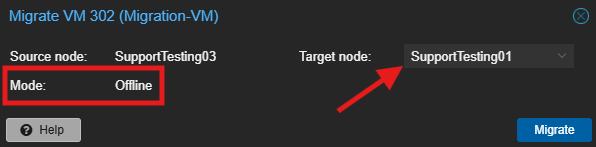
- Destination Host: Select the destination Proxmox host.
- Migration Type: It will typically default to “Offline” or perform an offline migration if live migration is not possible.
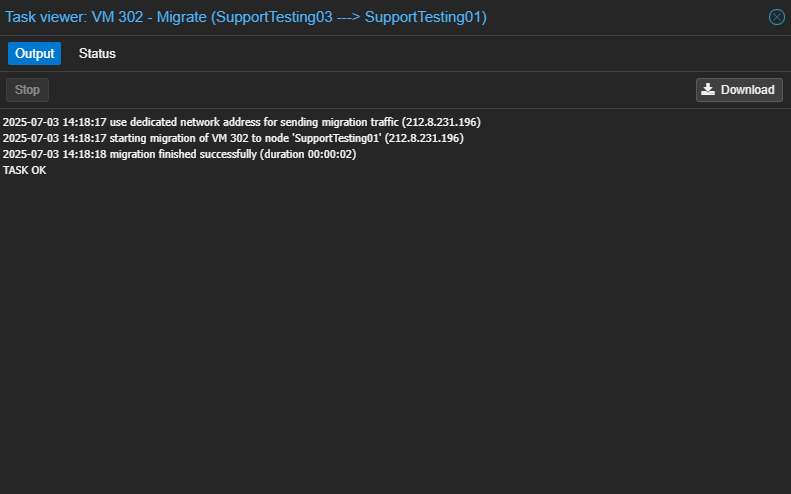
- Monitor the progress in the task viewer window. Once completed, it will display “TASK OK”.
- Start the VM on the new destination host.
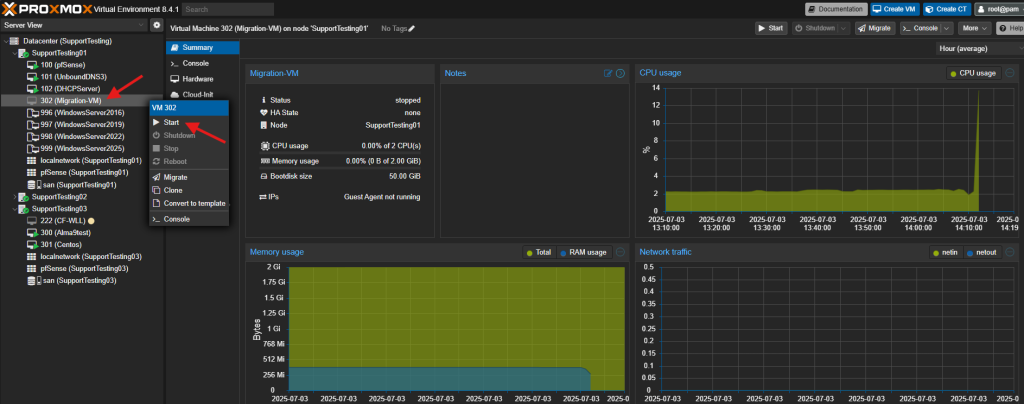
- Verify the VM’s functionality and network connectivity.

Potential Issue:
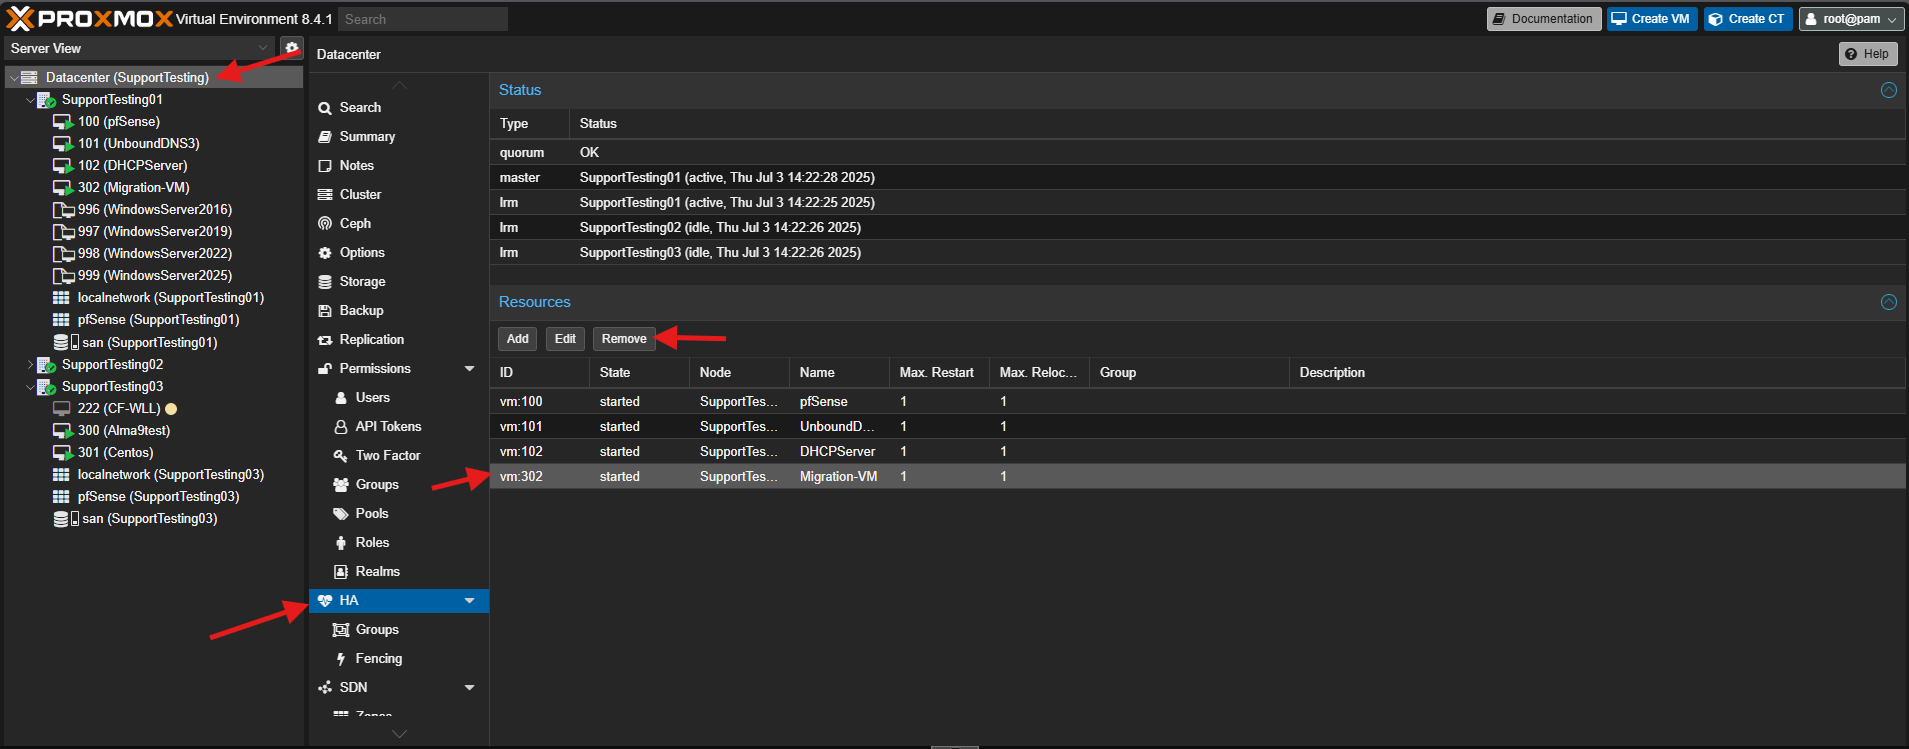
If you are unable to migrate, it could be the High Availability (HA) settings in Proxmox.
- Navigate to Datacenter.
- Navigate to HA.
- Remove the Virtual Machine from the Resource list. Then add back after the Virtual Machine is migrated.
Conclusion
By following this guidance, you can effectively migrate your Virtual Machines to different hosts within your Proxmox environment, whether for load balancing, hardware maintenance, or disaster recovery, ensuring continued operation of your services.
For additional assistance or if you encounter any issues, please contact our support team at support@ipserverone.com.