Search Our Database
How to restore backup using Veeam in Windows Server
Introduction
The process of restoring files and folders with Veeam Backup & Replication is a pivotal component in data management and disaster recovery strategies. This methodology is instrumental in ensuring the effective recovery of crucial data stored on Windows systems, safeguarding against scenarios such as data loss, system failure, or data corruption. Mastery of Veeam Backup & Replication for file-level restore is vital for preserving data integrity and sustaining business operations. This guide delineates a detailed walkthrough for restoring files and folders from a backup, specifically designed for Windows environments employing Veeam solutions.
Prerequisite
- Veeam Backup & Replication software installed.
- Access to a backup file eligible for restoration.
Steps for Restoring Files and Folders
- Launch the File Level Restore Wizard
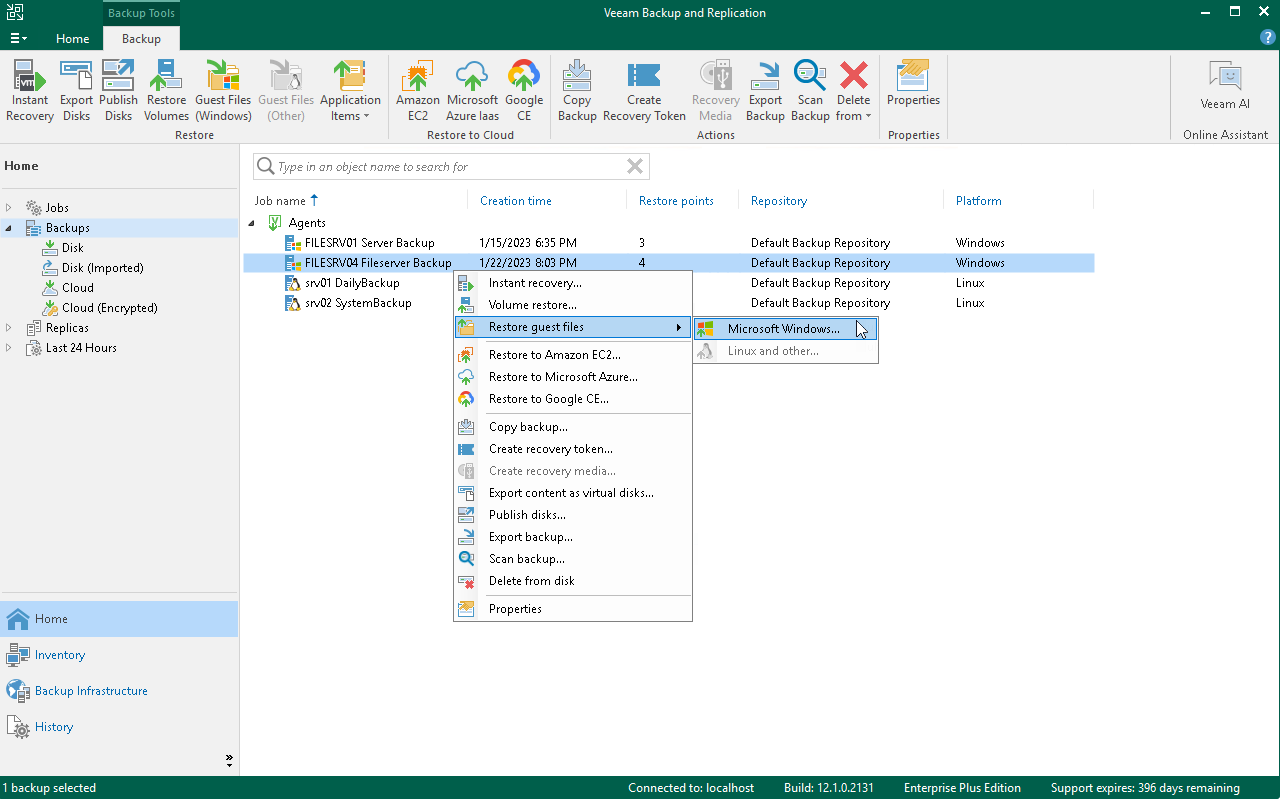
- Option 1: Navigate to the Home tab, select Restore > Agent > Guest files restore > Microsoft Windows. This path allows you to choose a Veeam Agent computer for file and folder restoration at the Machine step of the wizard.
- Option 2: Access the Home view, click on the Backups node in the inventory pane. In the working area, expand the desired Veeam Agent backup, select the targeted computer, and click Guest Files (Windows) on the ribbon. Alternatively, right-click the computer and choose Restore guest files > Microsoft Windows. This method directs you straight to the Restore Point step of the wizard.
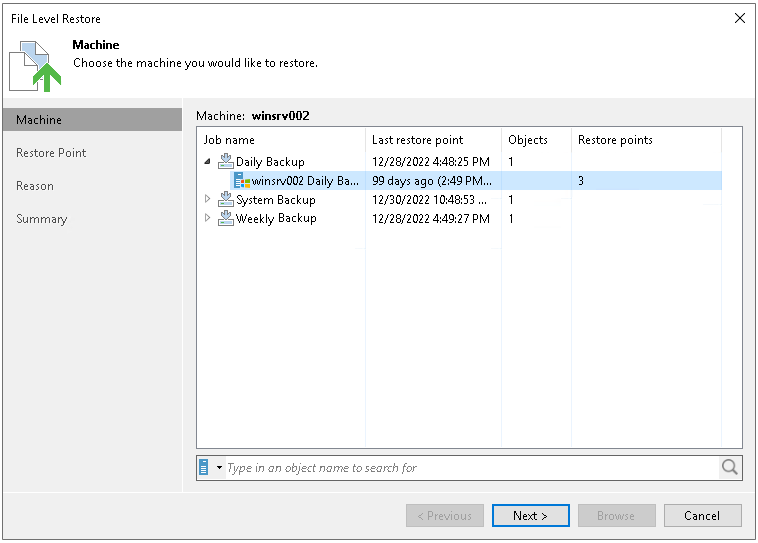
- Select Machine
- In the Machine step, choose the backup source for data recovery.
- Utilize the search field at the bottom to locate a specific backup quickly. Enter the name or a part of the Veeam Agent computer’s name, then click Start search or press [Enter].
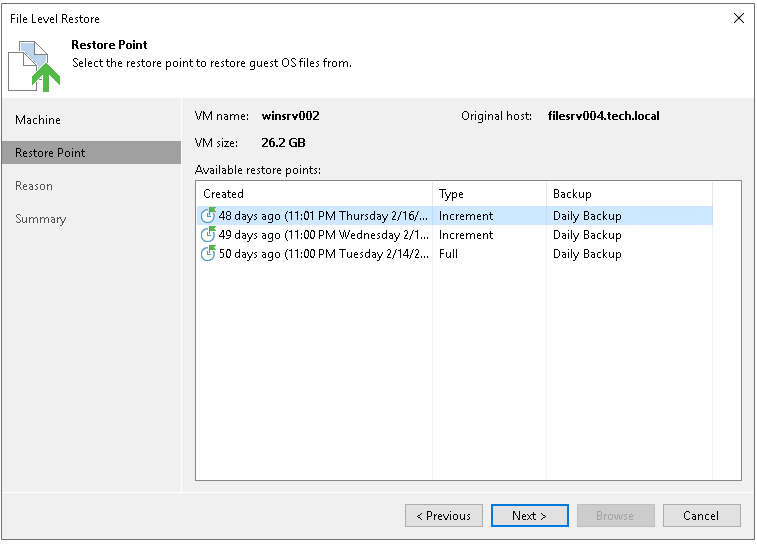
- Select Restore Point
- At the Restore Point step, pick a restore point for data recovery.
- The system defaults to the most recent restore point, but you have the flexibility to select any valid restore point of your choice.
- Specify Restore Reason
- In the Reason step, detail the rationale behind the data restoration.
- Tip: To bypass this step in future processes, tick the Do not show me this page again checkbox.
- Verify Restore Settings
- In the Summary step, review the restore task details and click Browse to exit the wizard and launch the Veeam Backup browser.

- In the Summary step, review the restore task details and click Browse to exit the wizard and launch the Veeam Backup browser.
- Finalize Restore
- Upon closing the wizard, the Veeam Backup & Replication will open the Veeam Backup browser, displaying the file system tree of the restored Veeam Agent computer.
Conclusion
The outlined steps demystify the process of file and folder restoration using Veeam Backup & Replication, ensuring a seamless and effective recovery experience. This guide empowers users to confidently navigate through the restoration process, fostering an environment where data security and accessibility are paramount. By following these detailed instructions, users can rest assured that their critical data is reliably safeguarded and can be swiftly restored in the event of unexpected data loss or system failures, thereby contributing significantly to maintaining continuous business operations and data integrity.
Should you have any inquiries of the guidelines, please feel free to open a ticket through your portal account or contact us at +603 – 2026 1688. We’ll be happy to assist you further