Search Our Database
How to restore a restore point using Veeam Agent in Linux
Introduction
Veeam is a robust data protection and disaster recovery solution that enables users to create and manage backups, also known as restore points, for their servers. These restore points act as snapshots of the system at a particular time and can be used to recover data in the event of accidental deletion, system corruption, or other forms of data loss. Veeam provides a command-line interface on Linux servers, allowing system administrators to interact directly with restore points, mount them for file recovery, and unmount them once restoration is complete.
This guide is intended for system administrators and DevOps professionals responsible for server maintenance and data integrity. The process described here applies specifically to Linux servers that have Veeam installed and configured. The ability to mount a restore point enables users to access historical snapshots of the file system without altering the current system state. This temporary mount is created under the /mnt/backup/ directory, allowing selective file recovery before the restore point is safely unmounted.
Prerequisites
-
A Linux server with Veeam Backup & Replication installed
-
SSH access to the server
-
Public IP address or hostname of the server
-
A user account with sudo privileges
-
Veeam must have at least one existing restore point
-
Basic familiarity with Linux command-line operations
-
Veeam CLI installed and accessible via terminal
Step-by-Step Guide
Step 1: Log in to your server via SSH
- Passwordless login:
ssh USERNAME@SERVER_IP_ADDRESS -pPORT_NUMBER -i PATH_TO_YOUR_PEM_FILE
- Password login:
ssh USERNAME@SERVER_IP_ADDRESS -pPORT_NUMBER
It will prompt you to enter your password.
Step 2: Launch the Veeam CLI
Once logged in, run the following command to open the Veeam interface:
veeam
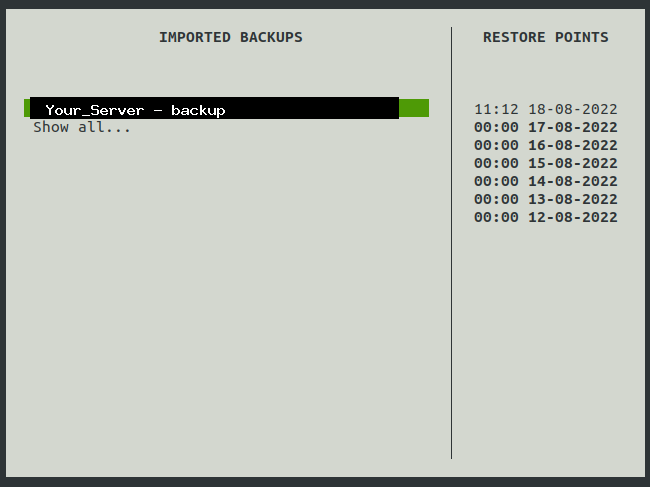
You will see the interface as below.

Step 3: Access the list of restore points
Press Shift + R to enter the restore point selection screen. A list of available restore points will appear on the right-hand panel.
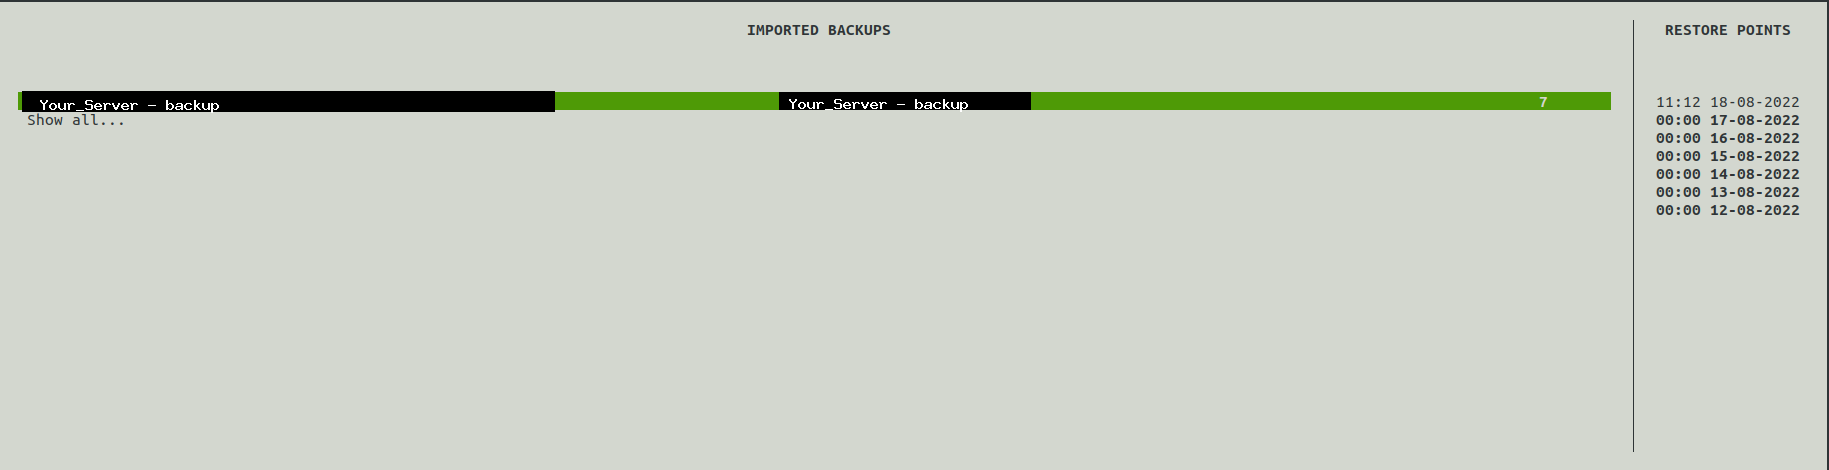
Step 4: Navigate through restore points
Use the Up and Down arrow keys to browse the available restore points. Press Enter to select the desired restore point.
Step 5: Mount the selected restore point
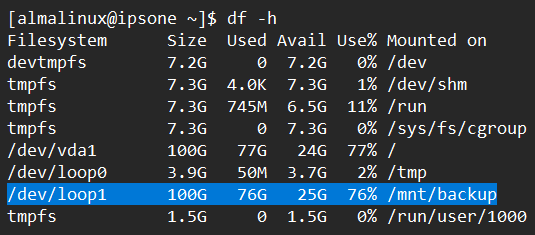
After selecting a restore point, press Enter again. A confirmation message will appear, and the restore point will be mounted at:
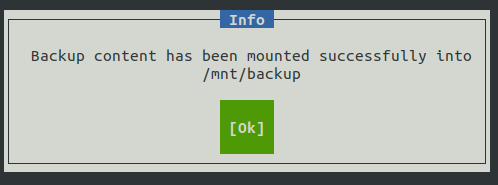
Files from the selected snapshot will now be accessible in this directory. Browse and copy any necessary files from the mounted restore point.
Step 6: Exit the mounted directory
Before unmounting, ensure the working directory is no longer inside /mnt/backup/. To verify and change the directory if necessary, run:
cd ~
Then enter the Veeam interface again by typing:
veeam
Step 7: Unmount the restore point
Press Shift + U to unmount the restore point. A pop-up will confirm the successful unmounting.
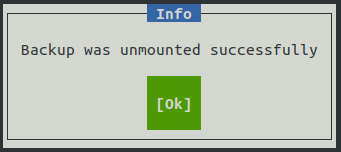
After this step, the /mnt/backup/ directory will no longer contain the restore point data. Attempting to access it will result in an empty or non-existent directory.
Conclusion
Restoring backup points using the Veeam application is a straightforward and efficient process, allowing you to recover lost or deleted files with minimal impact on your server’s current state. By following this guide, you can easily mount a restore point, extract the necessary files, and unmount the backup securely.