Search Our Database
Backup and Restore database on Microsoft SQL Server
Introduction
In the realm of database management, ensuring the integrity and availability of data is paramount. Microsoft SQL Server, a widely used relational database management system, offers robust tools for backing up and restoring databases. These functions are critical for data protection, disaster recovery, and maintaining business continuity. Regular backups are essential to safeguard against data loss due to system failures, data corruption, or other unforeseen events. Similarly, the ability to restore from these backups is crucial in minimizing downtime and data loss during such incidents. This knowledge base document provides step-by-step instructions on how to perform backup and restoration of databases using SQL Server Management Studio (SSMS), a common tool for managing SQL Server environments.
Objective
To create a backup of a specific database within Microsoft SQL Server using SQL Server Management Studio (SSMS).
Requirements
- Access to Microsoft SQL Server instance.
- SQL Server Management Studio (SSMS) installed.
Steps for Backup Database
- Launch SQL Server Management Studio (SSMS): Open SSMS and connect to your SQL Server instance using the appropriate credentials.
- Locate the Database:
- In the Object Explorer, expand the server tree.
- Find and expand the ‘Databases’ folder.
- Locate the database you wish to backup.
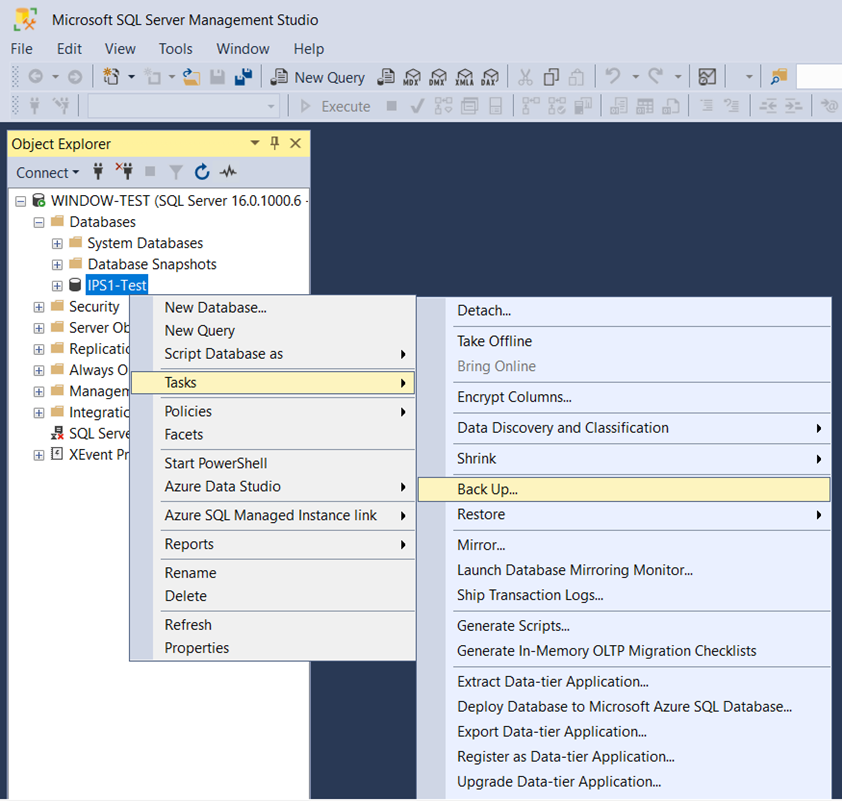
- Initiate Backup Process:
- Right-click on the target database.
- Navigate to ‘Tasks’ > ‘Backup’.
- Configure Backup Settings:
- In the Backup dialog, under the ‘Destination’ section, check the backup path.
- To change the path, remove the existing one and add a new path by browsing to the desired location.
- Execute Backup:
- Click ‘OK’ to start the backup process.
- Wait for the process to complete successfully.
Steps for Restore Database
- Launch SQL Server Management Studio (SSMS): Open SSMS and connect to your SQL Server instance.
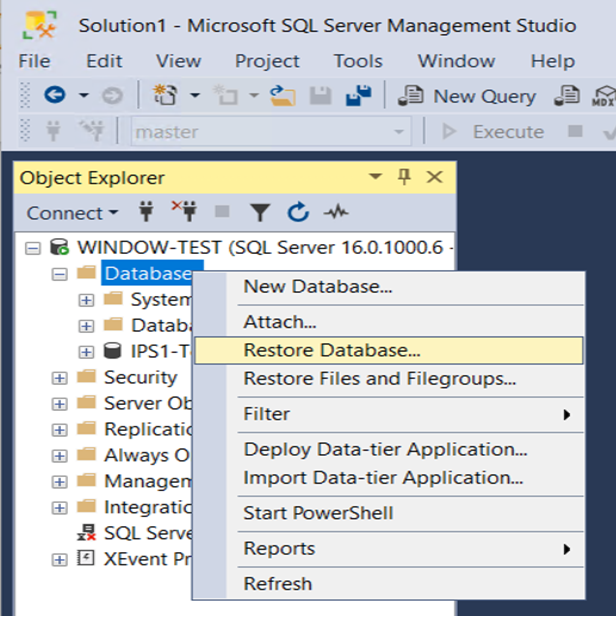
- Initiate Restore Process:
- Right-click on the ‘Databases’ folder in the Object Explorer.
- Select ‘Restore Database’.
- Select Backup File:
- In the Restore Database dialog, choose ‘Device’.
- Click on the ellipsis button (…) to open the ‘Select backup devices’ dialog.
- Click on ‘Add’ to browse and select the backup file from its location.
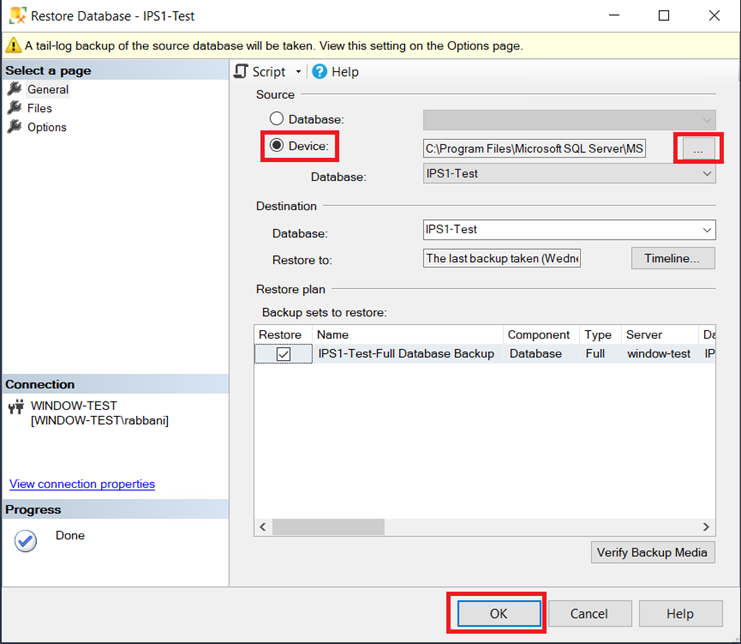
- Complete Restoration:
- After selecting the backup file, click ‘OK’ to close the dialog.
- Back in the Restore Database dialog, review the settings.
- Click ‘OK’ to start the restoration process.
Conclusion
By following these steps, you can successfully backup and restore databases in Microsoft SQL Server using SQL Server Management Studio. It is crucial to ensure that backups are performed regularly and tested periodically to guarantee data integrity and availability.