Search Our Database
How to Use Google Public DNS on PC
Google Public DNS is the preferred DNS and is known for being fast, accurate and no restriction.
Step 1 – Navigate to Control Panel >> Network and Internet >> Network and Sharing Center >> Change Adapter Settings.
Step 2 – Select the connection that you want to configure Google Public DNS.
For example:
– To change the settings for an Ethernet connection, right-click Local Area Connection, and click Properties.
– To change the settings for a wireless connection, right-click Wireless Network Connection, and click Properties.
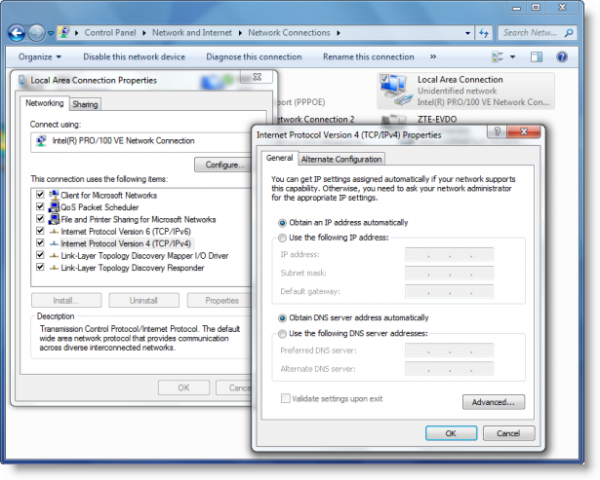 Step 3 – Click on the Networking tab. Click on Internet Protocol Version 4 (TCP/IPv4) and then Properties.
Step 4 – Click on Advanced and then DNS tab.
If there is an existing IP address listed here, do write them down for future reference.
For Google Public DNS, select Use the following DNS server addresses:
Preferred DNS Server: 8.8.8.8
Alternate DNS Server: 8.8.4.4
Step 5 – Click OK and restart your network connection for changes to be applied.
You are now using Google Public DNS.
Malaysia’s Top Web Hosting Company
Visit http://www.ipserverone.com/.
Contact us @ +603-6259-5625 or email @ sales@ipserverone.com