Search Our Database
How to use address importer in cPanel
Introduction
The Address Importer feature in cPanel allows you to bulk create email accounts or forwarders by uploading a spreadsheet file in CSV or Excel format. This is especially useful when managing multiple email addresses under a domain, saving time and effort compared to manual creation.
Prerequisites
Before using the Address Importer, please ensure the following:
-
You have access to your cPanel account.
-
You have a CSV or Excel file ready with the correct format:
-
For Email Accounts: each row should contain username and password.
-
For Forwarders: each row should contain source address and destination.
-
Example formats:
Email Accounts (CSV):
info@example.com,support@example.net
sales@example.com,nafim@gmail.com
Forwarders (CSV):
info@example.com,support@example.net
sales@example.com,user@gmail.com
Steps to Use Address Importer in cPanel
Step 1: Log in to cPanel
-
Go to your domain’s cPanel URL (e.g., https://yourdomain.com:2083/)
-
Enter your cPanel username and password.
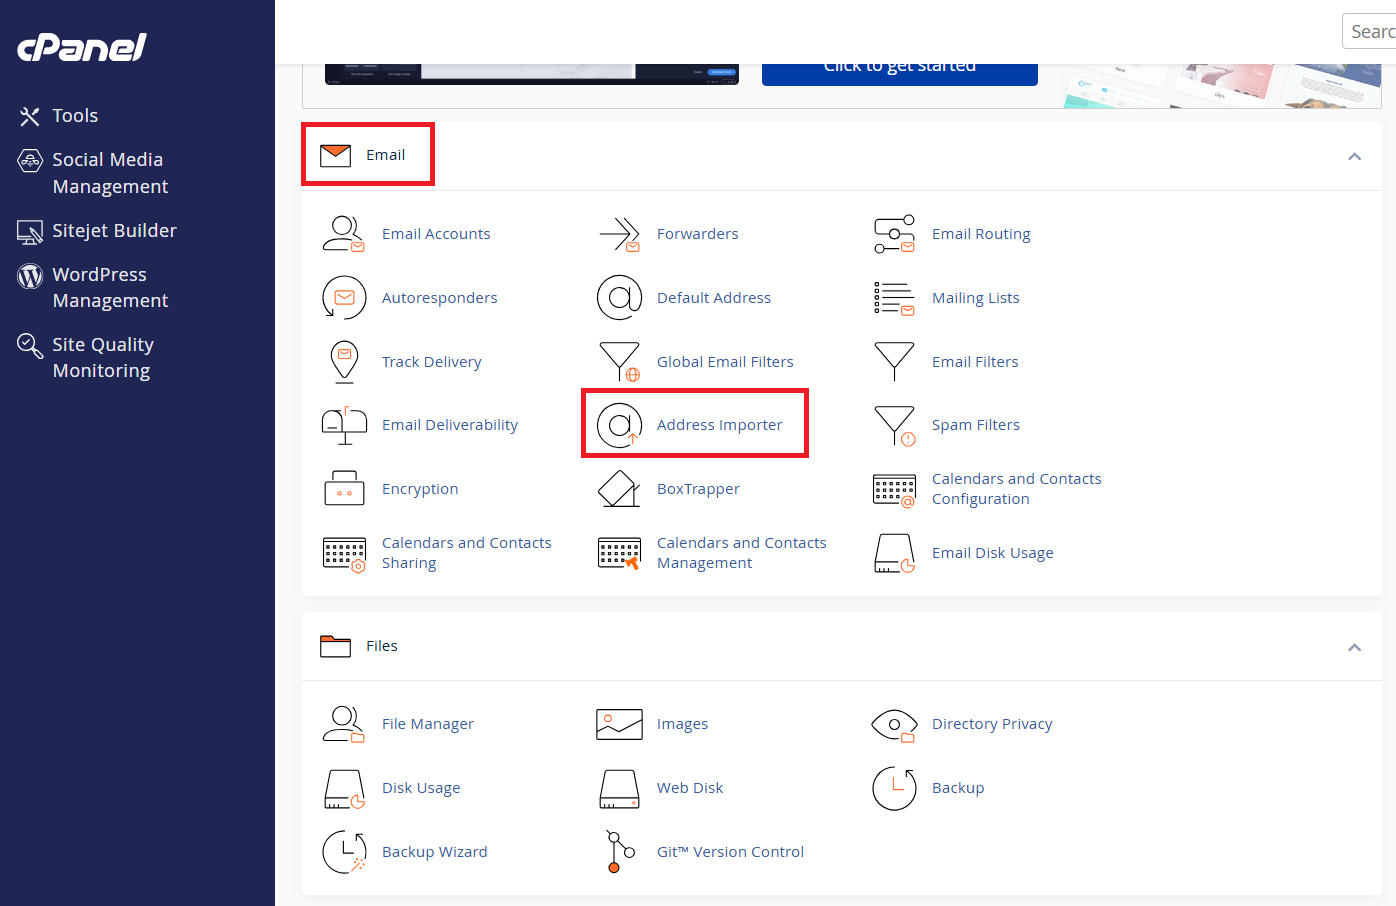
Step 2: Open the Address Importer Tool
Once logged in, scroll to the “Email” section and click on “Address Importer”.
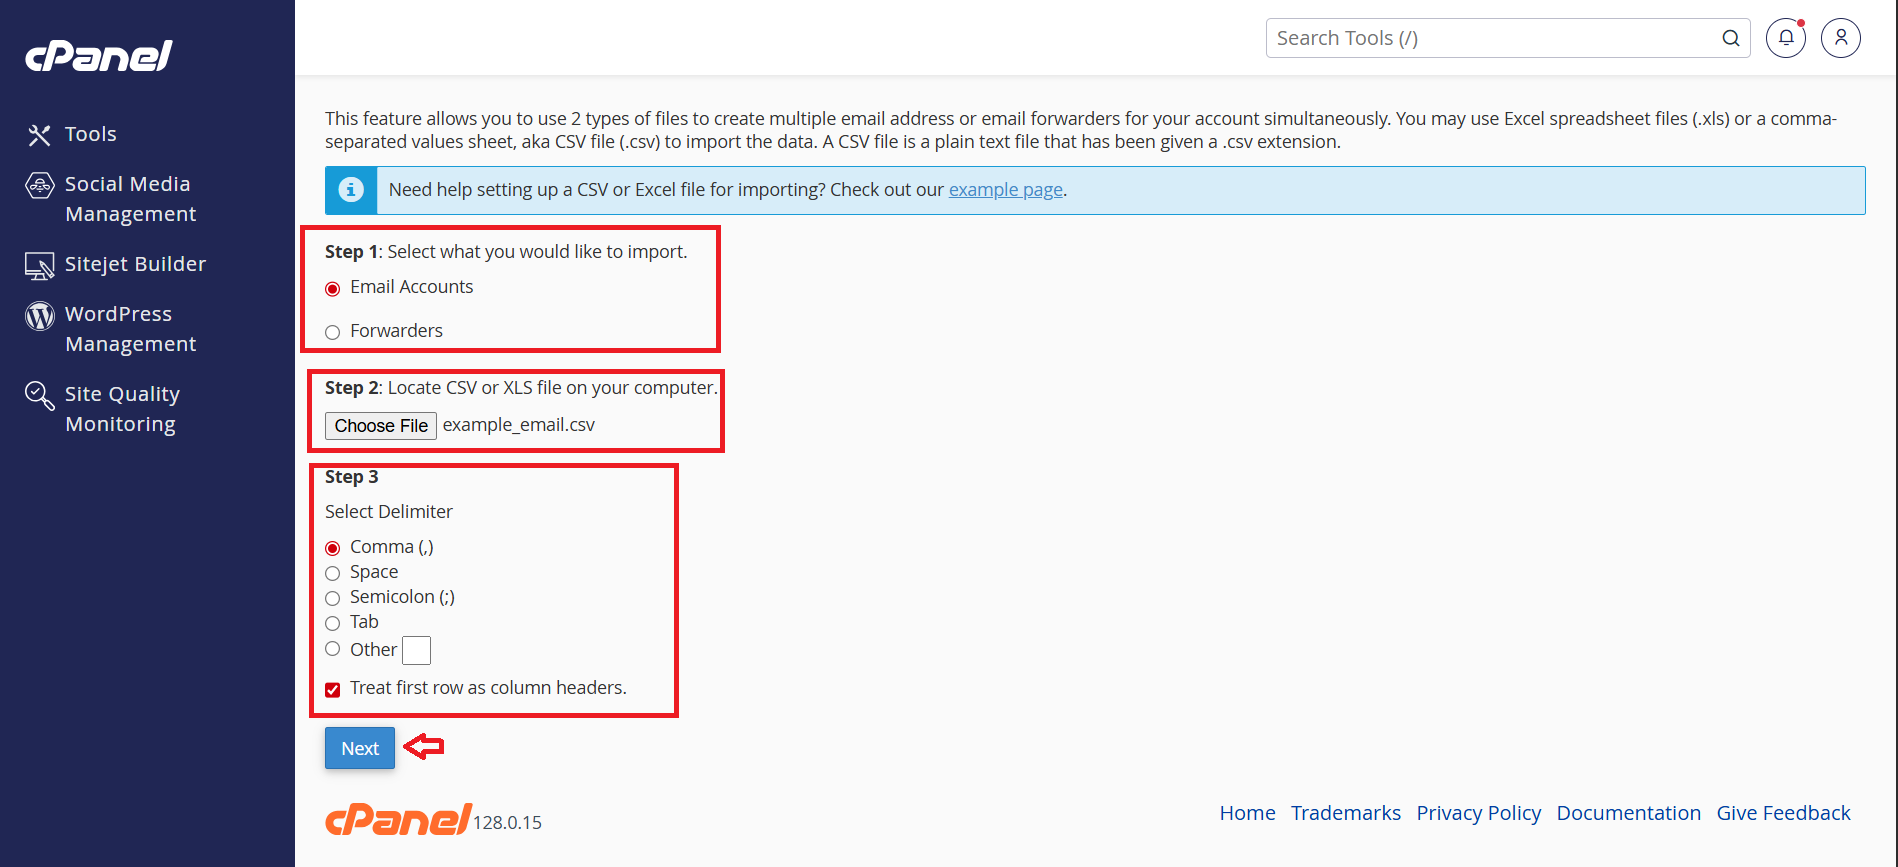
Step 3: Select Import Type and Upload File
-
Choose whether you want to import E-mail Accounts or Forwarders.
-
Click “Choose File” and upload your .csv or .xls file.
-
Select the correct delimiter (comma is common for .csv files).
-
Click “Next” to continue.
You may click the “example page” to get more details about how to set up a CSV file or how to import Excel file.
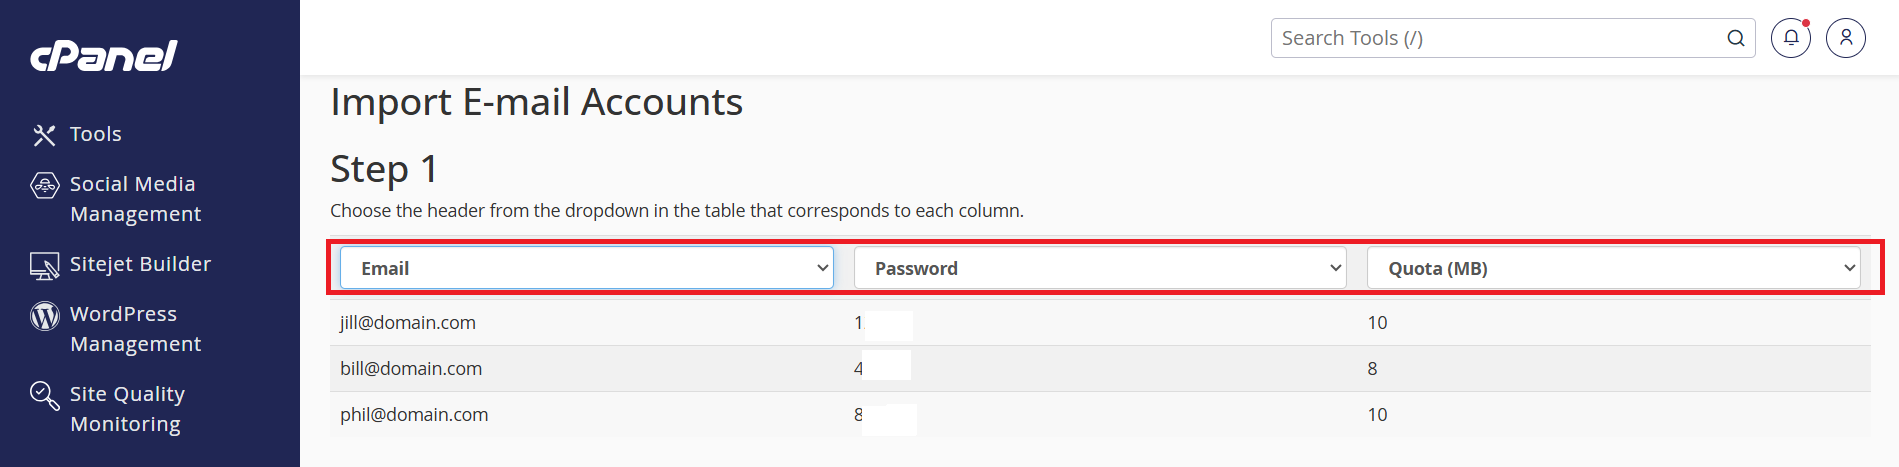
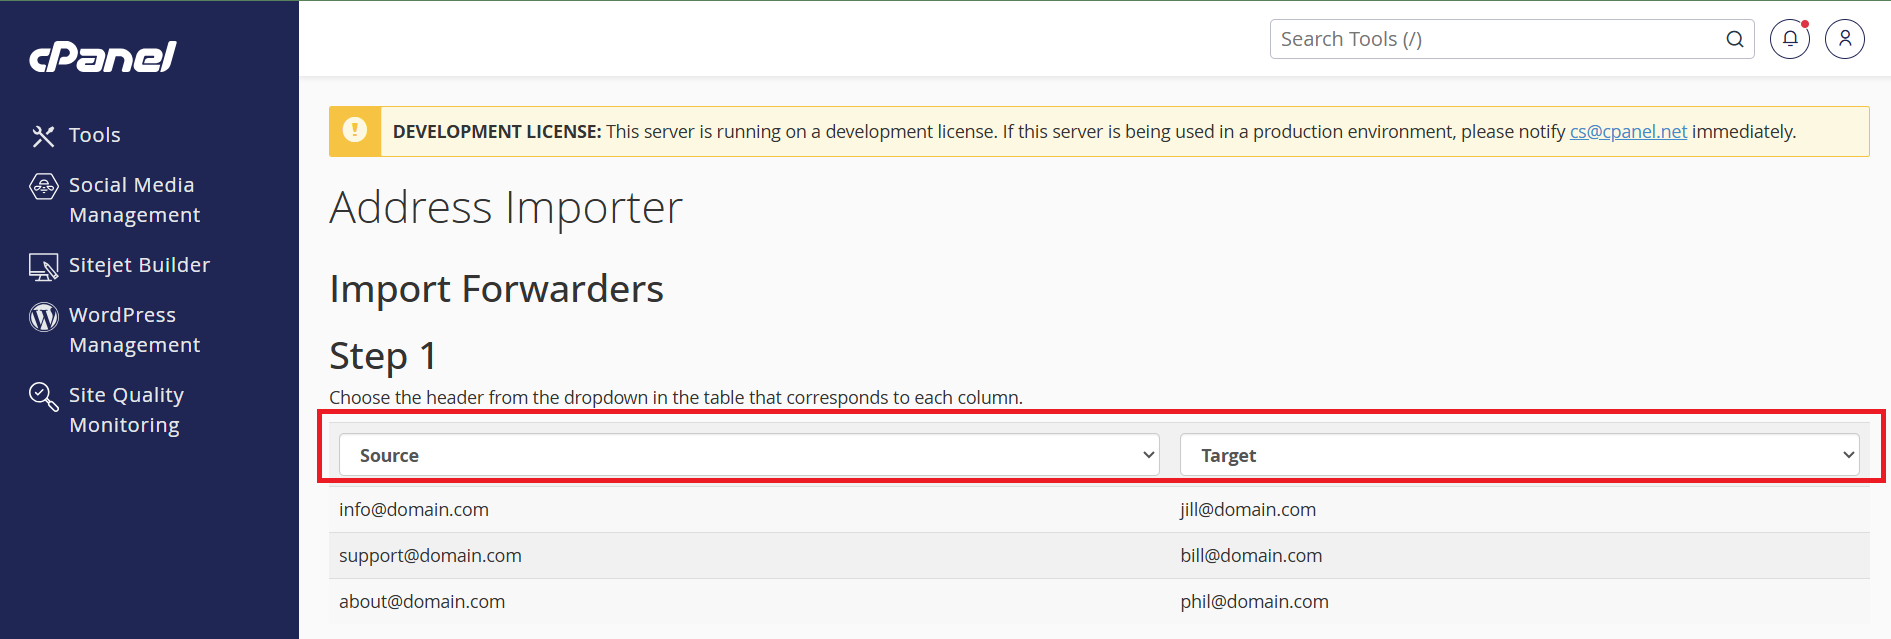
Step 4: Match Column Headers
Map the columns to their respective fields:
-
For Email Accounts: Username, Password and Qutota
-
For Forwarders: Address and Destination
Step 5: Select Domain
Choose the domain where the email accounts or forwarders should be created from the dropdown list.
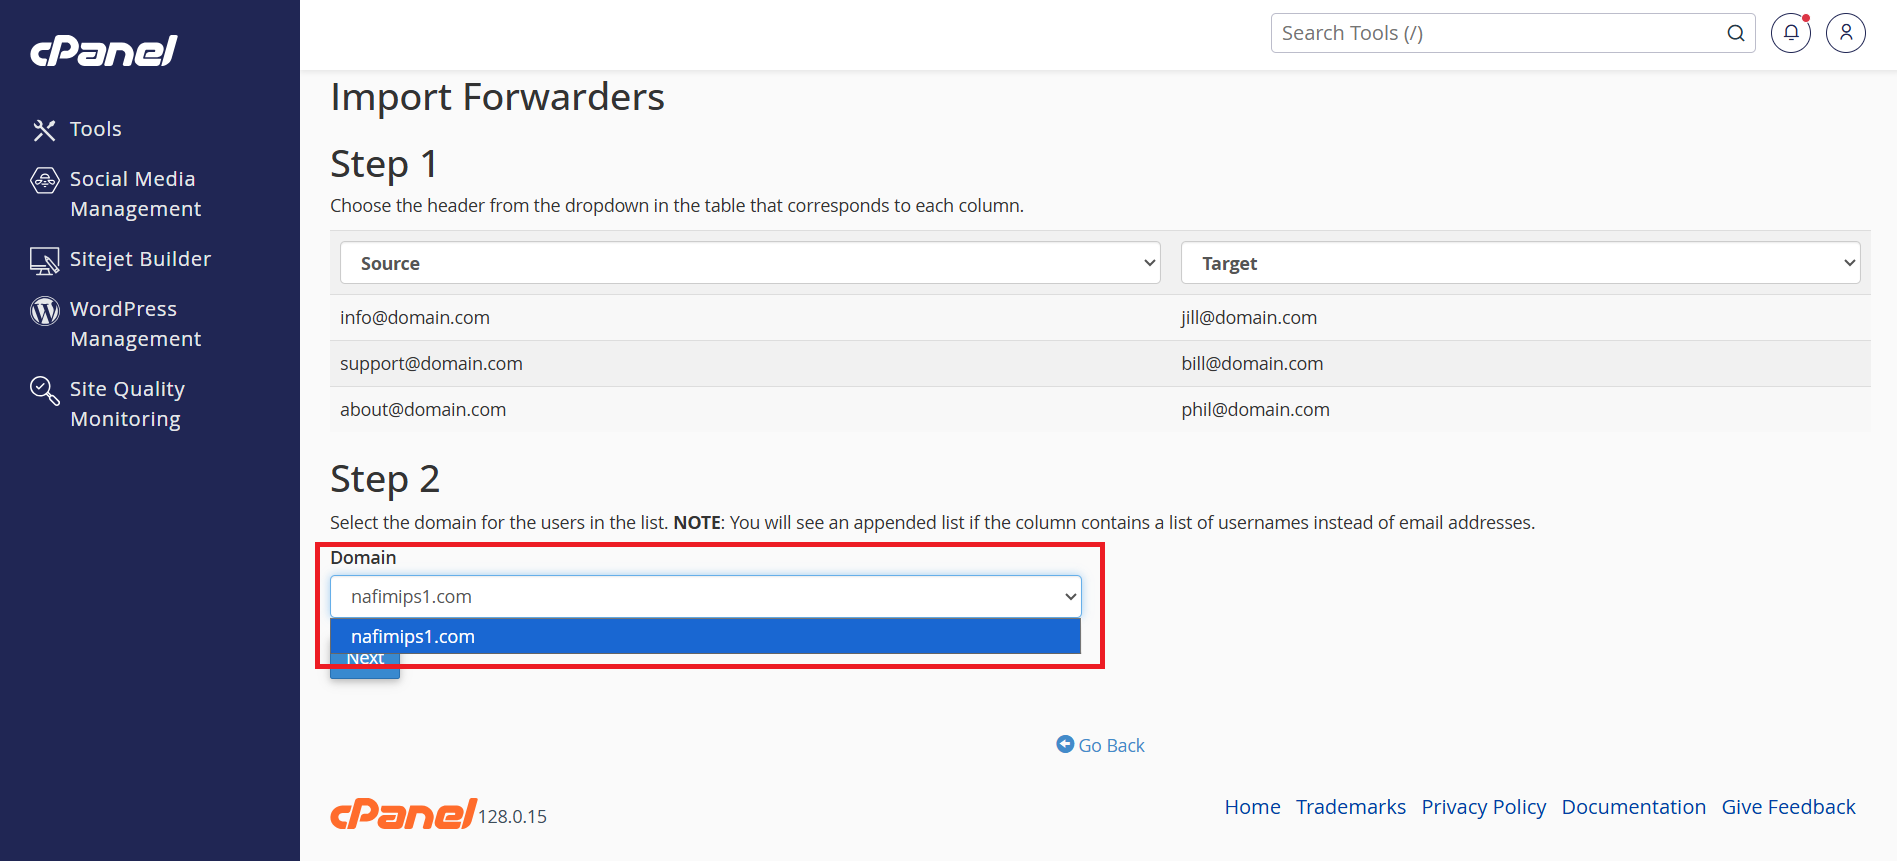
Step 6: Complete the Import
Click “Next” to review the entries, then click “Finish” to complete the import process.
Step 7: Verify the Imported Entries
After completing the import:
-
For Email Accounts:
-
Navigate to Email Accounts in cPanel.
-
Confirm that the newly imported email addresses are listed and active.
-
-
For Forwarders:
-
Go to Forwarders in cPanel.
-
Check that the forwarding rules have been applied correctly.
-
Conclusion
The Address Importer is a time-saving tool for bulk email account and forwarder creation in cPanel. Be sure to verify the imported entries to ensure successful setup.
If you require further assistance, feel free to contact our support team at support@ipserverone.com