Search Our Database
How to Swap IP Addresses Between Instances in the Customer Portal
Introduction
Swapping public IP addresses between cloud instances is a common networking operation that helps in minimizing downtime during infrastructure changes, software upgrades, or troubleshooting. This guide outlines the process of swapping IPv4 addresses between instances via the Customer Portal on NovaCloud or NovaGPU. The ability to swap IP addresses is particularly beneficial for users managing multiple instances and aiming for seamless migration or transition between application environments.
This process is applicable to users hosting cloud compute instances that require high availability or frequent re-deployments. Instead of reconfiguring DNS records or firewalls every time a new instance is created, users can simply swap IP addresses, reducing overhead and accelerating workflows.
Swapping an IP address is especially useful in deployment strategies such as blue-green deployments or rolling updates, where production traffic is shifted from one instance to another without causing service interruption. However, it is important to ensure that the new instance is fully configured and ready to handle production traffic before initiating the swap.
The Customer Portal interface provides a user-friendly mechanism for managing IP assignments, but there are specific requirements that must be met before the option to swap IPs becomes available. This guide will walk through the necessary conditions and provide a detailed step-by-step process to complete the swap operation securely and correctly.
Prerequisites
- Access to the Customer Portal with administrative permissions.
- At least two active instances under the same project (e.g., NovaCloud or NovaGPU).
- The instances involved in the swap must have assigned IPv4 addresses.
- The selected IP to be swapped must belong to another instance that is currently active.
- Each public IPv4 address is only eligible for one swap every 7 days.
Step-by-step Guide
Step 1: Log in to the Customer Portal
- Access the Customer Portal using valid credentials via the official URL.
- Ensure the account has permission to manage cloud instances.
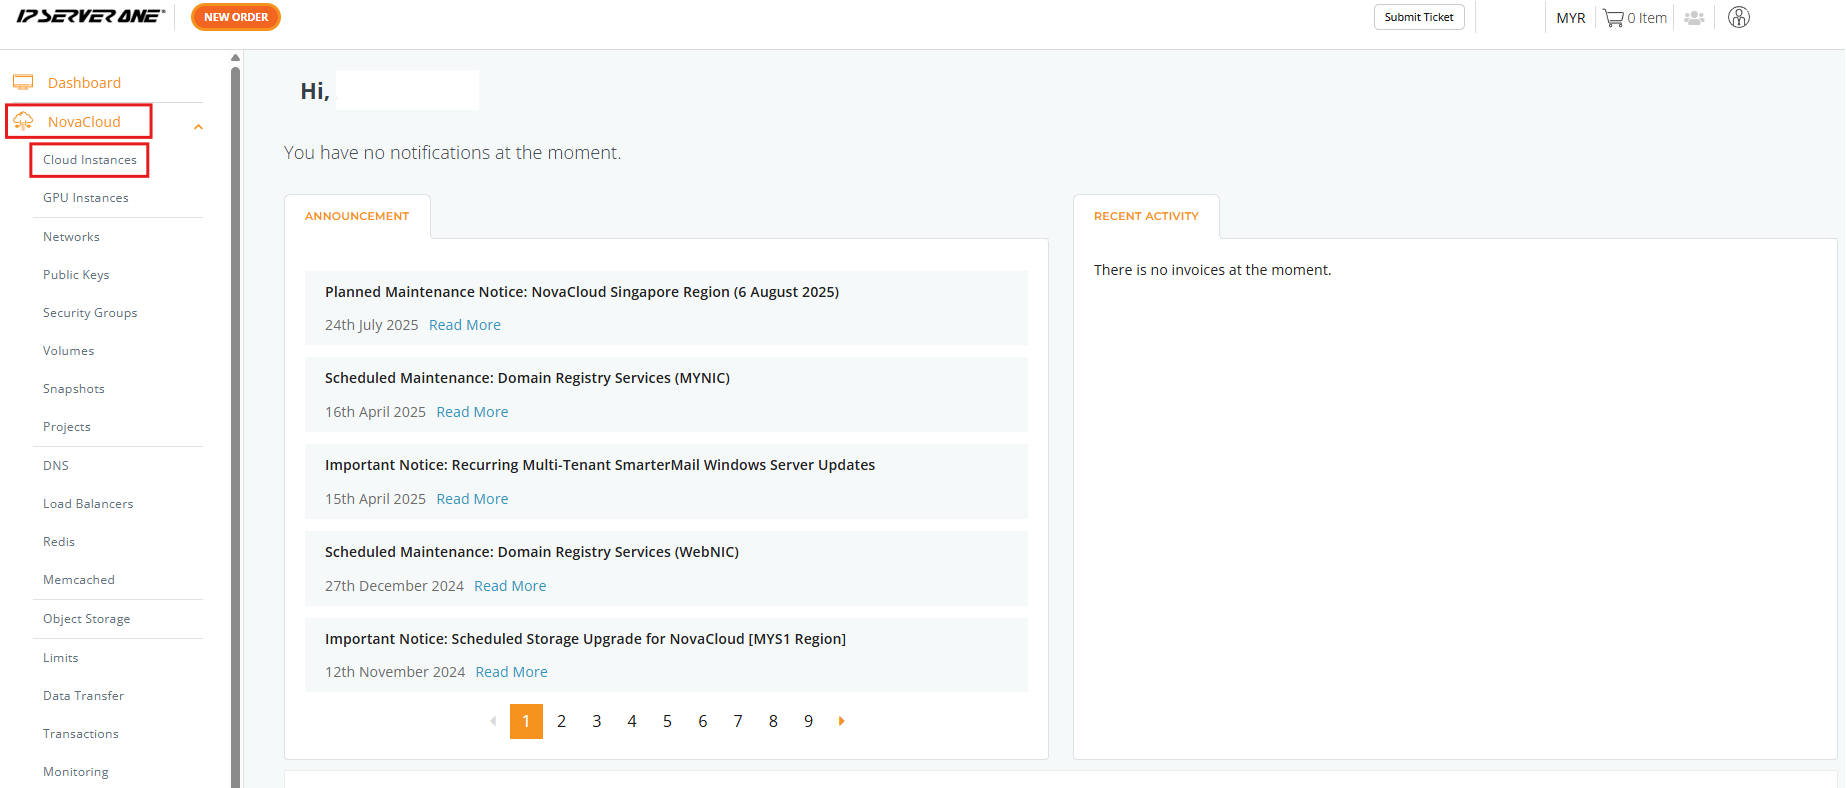
Step 2: Navigate to the Relevant Service
From the left-hand navigation menu:
-
Under NovaCloud, click on Cloud Instance if managing general-purpose compute instances.
-
Under NovaGPU, click on NovaGPU if managing GPU-based instances.
Select the service based on the type of instance involved in the IP swap.
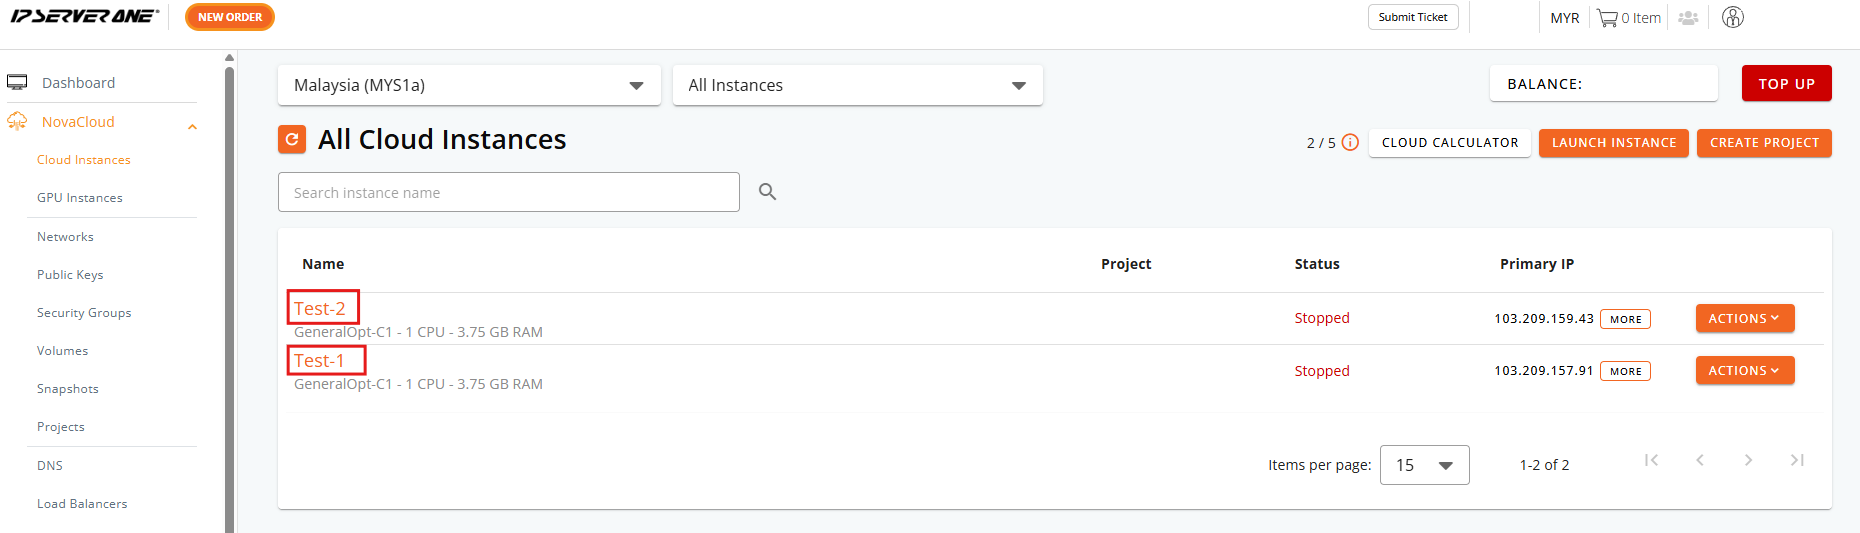
Step 3: Select the Instance for IP Swap
From the list of available instances, click on the instance that will receive the new IP address (i.e., the target instance for the swap).
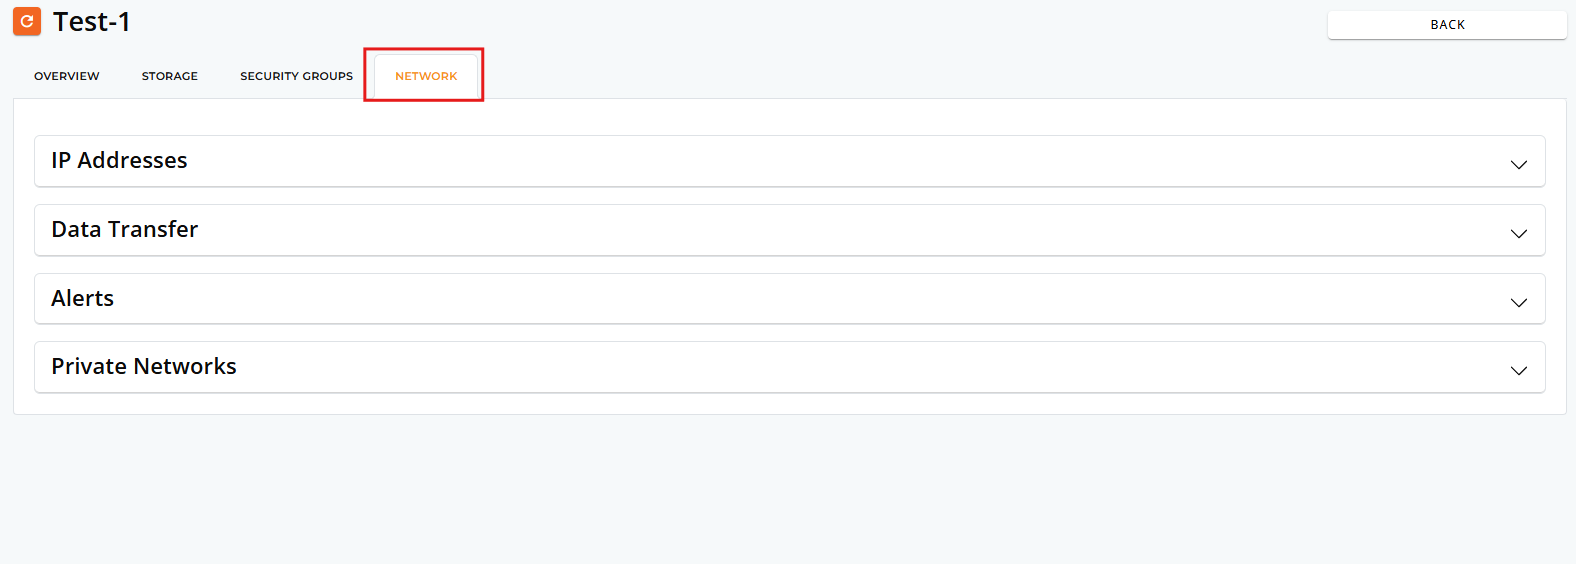
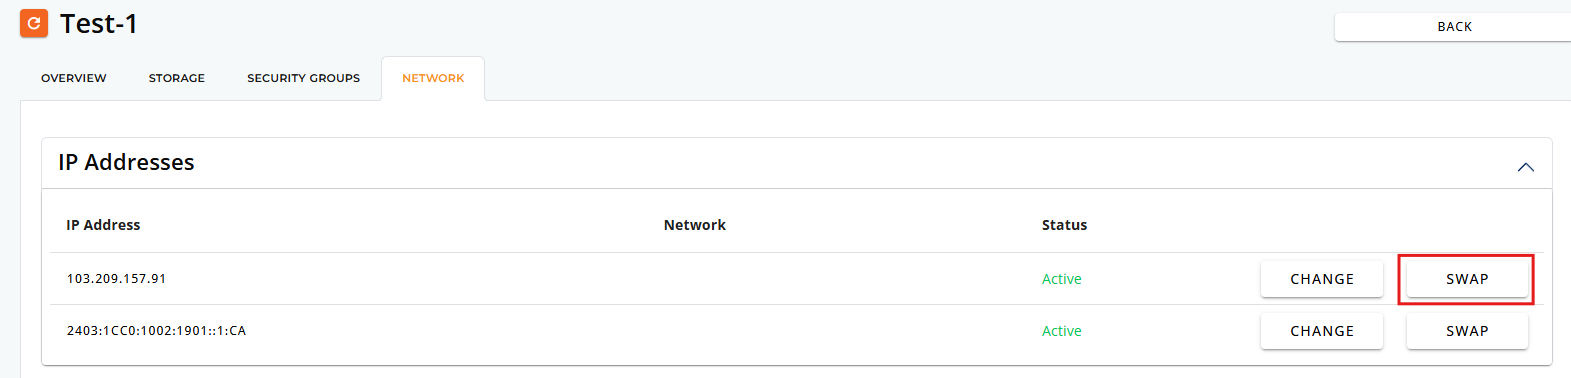
Step 4: Access the Network Tab
Once inside the instance details page, locate and click the Network tab to manage network-related settings.
Step 5: Open the IP Address Section
In the Network tab, find and select the IP Address section. This will display both the IPv4 and IPv6 addresses assigned to the instance.
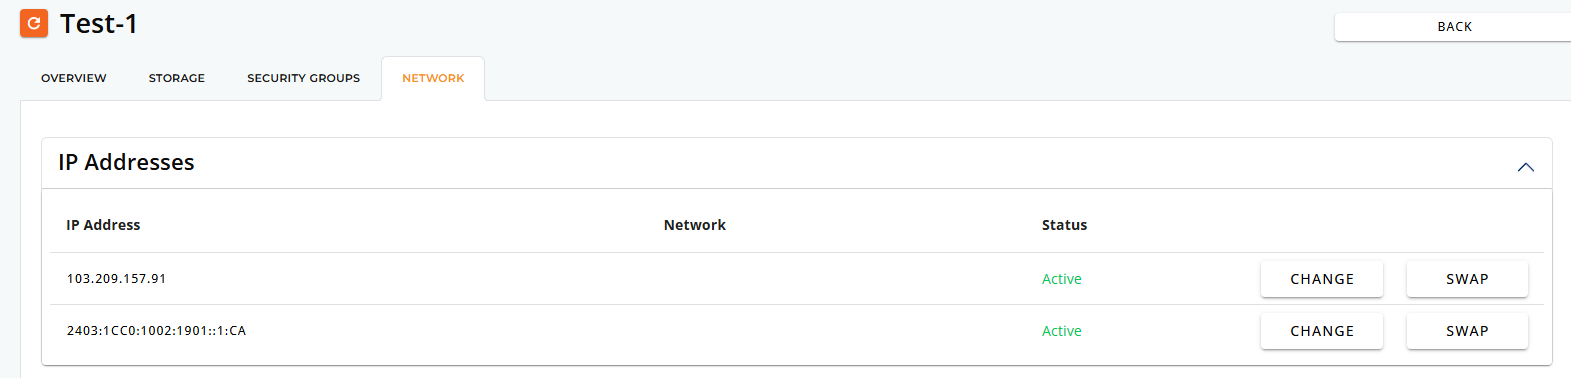
Step 6: Initiate the IP Swap
Locate the assigned IPv4 address, then click the SWAP button next to it. This action will open a prompt listing eligible IPs from other instances.
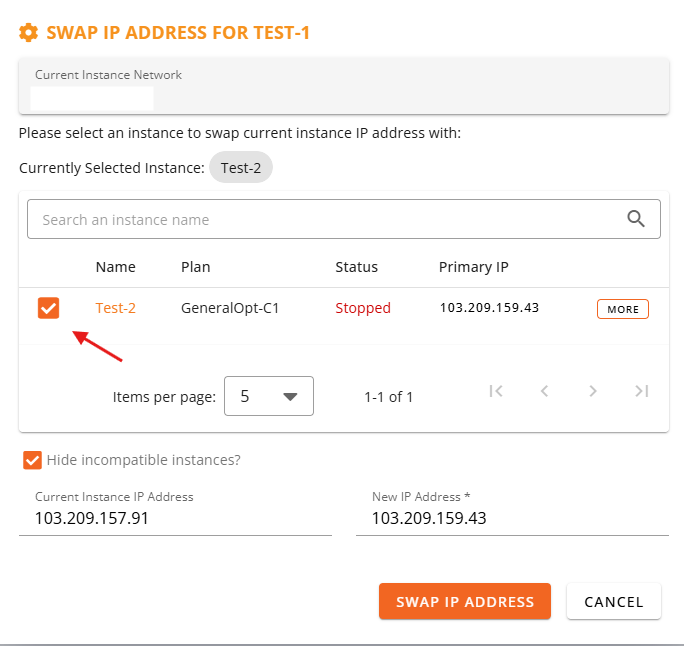
Step 7: Choose the IP to Swap With
In the IP swap prompt:
-
Review the list of available IPs that can be swapped. These will be from other active instances under the same account.
-
Tick the checkbox next to the IP address that should be exchanged with the current one.
- Review the list of available IPs that can be swapped. These will be from other active instances under the same account.
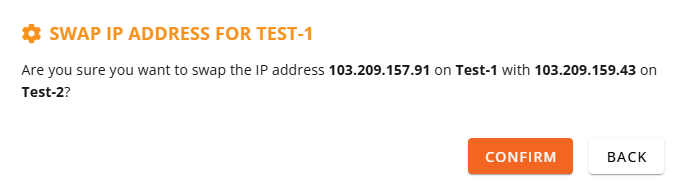
Step 8: Final Confirmation and Execution
A confirmation window will appear:
-
Click CONFIRM to finalize the operation.
-
The portal will begin processing the IP address swap. This may take a few moments.
Once completed, both instances will have exchanged their respective IPv4 addresses. Ensure to verify application behavior or update any related configurations as needed.
Step 9: Reboot the Instance to Apply Changes
After the swap is completed, it is strongly recommended to reboot the affected instance(s) to ensure the new IP configuration is applied correctly.
Conclusion
Swapping IP addresses between instances in the Customer Portal enables fast and seamless transitions between environments without requiring changes to DNS or firewall rules. This feature is especially useful in scenarios such as deployment upgrades or instance failovers. Always ensure both instances are fully configured before performing a swap, and keep in mind that public IPv4 addresses can only be swapped once every 7 days.
Should you have any inquiries about the guidelines, please feel free to open a ticket through your portal account or contact us at support@ipserverone.com. We’ll be happy to assist you further.