Search Our Database
How to Shrink a Partition on Windows Server Using Disk Management
Introduction
Managing disk space effectively is crucial for maintaining system performance and optimizing storage usage in Windows Server environments. While extending partitions is a common task when additional space is required, there are scenarios where shrinking a partition becomes necessary. Shrinking allows administrators to reduce the size of an existing volume, thereby creating unallocated space that can be used for other partitions or system configurations.
Shrinking a partition is particularly useful when consolidating disk space, creating new volumes, or preparing for dual-boot setups. It is also applicable in virtualized environments where unused storage can be reclaimed and allocated elsewhere. The built-in Disk Management utility in Windows Server provides a straightforward method to shrink volumes without the need for third-party tools or command-line utilities.
This guide outlines the process of shrinking partitions on Windows Server systems, focusing on practical applications such as freeing up space from a large volume or creating space for additional logical drives. The procedure applies to most modern versions of Windows Server, including 2012, 2016, 2019, and 2022.
It is important to note that certain limitations may affect the amount of space that can be reclaimed. For example, immovable files like the page file or shadow copies may restrict how much the volume can be shrunk. In such cases, additional steps may be required, such as disabling certain features temporarily.
This guide walks through the process using the Disk Management interface, identifies common issues users may encounter, and highlights best practices for preparing and validating the system before making disk changes. The objective is to provide a safe and reliable method to shrink partitions while minimizing risks to data and system stability.
Prerequisites
- A Windows Server operating system (2012, 2016, 2019, or 2022)
- Administrator access to the server
- A partition with free space available to shrink
- Disk Management enabled and accessible via GUI
- Backups of critical data before performing any disk operations
Step-by-step Guide
Step 1: Open Disk Management
Access the Disk Management utility using one of the following methods:
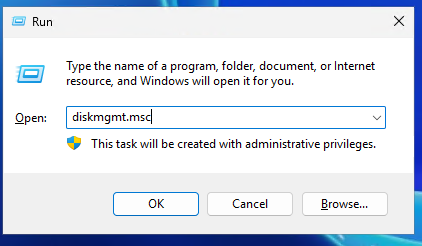
- Press Windows + R, type diskmgmt.msc, and press Enter.
- Or right-click on Start and select Disk Management.
Step 2: Choose the Partition to Shrink
In the Disk Management window, identify the volume that has sufficient free space and needs to be shrunk. Right-click the partition (e.g., C:) and select Shrink Volume…
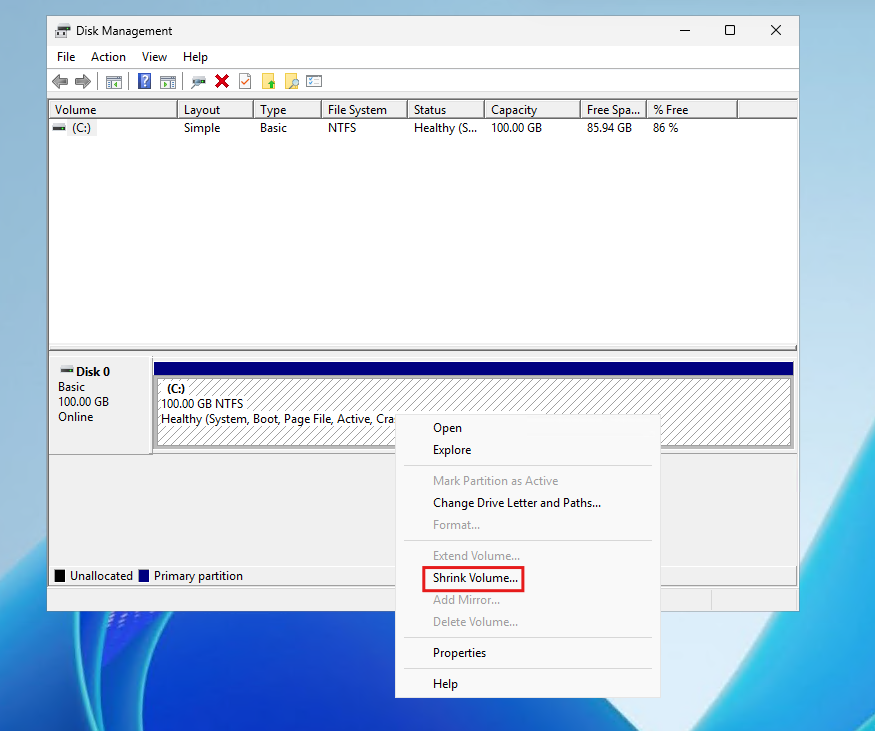
A new window titled Shrink [Volume Label] will appear.
Step 3: Analyze Available Space
The utility will calculate how much space can be reclaimed based on current disk usage and file layout.
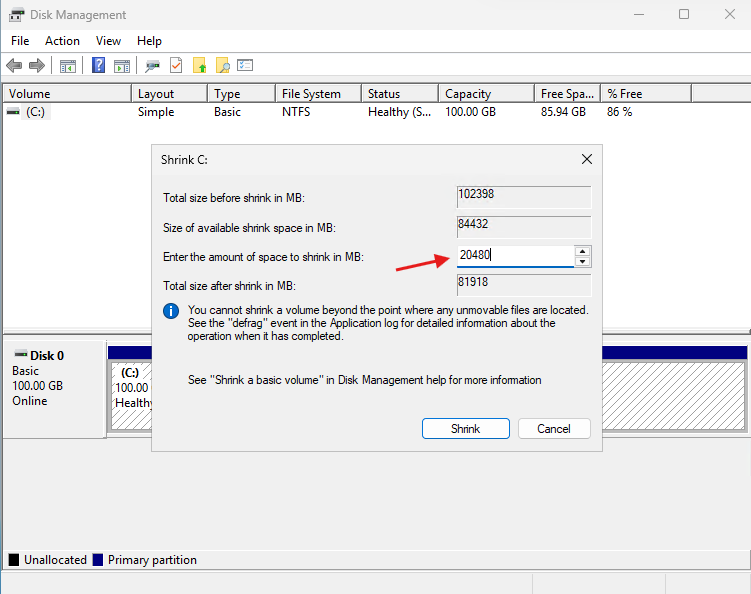
The window displays:
- Total size before shrink in MB
- Size of available shrink space in MB
- Enter the amount of space to shrink in MB
- Total size after shrink in MB
Enter the desired amount of space to shrink (in MB), ensuring it does not exceed the available shrink space.
Example: To shrink 20GB, enter 20480.
Step 4: Confirm and Shrink the Volume
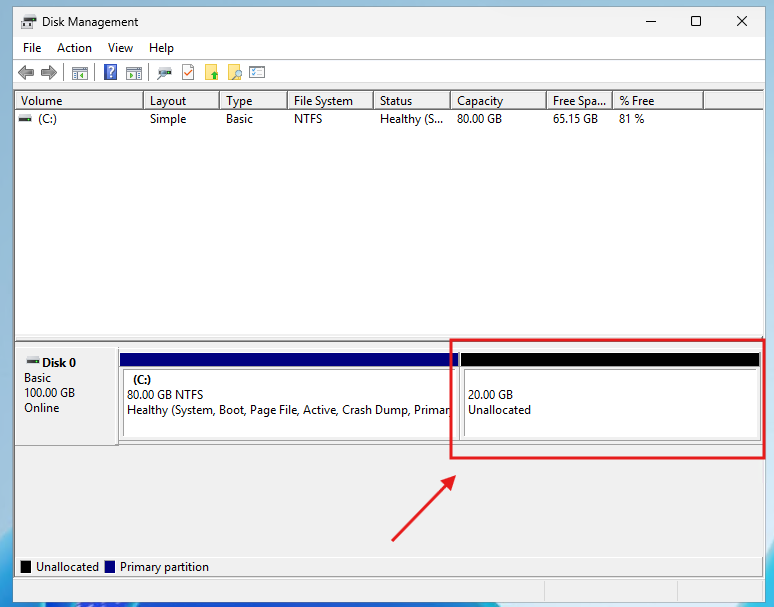
After entering the shrink amount, click Shrink

Disk Management will process the request and reduce the size of the selected volume. The reclaimed space will now appear as Unallocated on the disk map:
Step 5: Use the Unallocated Space (Optional)
Once the partition is shrunk, the resulting unallocated space can be used to:
- Create a new partition
- Extend an adjacent partition
- Allocate it to another drive using advanced tools
To create a new volume:
- Right-click the Unallocated space
- Select New Simple Volume
- Follow the wizard to assign a drive letter, file system, and size
Conclusion
Shrinking a partition on Windows Server is a simple and effective method to manage disk space without affecting existing data. By using the built-in Disk Management tool, administrators can reclaim unused space for system expansion or other operational needs. Proper planning and awareness of system limitations ensure a smooth process, minimizing disruption to server operations.
For more advanced partition management, consider using diskpart or third-party tools with greater control and flexibility.
Should you have any inquiries about the guidelines, please feel free to open a ticket through your portal account or contact us at support@ipserverone.com. We’ll be happy to assist you further.