Search Our Database
How to setup LAMP configuration on Ubuntu
Introduction
This article is intended for Ubuntu users, including system administrators and developers, who need to set up a LAMP (Linux, Apache, MySQL, PHP) stack on their server. It provides a step-by-step guide to installing and configuring each component of the LAMP stack on Ubuntu. This information is essential when you’re preparing a server to host websites or web applications, especially those running on popular CMS platforms like WordPress or Joomla. The steps outlined here are applicable for Ubuntu environments and can be applied through the command-line interface for flexible server management.
Prerequisites
- Access to the Ubuntu Server with root privileges using SSH.
- Basic knowledge of terminal/command line usage
You need to set up a LAMP server if you are planning to run your site using content management systems such as WordPress or Joomla.
LAMP is an acronym for Linux, Apache, MySQL, and PHP; four of the most commonly used software to host and run virtually all websites on the Internet.
Linux = Choice of operating system, ie: Red Hat, CentOS, Ubuntu.
Apache = Web server application.
MySQL = World’s second most widely used relational database management system (RDBMS).
PHP = Server-side scripting language designed for web development and general-purpose programming language.
You can easily install LAMP onto your server by running the commands below.
sudo apt-get update
sudo apt-get install lamp-server^
That’s it. You have successfully installed all four web server applications with two commands.
However, if you prefer to install them individually, please continue reading.
Step 1: Install Apache
- Run the following command using the server’s terminal. Apache will start automatically upon successful installation.
sudo apt-get install apache2
2. Type the link as following in your browser’s address bar to check if you have performed step 2 correctly. If successful, you should see “It works!” on your site.
http://your-ip-address-here
Step 2: Install MySQL
- Run the following command using the server’s terminal. We would recommend downloading the PHP 7 and above which is widely supported.
sudo apt-get install php7.4 libapache2-mod-php7.4 php7.4-mysql
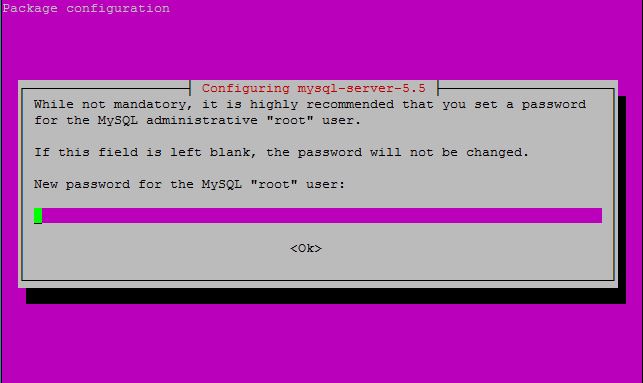
2. You will be prompted to enter a password and another time for confirmation for root access. See image below.
3. When the installation is completed, you can access your MySQL database by running the command below using your server’s terminal.
sudo mysql -u root -p
It is highly recommended and a best practice to remove the test database and anonymous user from your MySQL database.
4. Run the following command using your server’s terminal to reinitialize your database.
sudo mysql_install_db
5. Enter the following command into the terminal after Step 1 has completed.
sudo /usr/bin/mysql_secure_installation
Note: If you have forgotten the password that was set earlier, enter the command below into your terminal to reset your MySQL root password before you proceed with Step 2.
sudo /usr/bin/mysqladmin -u root password insert-your-desire-password-here
6. You should now be able to login to MySQL database with the following command.
sudo mysql -u root -p
Step 3: Install PHP
- Run the following command using your server’s terminal. Once completed, PHP is installed.
sudo apt-get install php5 libapache2-mod-php5 php5-mcrypt
2. Create a new file by running the command below to check if PHP has been successfully installed and is now working on your server.
sudo vi /var/www/info.php
3. Type and save the command below into the newly created file.
<?php
 phpinfo();
?>
4. Then, we will need to restart Apache service to apply the changes.
sudo service apache2 restart
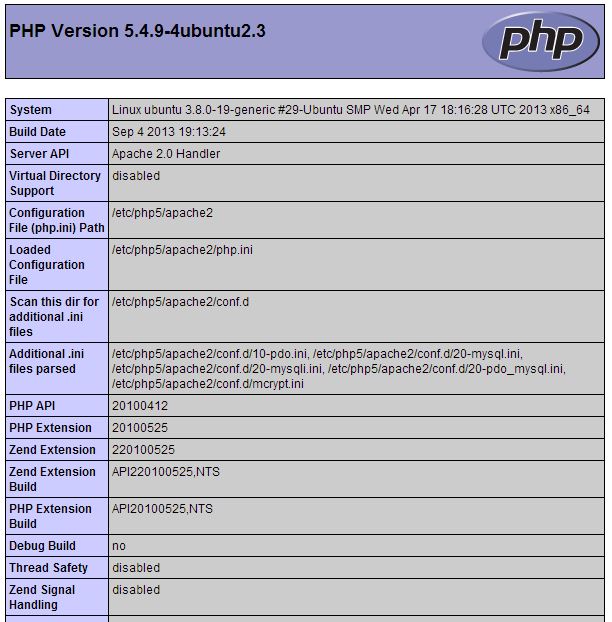
5. By now, your server is able to run any PHP-scripted software. Type link as following into your browser’s address bar and if successful, you should see something similar as below.
http://your-ip-address-here/info.php
Conclusion
You have now successfully installed and configured the LAMP stack on your Ubuntu server. This configuration is essential for running CMS platforms like WordPress or Joomla on your server. Whether you choose to install all components at once or individually, your server is now ready to handle dynamic content. For additional assistance or if you encounter any issues, please contact our support team at support@ipserverone.com.
Read more: How to Install WordPress in Ubuntu
Article posted on 22 March 2020.