Search Our Database
How to Setup a Private IP on Openstack Instances
📝 Introduction
By default, newly created OpenStack instances are not connected to each other on a private network. After setting up a private network in the OpenStack portal, an additional network interface must be configured manually on the instance to enable communication between instances using private IP addresses.
✅ Setting Up a Private Network Interface on RHEL-Based Distributions
🖥️ Step 1: Check Existing Network Interfaces
Run the following command to list all network interfaces:
ip addr
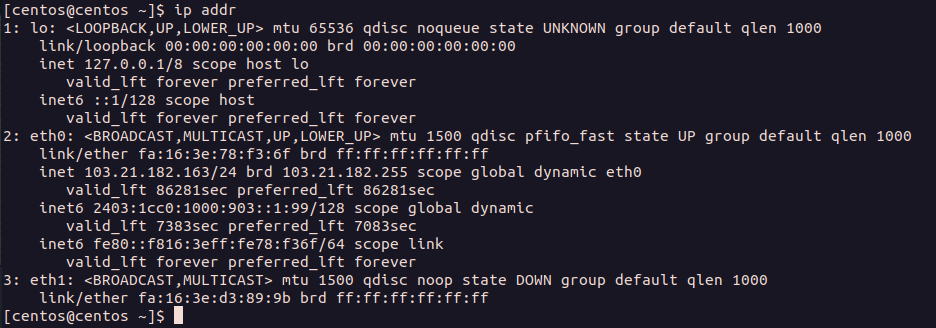
In this example, we have attached our private network interface to the instance before hand. Upon running ip addr , we can see that the private network interface has been added as eth1.
⚙️ Step 2: Create a New Network Configuration File
-
Navigate to the network configuration directory:
-
Open a new configuration file for the interface ( eth1 in this example):
📝 Step 3: Configure the Network Interface
Add the following lines to the file to configure the private network interface using DHCP:
BOOTPROTO=dhcp
DEVICE=eth1
MTU=1500
NETMASK=255.255.255.0
ONBOOT=yes
STARTMODE=auto
TYPE=Ethernet
USERCTL=no
Save and exit the file by pressing ESC, then typing :wq and pressing Enter.
🔄 Step 4: Restart the Network Service
Apply the changes by restarting the network service:
sudo service network restart
✅ Step 5: Verify the New Network Interface
Run the following command to check if the private network interface is active:
ip addr
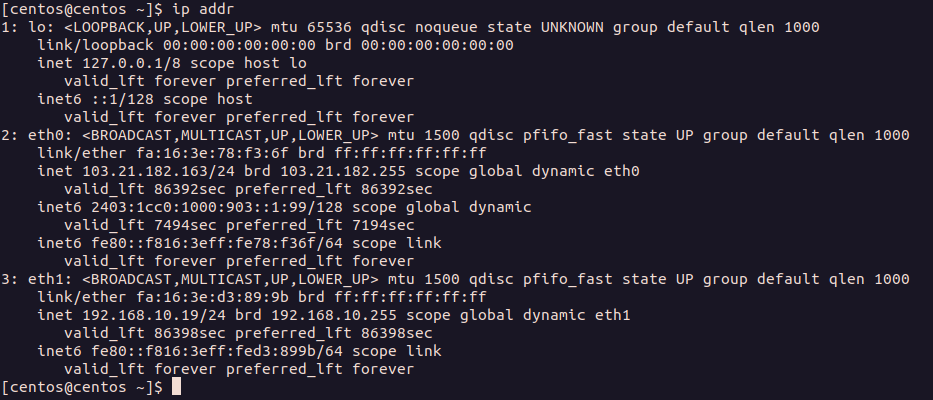
If successfully configured, the new network interface (eth1) should now have an assigned private IP address.
✅ Setting Up a Private Network Interface on Debian-Based Distributions
🖥️ Step 1: Check Existing Network Interfaces
Run the following command:
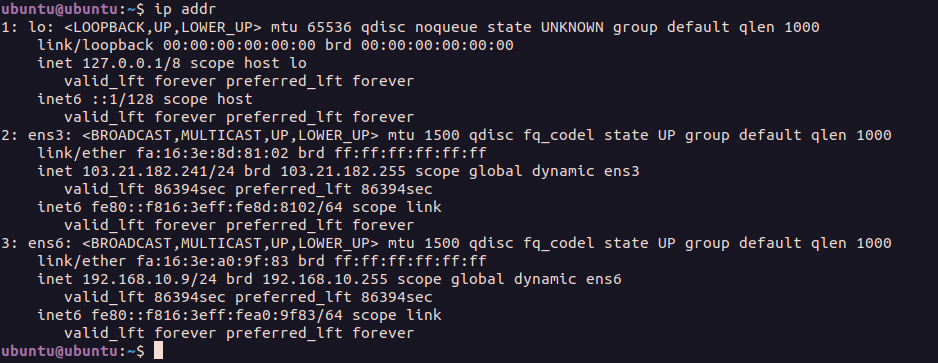
ip addr
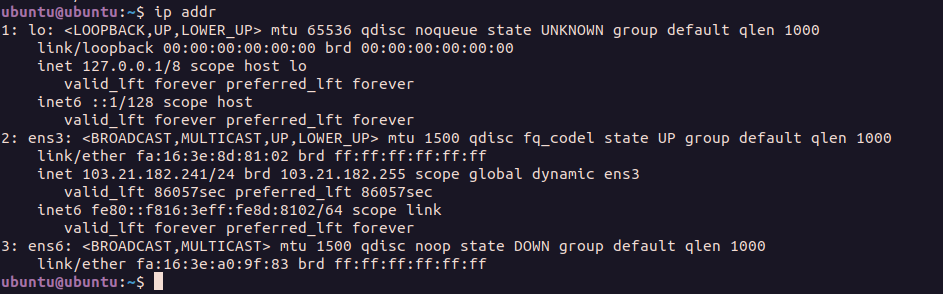
After attaching the private network interface, it should appear in the output as a new interface (e.g., ens6).
⚙️ Step 2: Edit the Netplan Configuration File
Open the Netplan configuration file (/etc/netplan/50-cloud-init.yaml)
sudo vi /etc/netplan/50-cloud-init.yaml
📝 Step 3: Configure the Network Interface
Add the following configuration under the network section:
ens6:
  # If your network interface is different from ens6, use the correct interface name.
  dhcp4: true
  mtu: 1500
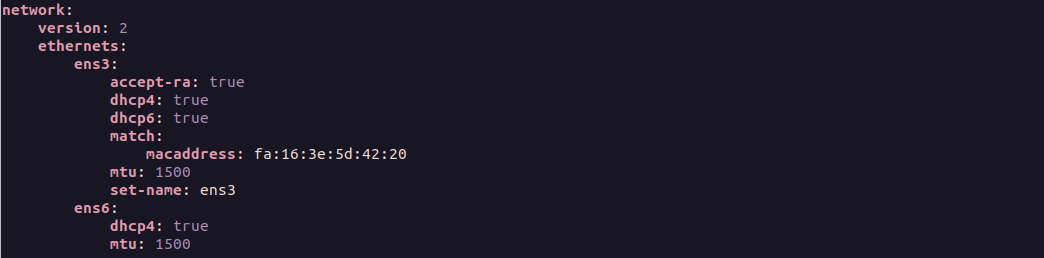
Save and exit the file by pressing ESC, then typing :wq and pressing Enter. Your netplan configuration file should look like this after the changes:
🔄 Step 4: Apply the Netplan Configuration
Run the following command to apply the new network configuration:
sudo netplan apply
✅ Step 5: Verify the New Network Interface
Run the following command:
ip addr
If successfully configured, the private network interface (ens6) should now be assigned a private IP address (e.g., 192.168.10.9 ).
Conclusion
By following this guide, you have successfully configured a private network interface on your OpenStack instance, allowing it to communicate with other instances using private IP addresses. This setup is crucial for internal networking and secure communications between cloud instances.
Should you have any inquiries, please open a ticket through your portal account or contact us at support@ipserverone.com. We’ll be happy to assist you further.
Article posted on 17 November 2021 by Louis