Search Our Database
How to Set Up DNS Records for Your Webmail in DirectAdmin (Evolution Skin)
Introduction
Proper DNS configuration plays a vital role in ensuring reliable email delivery and protecting your domain’s reputation. Without the correct DNS records, emails may fail to reach recipients or be flagged as spam by mail servers. DirectAdmin with the Evolution Skin provides an intuitive DNS Management interface, making it easy to configure the necessary records without advanced technical expertise.
This guide will walk you through setting up the key DNS records required for webmail—A, MX, SPF, DKIM, and DMARC. Configuring these records not only improves deliverability but also helps secure your domain against spoofing and phishing attempts. Before proceeding, make sure your domain is using DirectAdmin’s nameservers and that you have permission to manage DNS settings. Keep in mind that while setup is quick, DNS changes can take up to 24–48 hours to propagate globally.
Prerequisites
- Access to DirectAdmin with permissions to modify DNS records.
- Make sure your domain is pointing to DirectAdmin’s nameservers.
- A public IP address of the server hosting the mail services
Step-by-step Guide
Step 1: Access Direct Admin
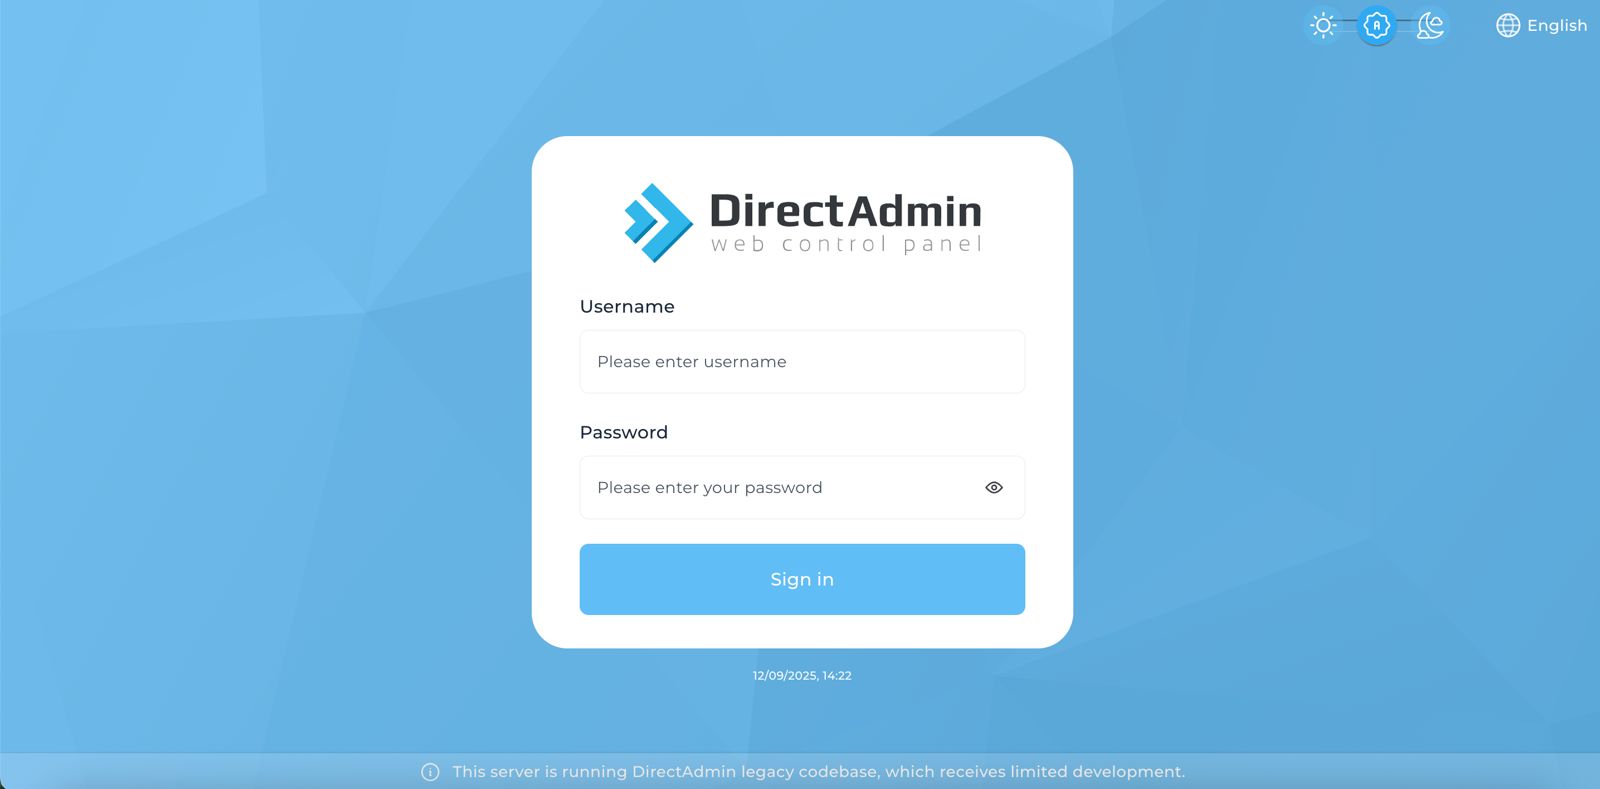
- Log in to your DirectAdmin control panel.
Step 2: Access DNS Records
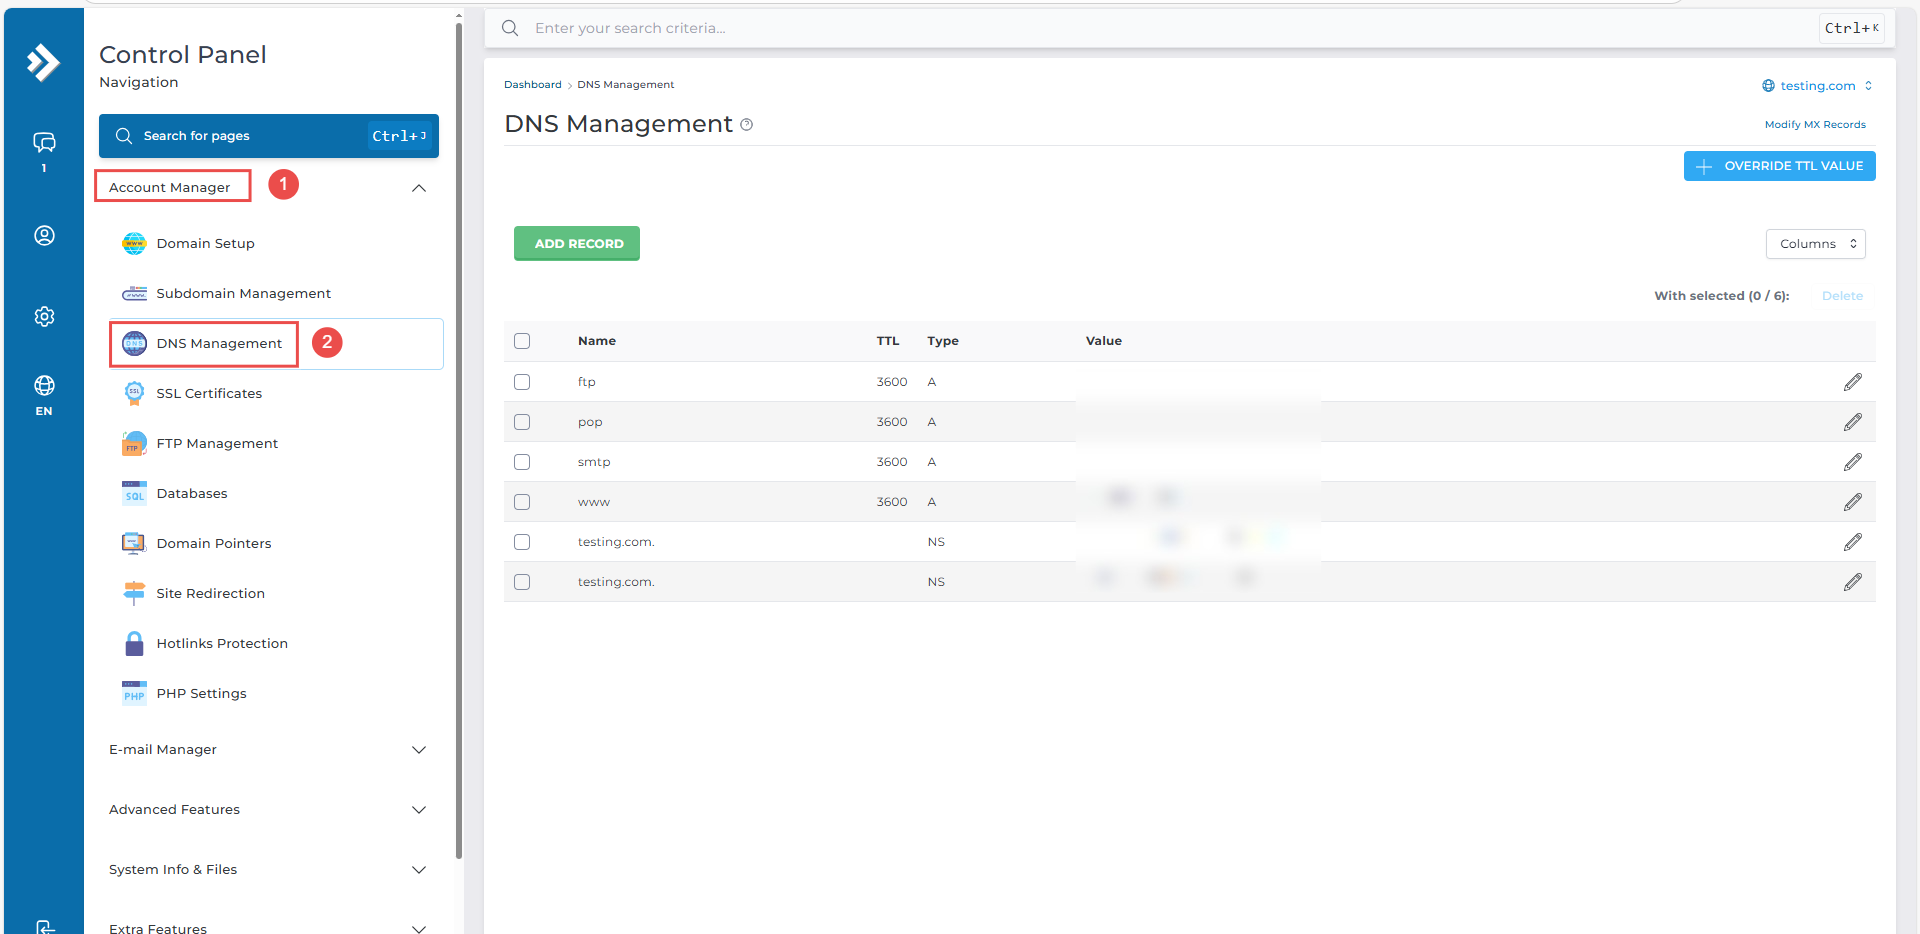
- on left menu click Account Manager
- Click DNS Manager
Step 3: Set Up A Record for mail.<yourdomian>.com
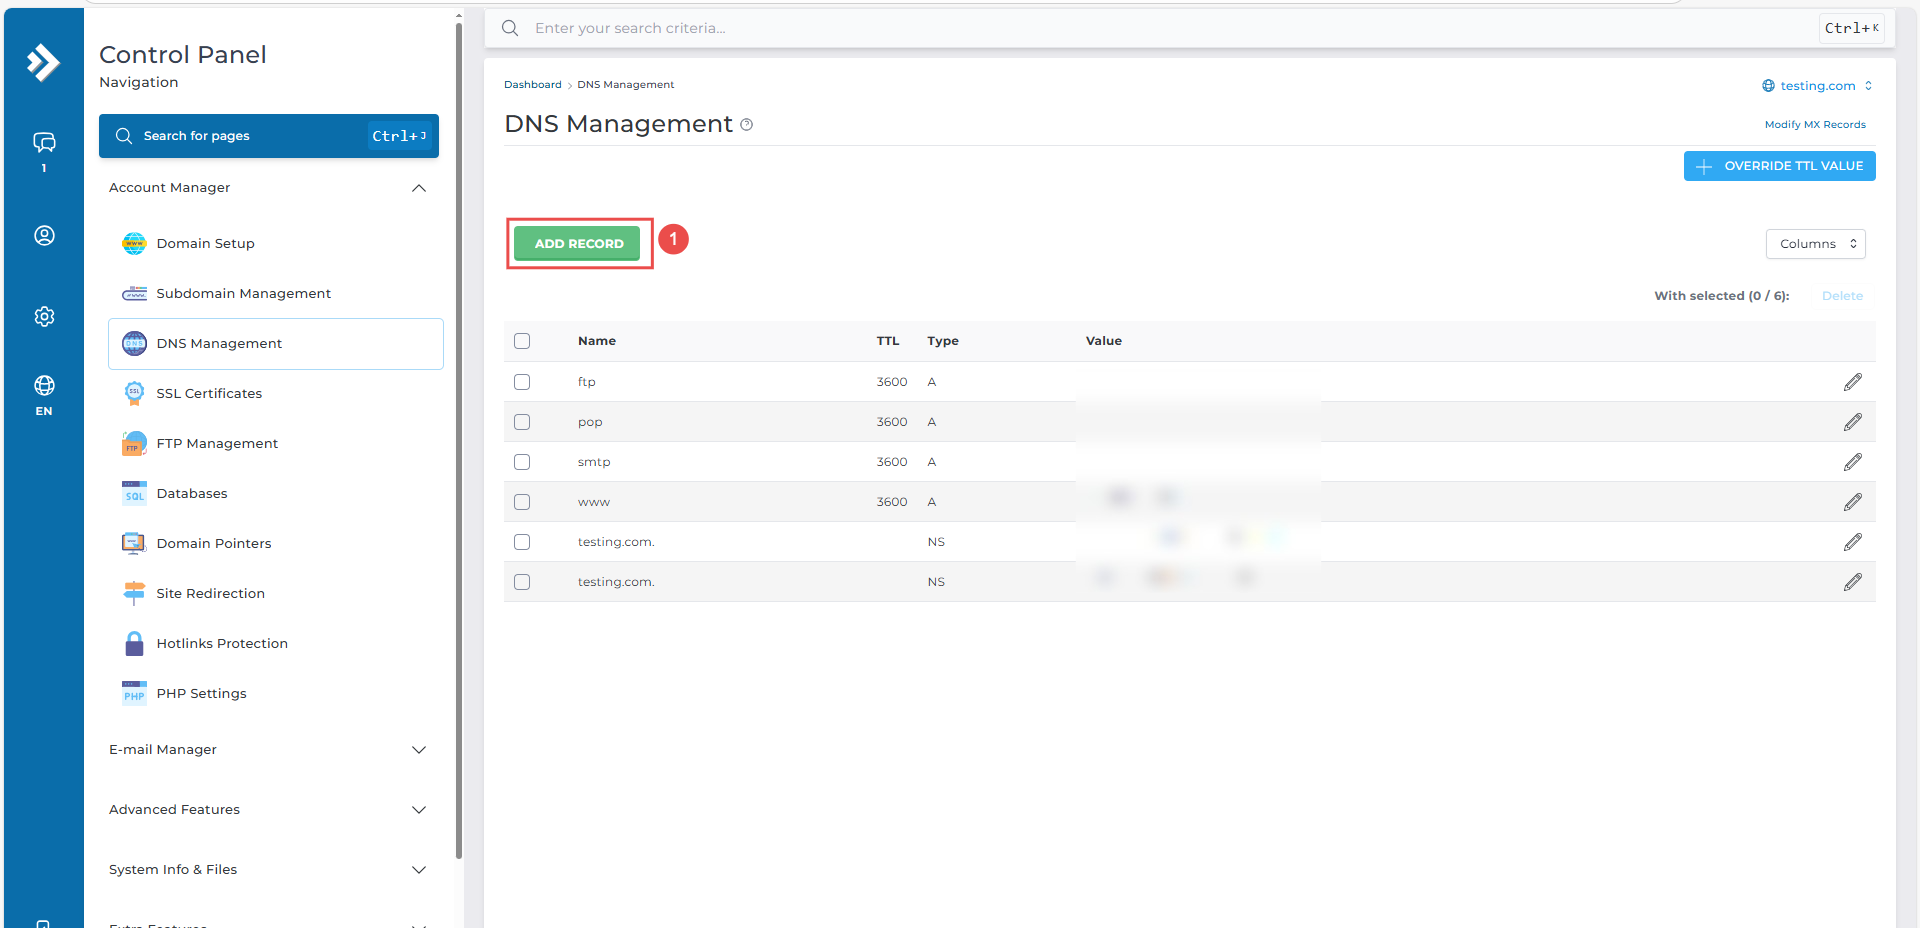
- Click ADD RECORD
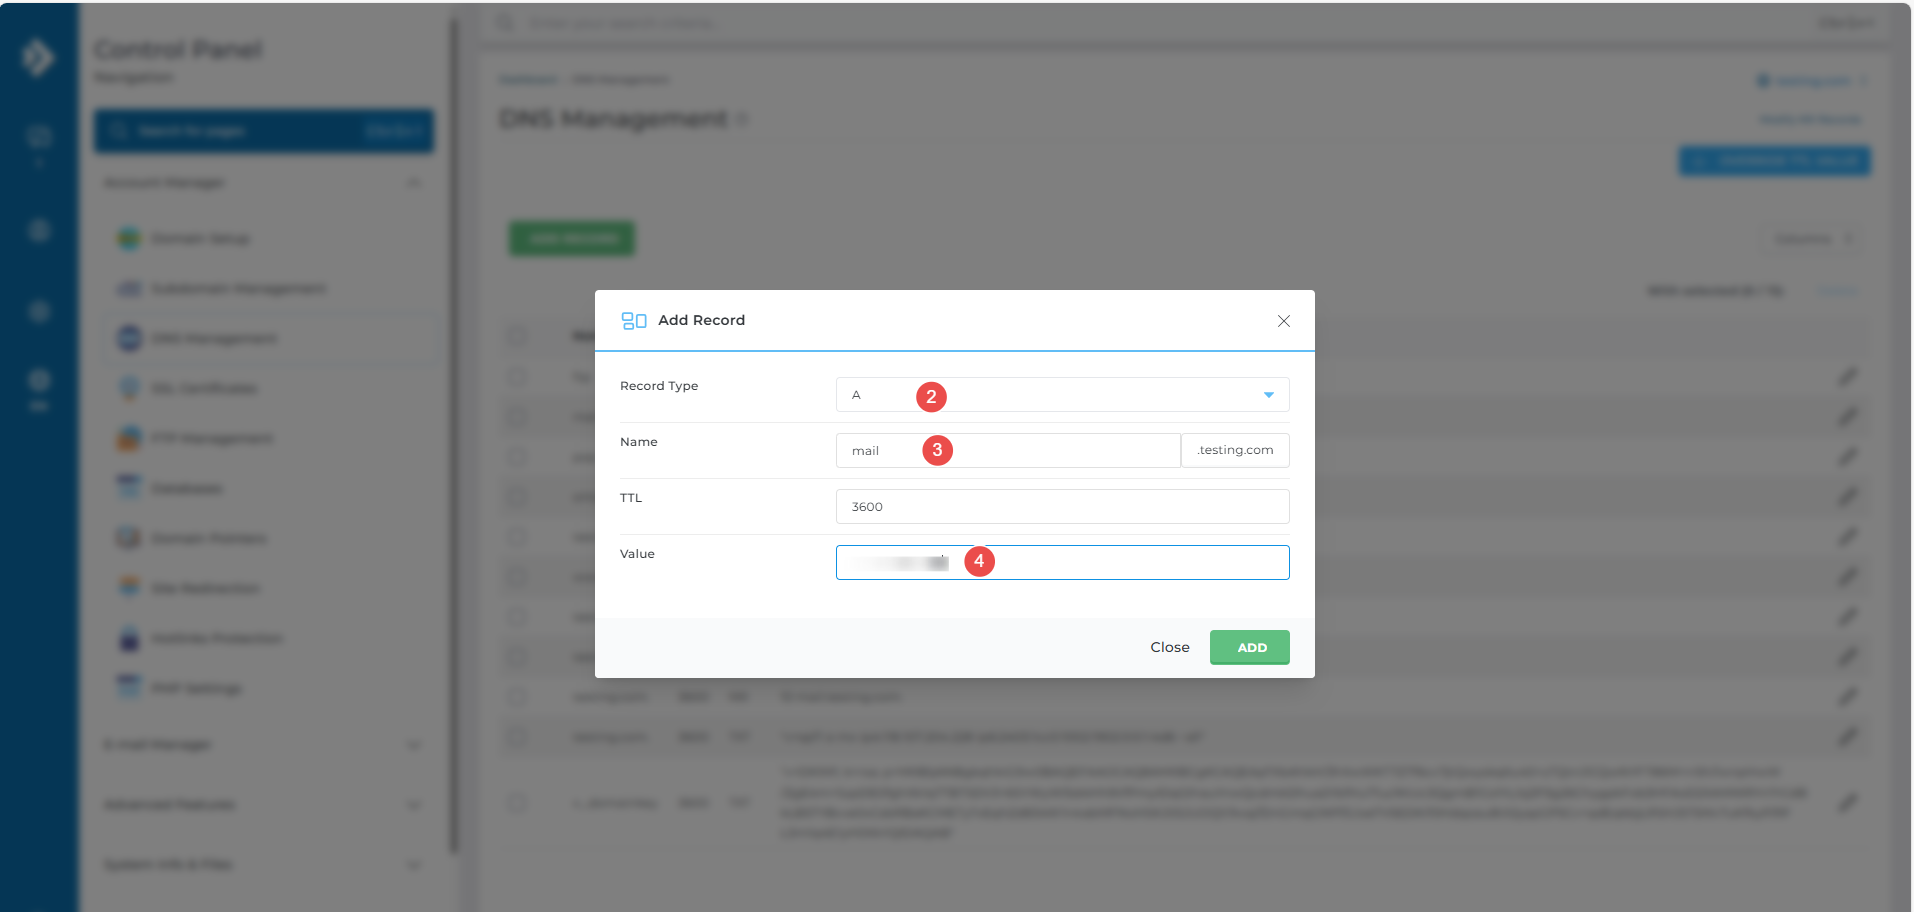
- Record Type: A
- Name: mail
- Value: <your server ip>
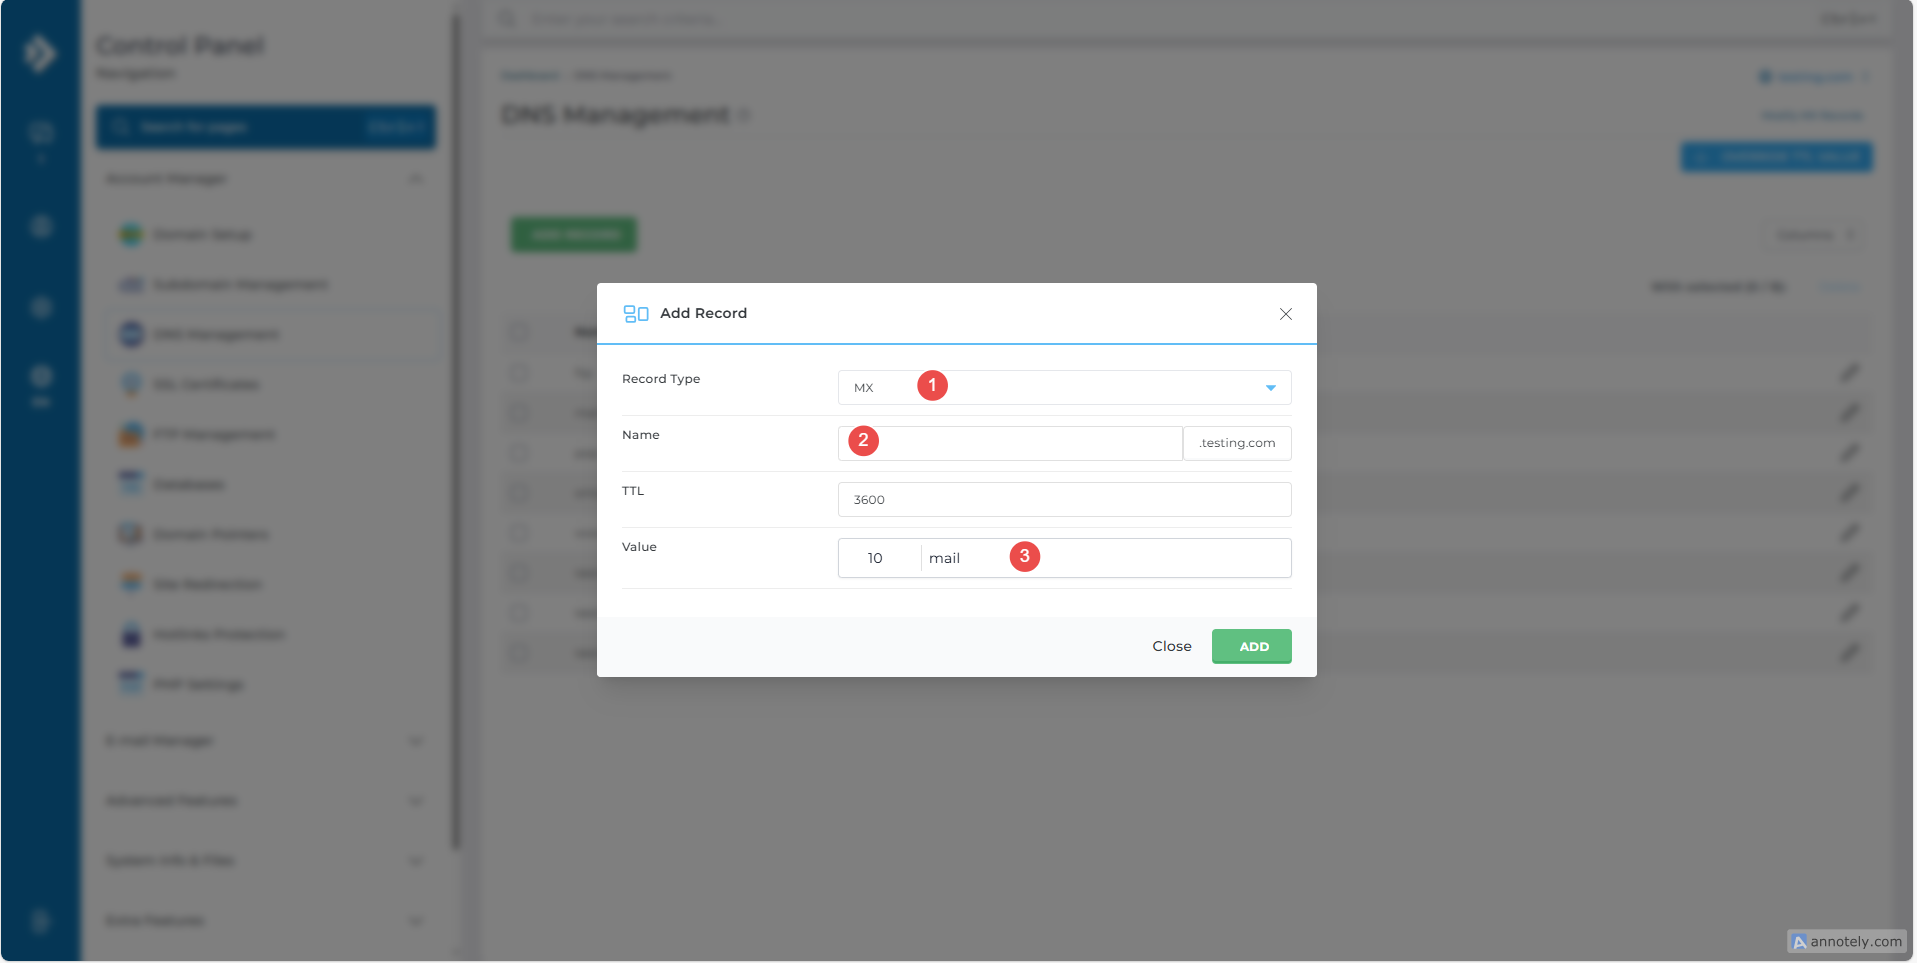
Step 4: Set Up MX Record for <yourdomian>.com
- Click ADD RECORD
- Record Type: MX
- Name: (leave blank or use @ ) → means the record applies to the root domain (<yourdomain.com>)
- Value: mail(the name created in Step 3)
Step 5: Set Up TXT Records
For mail servers, TXT records are essential for verifying your domain and preventing email spoofing. You’ll need to set up three key TXT records to ensure your emails are delivered correctly and securely: SPF, DKIM, and DMARC.
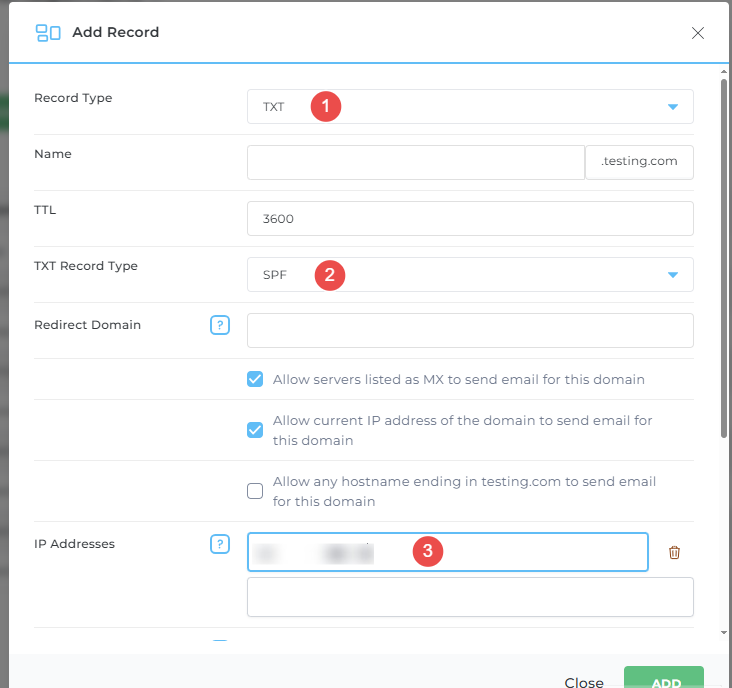
1. SPF Record
- Record Type: TXT
- TXT Record Type: SPF
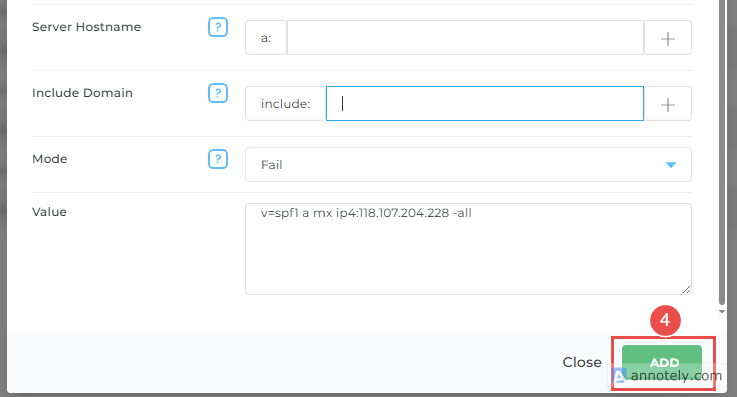
- IP Addresses: <your server ip>
- Click ADD
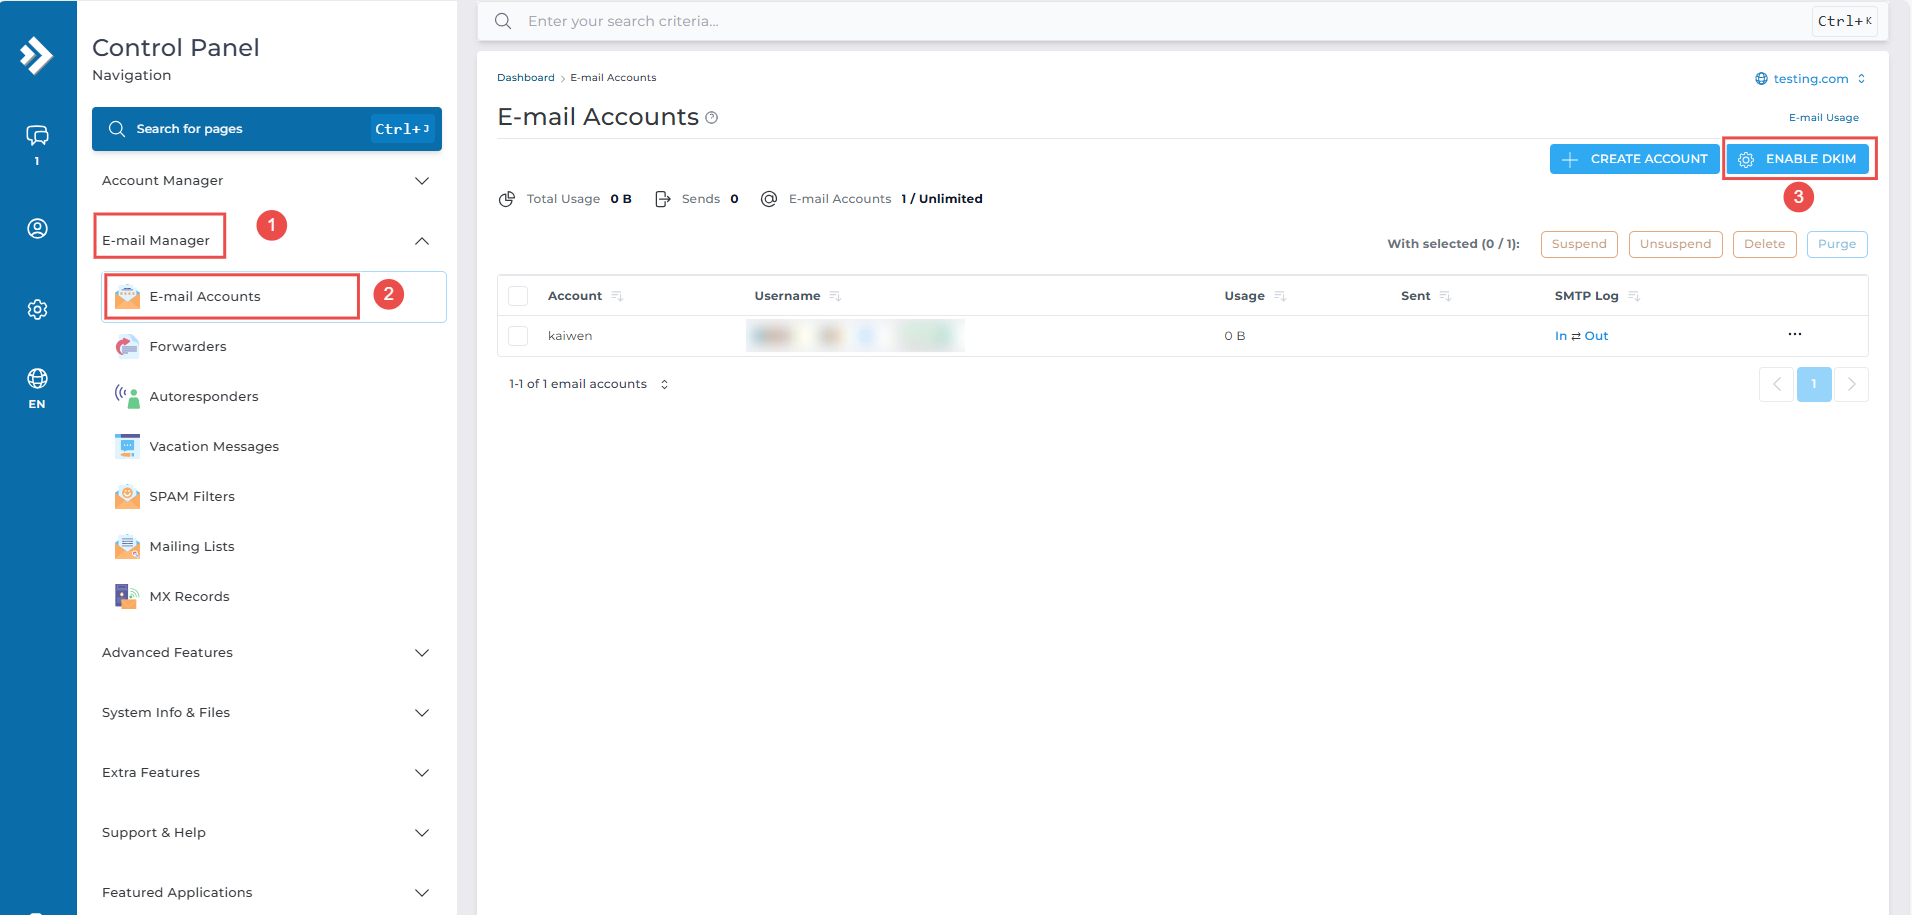
2.DKIM Record
- on left menu click Email Manager
- Click Email Accounts
- Click Enable DKIM
- Verify DKIM
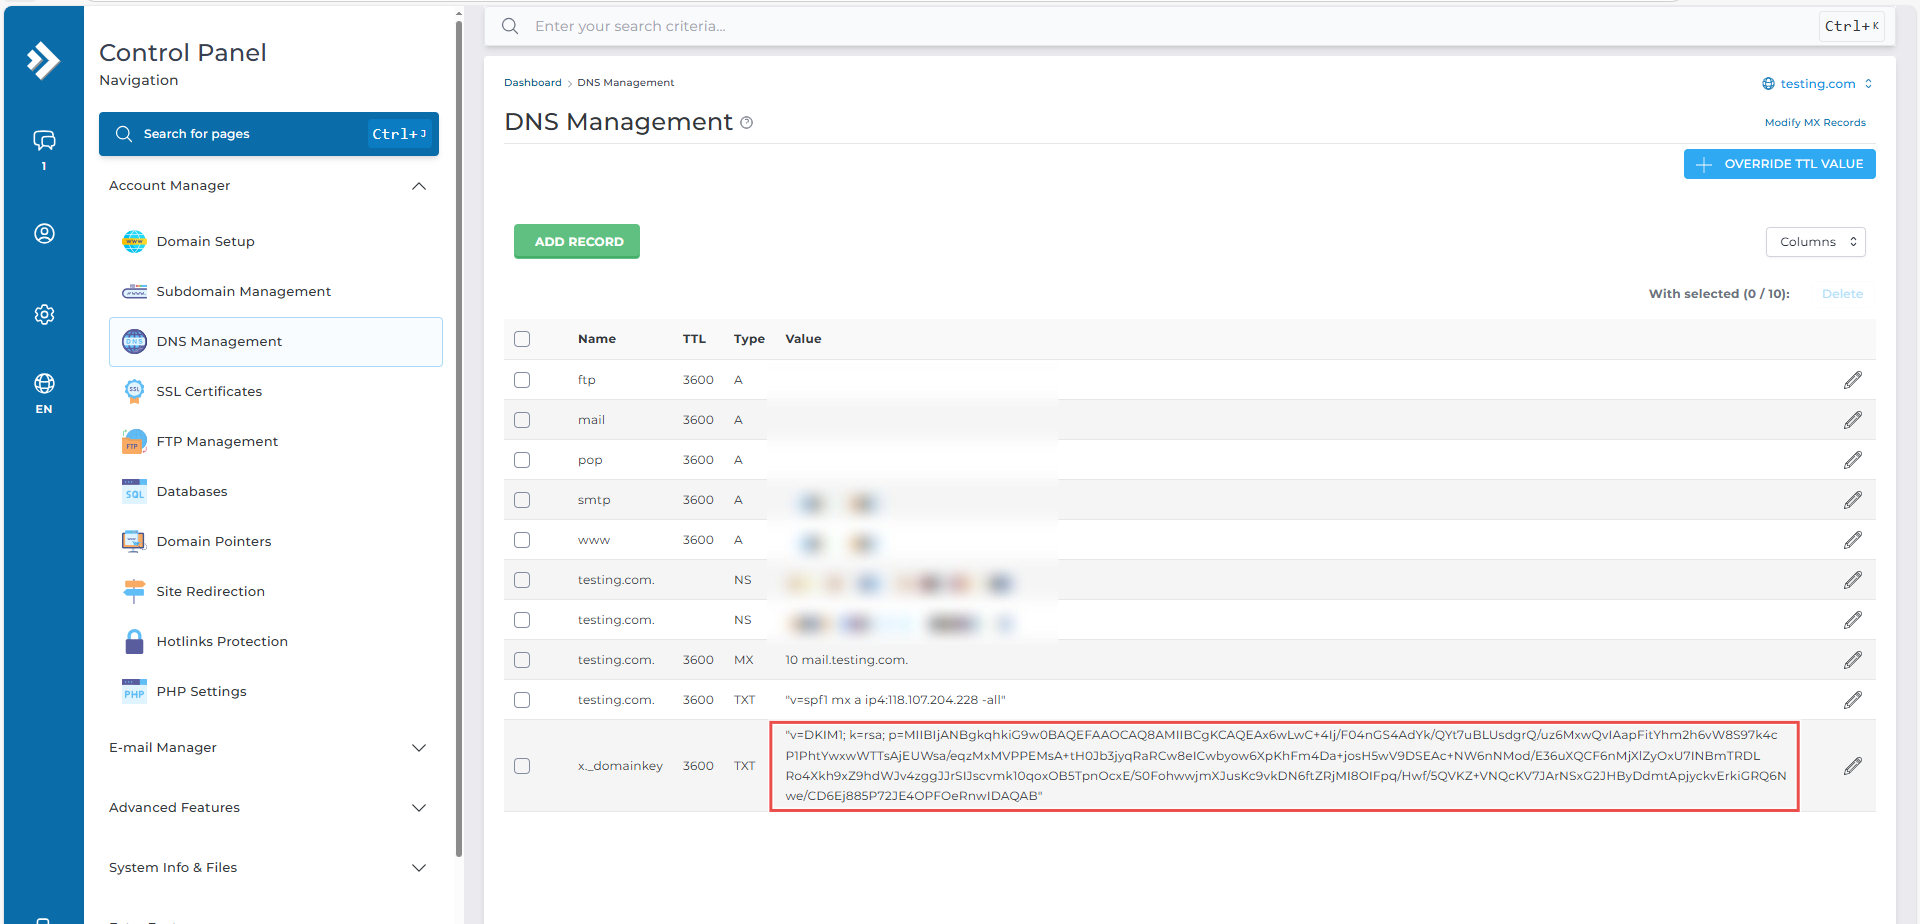
You can verify that the DKIM record has been generated in DNS Management.
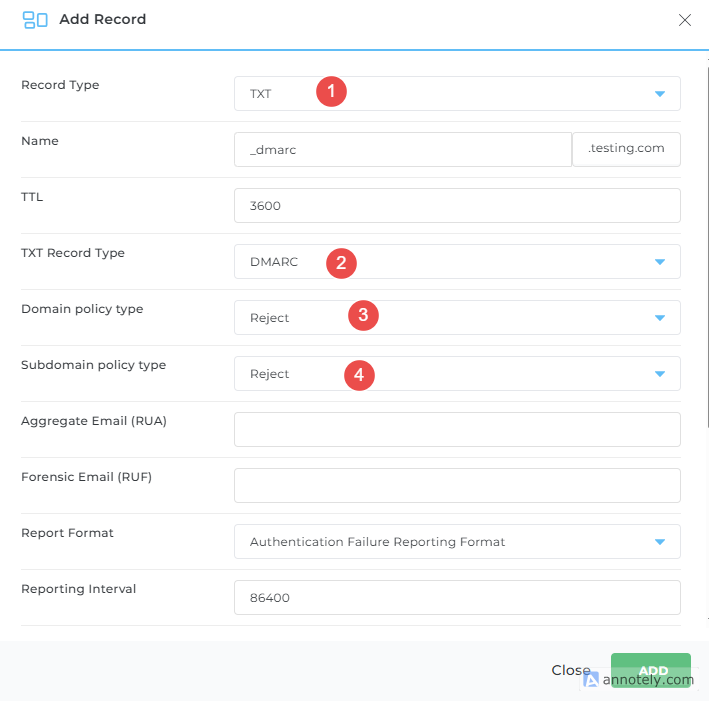
Go back to DNS Management. Click Add Record follow the step bellow:
- Record Type: TXT
- TXT Record Type: DMARC
- Domain policy type: Reject
- Subdomain policy type: Reject
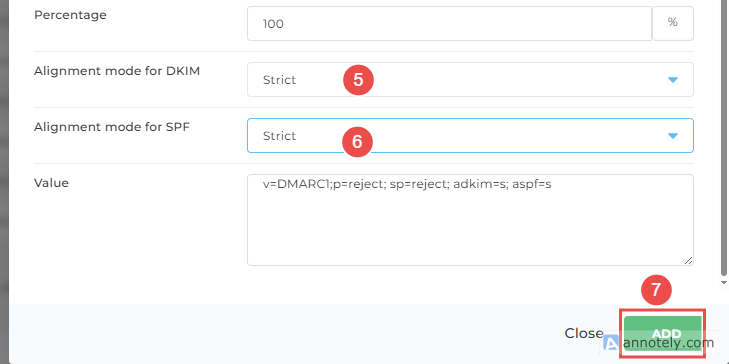
- Alignment mode for DKIM: Strict
- Alignment mode for SPF: Strict
Step 6: Verify DNS Records
After setting the records, use websites such as:
-
or Command line: dig <type> <name>
Example dig command:
dig txt _dmarc.yourdomain.com
Check for correct propagation and syntax. It may take up to 48 hours for DNS changes to take effect.
Step 7: Verify Email Sending and Receiving
After few hours, kindly try sending and receiving emails from your account to confirm that your webmail system is working correctly.
If the DNS changes do not take effect, or if there are issues in sending and receiving, please contact us at support@ipserverone.com for further assistance.
Conclusion
Configuring DNS records for email services through DirectAdmin is a straightforward process that significantly improves email deliverability and security. By properly setting up A, MX, SPF, DKIM, and DMARC records, you establish proper email authentication and protect your domain reputation. These configurations ensure your emails reach their intended recipients while maintaining security best practices.
Remember that DNS changes may take up to 48 hours to fully propagate across all DNS servers. Regular monitoring using tools like MXToolbox can help verify that your records are functioning correctly and your email system maintains optimal performance.
Should you have any inquiries about the guidelines, please feel free to open a ticket through your portal account or contact us at support@ipserverone.com. We’ll be happy to assist you further.
