Search Our Database
How to Reject Emails with Custom Error Messages using Email Filters in cPanel
Introduction
This Knowledge Base article provides a concise, step-by-step guide on How to Reject Emails with Custom Error Messages using Email Filters in cPanel. Email filters allow you to automatically manage incoming messages by setting specific rules and actions. By configuring a reject action with a custom error message, you can automatically bounce unwanted emails back to the sender with a personalized explanation, helping you maintain control over which messages reach your inbox while informing senders why their emails were not accepted.
Prerequisite
- Access to your cPanel login page.
Step-by-Step Guide
Step 1: Log in to cPanel
- Access and log in to your cPanel account using your username and password.
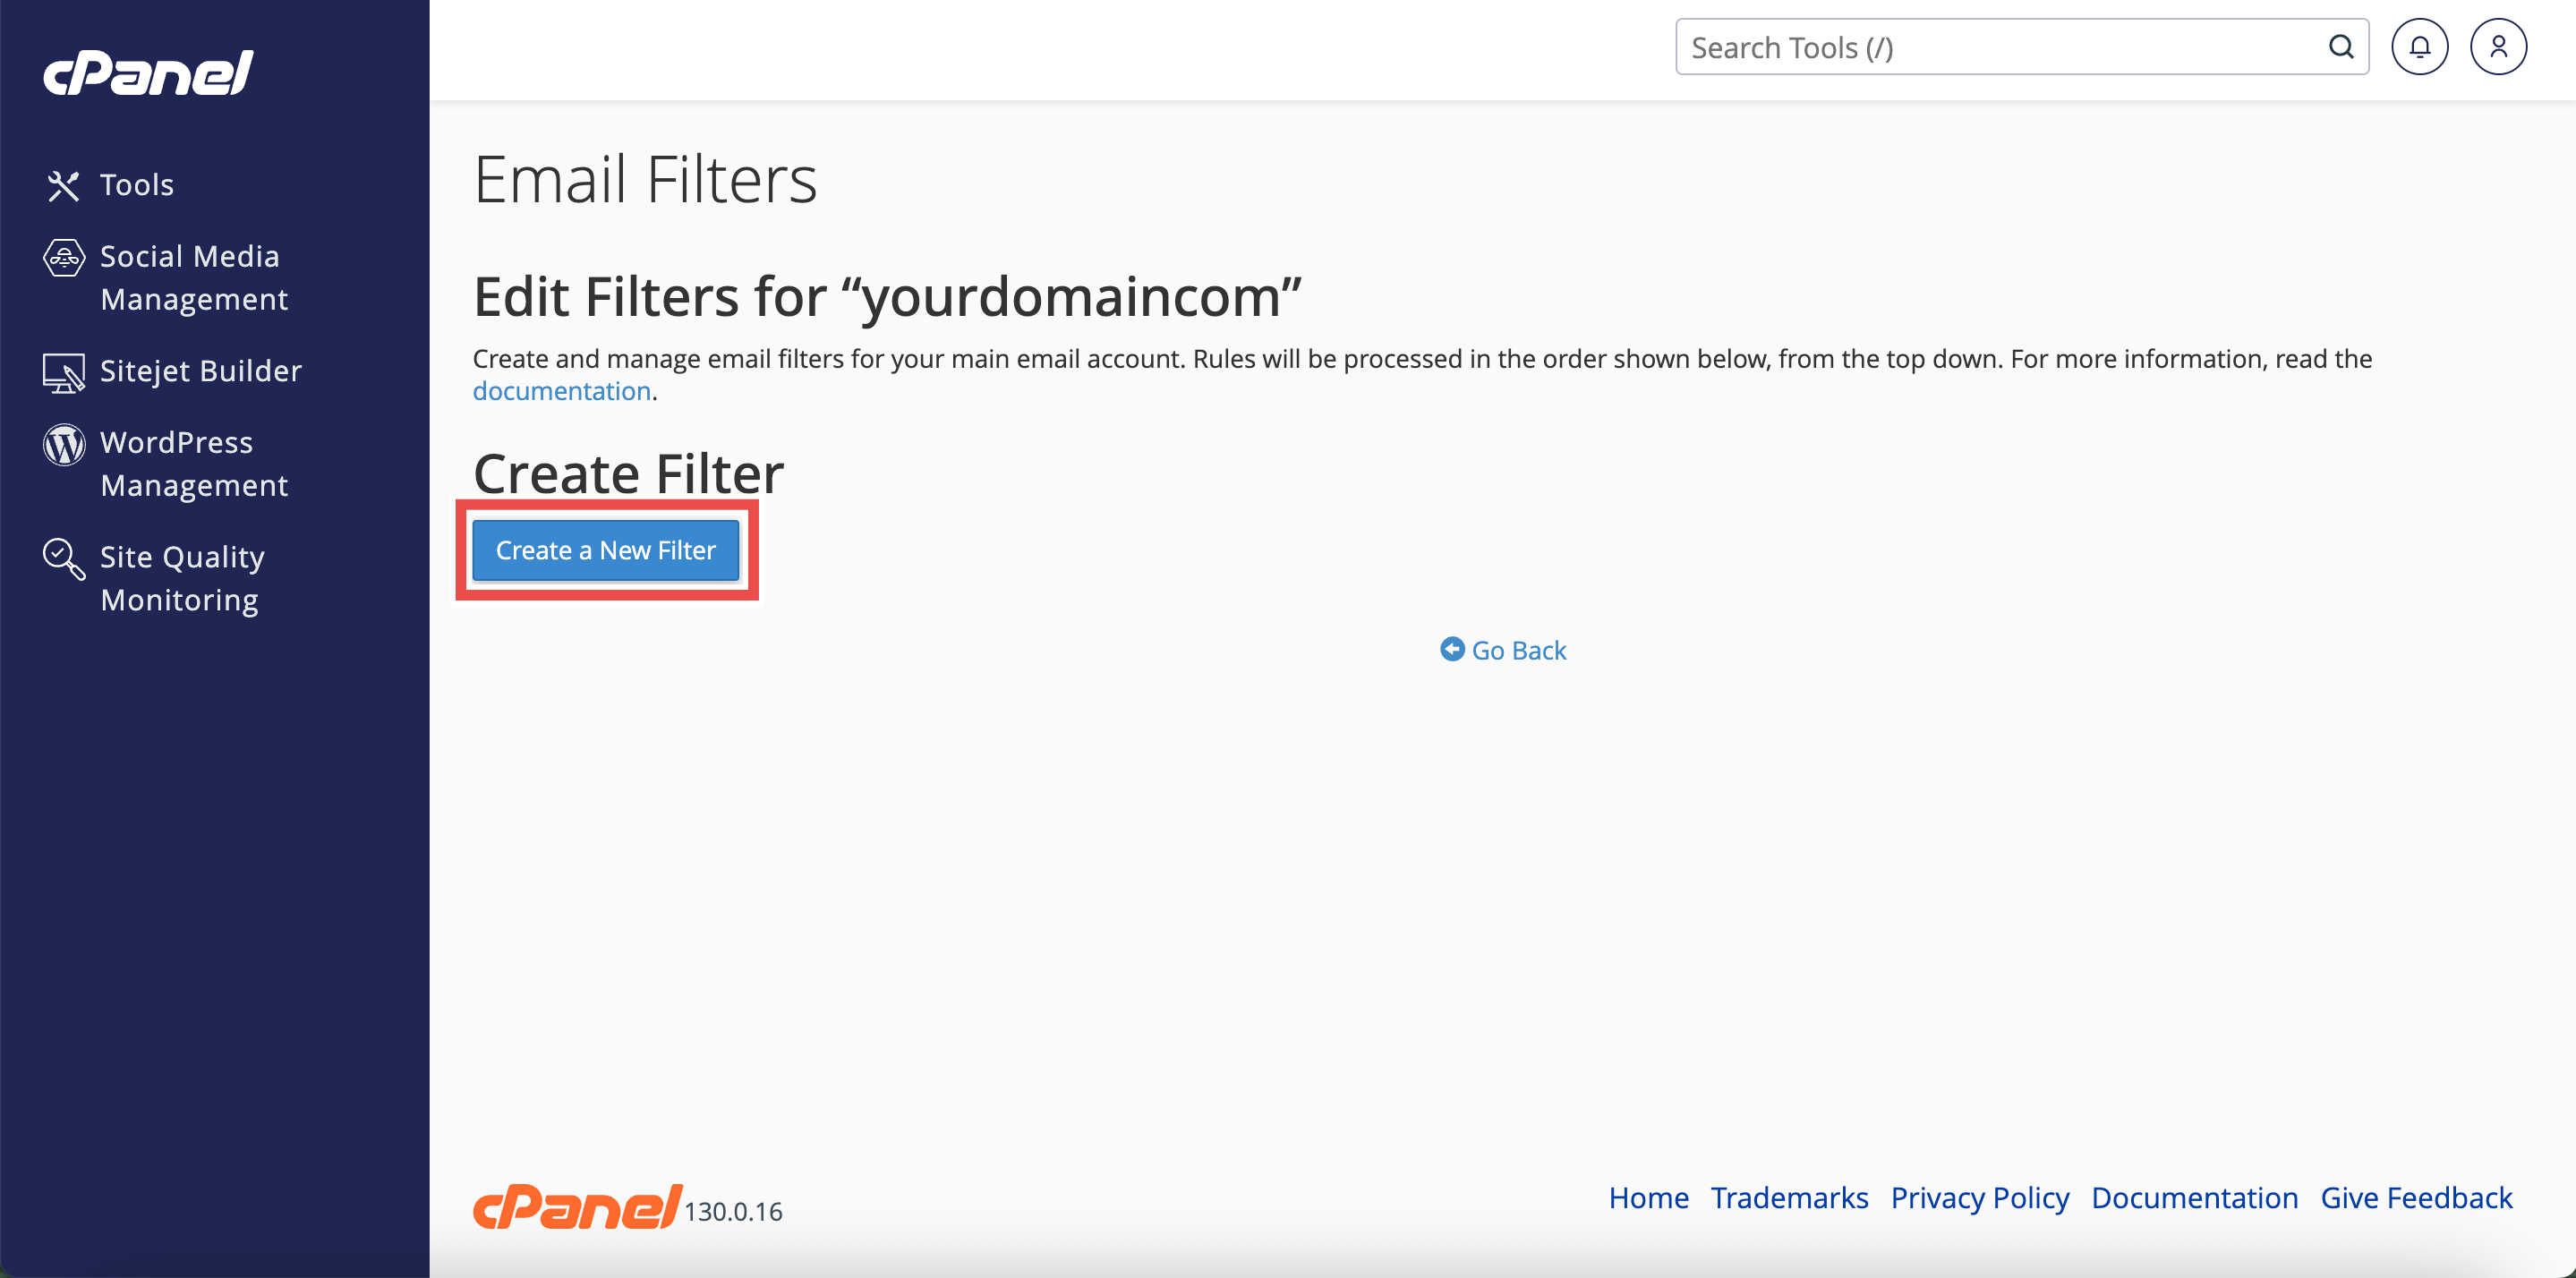
Step 2: Open Email Filters
- In the Home page, under Email, click Email Filters.

Step 3: Select Email Account
- In the Filters by Users table, locate the email account for which you want to create the filter.
- Click Manage Filters next to the email account.

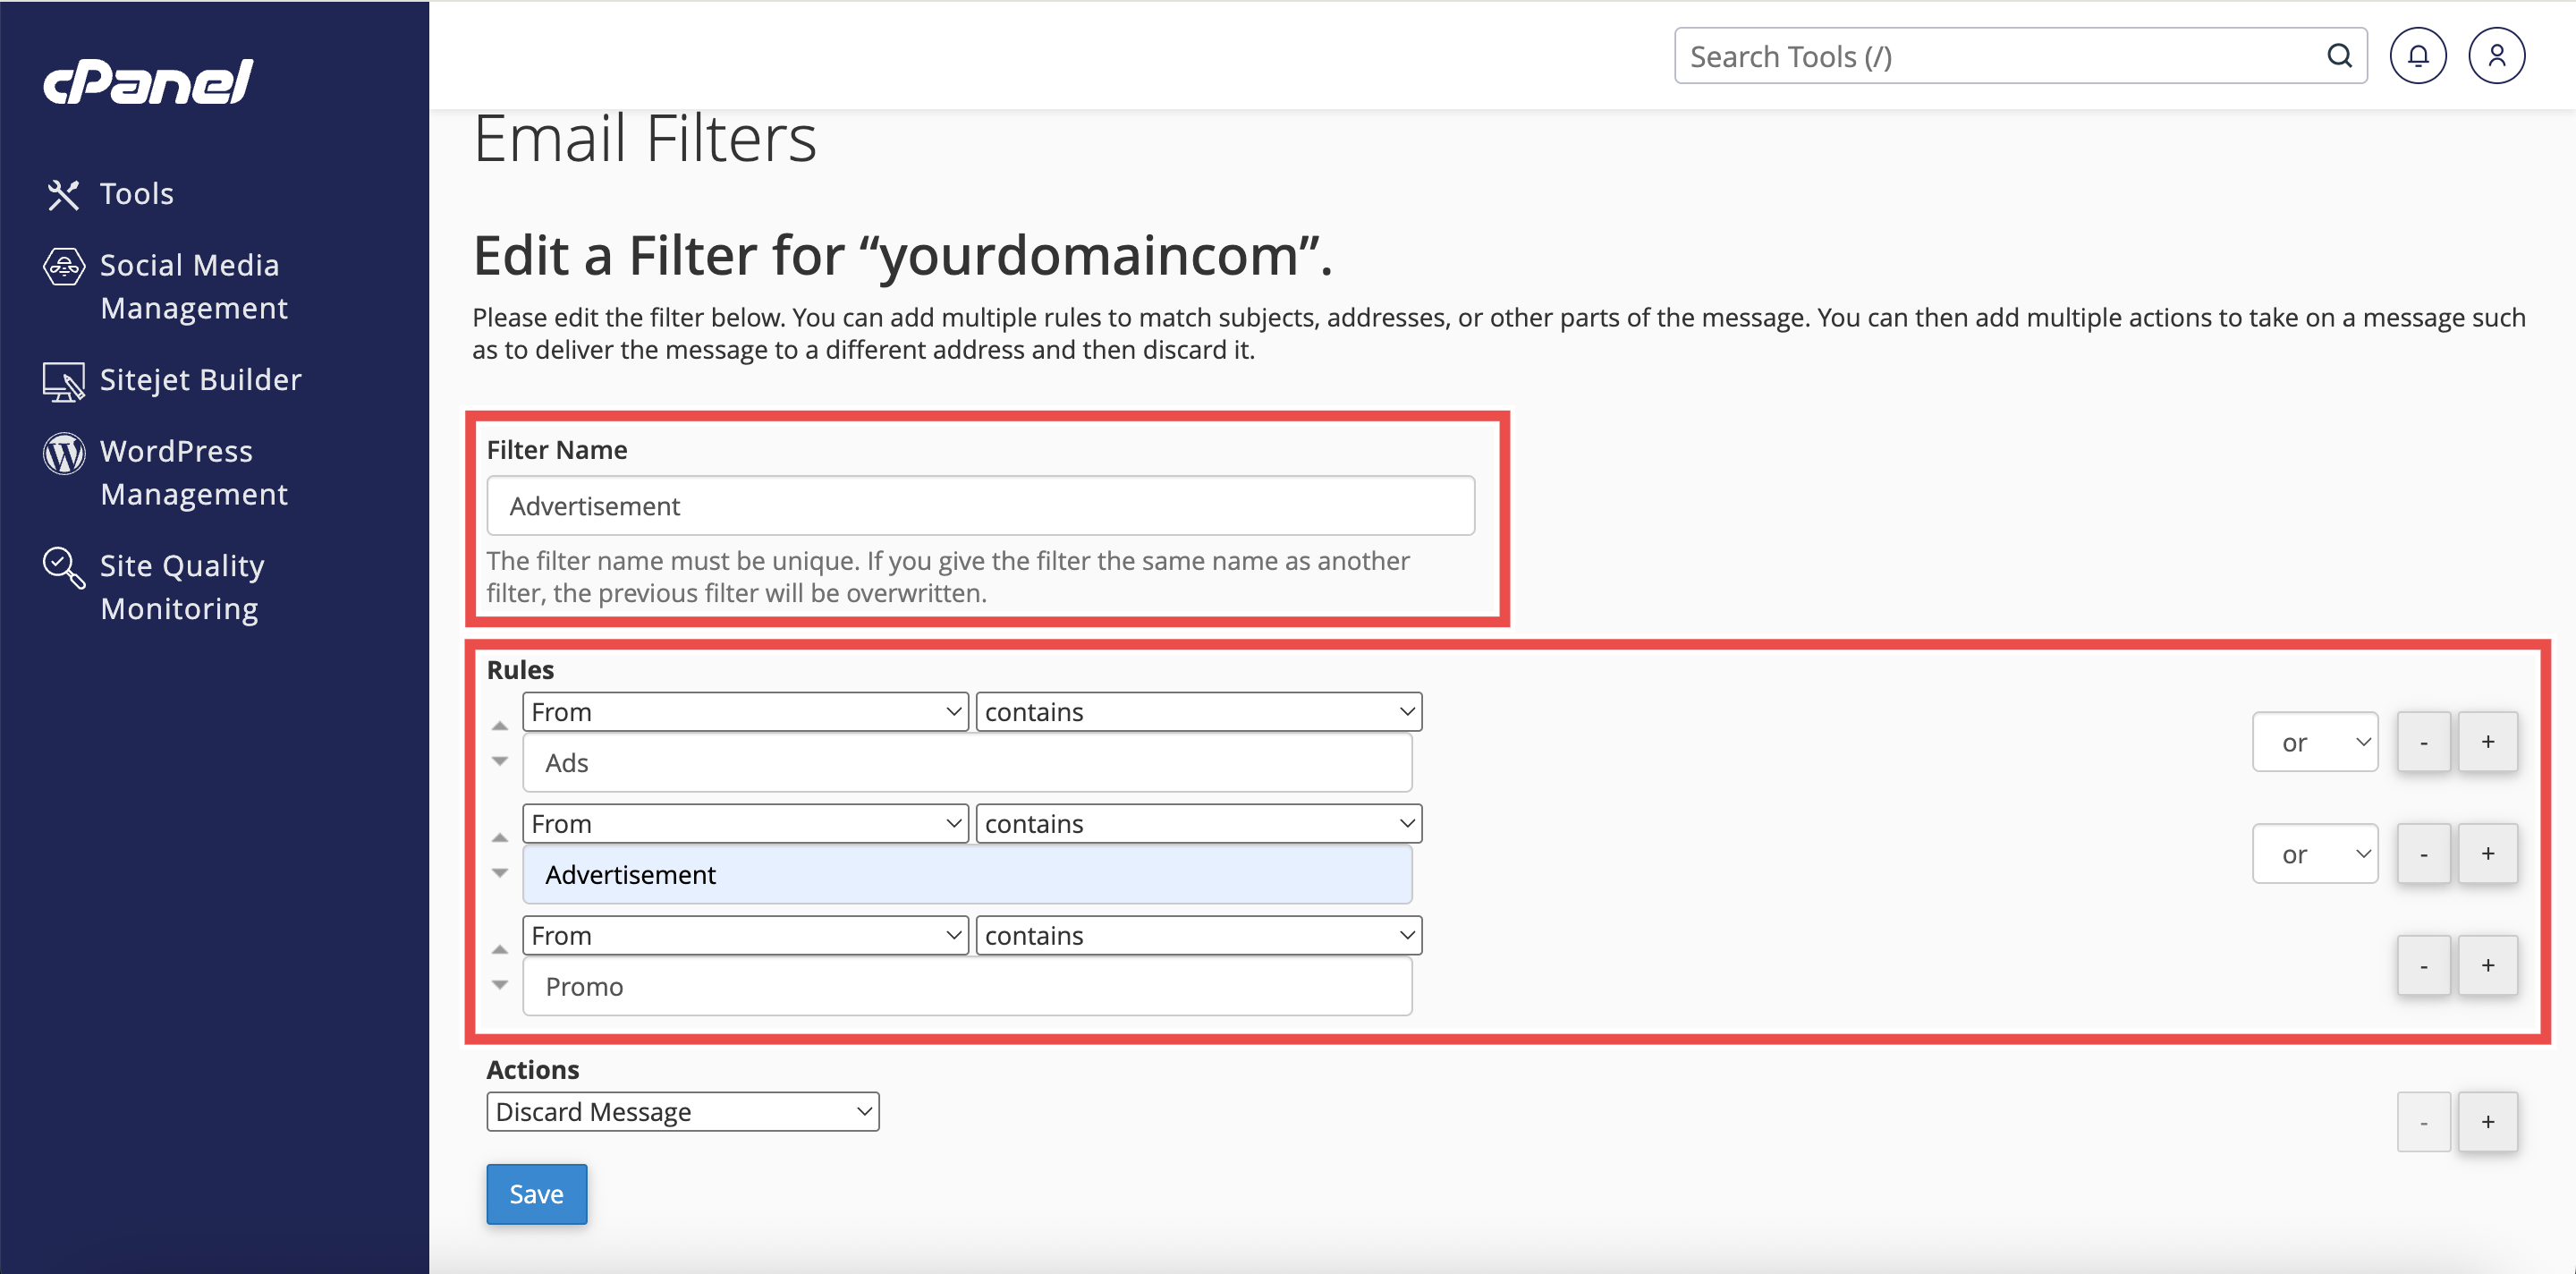
Step 4: Create a New Filter
- Click Create a New Filter.
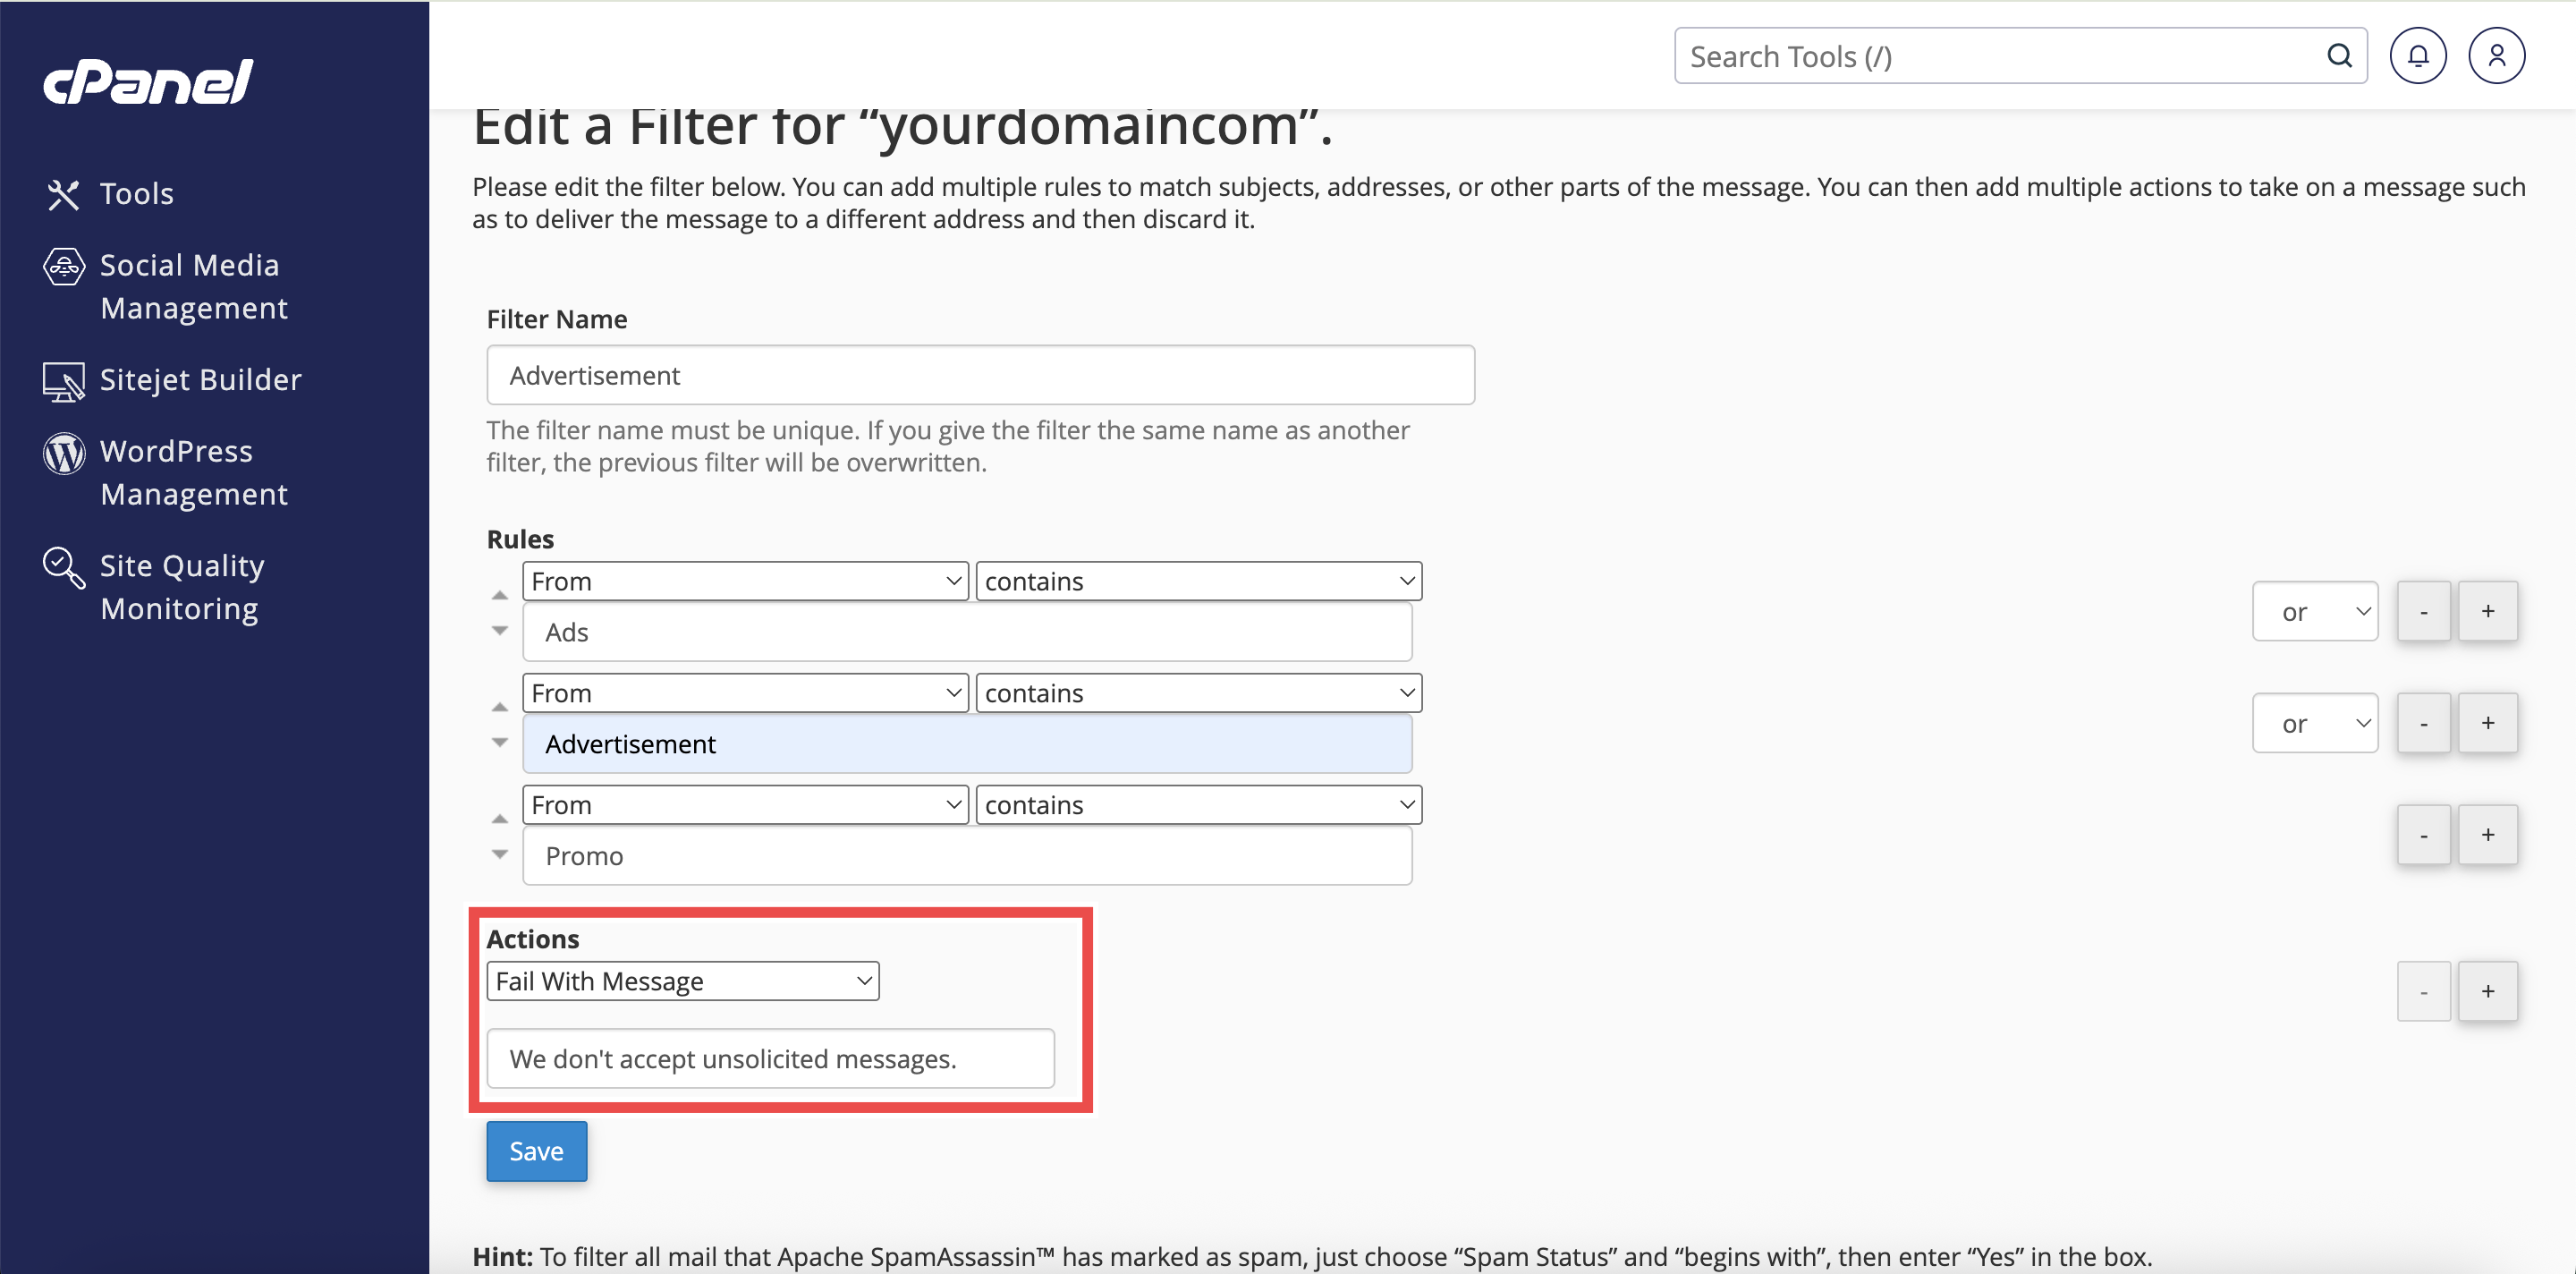
- Add or Change the filter’s Name, Rules, or Actions as needed.
- Filter’s Name: The label for your filter (e.g., Block Promo Emails).
- Rules: Conditions that trigger the filter (like sender, subject, or keywords).
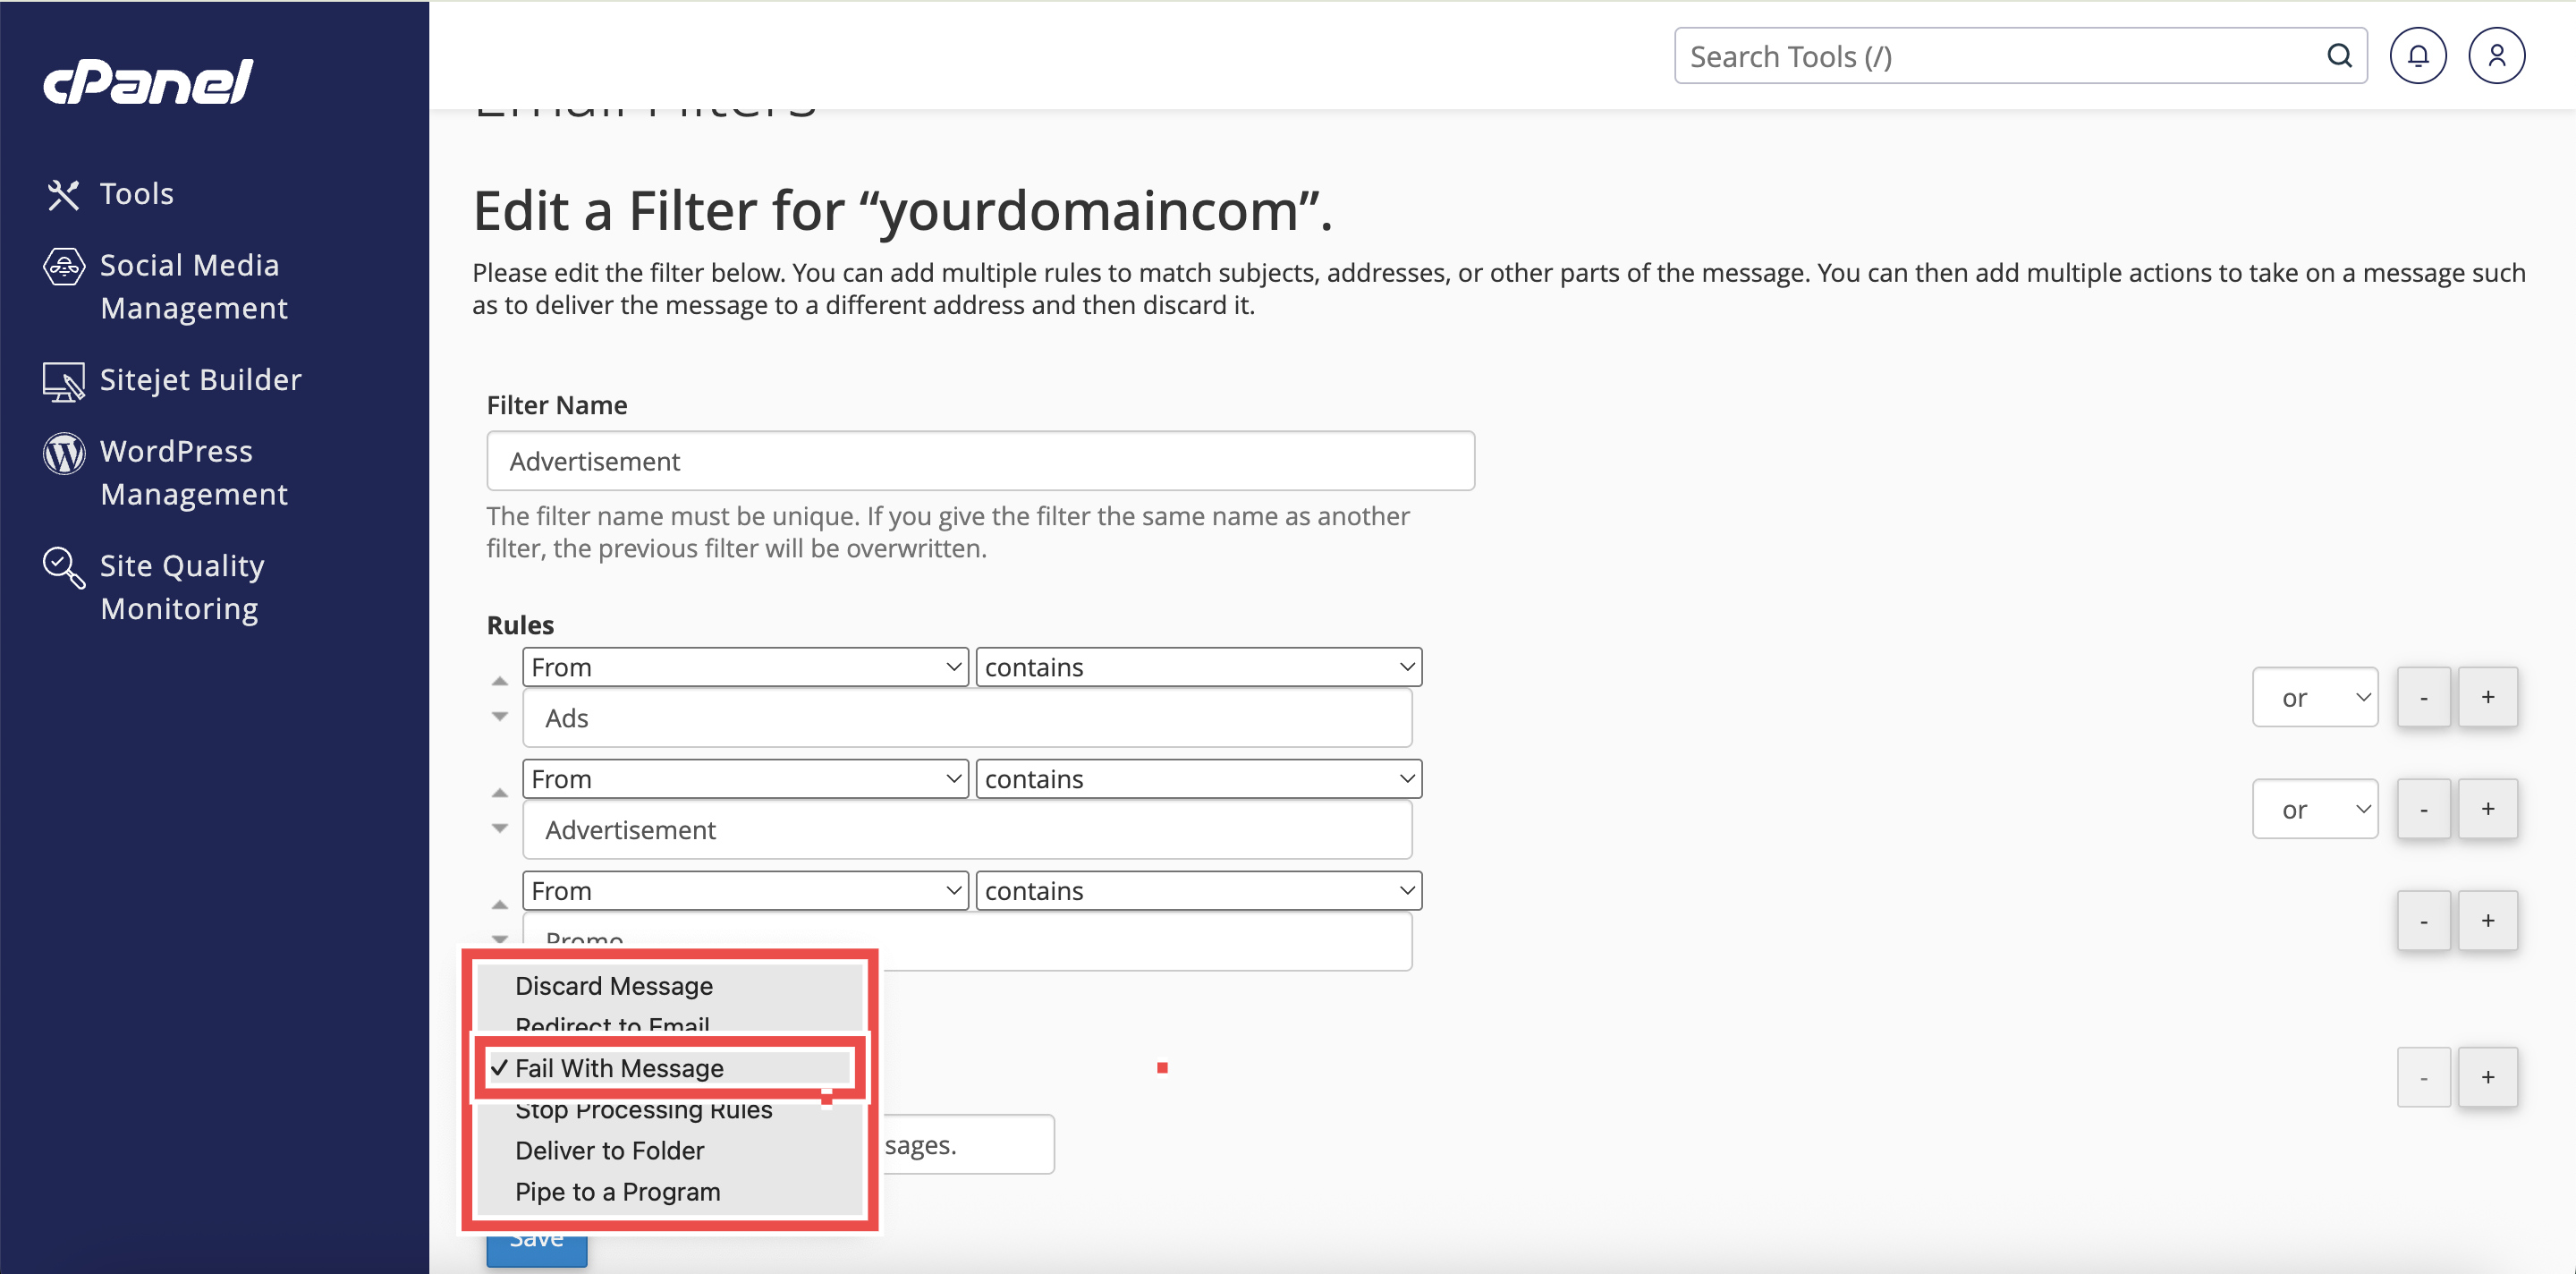
Step 5: Configure Actions
- Under Actions, select Fail with message from the dropdown menu.
- In the text field that appears, enter your custom error message that will be sent back to the sender. For example: “This email address does not accept unsolicited messages.”
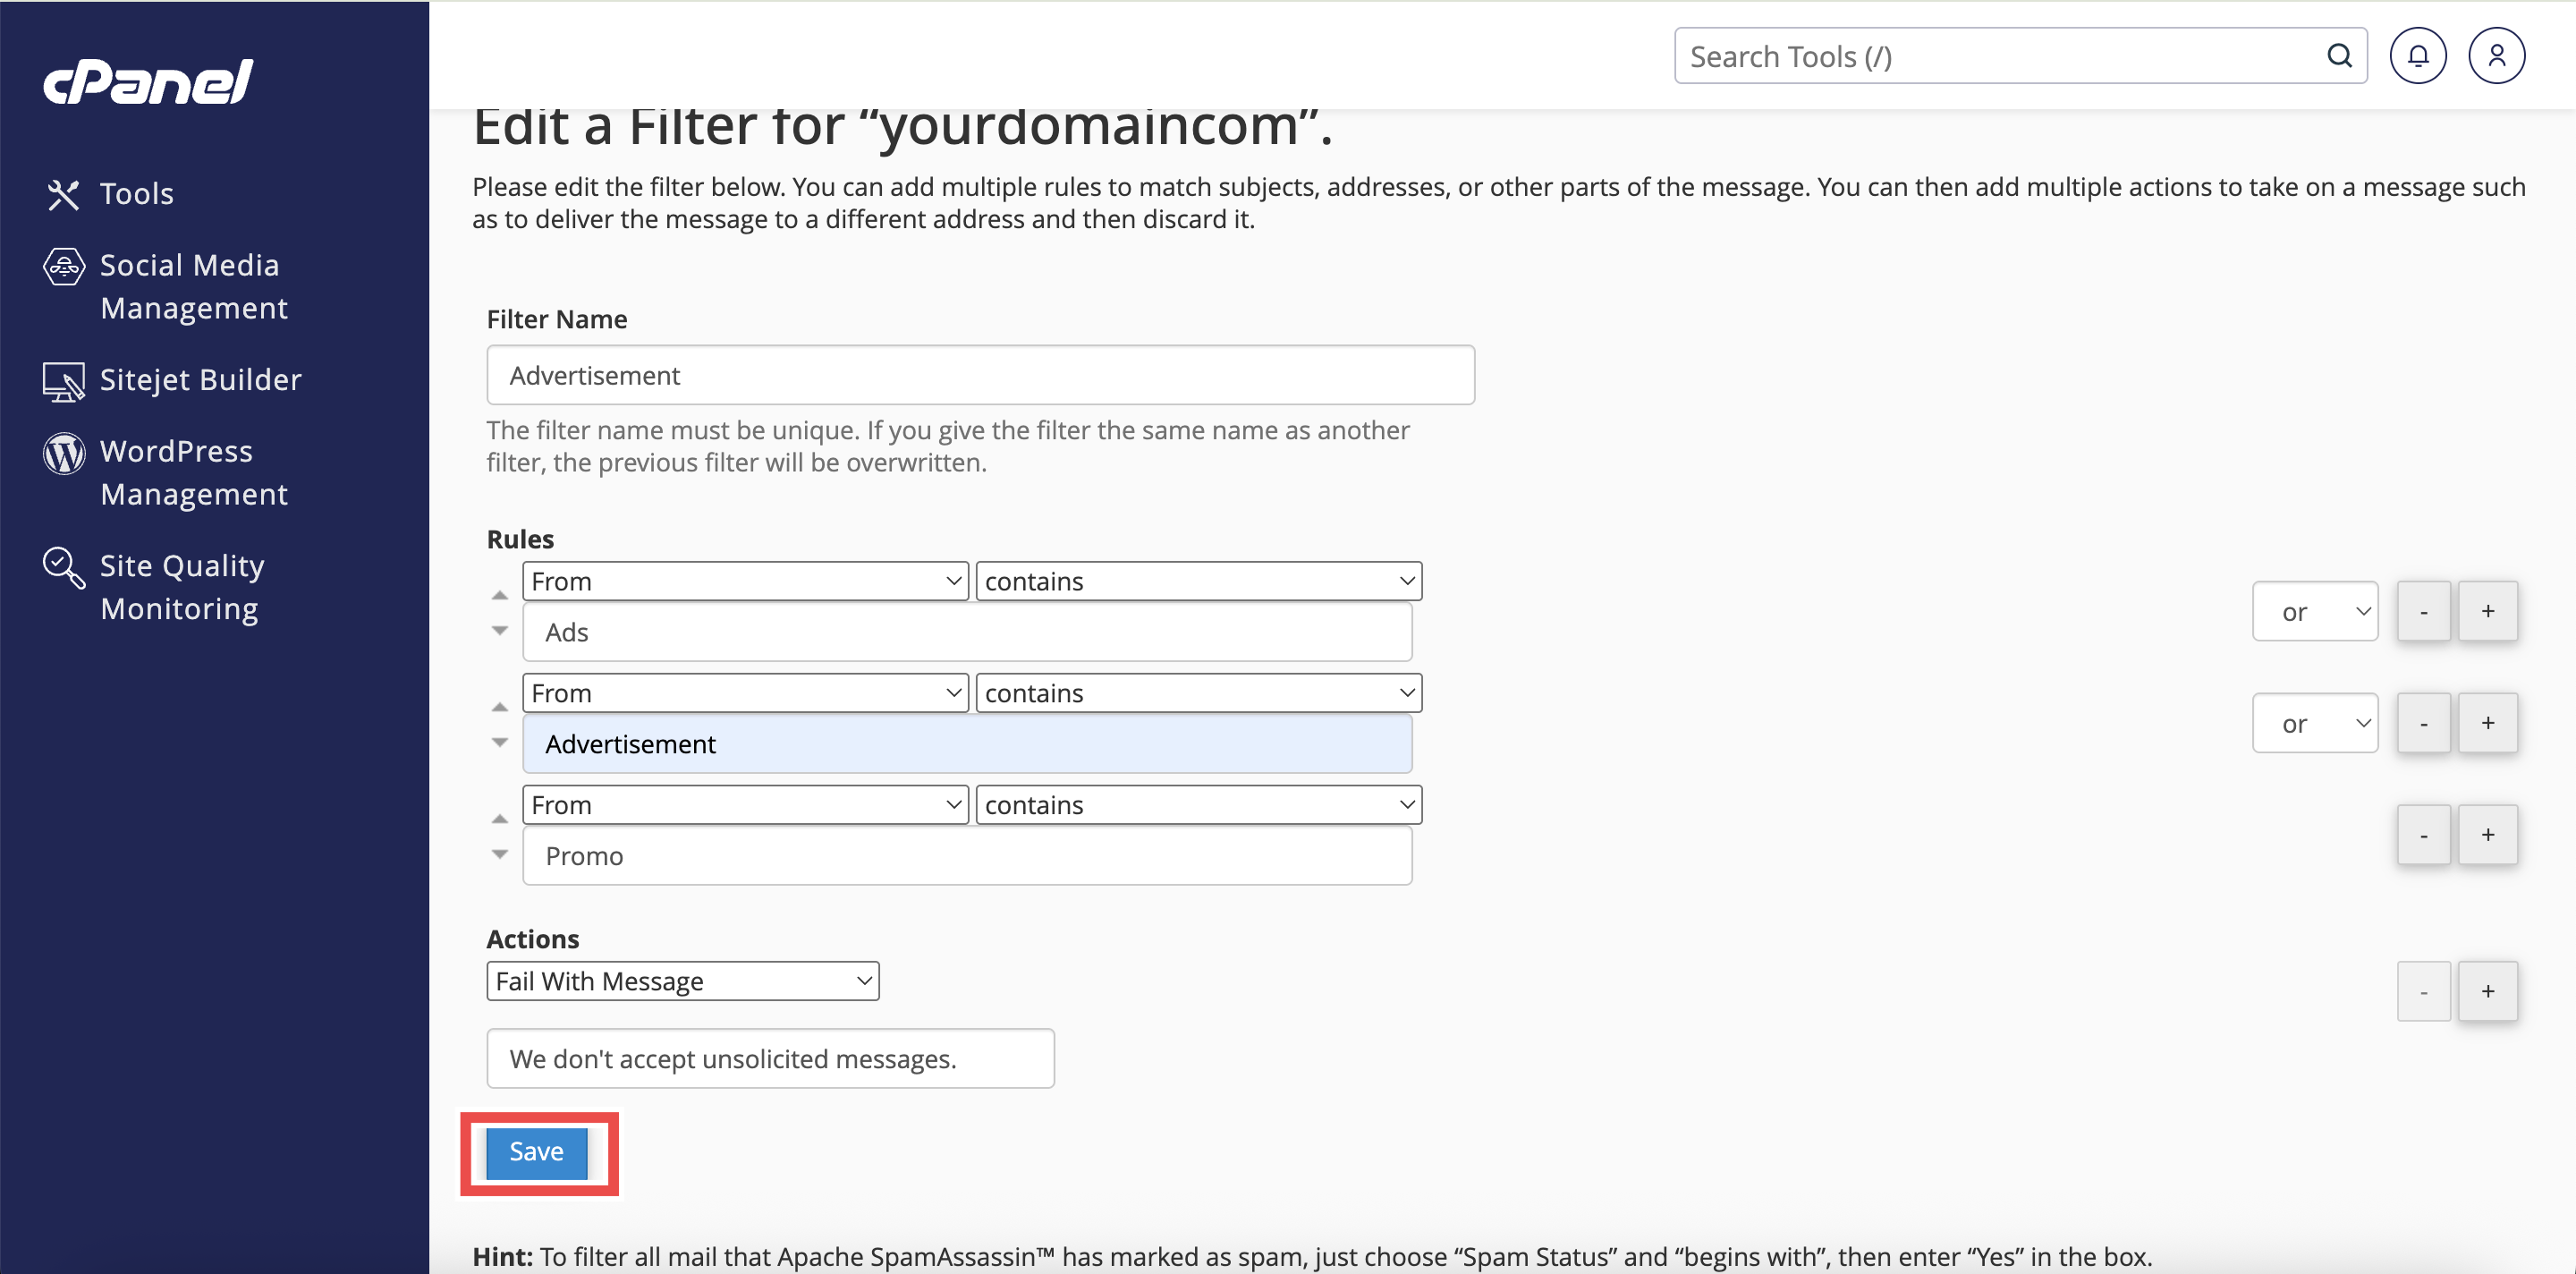
- Click Save to save the filter.
⚠️ Important Note:
- Keep your error message professional and clear.
- The sender will receive this message as a bounce notification explaining why their email was rejected.
Step 6: Verify the Changes
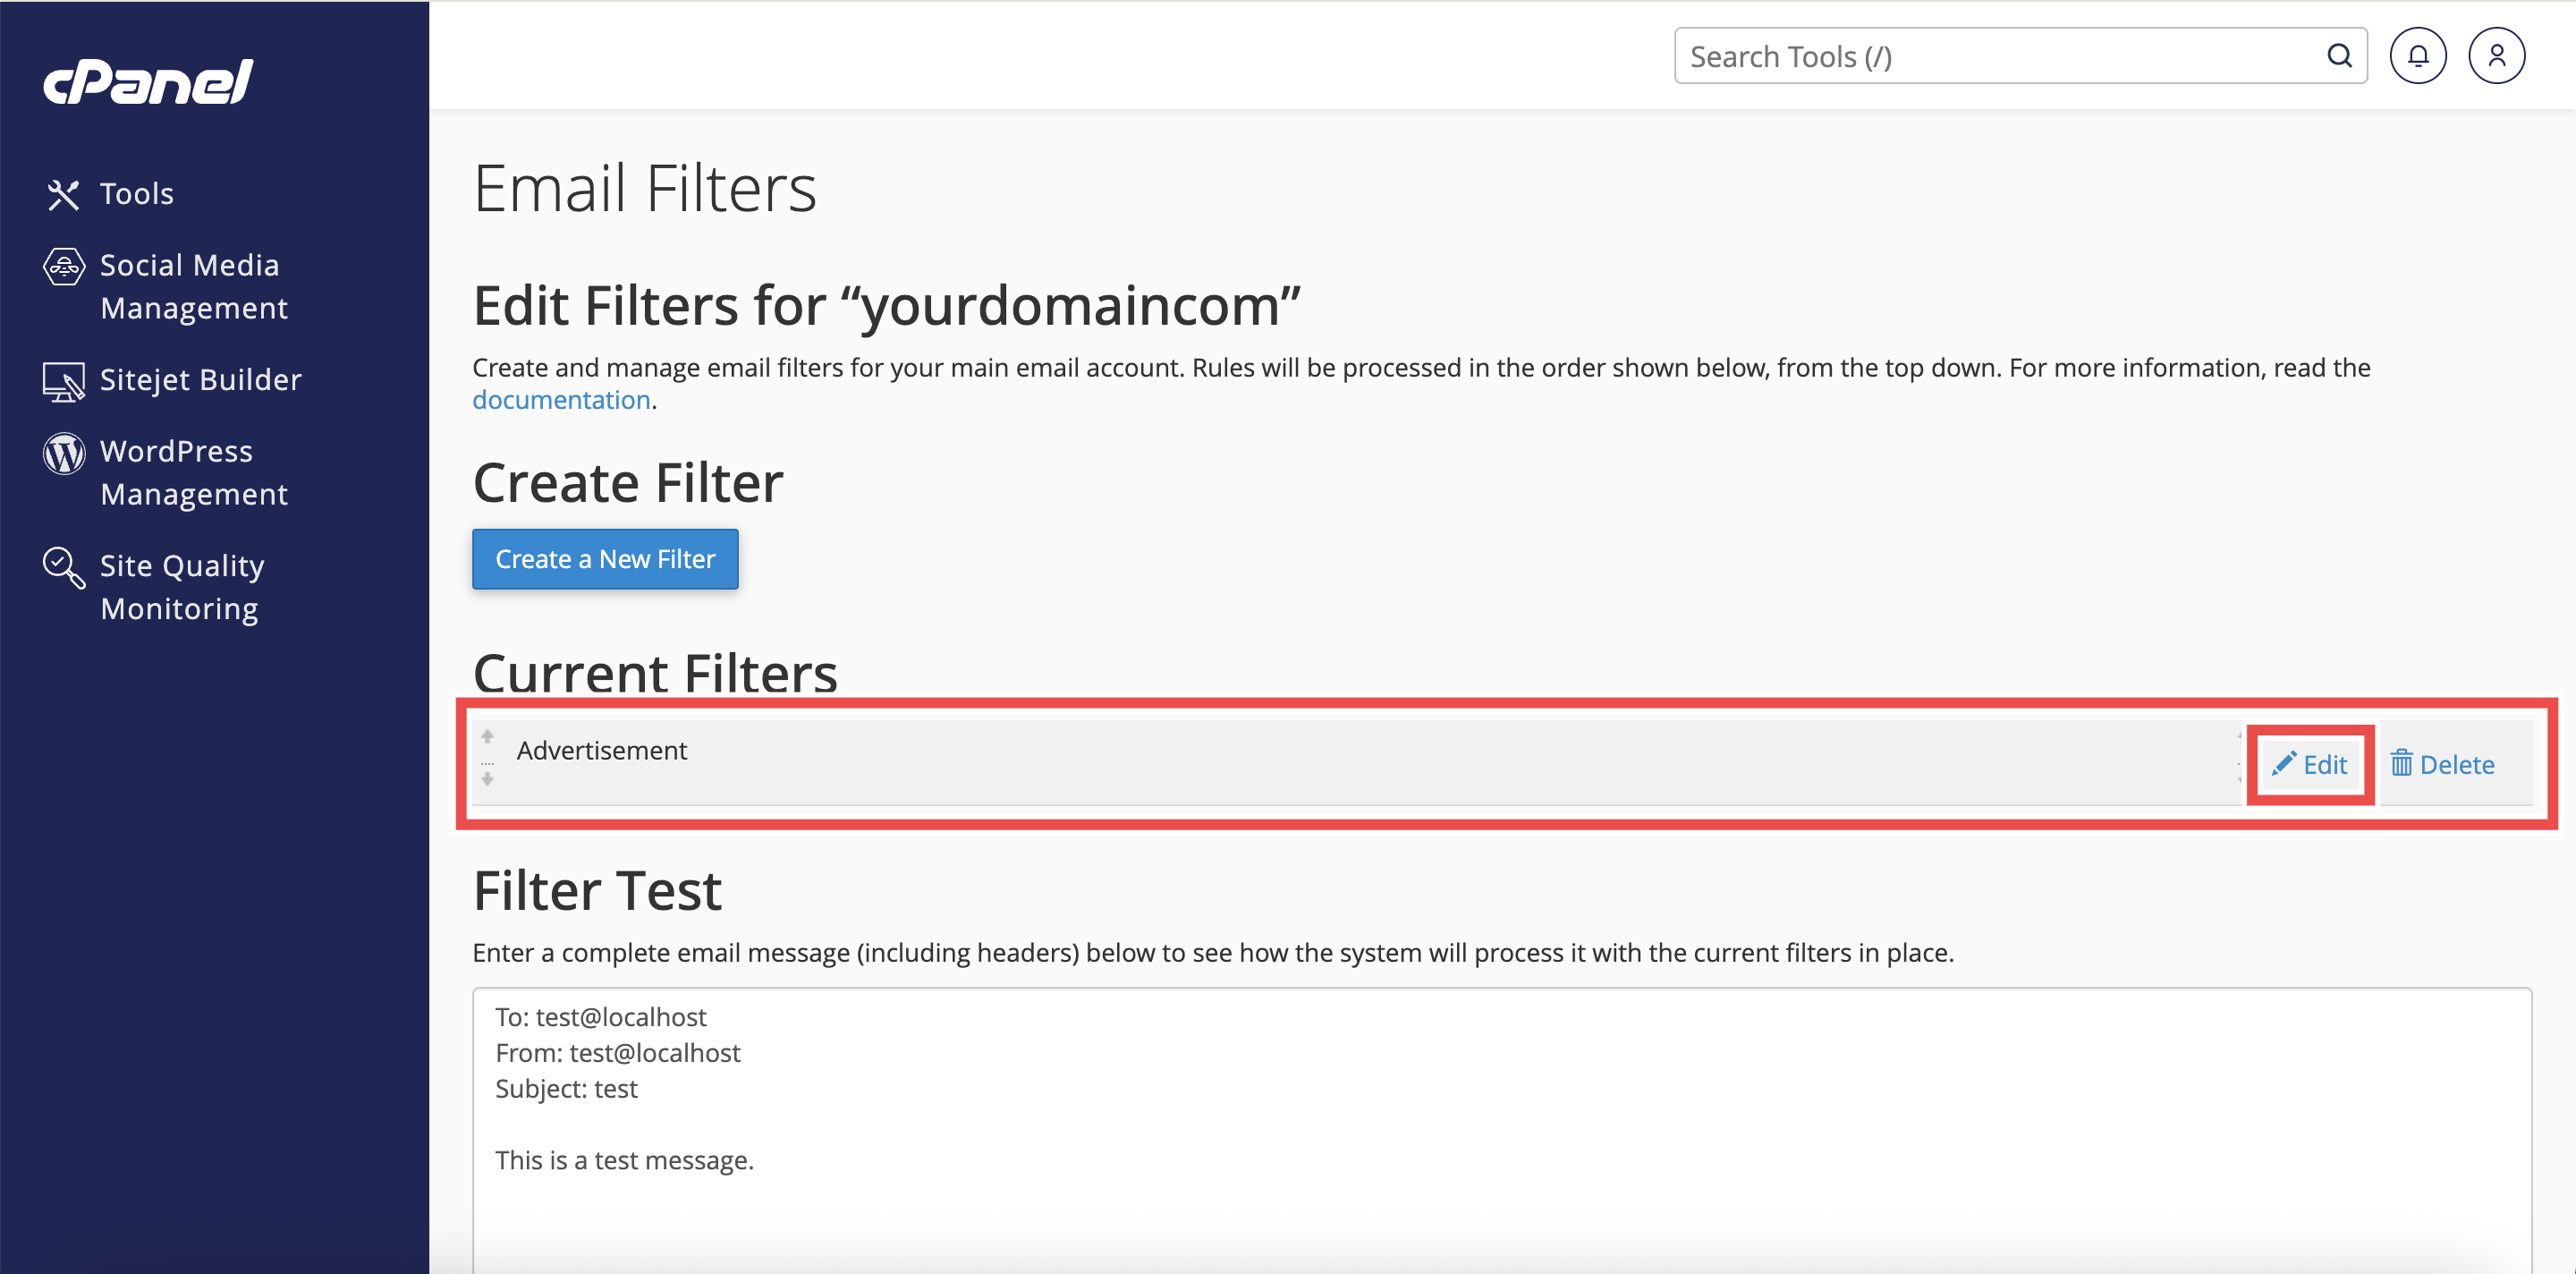
- Check that the filter appears in the Current Filters table and click Edit to check that the current filter’s details reflect the changes you made.
Conclusion
By following these steps, you can successfully reject emails with custom error messages using Email Filters in cPanel. This feature helps you automatically manage unwanted emails while providing clear feedback to senders about why their messages were not delivered. Remember to test your filters regularly and adjust them as needed to ensure they work correctly without blocking legitimate emails.
Should you encounter any issues or have any questions, our support team at IPSERVERONE is always here to assist you. Don’t hesitate to reach out to us at support@ipserverone.com for any help you need.