Search Our Database
How to Perform HTTP Verification for SSL on cPanel
Introduction
Domain validation is an essential step when generating an SSL certificate with Sectigo, ensuring that the requester has legitimate control over the domain. One of the methods for this process is HTTP-based verification, where a specific file is uploaded to your web server to prove domain ownership. This guide provides a step-by-step walkthrough of how to complete HTTP verification for SSL issuance using cPanel.
Prerequisites
- Access to your web server
- User access to your cPanel
- Domain validation for Single/Alpha SSL
- Your port 80 is running
- There is no redirection to another website
- Access to web files of the domain
Detailed Steps for HTTP Verification
Step 1: Receiving your TXT files
You should be receiving an email from IPSERVERONE with a TXT file attached, and/or instructions that include a specific text to place in your website. To complete the HTTP domain verification for Sectigo, you’ll need to upload the provided TXT file at the following path:
http://{yourdomain.com}/.well-known/pki-validation/{specific-name-file.txt}
Replace {yourdomain.com} with your domain and {specific-name-file.txt} with the actual name of the TXT file provided. This URL also can be used to view if the file upload is performed correctly.
Step 2: Browse to Domains
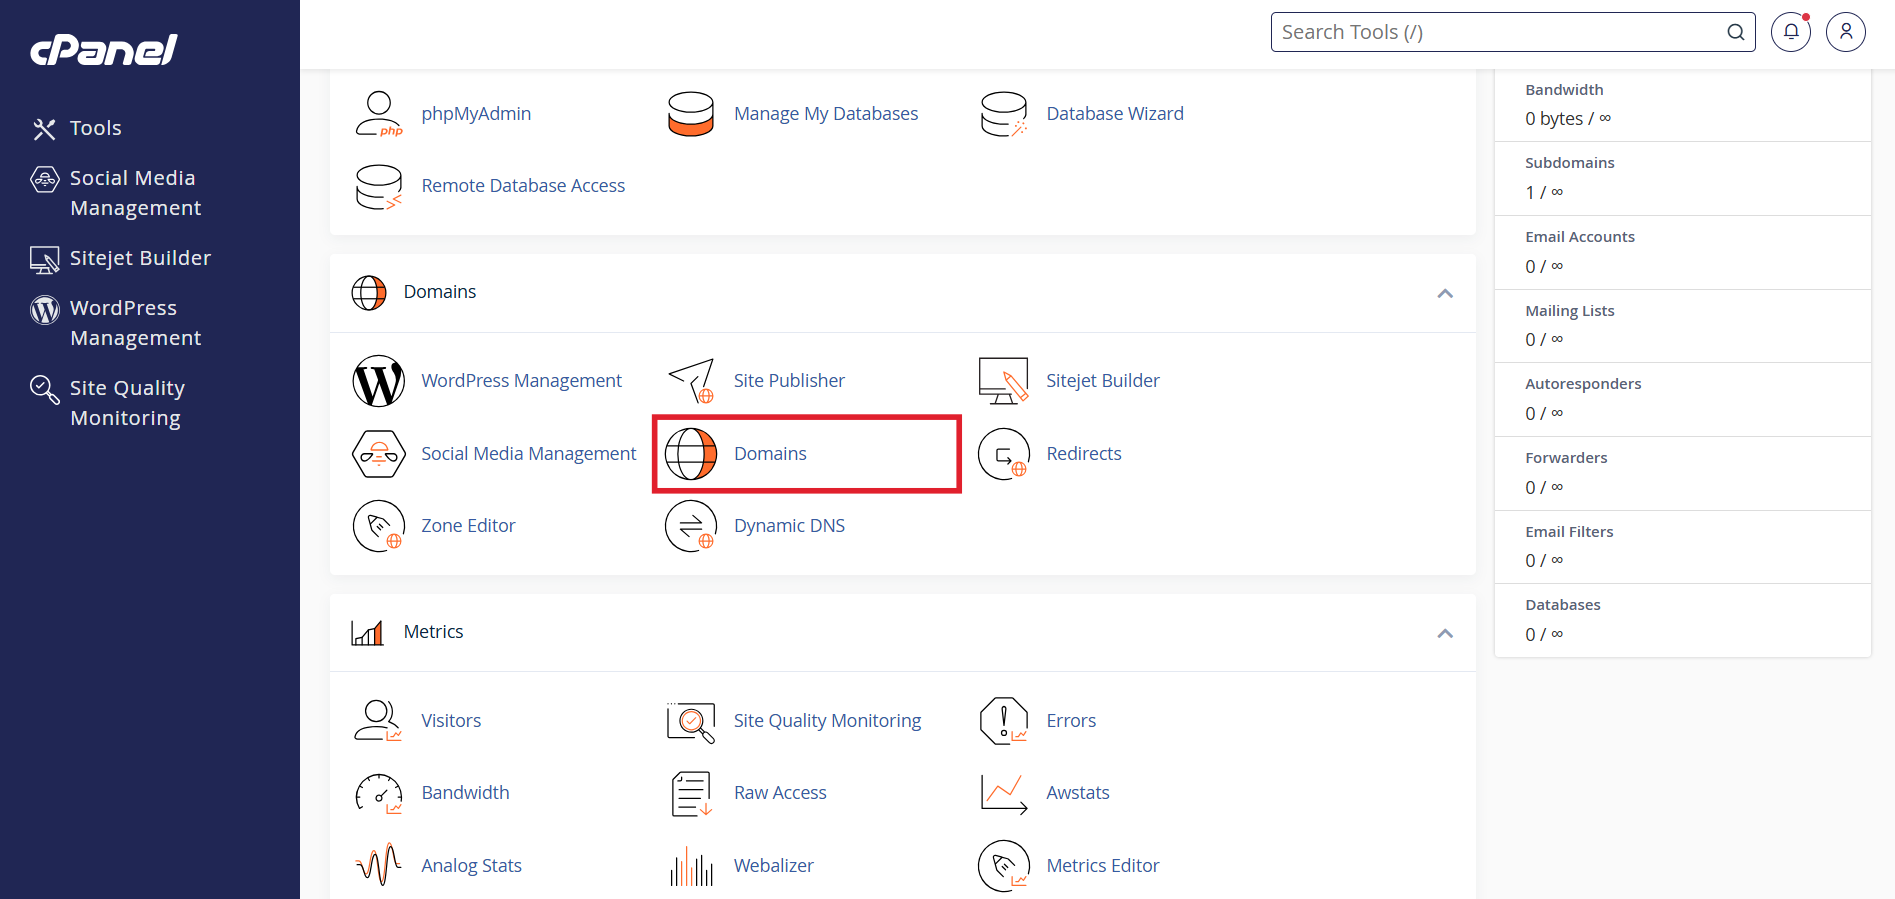
After logging into cPanel with user access and landing on the homepage, scroll down and click on Domains > Domains.
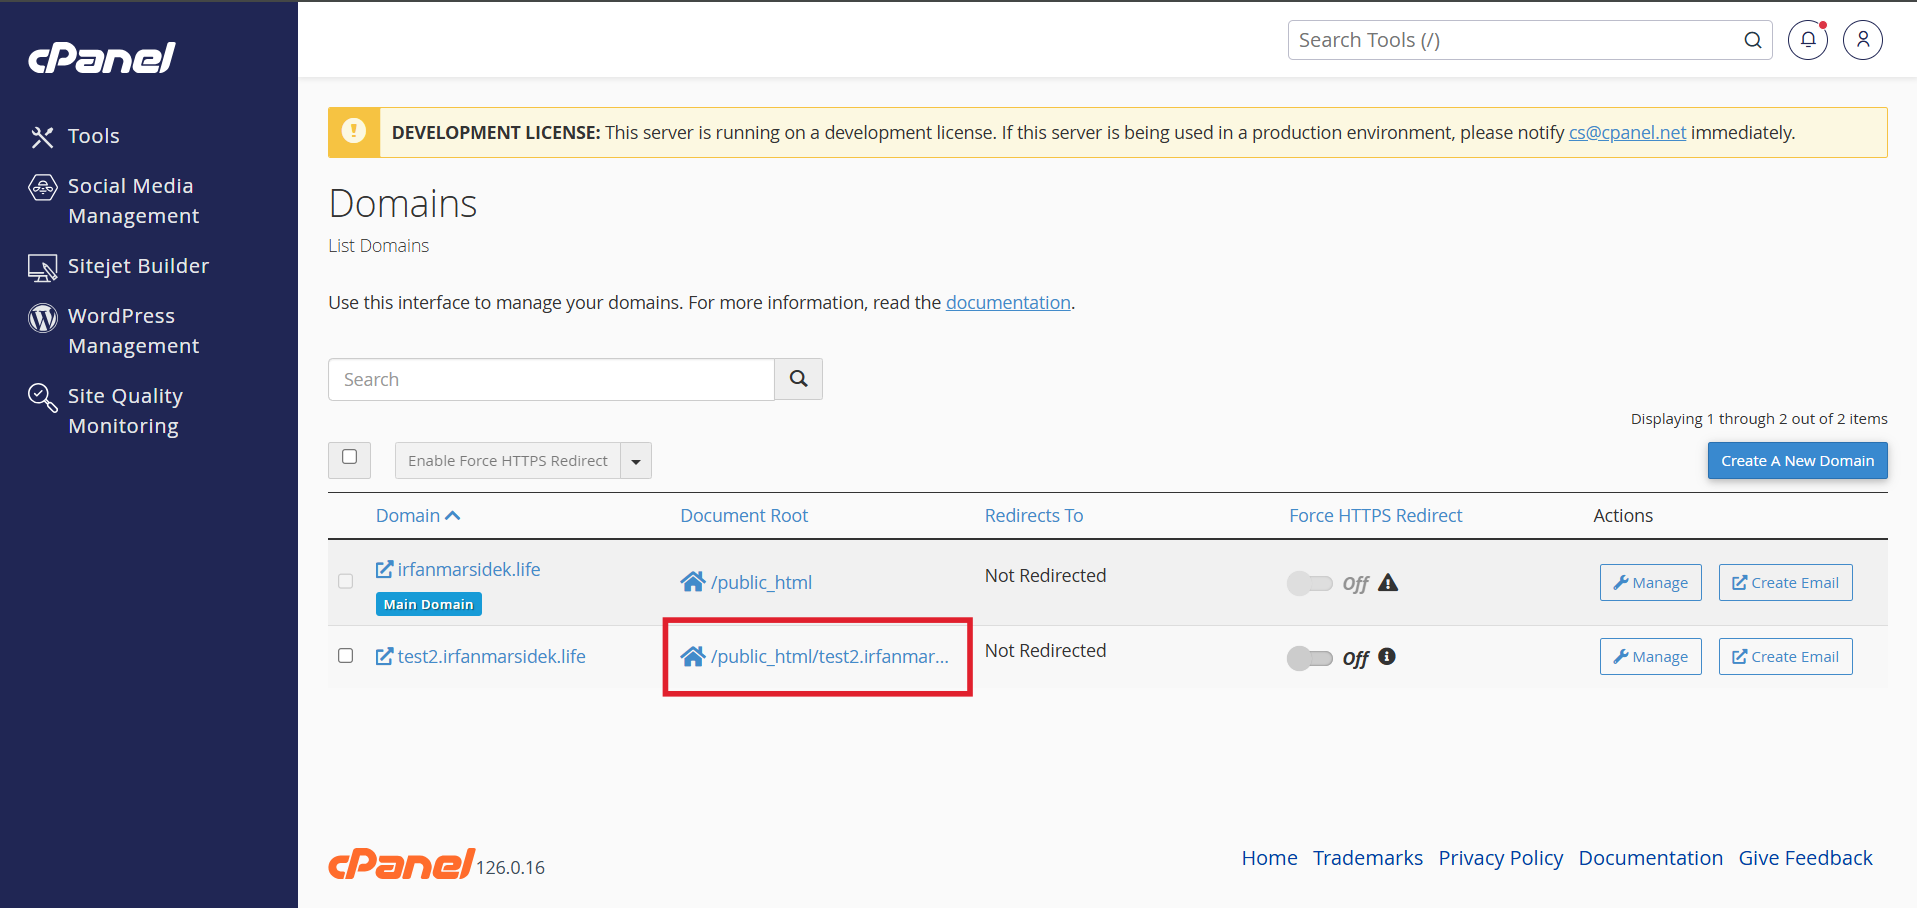
Step 3: Into the Document Root
Next, click on the document root of the domain/subdomain you intend to upload the TXT file for. In this example, we should click on public_html/test2.irfanmarsidek.life as it is the document root for test2.irfanmarsidek.life.
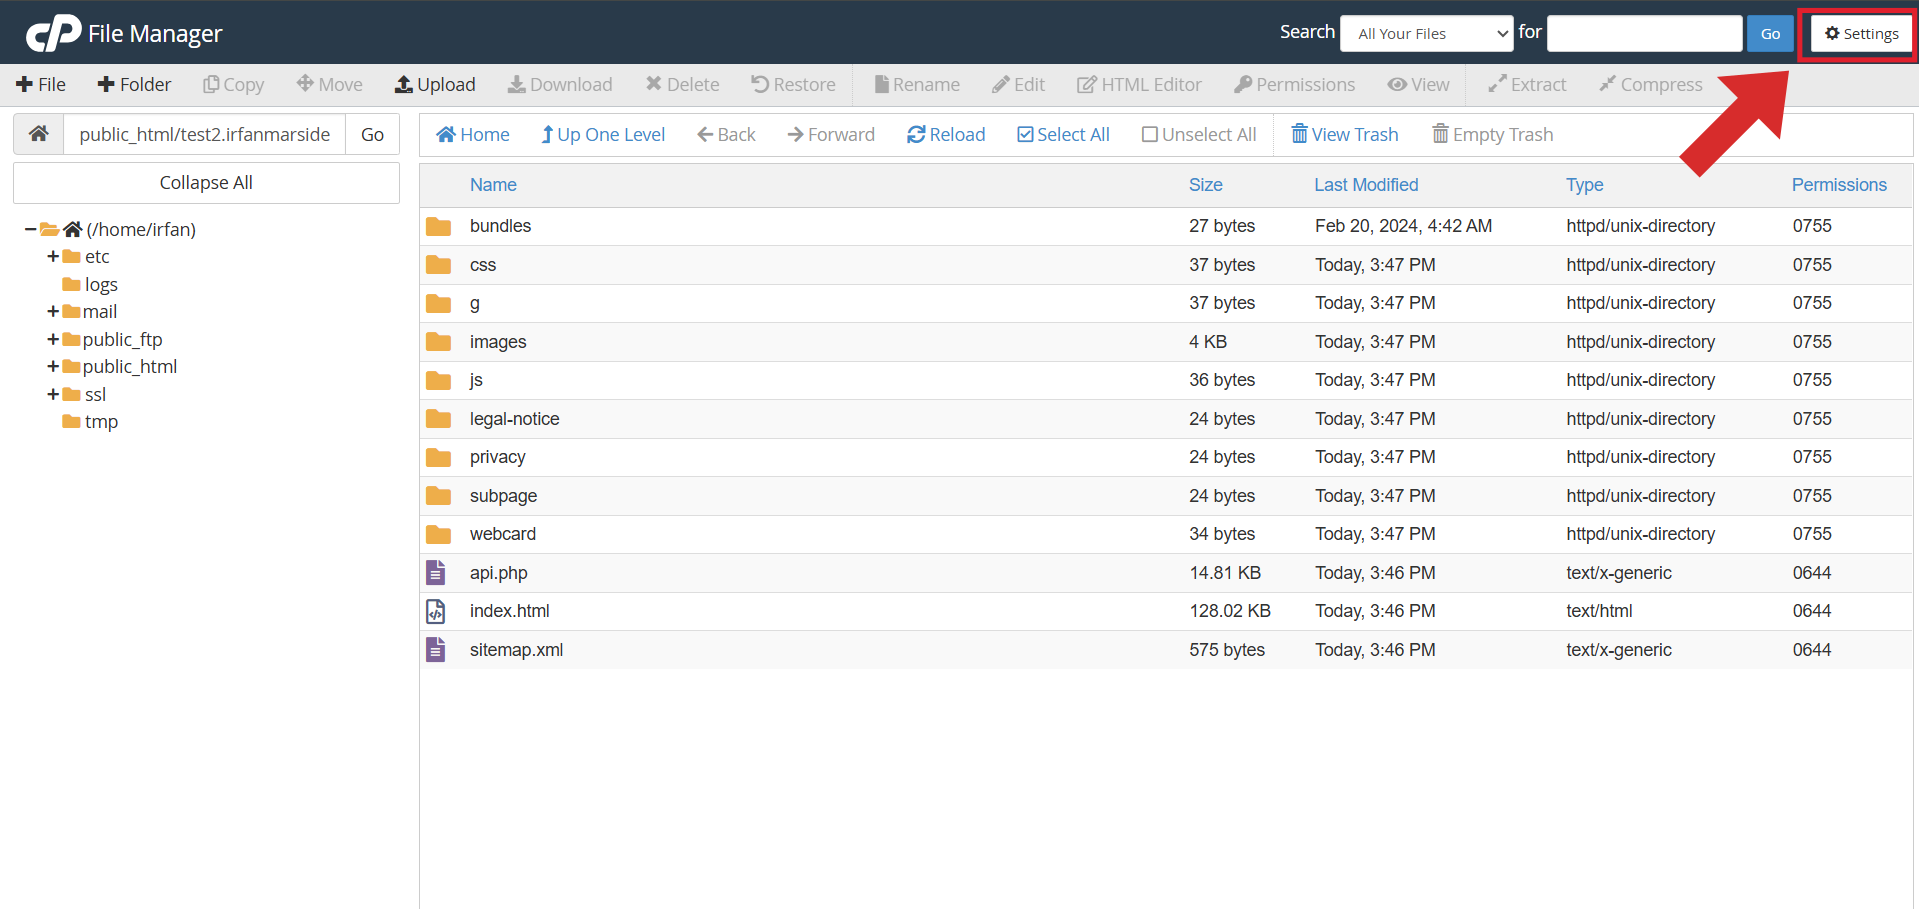
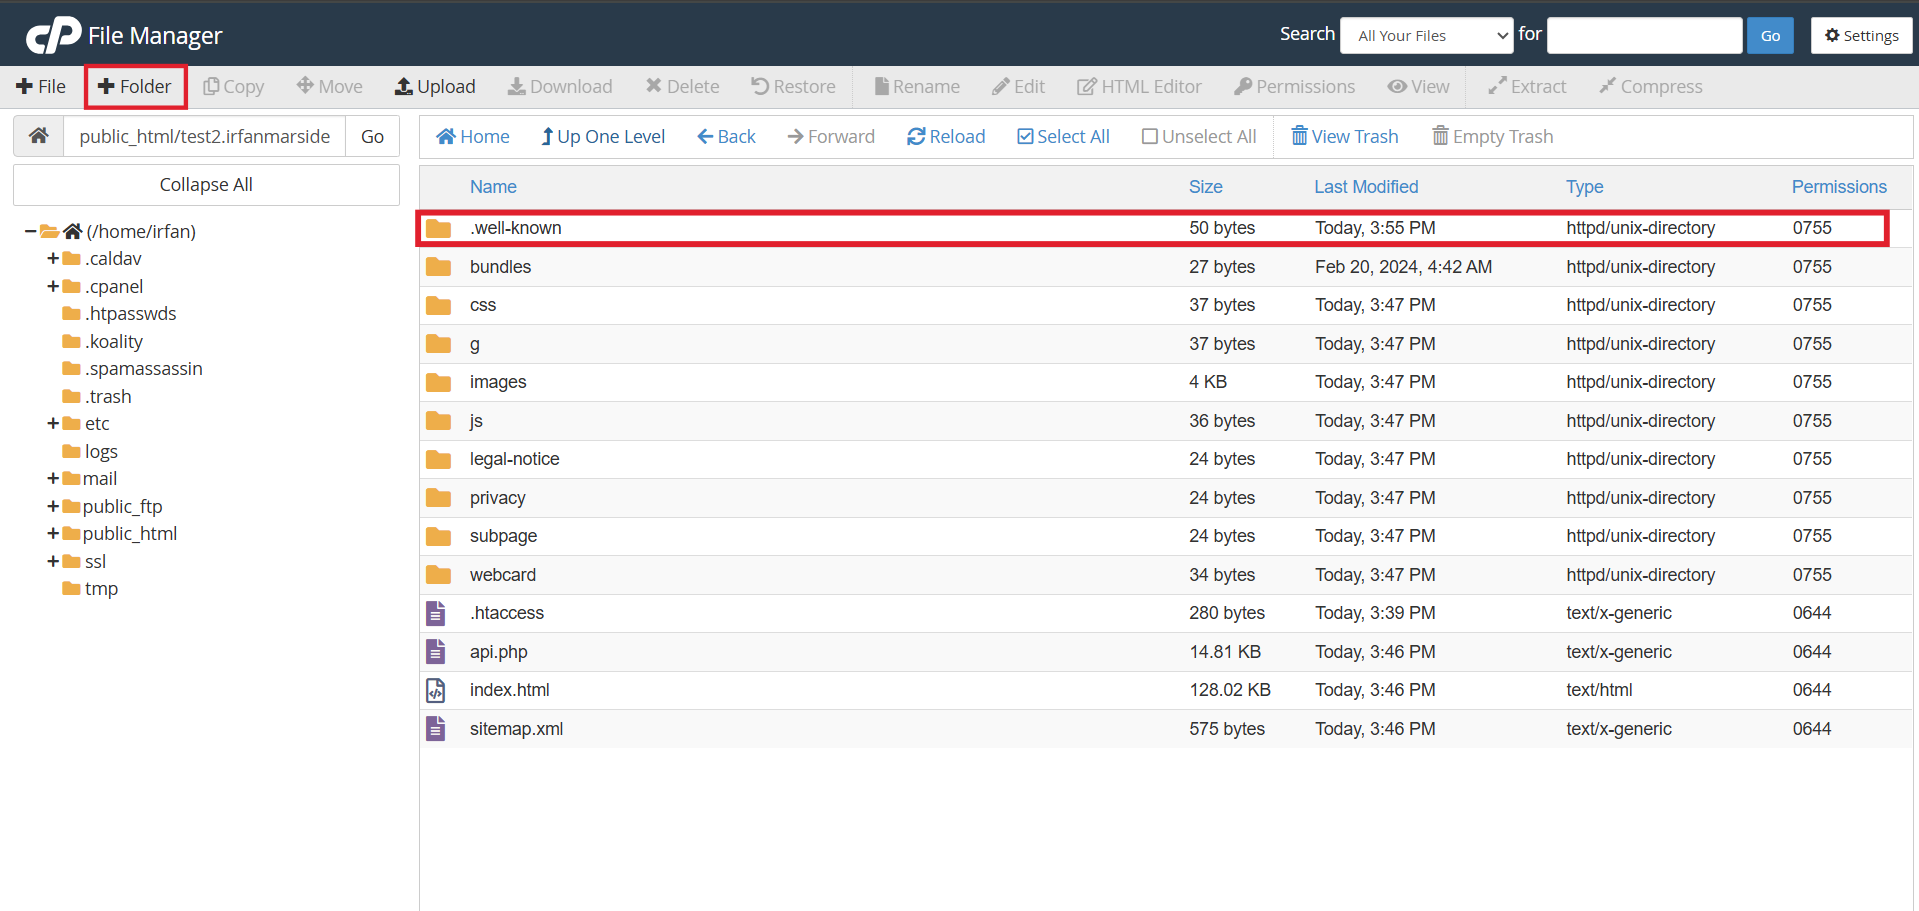
Step 4: Search for .well-known folder
Once you reach the document root, you should be looking for a folder named .well-known. If you are not seeing it, it might be hidden or not exist in the first place. To see the hidden folders, click on the Settings at the right top corner. Then, tick Show Hidden File (dotfiles)
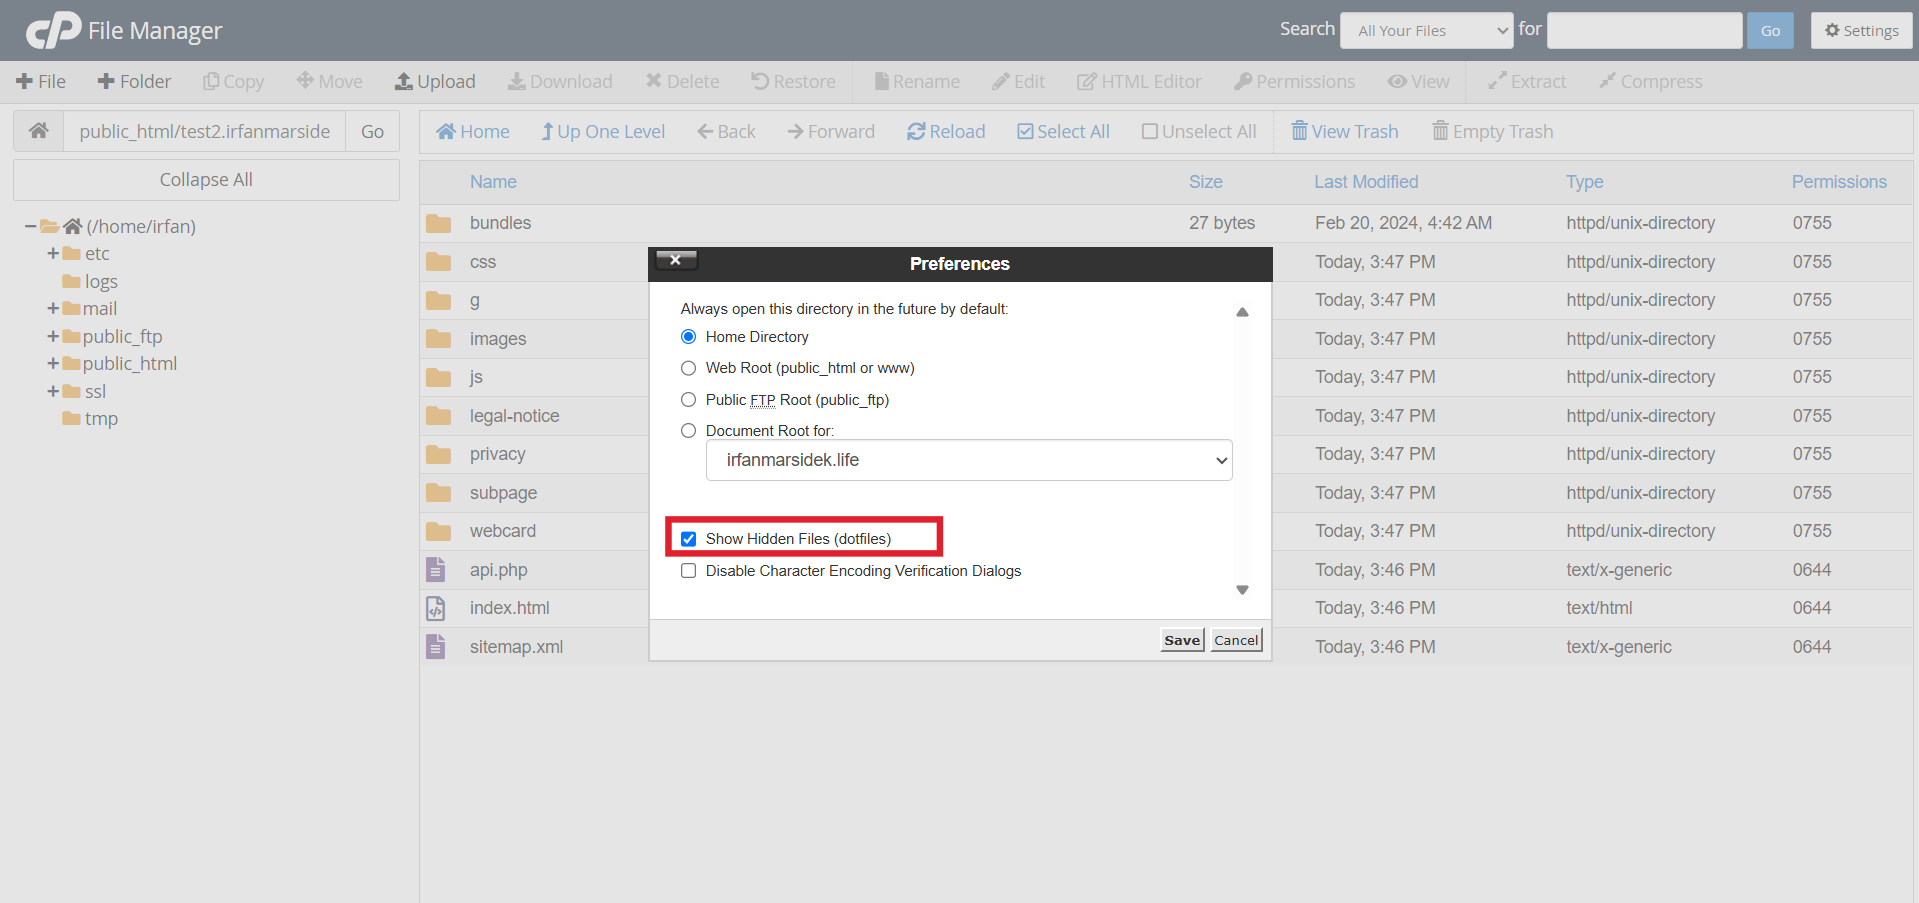
You should be able to view the .well-known folder by now. If you are not seeing it, proceed to create a new folder by clicking + Folder button and name the folder .well-known
Then, click on .well-known folder to view what is inside.
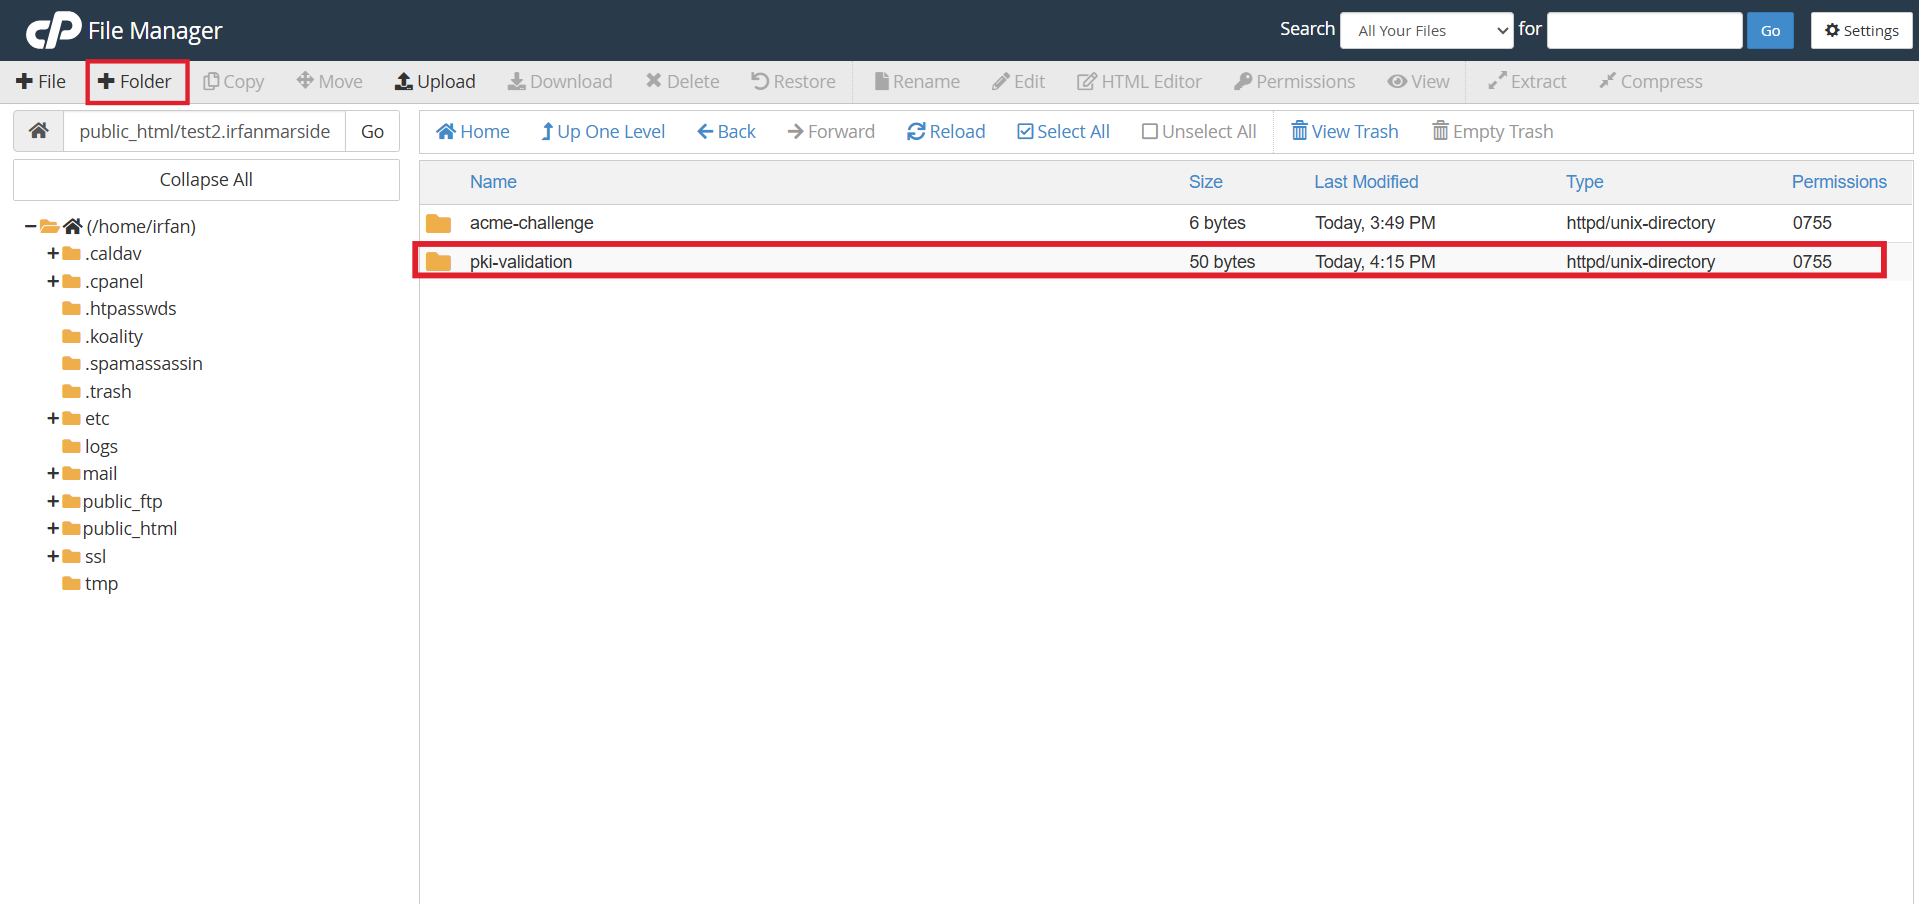
Step 5: Search for pki-validation folder
As you are inside the .well-known folder, you should now search for pki-validation folder. If there is no pki-validation folder, click on + Folder to create a new folder and name it pki-validation. Then, click on the pki-validation folder.
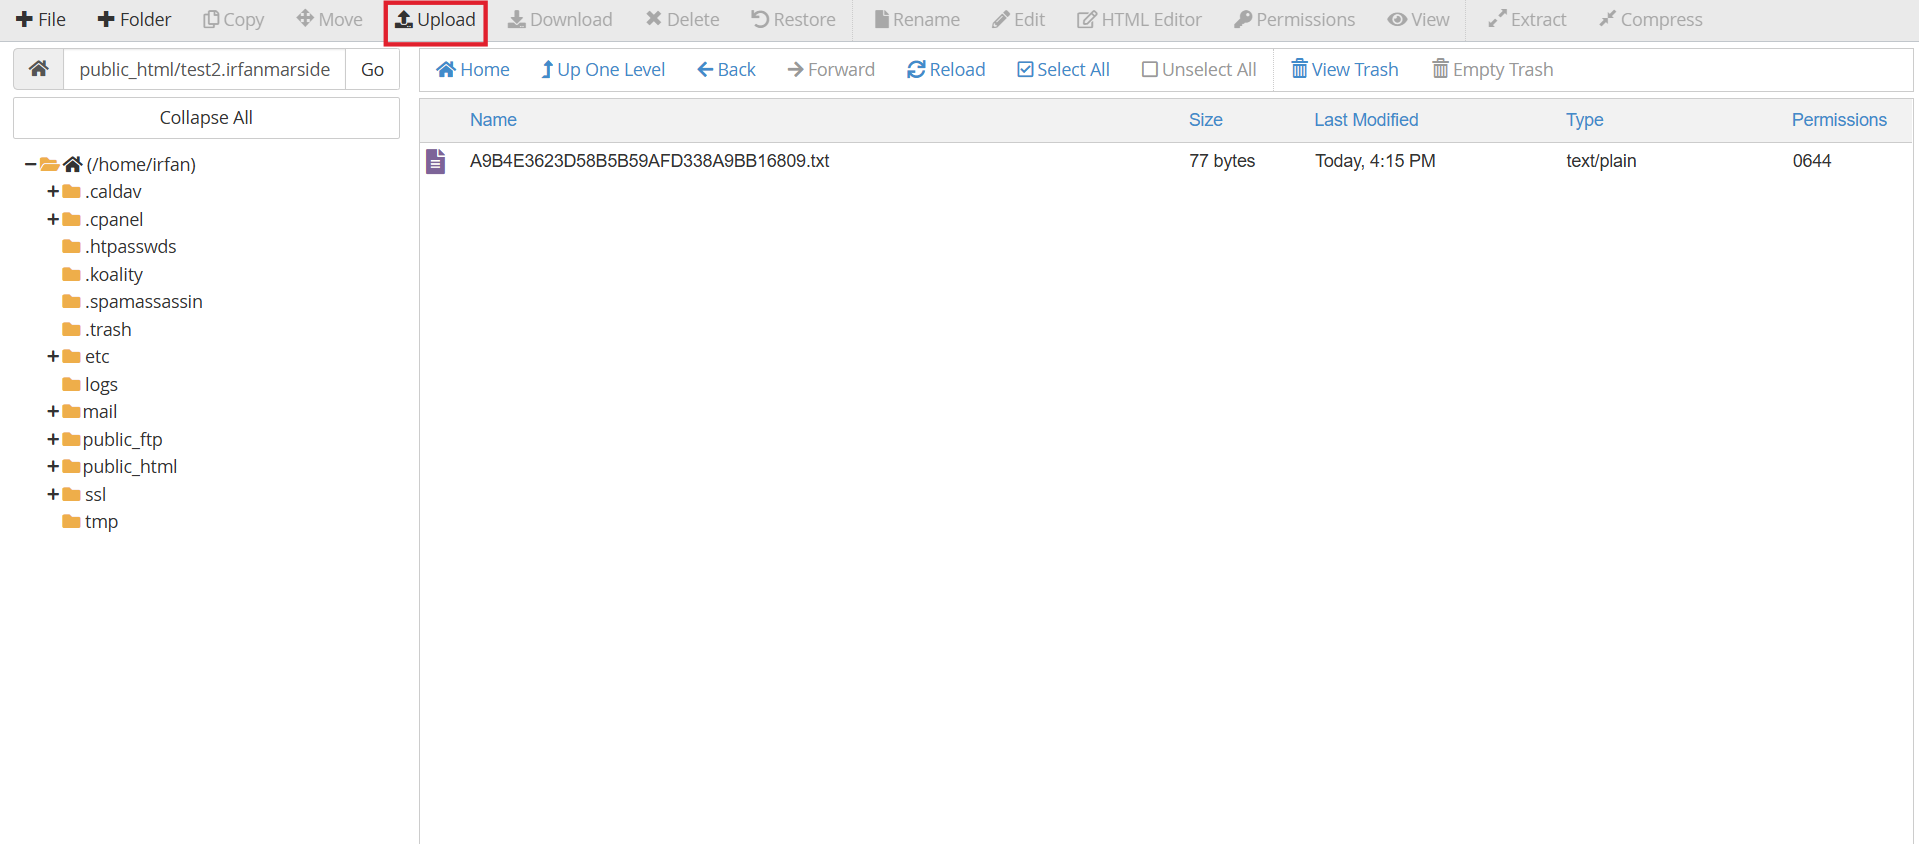
Step 6: Upload the TXT file
This is the location where we need to upload our TXT file. As you are inside the pki-validation folder, you may proceed to upload the TXT file provided by clicking the Upload button
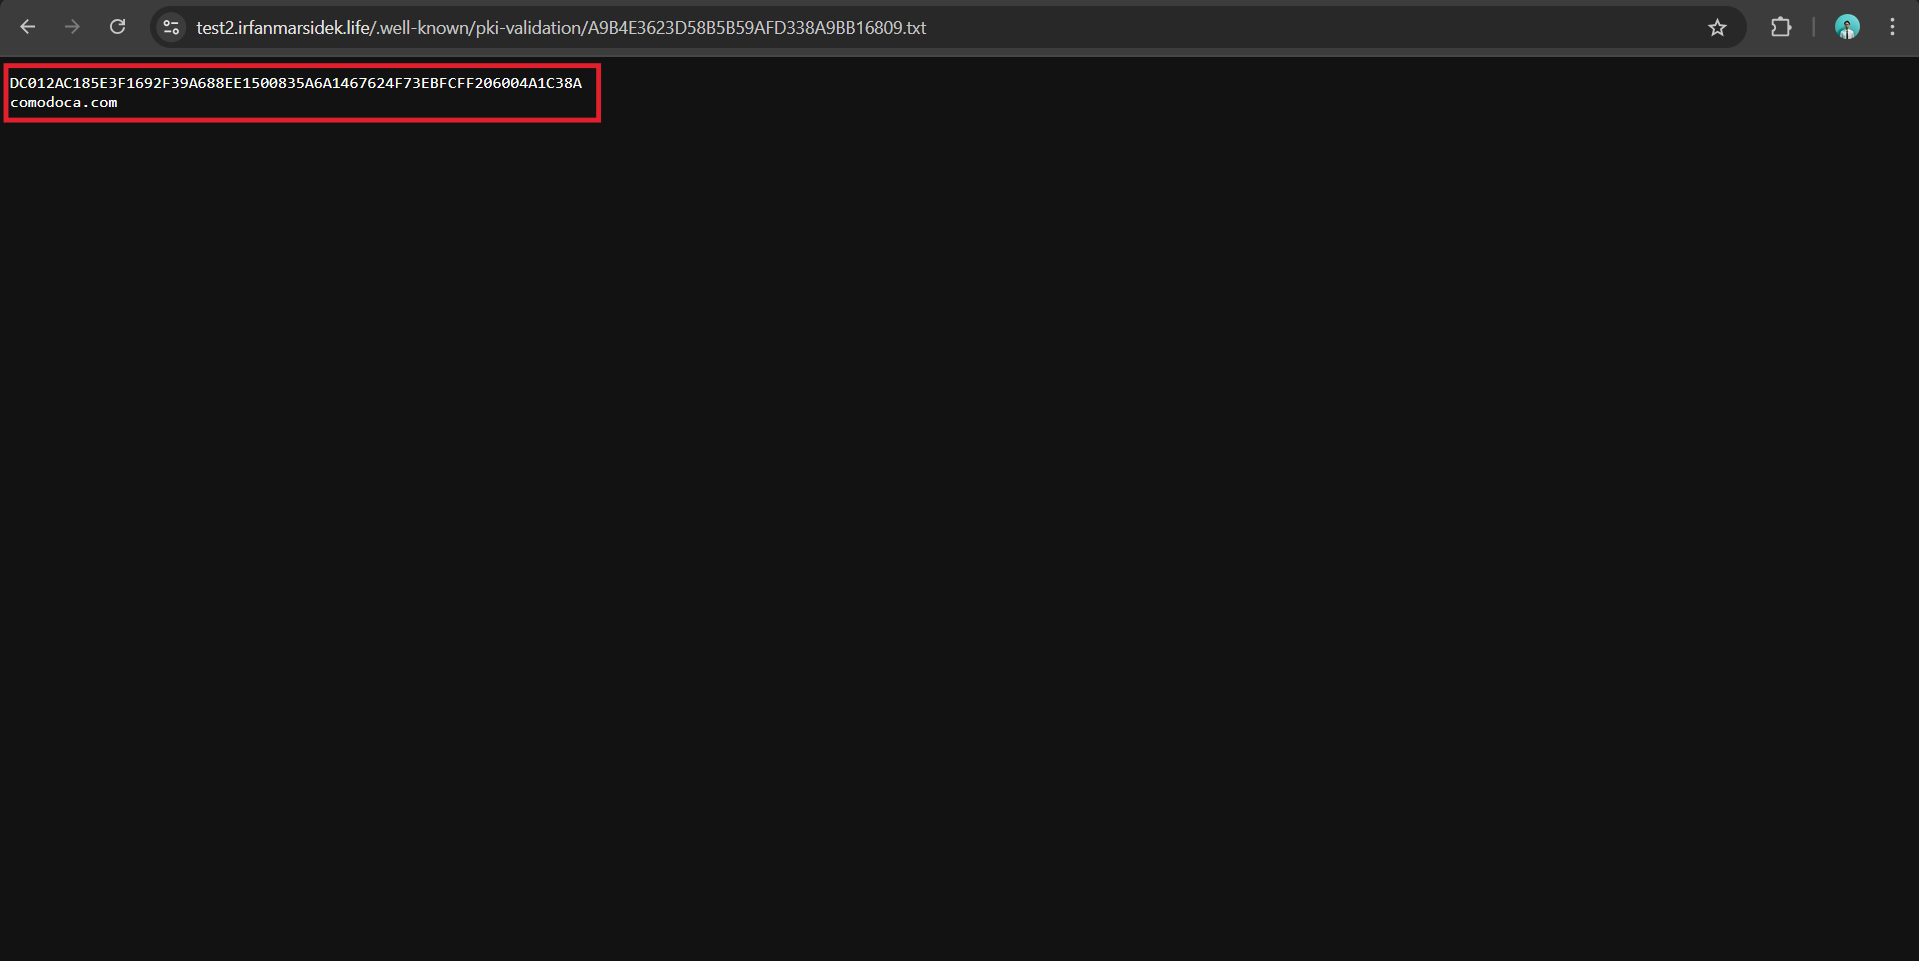
Step 7: Final Check
Finally, you can check if you have uploaded the file correctly by opening the same link as mentioned in Step 1 :
http://{yourdomain.com}/.well-known/pki-validation/{specific-name-file.txt}
Ensure that the page is accessible and displays the given text to confirm that your domain can be validated via HTTP verification.
Conclusion
HTTP domain verification is a method used by Sectigo to confirm domain ownership during SSL issuance. After following the guide, you’re able to complete HTTP domain verification with Sectigo by uploading the required file to the correct path using cPanel and ensuring it is publicly accessible for validation.
For any further assistance, feel free to contact our support team at support@ipserverone.com.