Search Our Database
How to manage Firewall rules for your vCloud Director
Firewall features in vCloud Director is provided by T1 edge gateway router, this firewall capability is also referred to as the edge firewall. The edge gateway firewall monitors North-South traffic to provide perimeter security functionality.
IPServerone provides all vCloud Director firewall features to be ‘ALLOW ALL’ by default, you can later make changes on the firewall rules to allow all necessary ports first, and later change the firewall default rules from ‘ALLOW ALL’ to ‘Incoming DENY ALL’, and only allow the ports you setup to allow, to secure your VMware Dynamic cloud environment.
The simplest way to start using the Firewall features is to first define Application Port profiles:
1.Login to vCloud Director account, and navigate to Networking à Edge Gateways à Choose your T1 Edge Router

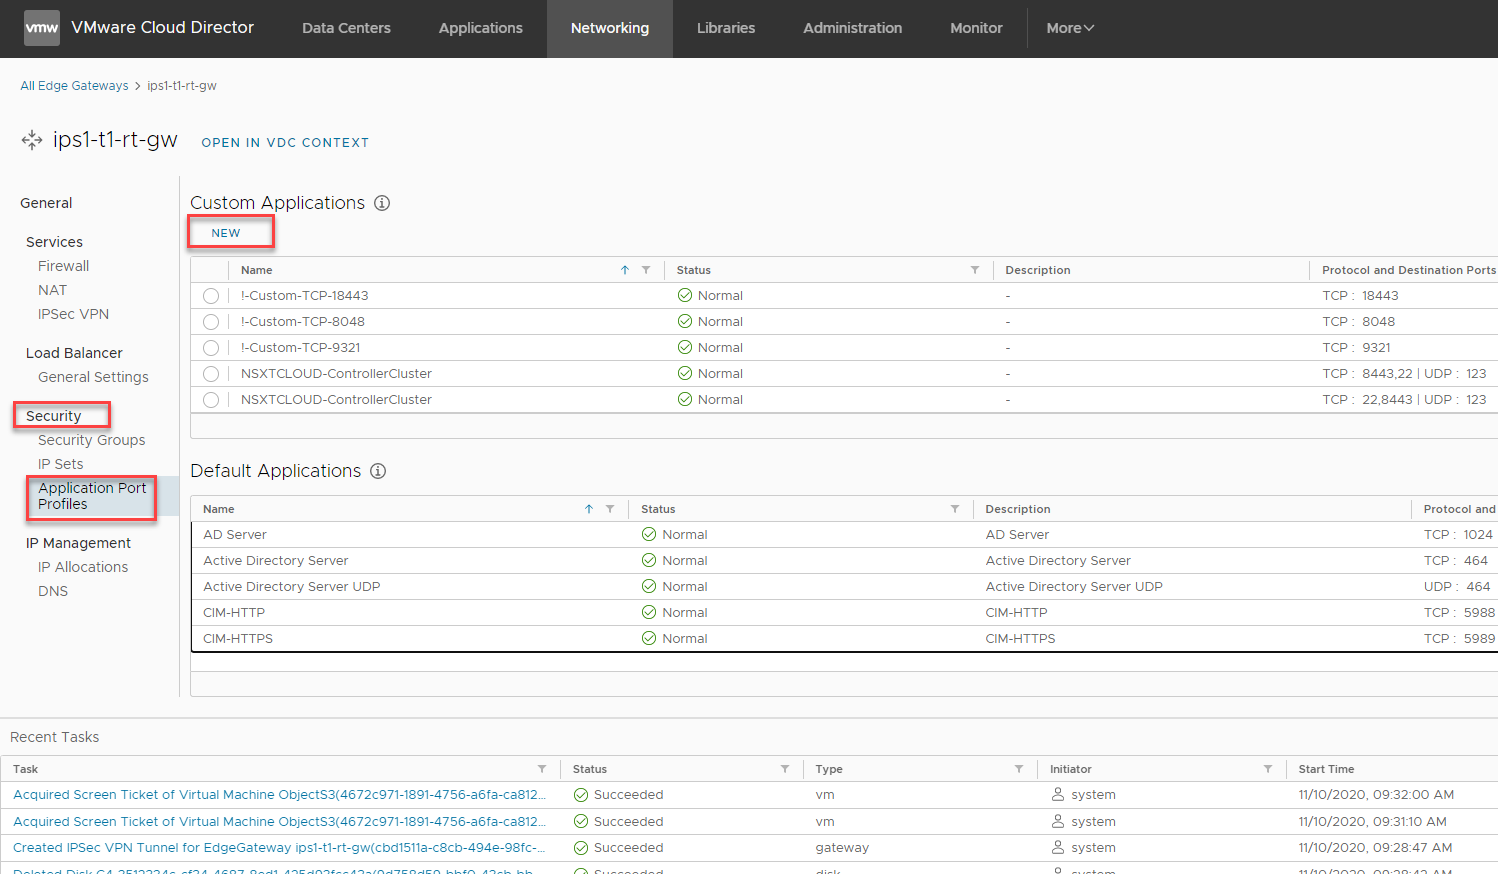
2.Continue to navigate to Security > Application Port Profiles, most of the default ports are already available at the ‘Default Applications’ list, in case you want to allow some customer ports, for example, port 18389, you need to add the port at ‘Custom Applications’ list. Click ‘NEW’ to add custom applications.
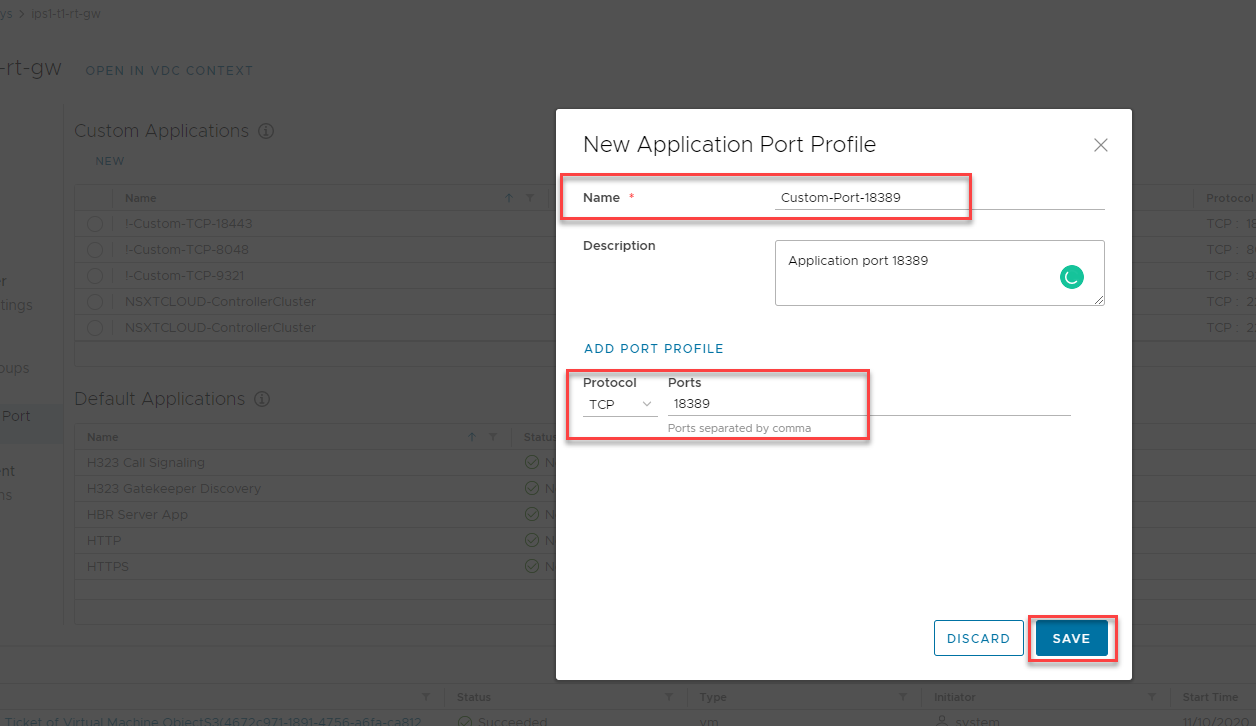
3.In the pop up box, insert the new custom application name, the port number, and then click save.
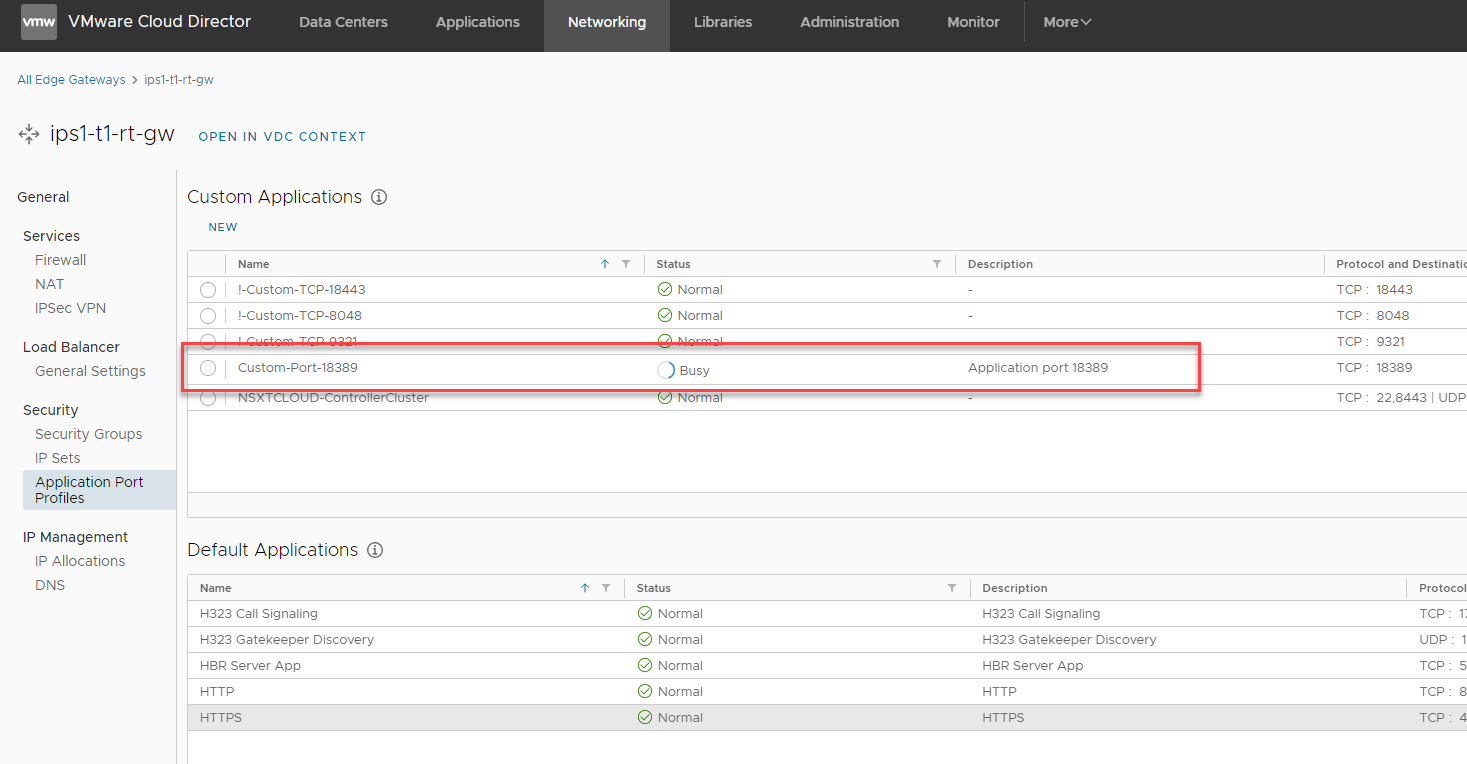
4.The new Application port is being created, check the custom application list again to ensure the port you just inserted has been added.
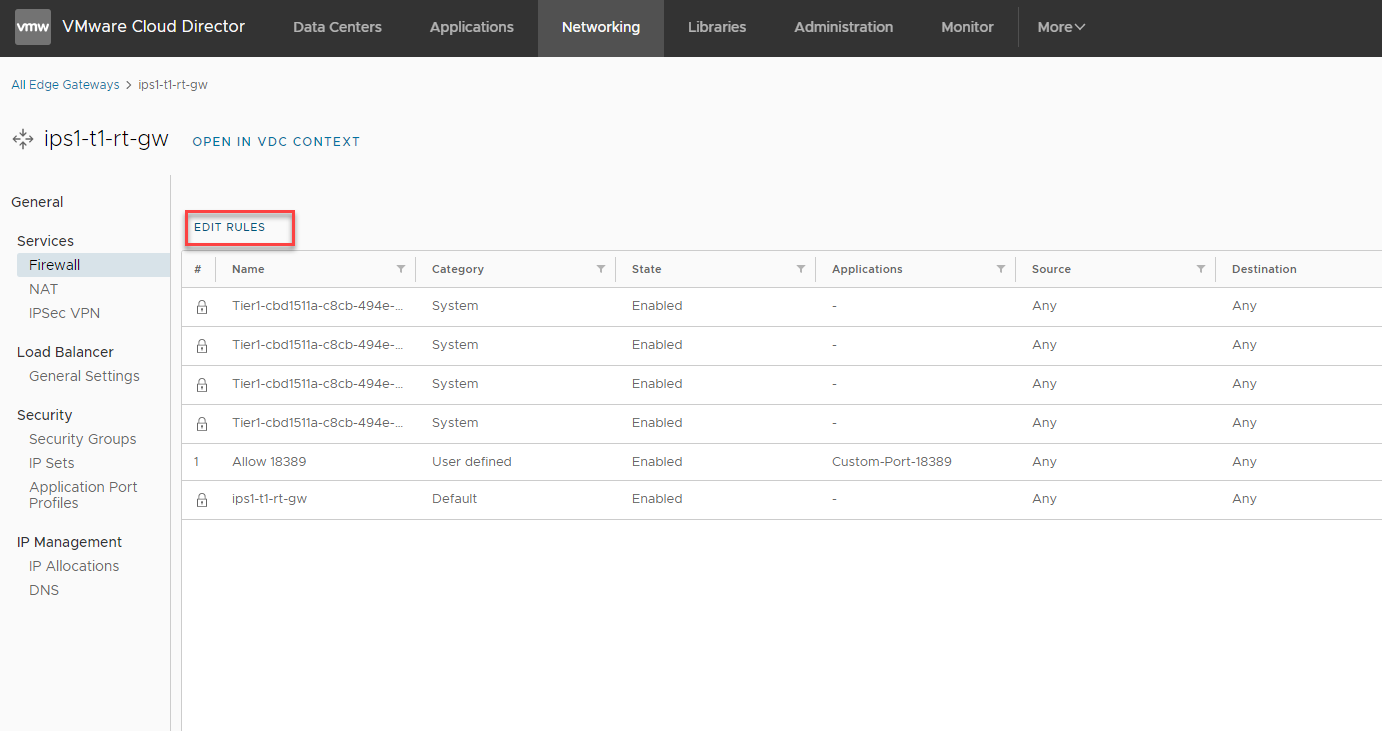
5.Next Navigate to Services à Firewall at the left panel to navigate to firewall config page, click on ‘EDIT RULES’ to make changes to the firewall rules.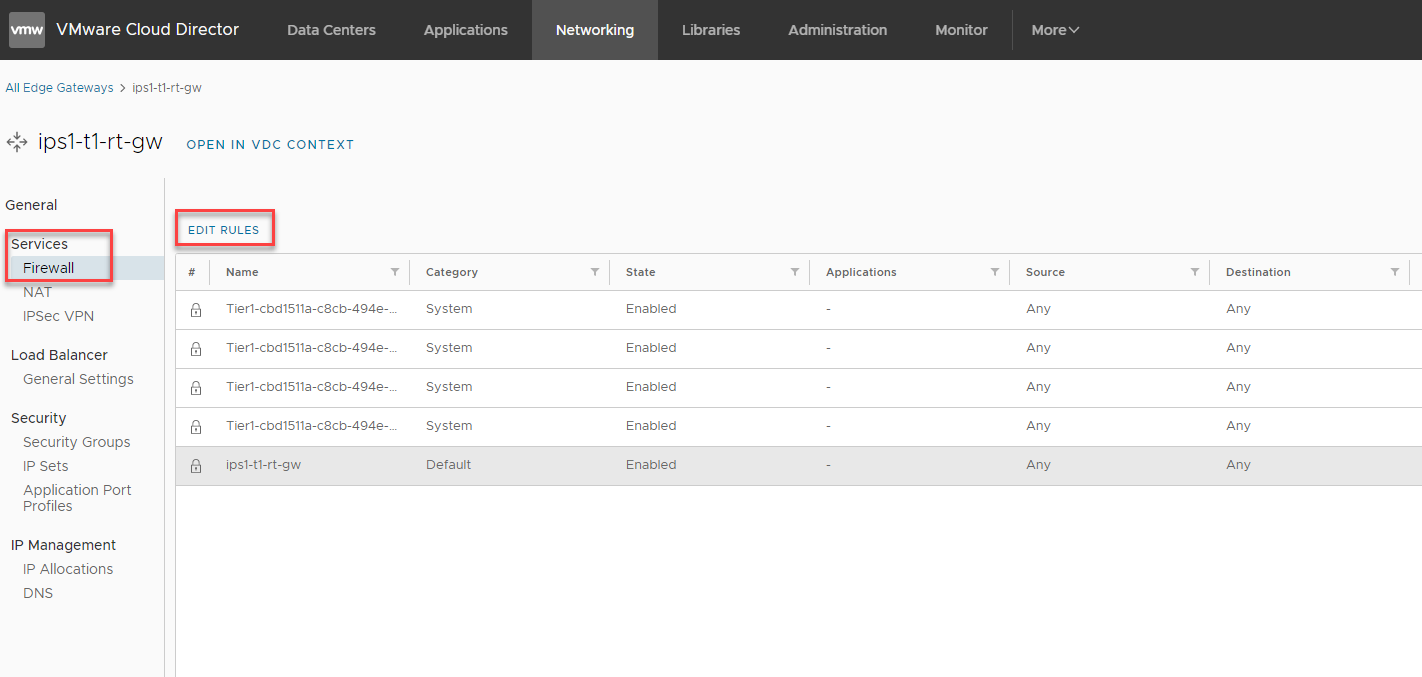
6.A wizard will pop up to allow firewall rules to edit, click ‘NEW ON TOP’ to add new rules to the firewall.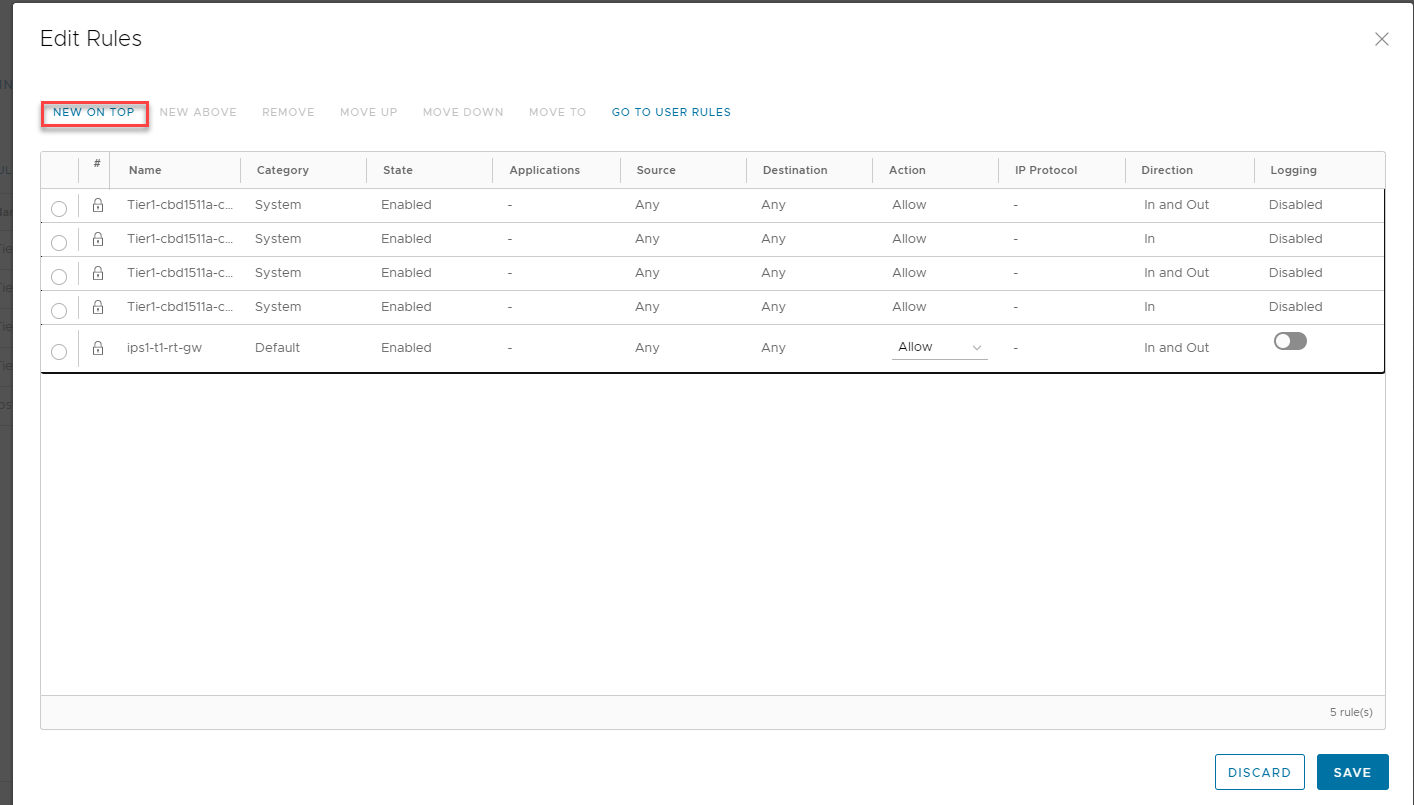
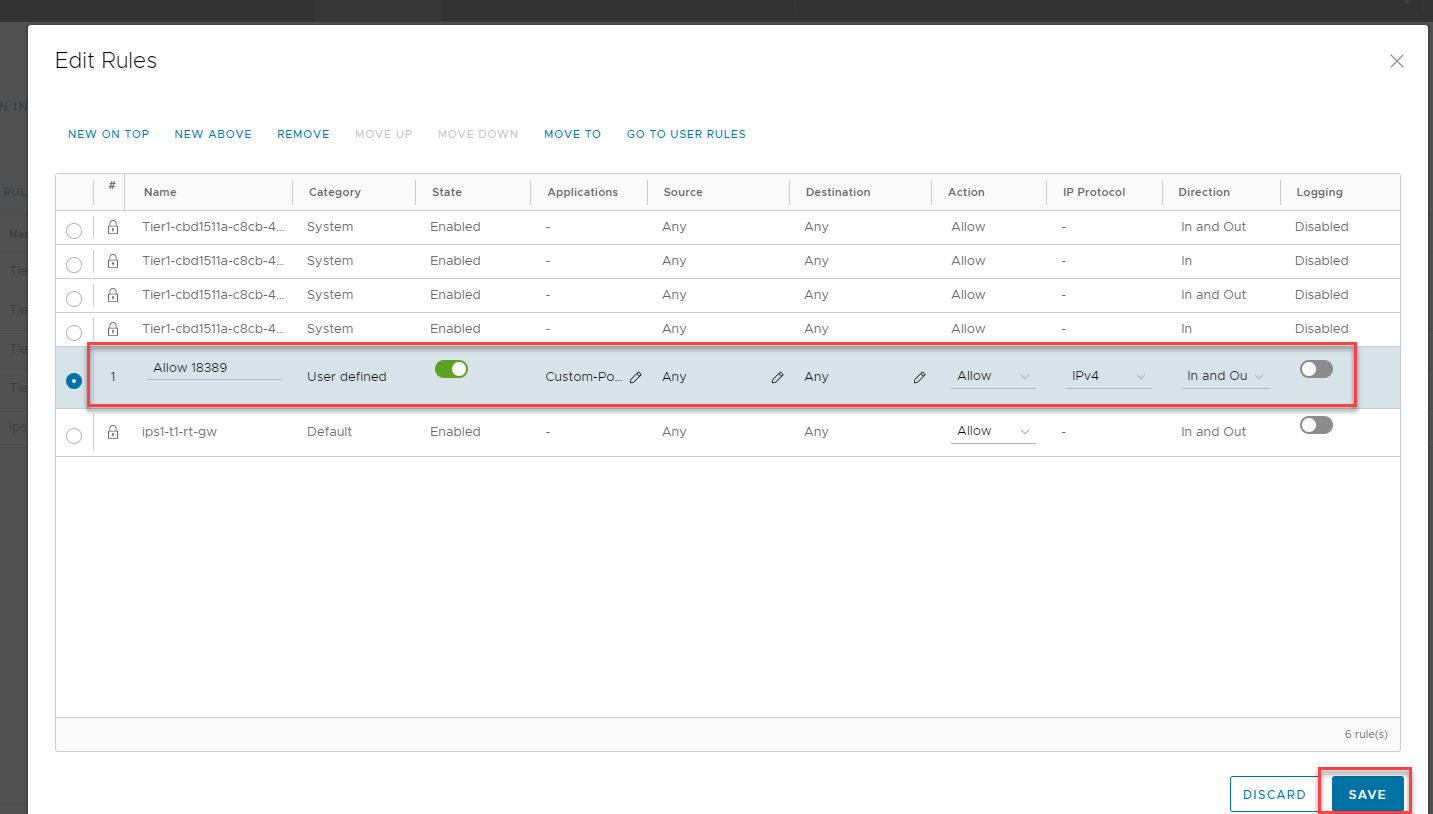
7.A line of rules will pop up like below
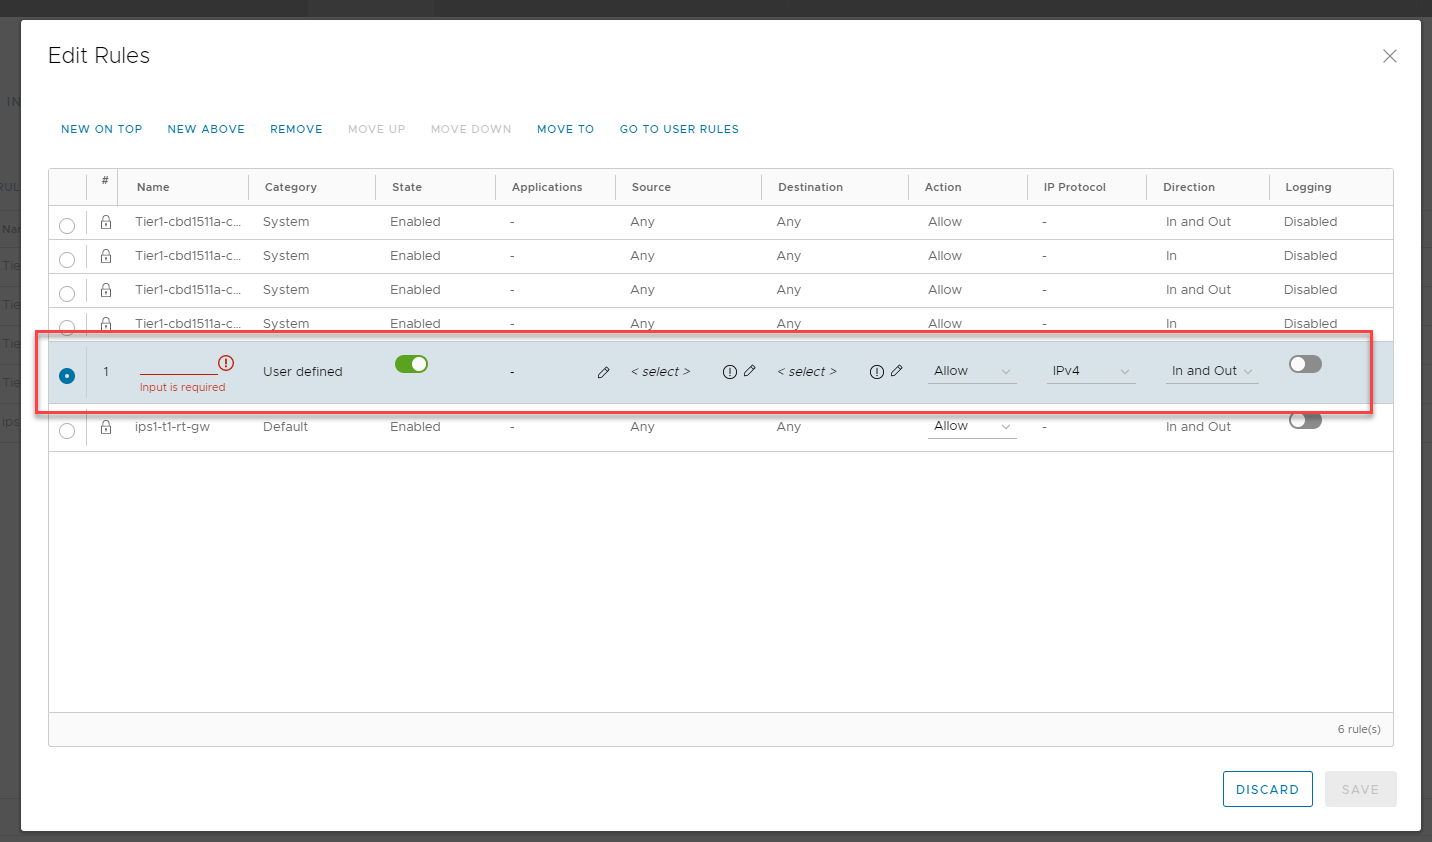
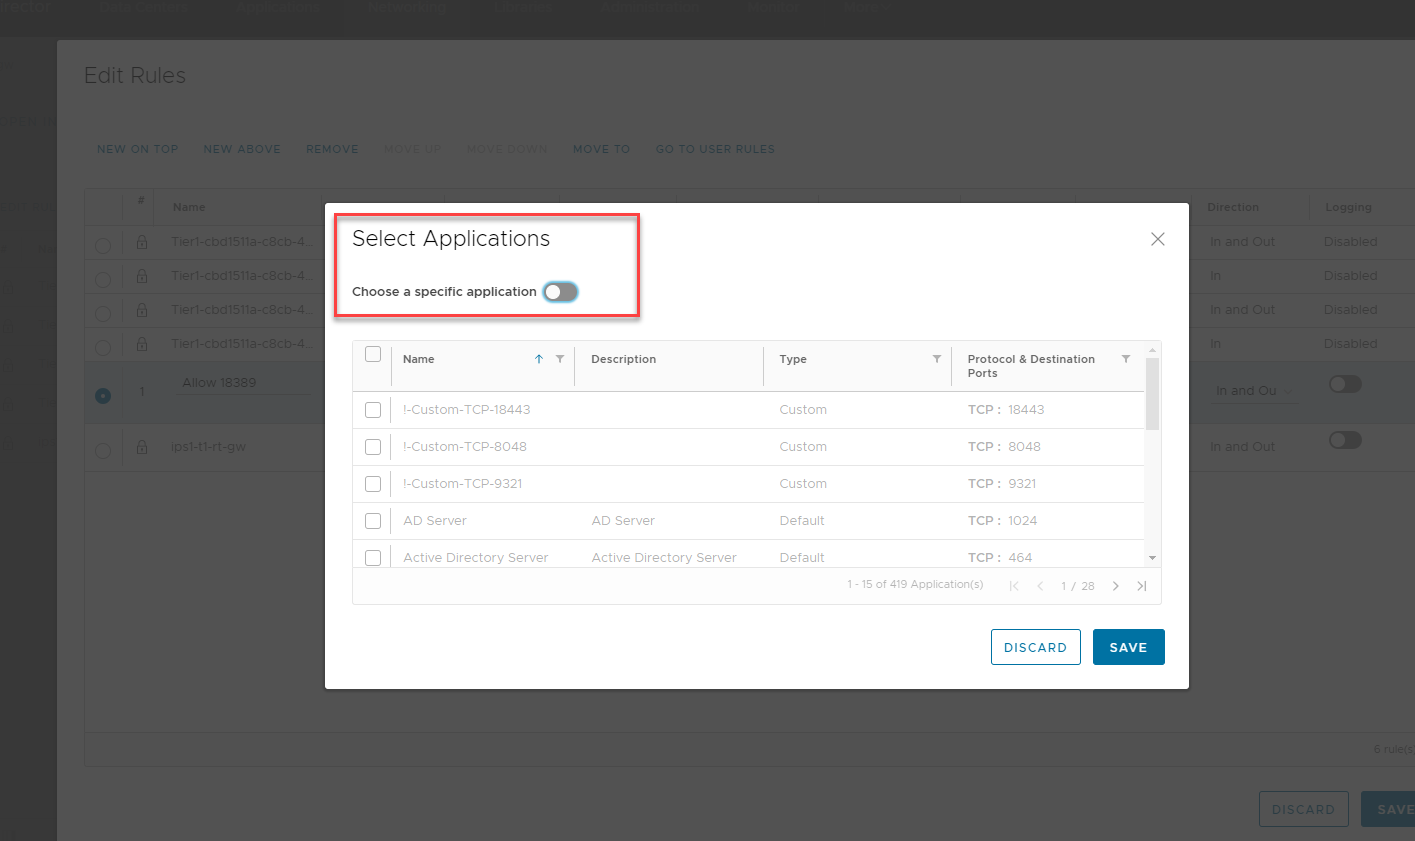
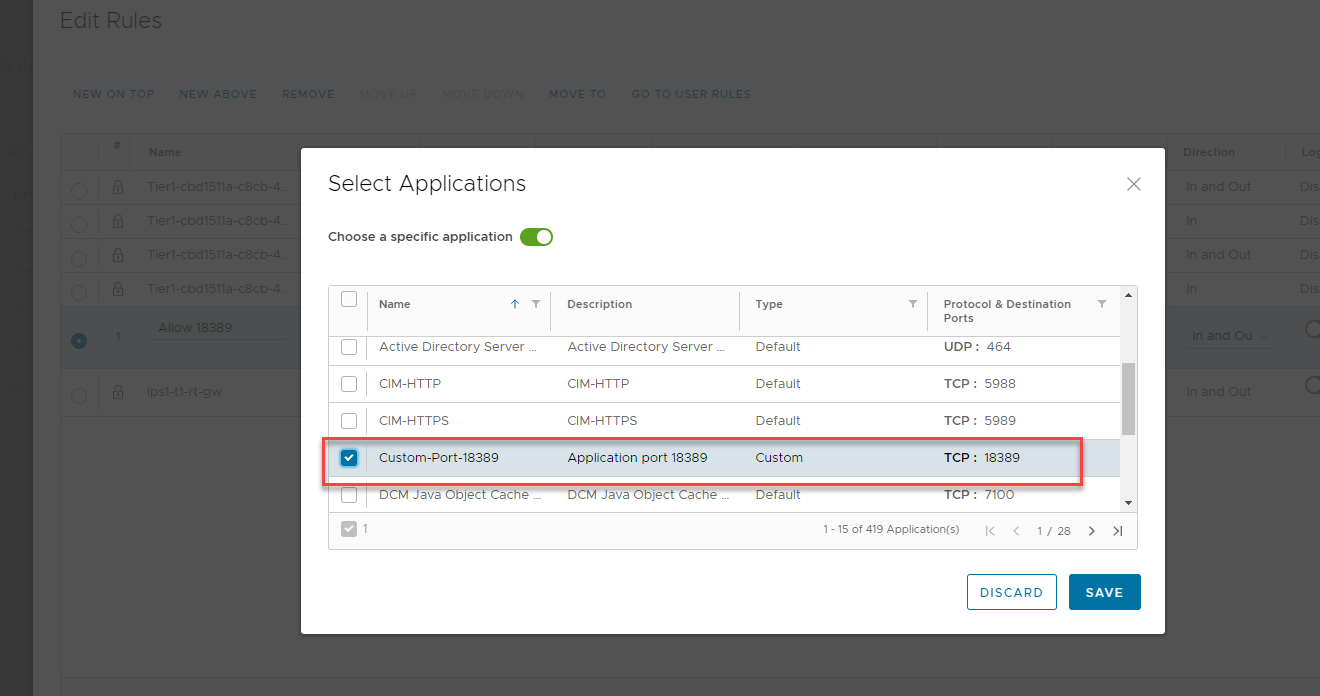
8.Insert all the rules details accordingly by clicking on the pencil icon under ‘Applications’, ‘Source’, ‘Destination’ row. While selecting an applications, after click on the pencil icon, a screen as below will pop up, allow ‘Choose a specific application’ option and choose the port rules you created just now.
9.The custom rules have been added, now click ‘SAVE’ button to save your changes.
10.Last verify your custom changes have been added.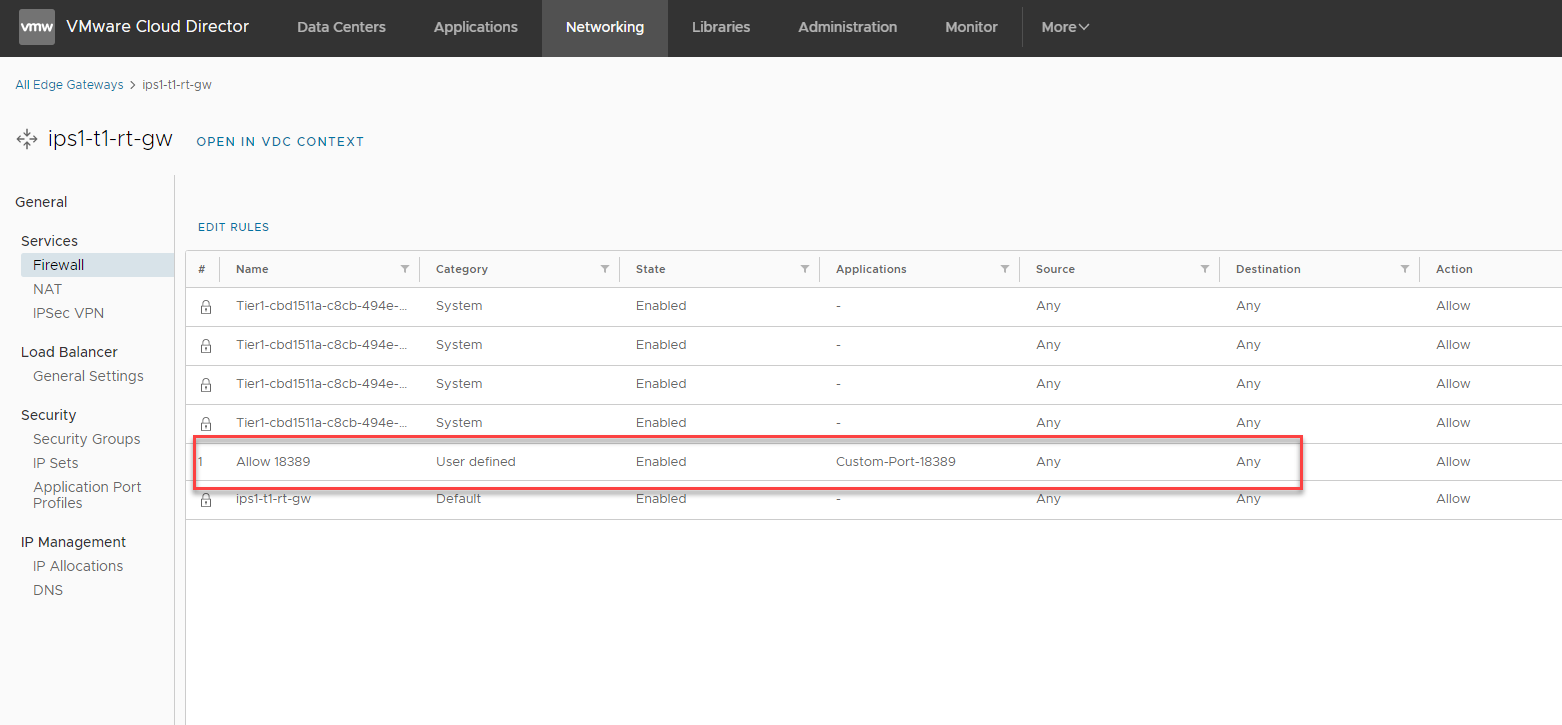
(Optional Steps)
After all necessary ports of your environment have been added to the rules, you can decide whether to change the default rules of the firewall to become ‘Incoming DENY ALL’ to secure your VMware dynamic cloud environment. Please proceed with cautions, if mistakes made while doing this, the live environment traffic connection may be disrupted by the changes.
To do so, follow the steps below:
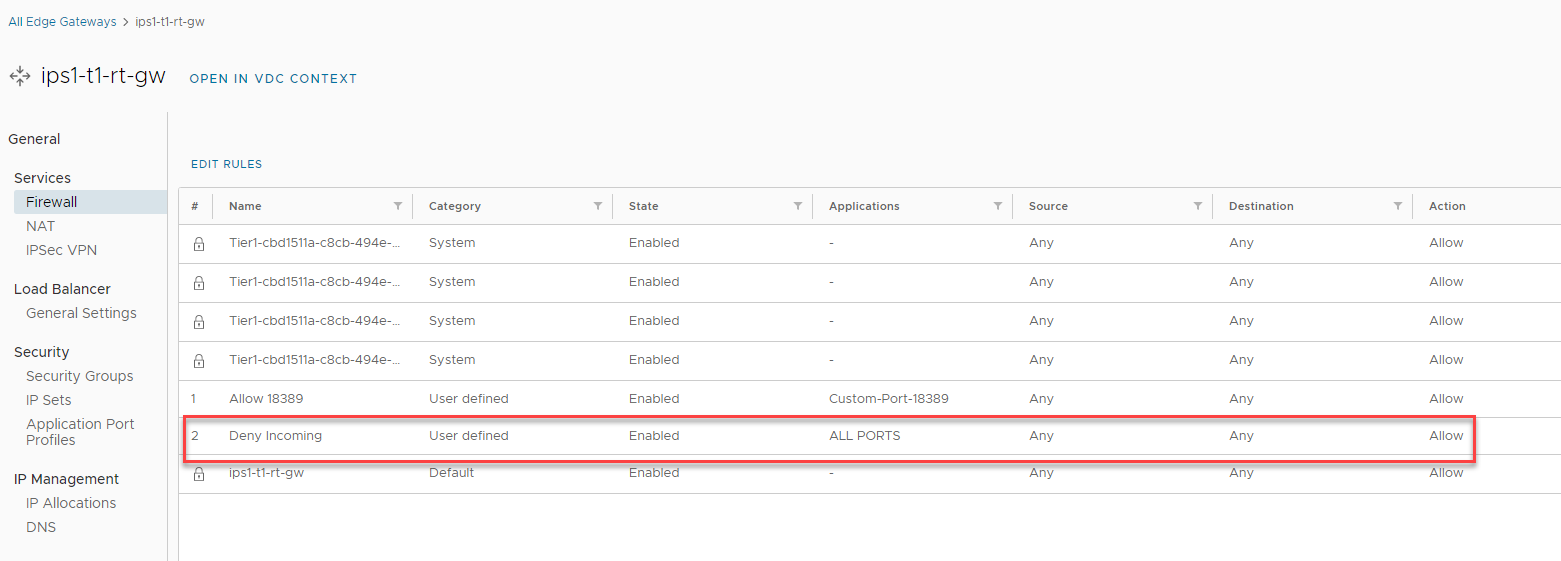
1.First add a new custom rules for all TCP ports

2.Navigate back to the firewall page and click ‘EDIT RULES’
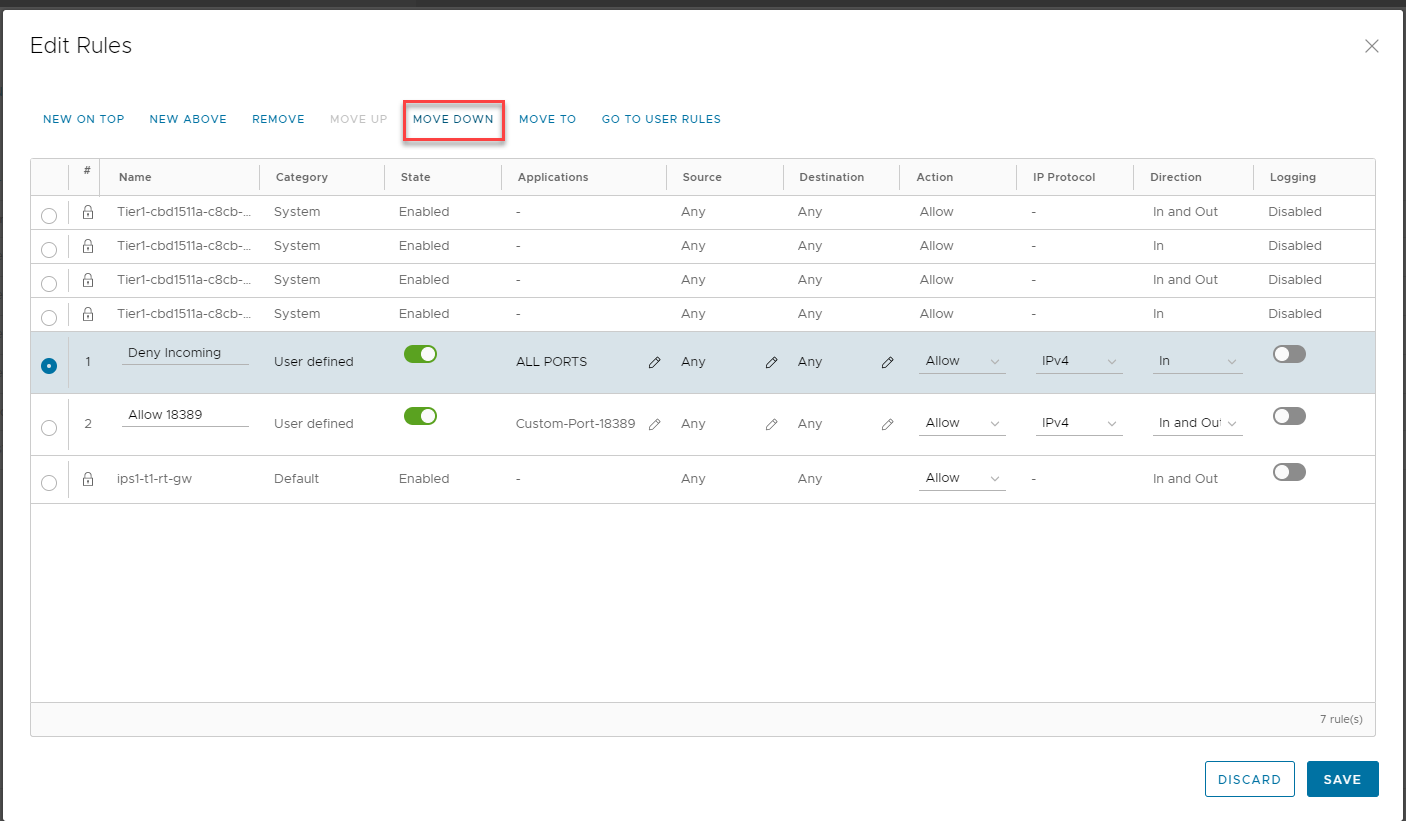
3.Click on ‘NEW ON TOP’ to add the rules first, Edit the rules to become denying all Incoming TCP ports.

4.‘MOVE DOWN’ the rules to the most bottom rules, make sure all of your TCP port allow rules are located above the ‘Deny Incoming’ Rules.
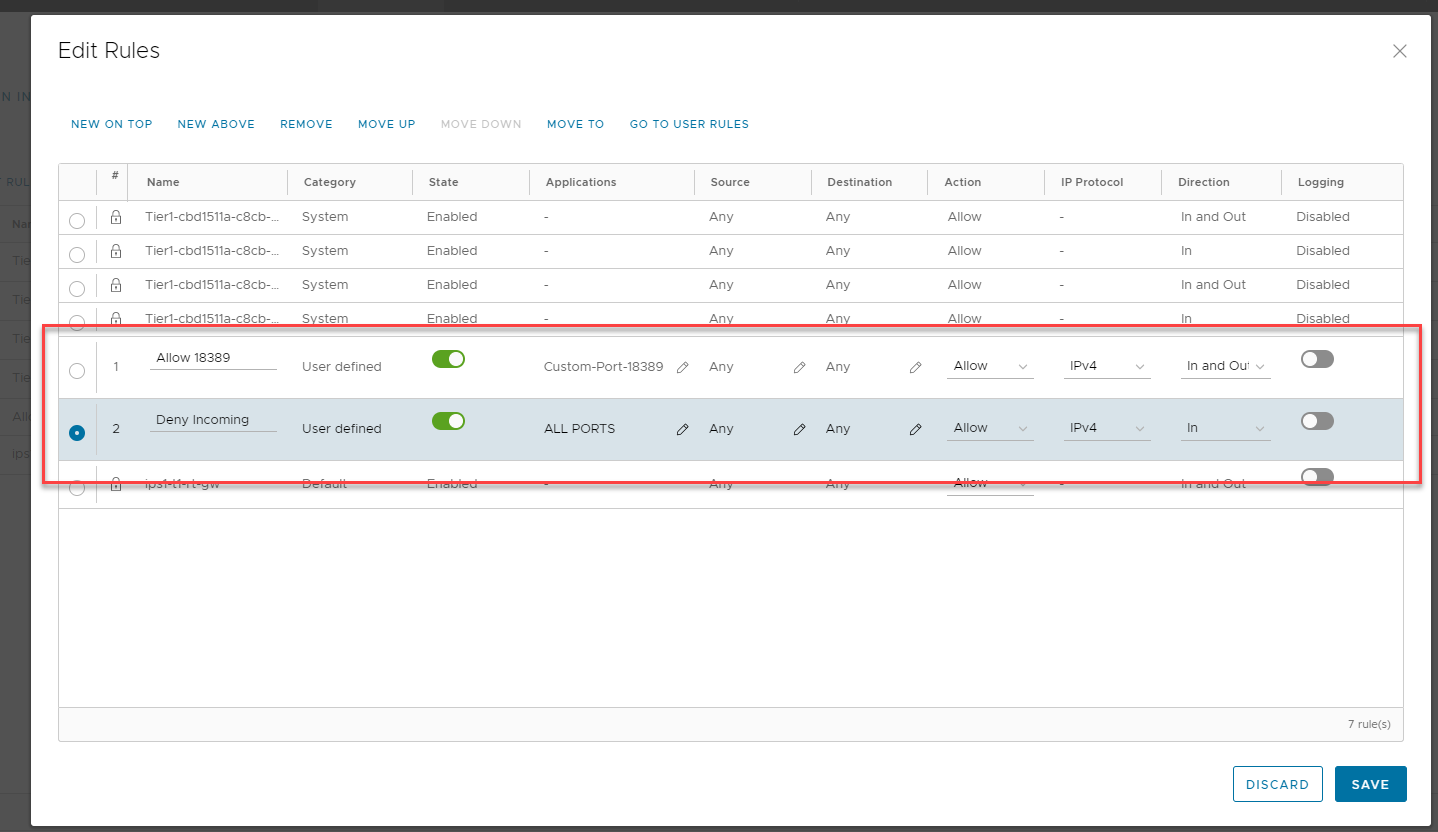
5.Save the changes, and retest your network environment to ensure every network connections is working fine.