Search Our Database
How to enable DKIM in SmarterMail
Introduction
This guide is designed to assist domain administrators in enabling DomainKeys Identified Mail (DKIM) for their domain using the SmarterMail interface. DKIM provides an additional layer of security, ensuring that emails sent from your domain are authenticated and less likely to be marked as spam.
Prerequisite
- Domain Administrator Access: You must have domain administrator privileges in SmarterMail to perform these steps.
- Access to your domain’s DNS settings: You will need the ability to modify DNS records for your domain.
Step by step guide
Step 1: Log in as domain administrator
- Sign in to your SmarterMail account with domain administrator credentials.
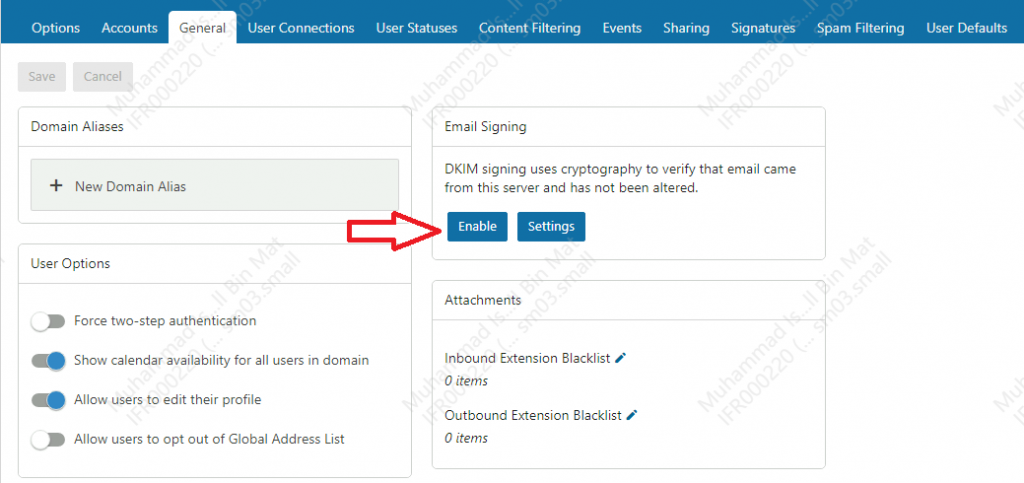
Step 2. Enabling DKIM
- Navigate to the General settings.
- Click on Enable under the Email Signing section. This action will generate the DKIM record needed for your domain.
Step 3: Retrieving the DKIM Record
- After click enable, it will show the following DKIM record.
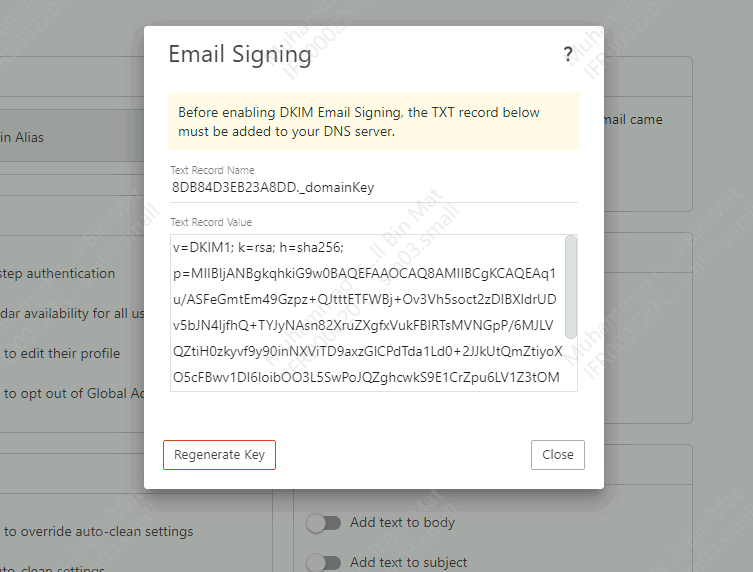
Step 4: Adding the DKIM Record as DNS record
- Add the following record into the DNS records of the domain.
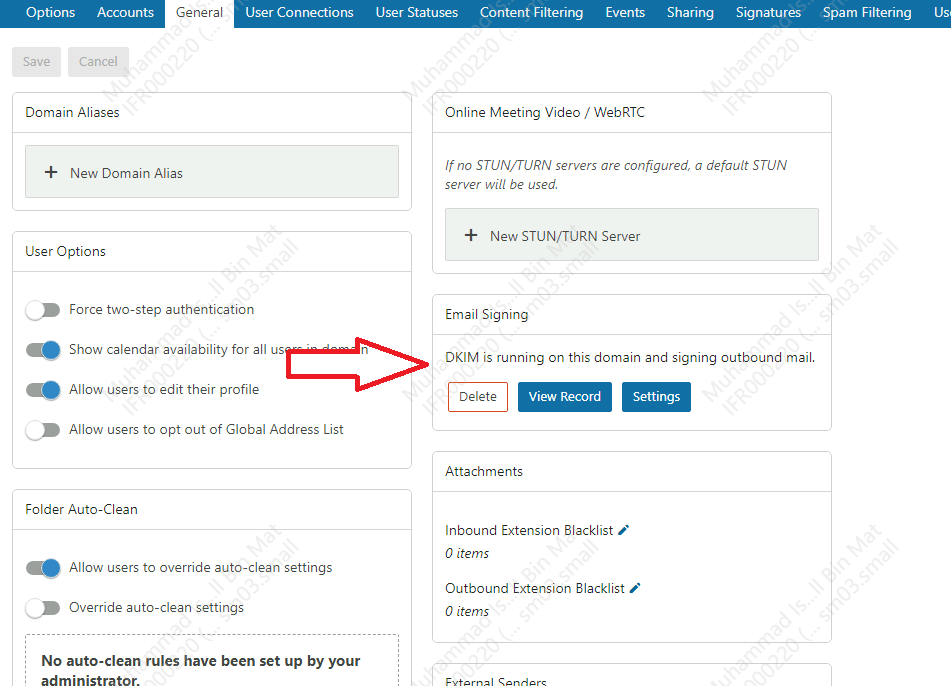
- After done adding the record, go back to SmarterMail general setting and click Enable to verify the DKIM record.
- Once enabled, it will show as DKIM is running on this domain and signing outbound mail.
Conclusion
By completing these steps, you have successfully enabled DKIM for your domain in SmarterMail. This setup is essential for authenticating your emails and improving their deliverability. Remember, changes to DNS records can take some time to propagate, so the verification process may not be immediate.
For additional assistance or if you encounter any issues, please contact our support team at support@ipserverone.com.