Search Our Database
How to Edit Existing Cron Job in cPanel
Introduction
This Knowledge Base article provides a simple, step-by-step guide on How to Edit Existing Cron Job in cPanel. Editing cron jobs allows adjustments to the schedule or command without deleting and recreating the task. Proper management ensures that automated tasks run correctly and efficiently.
Prerequisite
- Access to your cPanel login page.
- Existing Cron Jobs to edit in cPanel.
Step-by-Step Guide
Step 1: Log in to cPanel
- Access and log in to your cPanel account using your username and password.
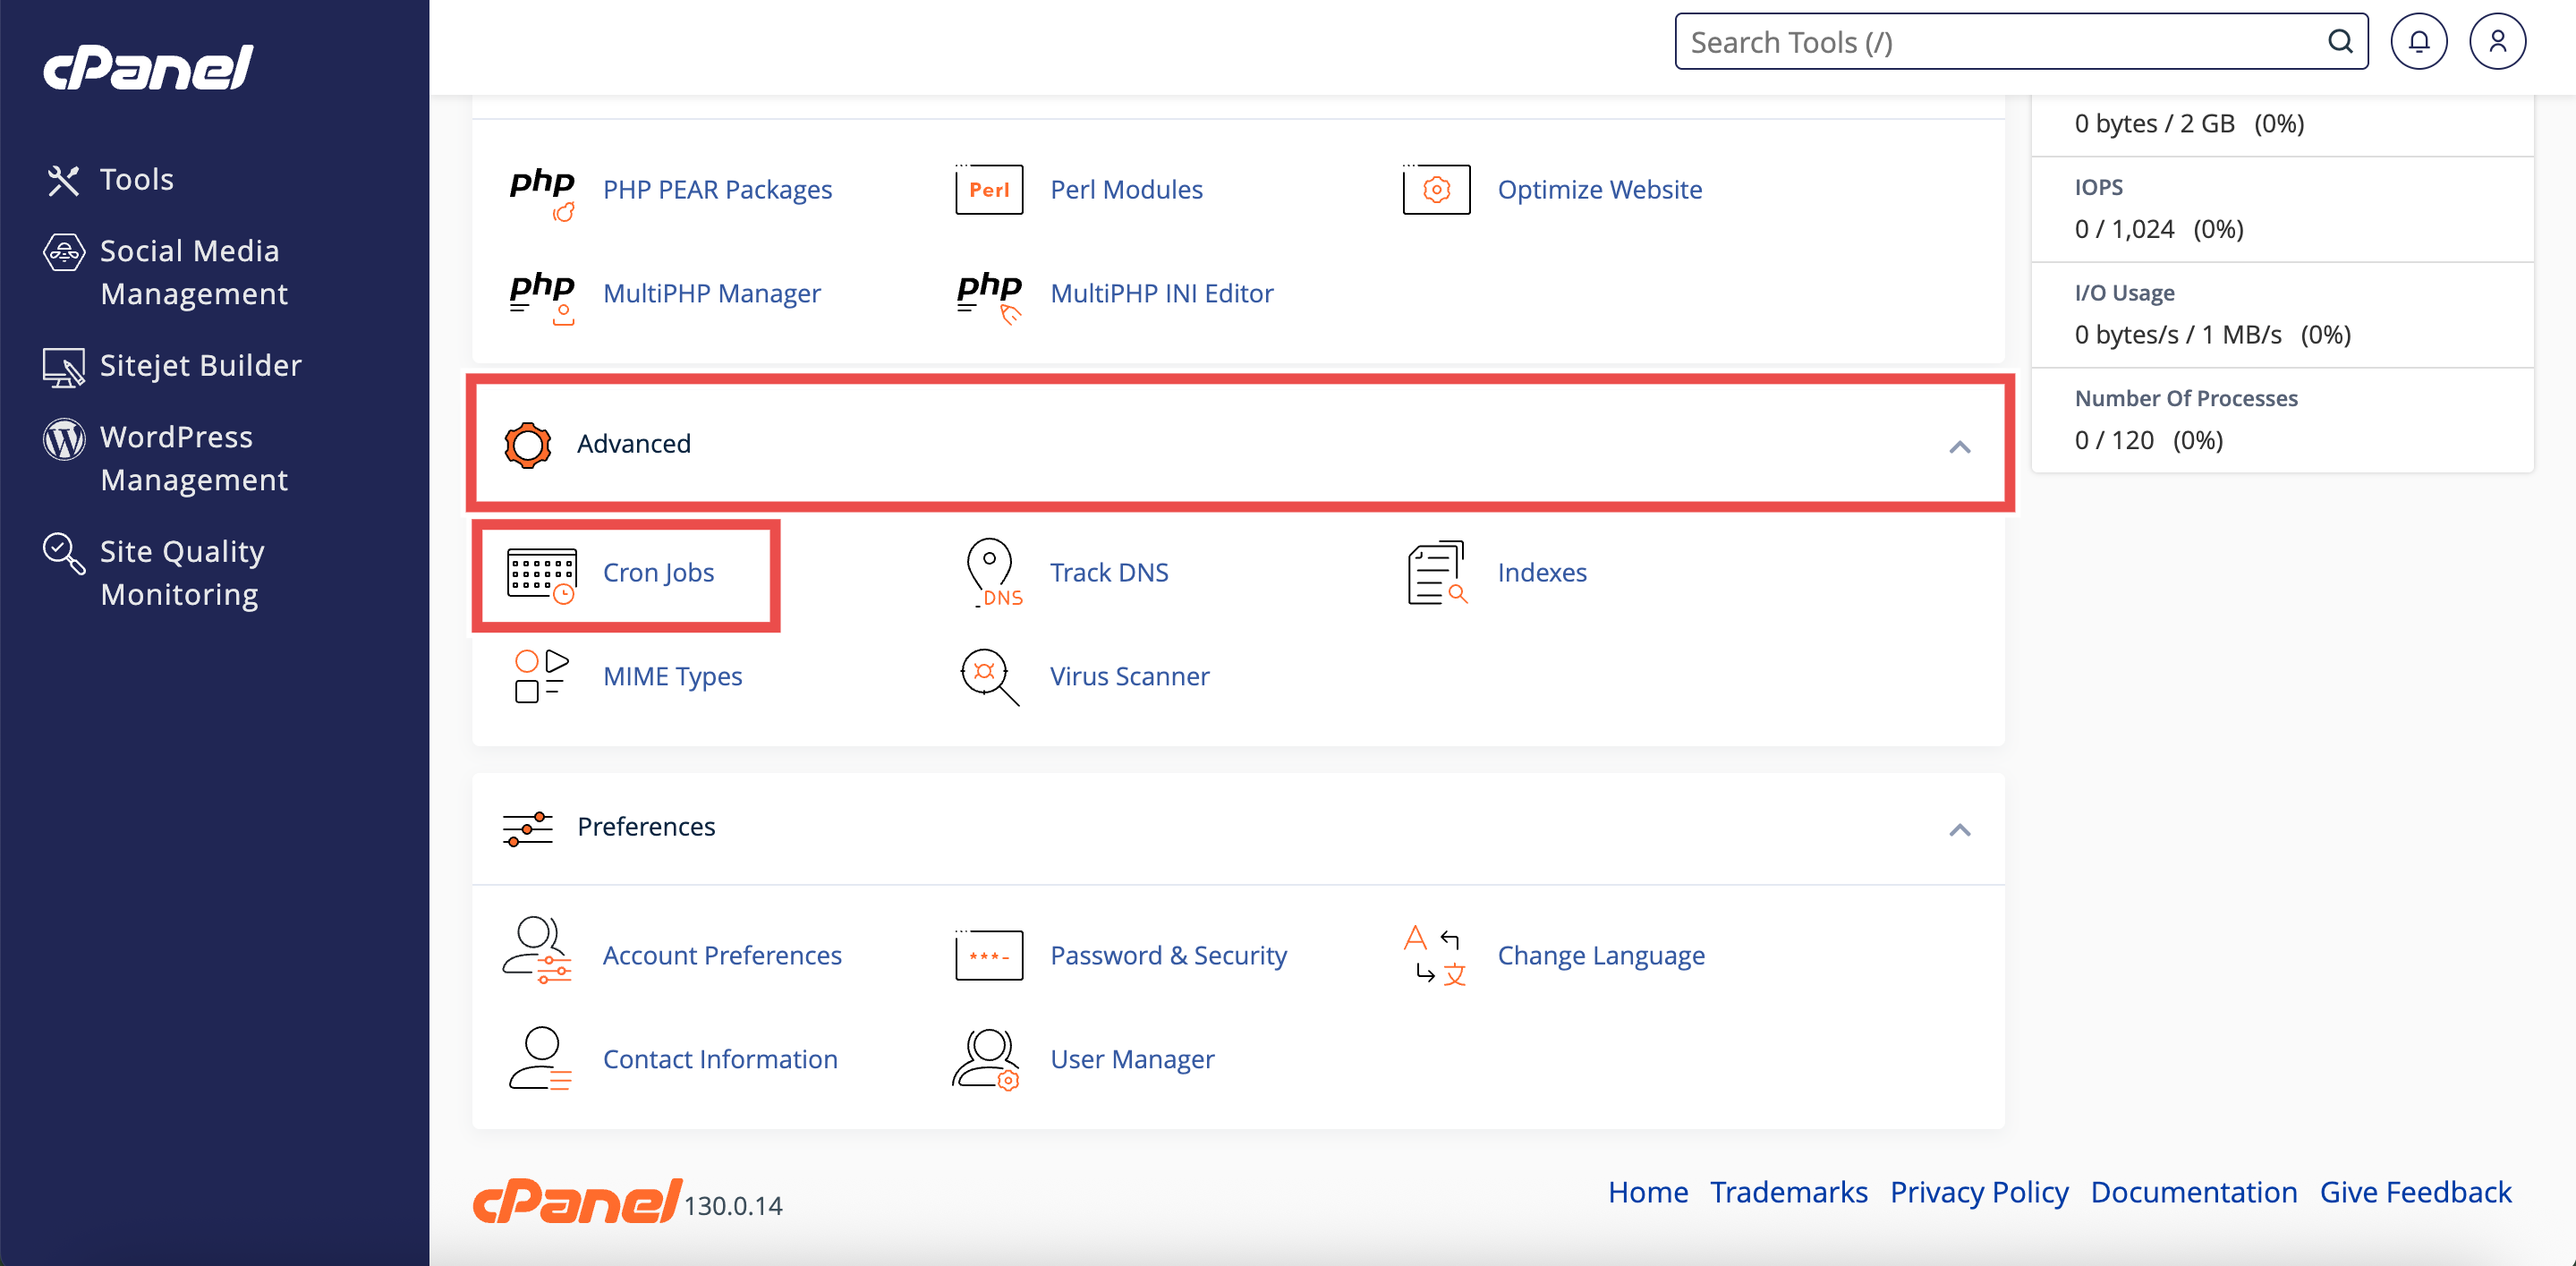
Step 2: Open Cron Jobs
- In the Home page, under Advanced, click Cron Jobs.
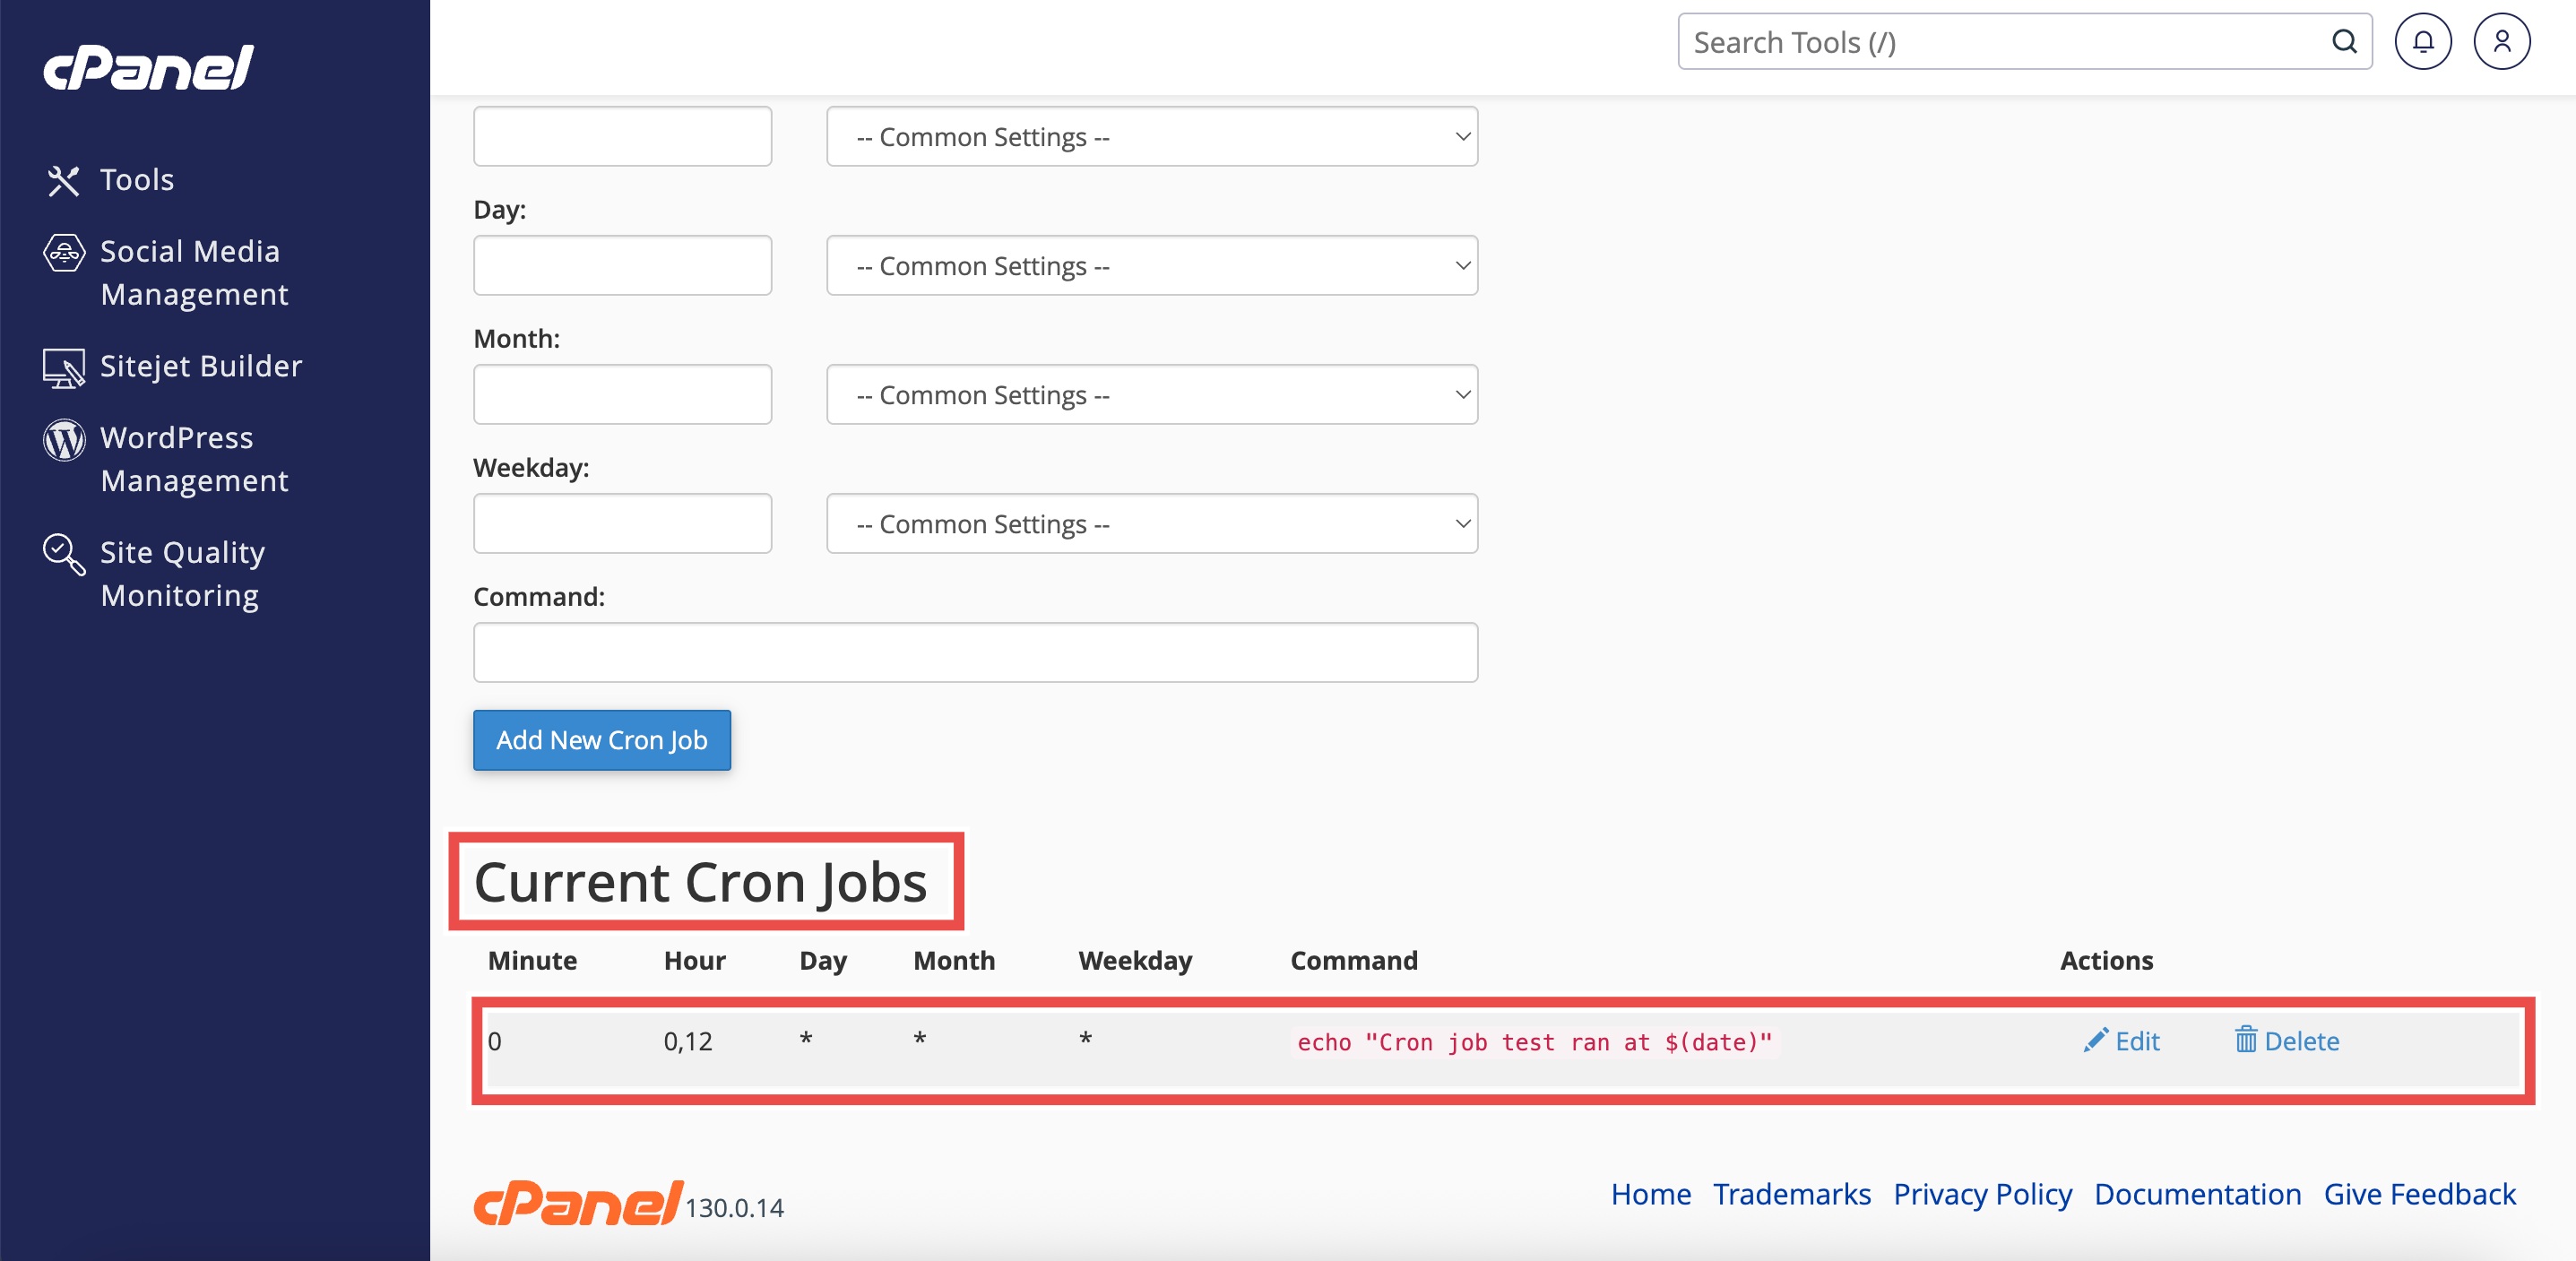
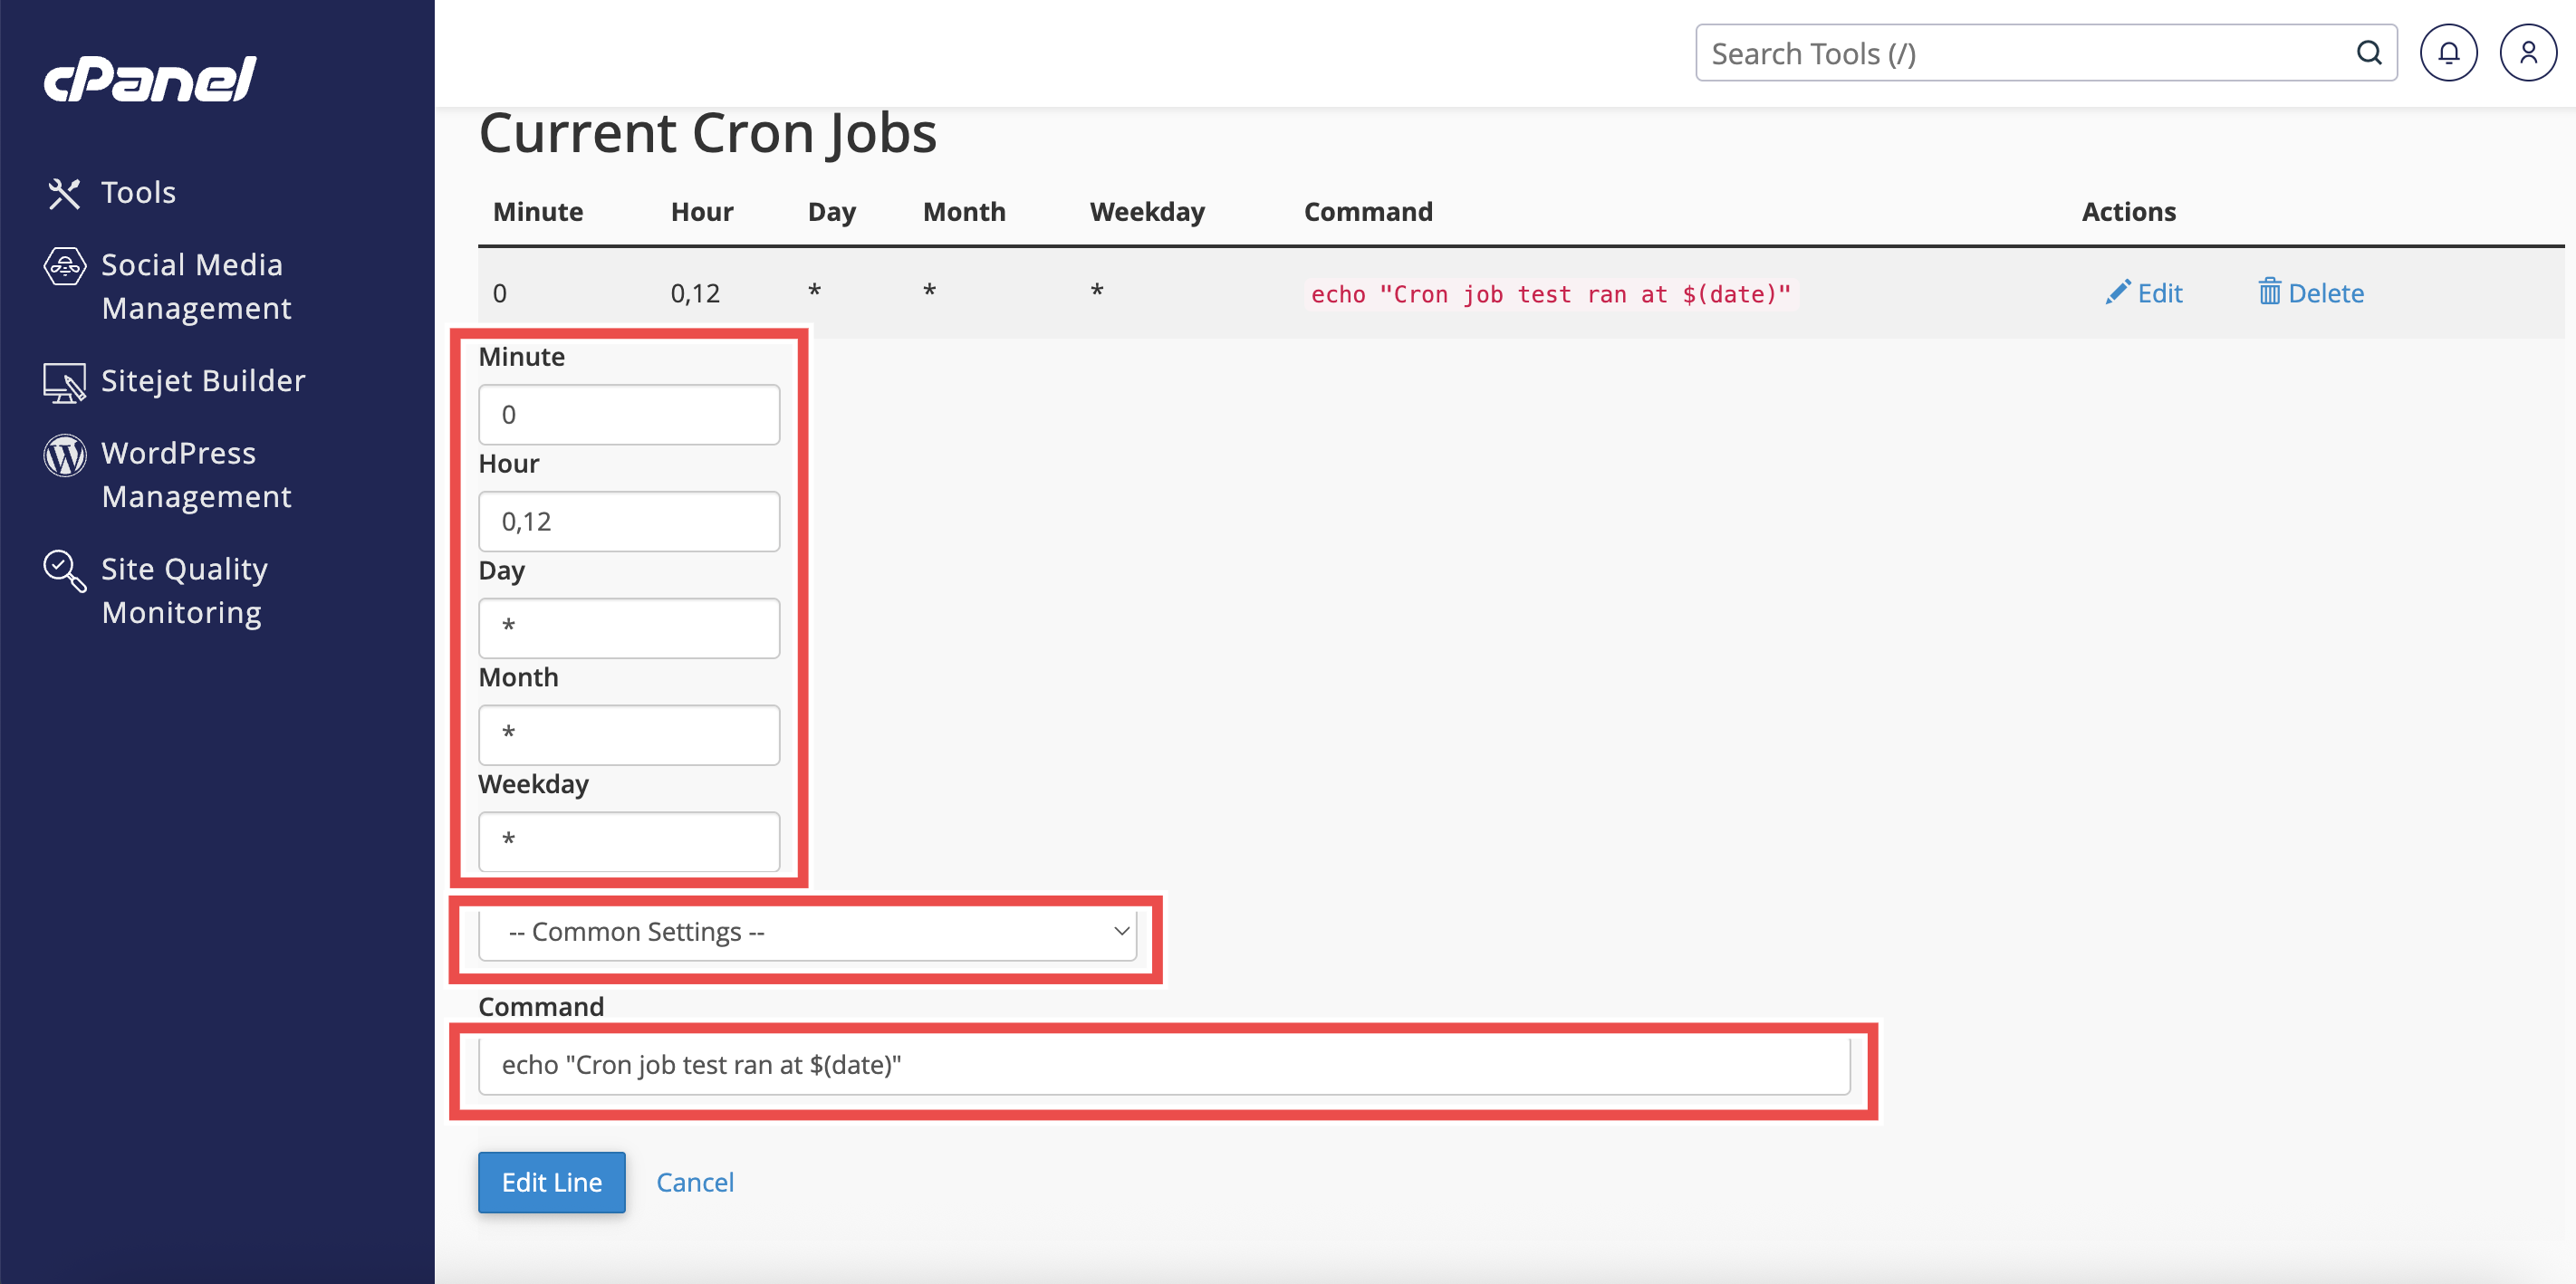
Step 3: Locate the Cron Job
- Scroll down to the Current Cron Jobs table.
- Find the cron job to be edited in the Current Cron Jobs table.
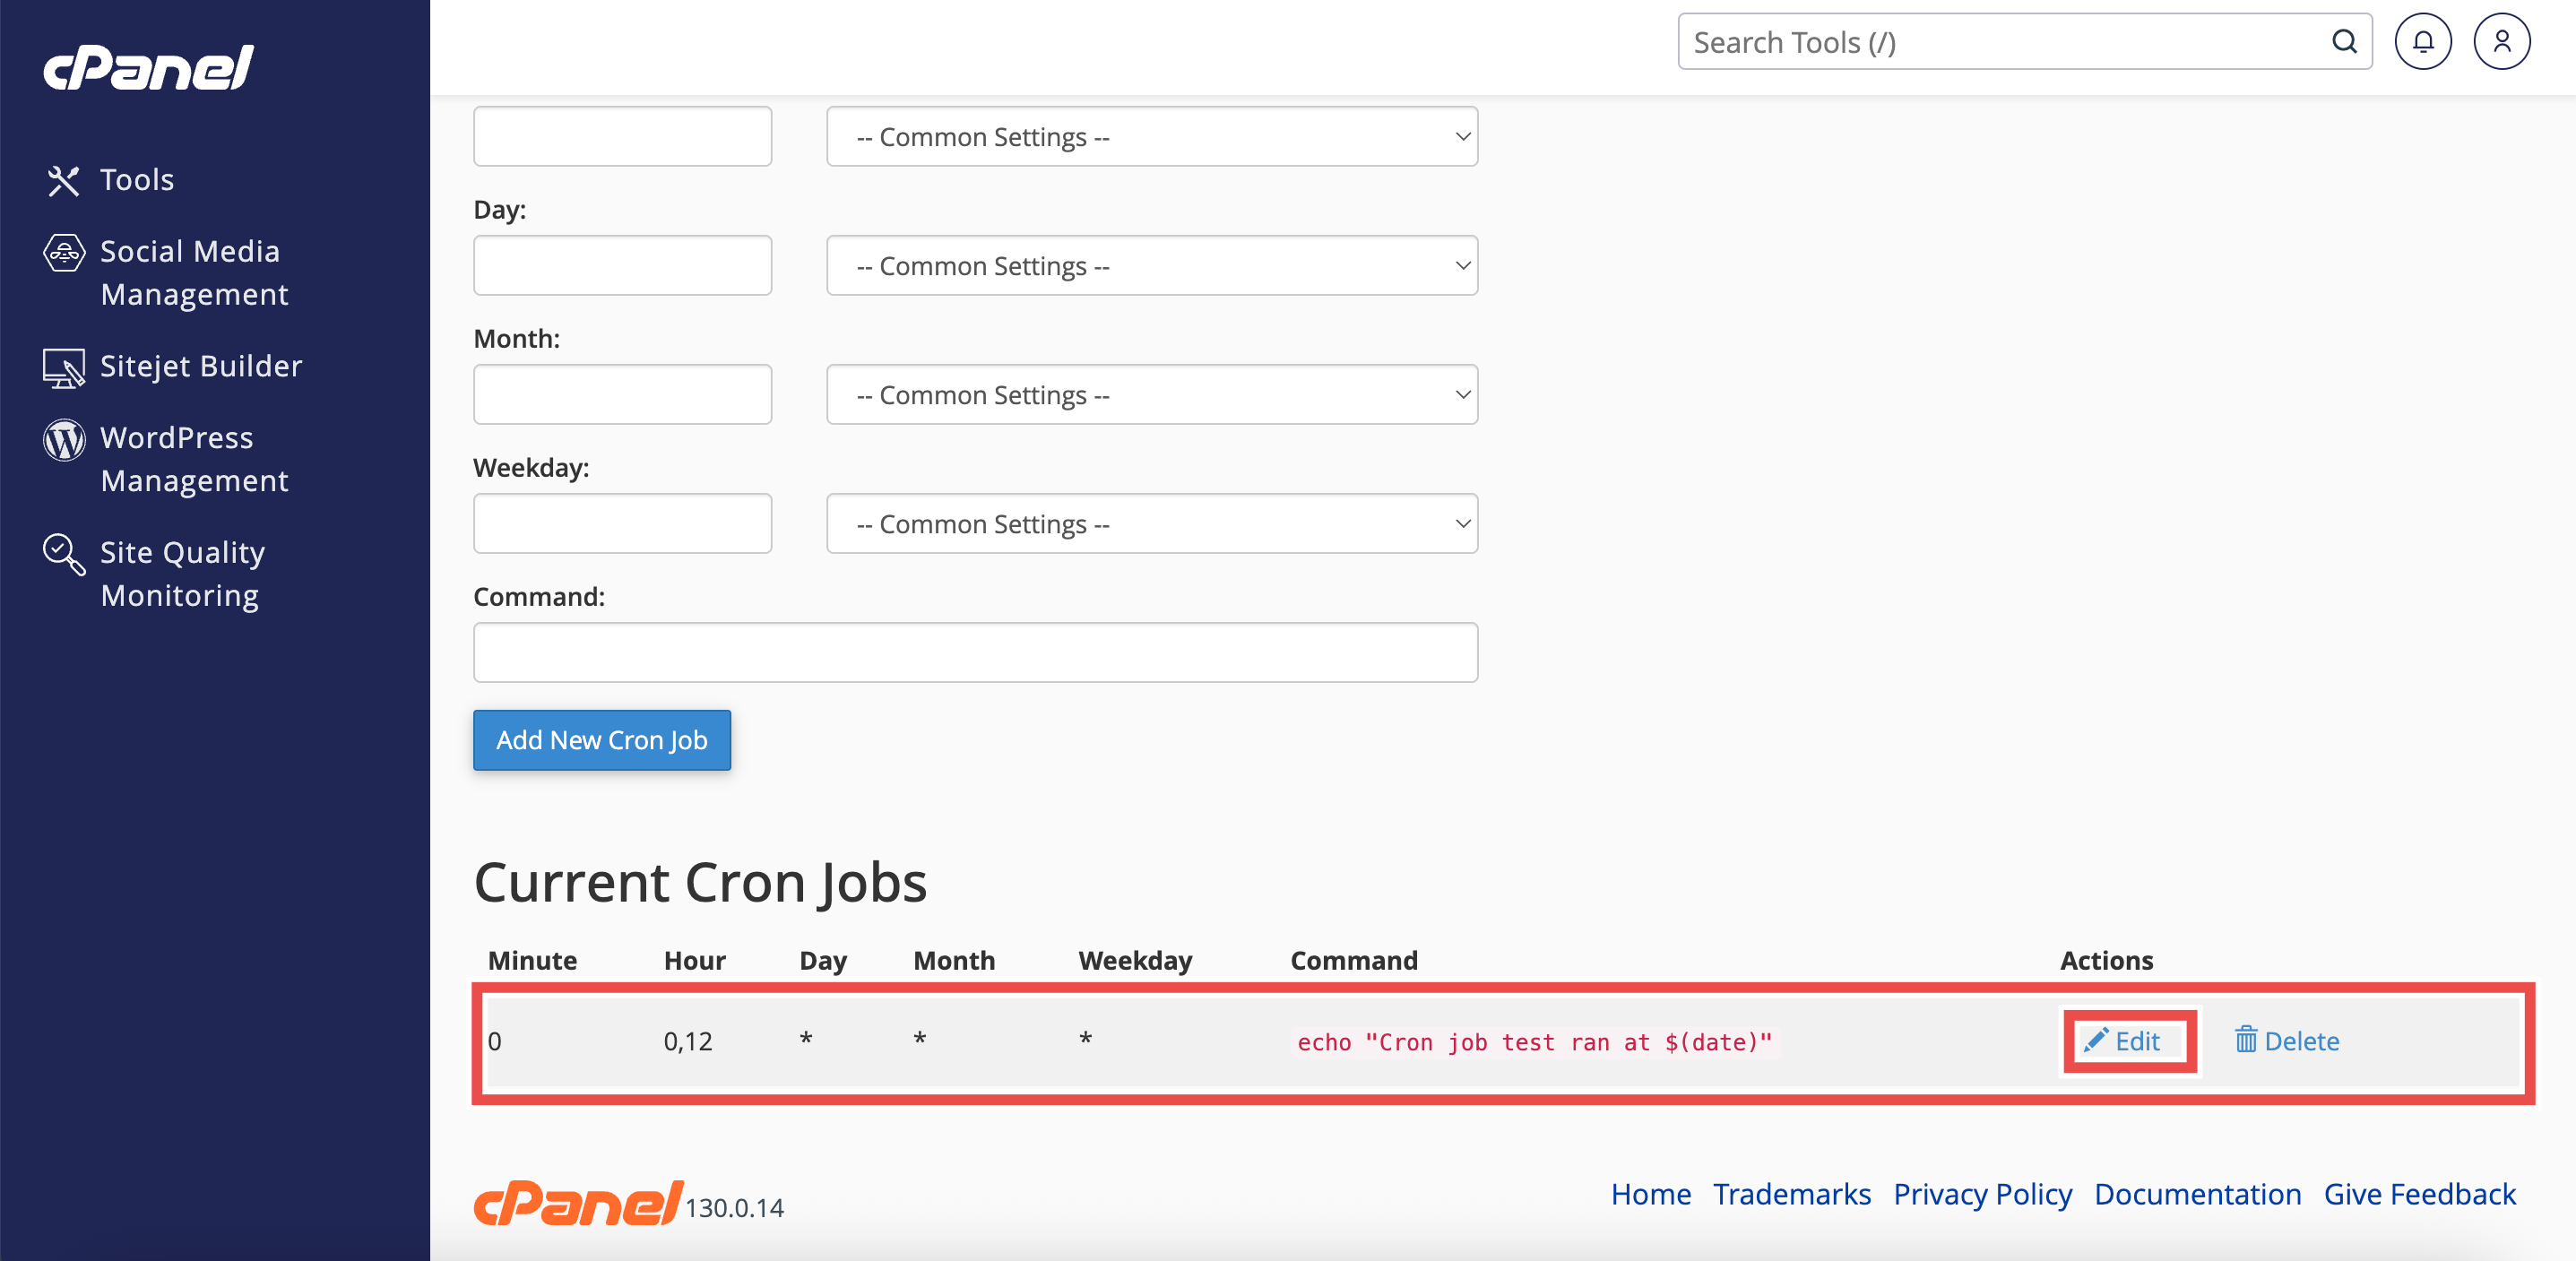
Step 4: Edit the Cron Jobs
- Click the Edit button next to the selected cron job.
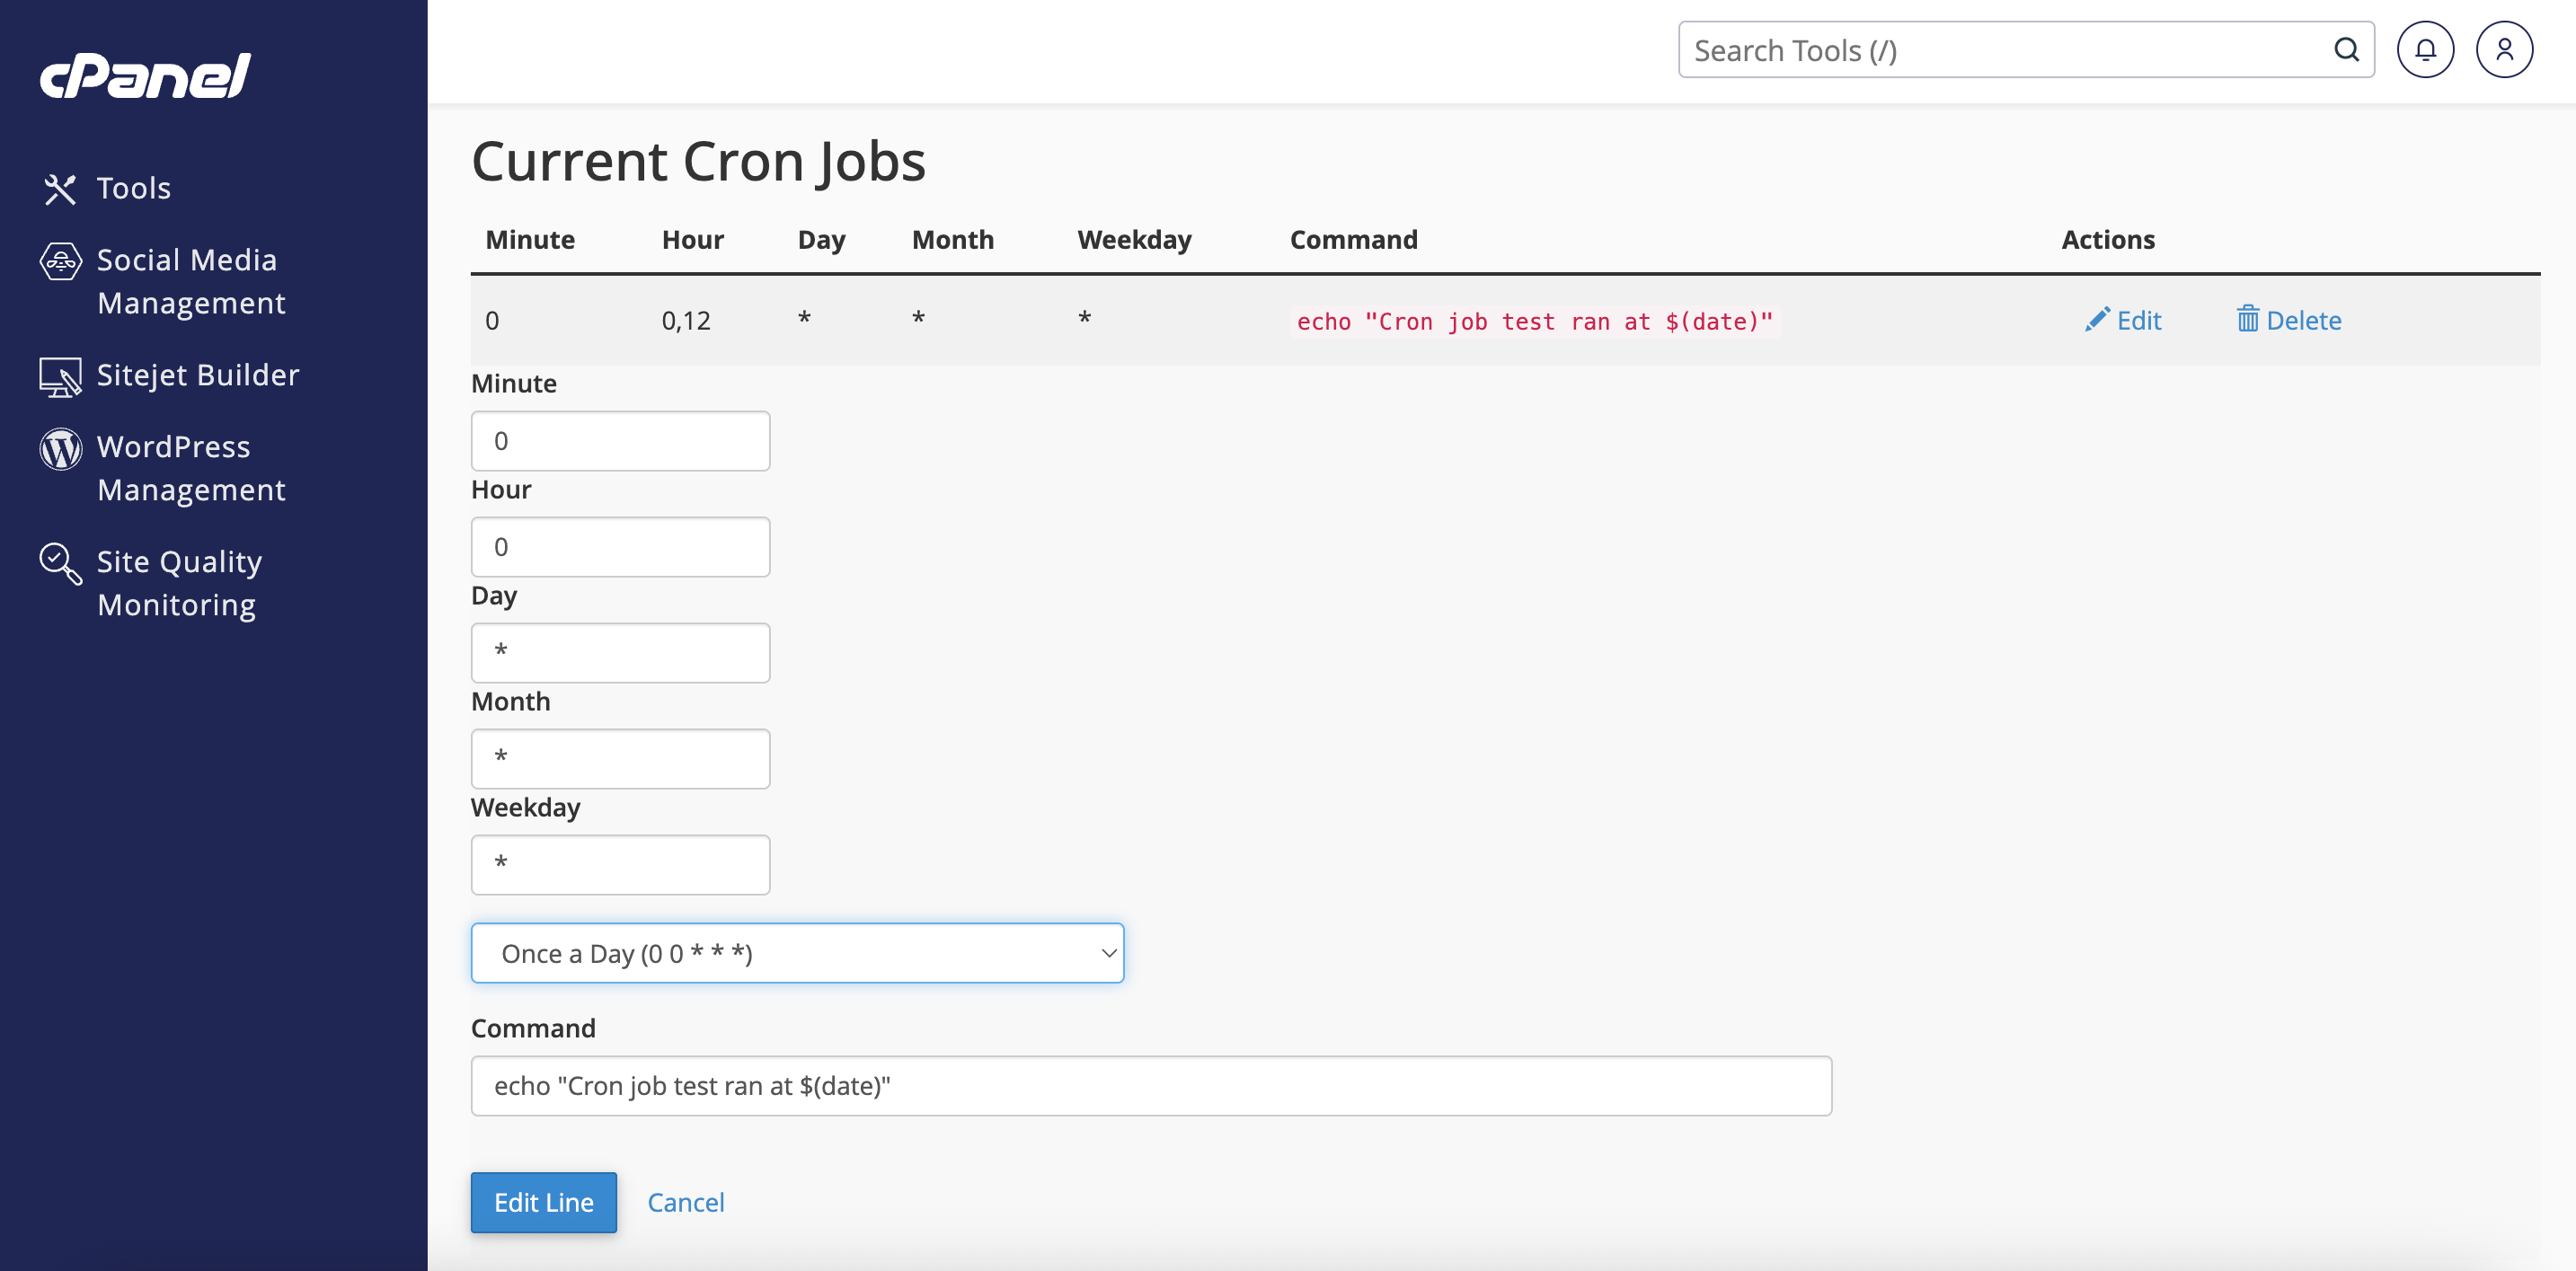
Step 5: Modify Schedule or Command
- Update the Minute, Hour, Day, Month, Weekday fields or modify the Command field as needed.
-
Use the Common Settings dropdown for a quick preset schedule, or manually adjust the fields for a custom schedule.
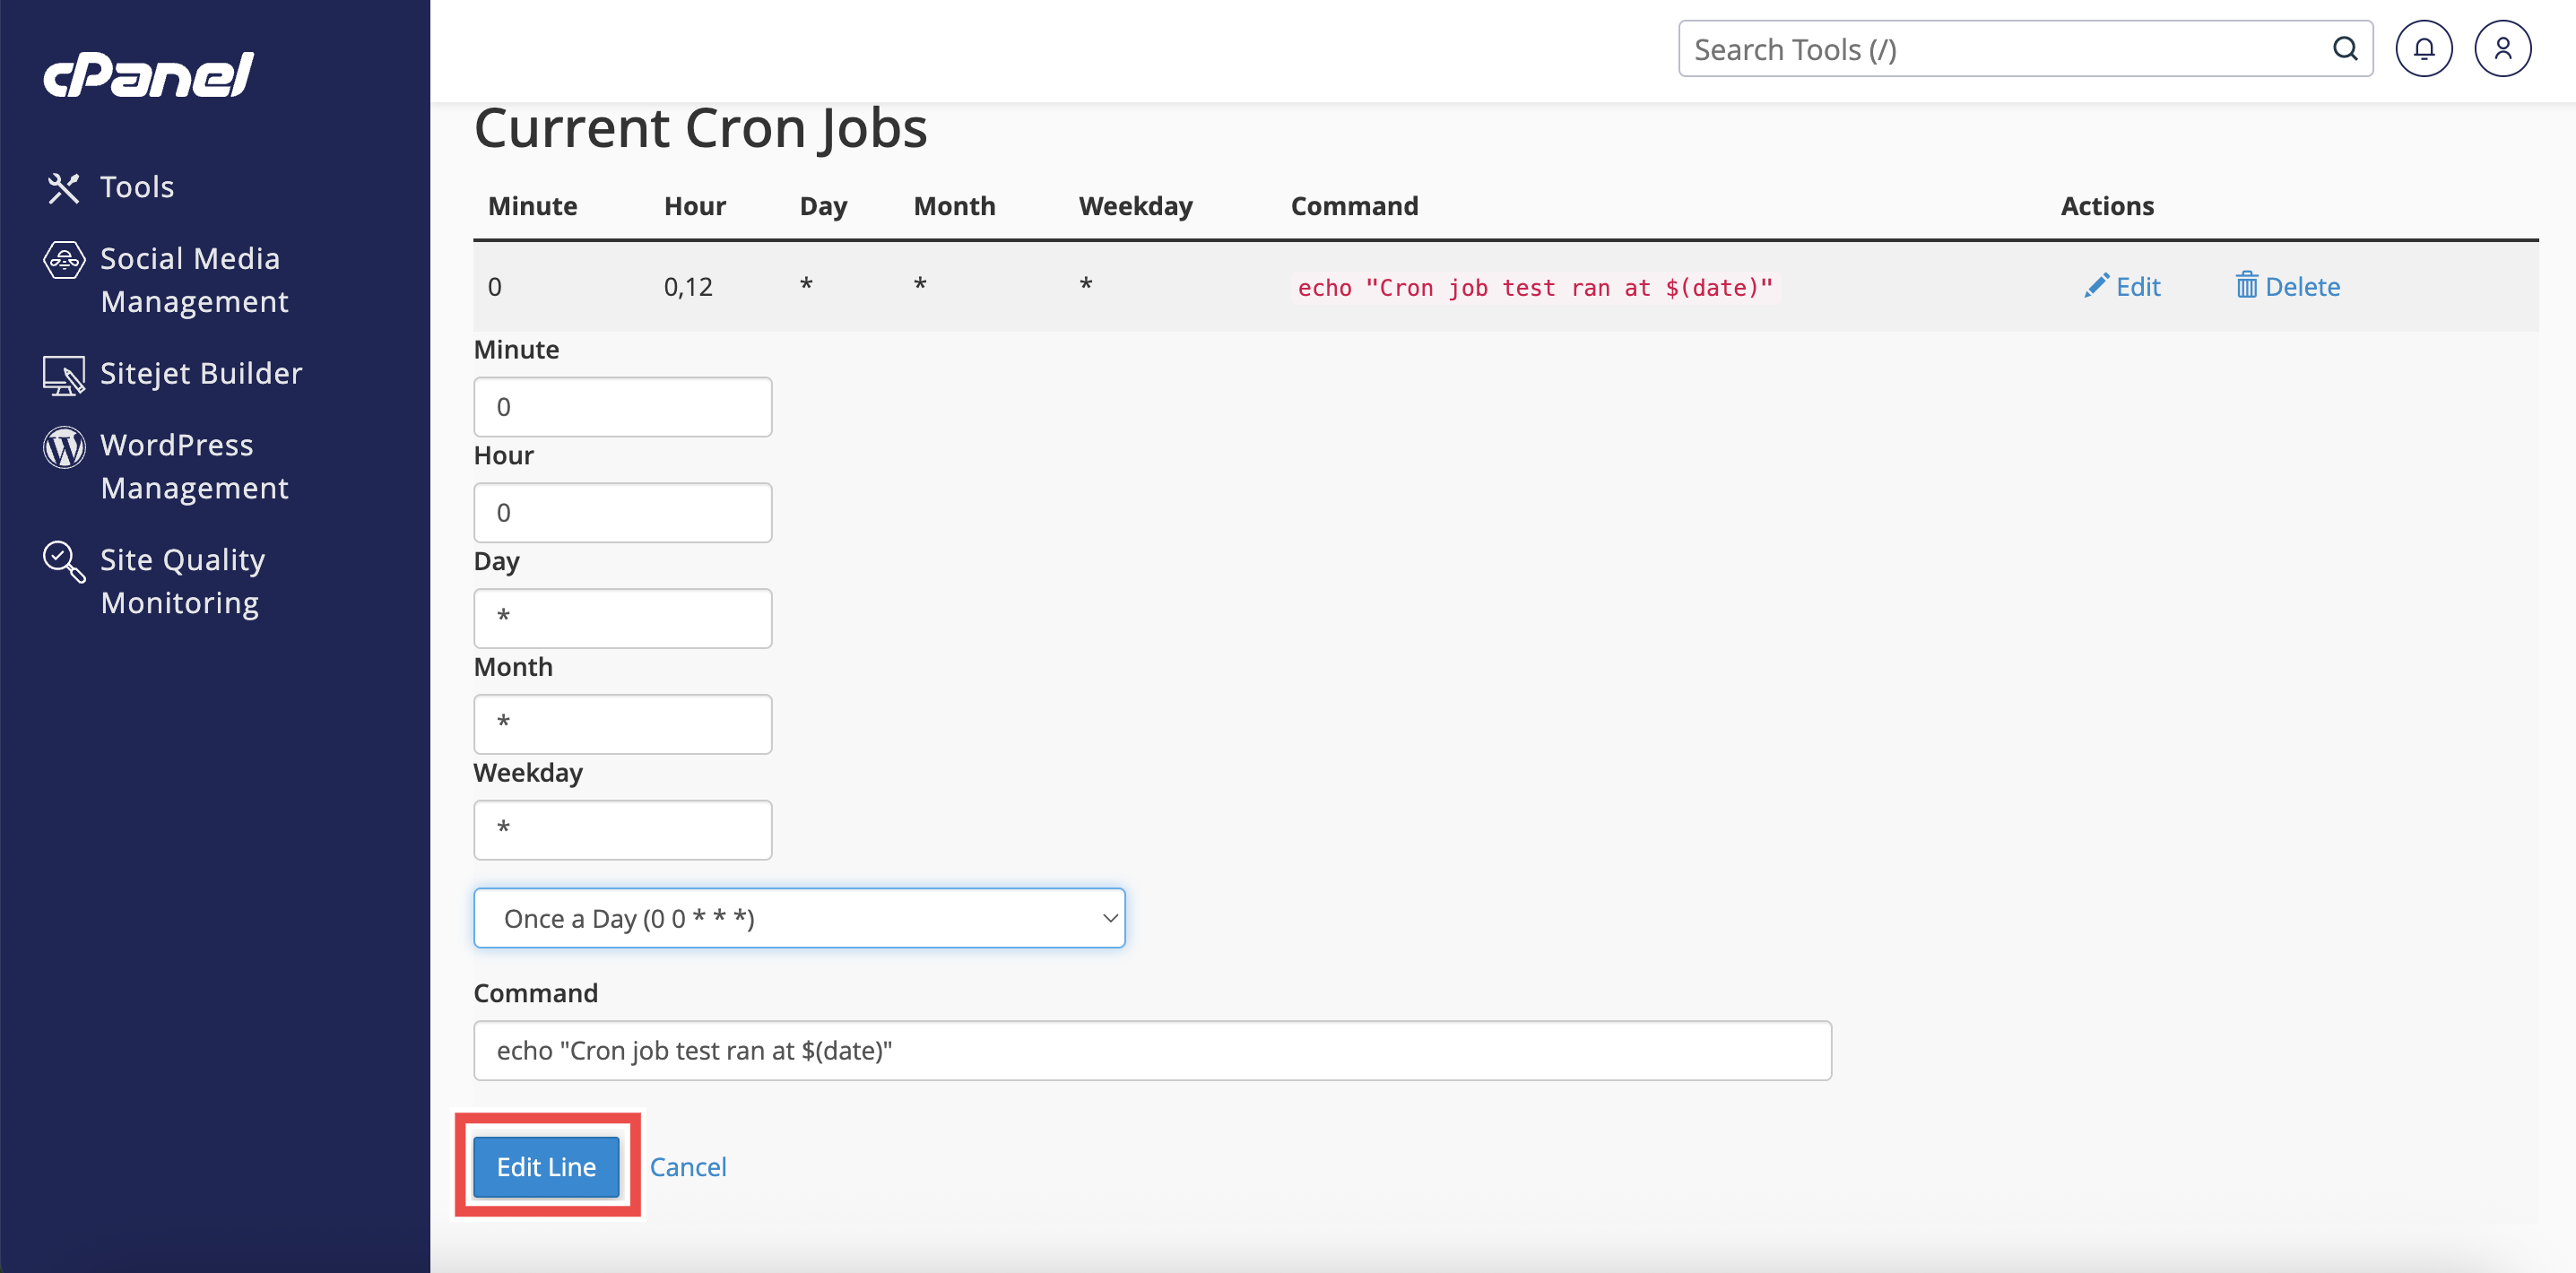
Step 6: Save Changes
- Click Edit Line to apply the modifications.
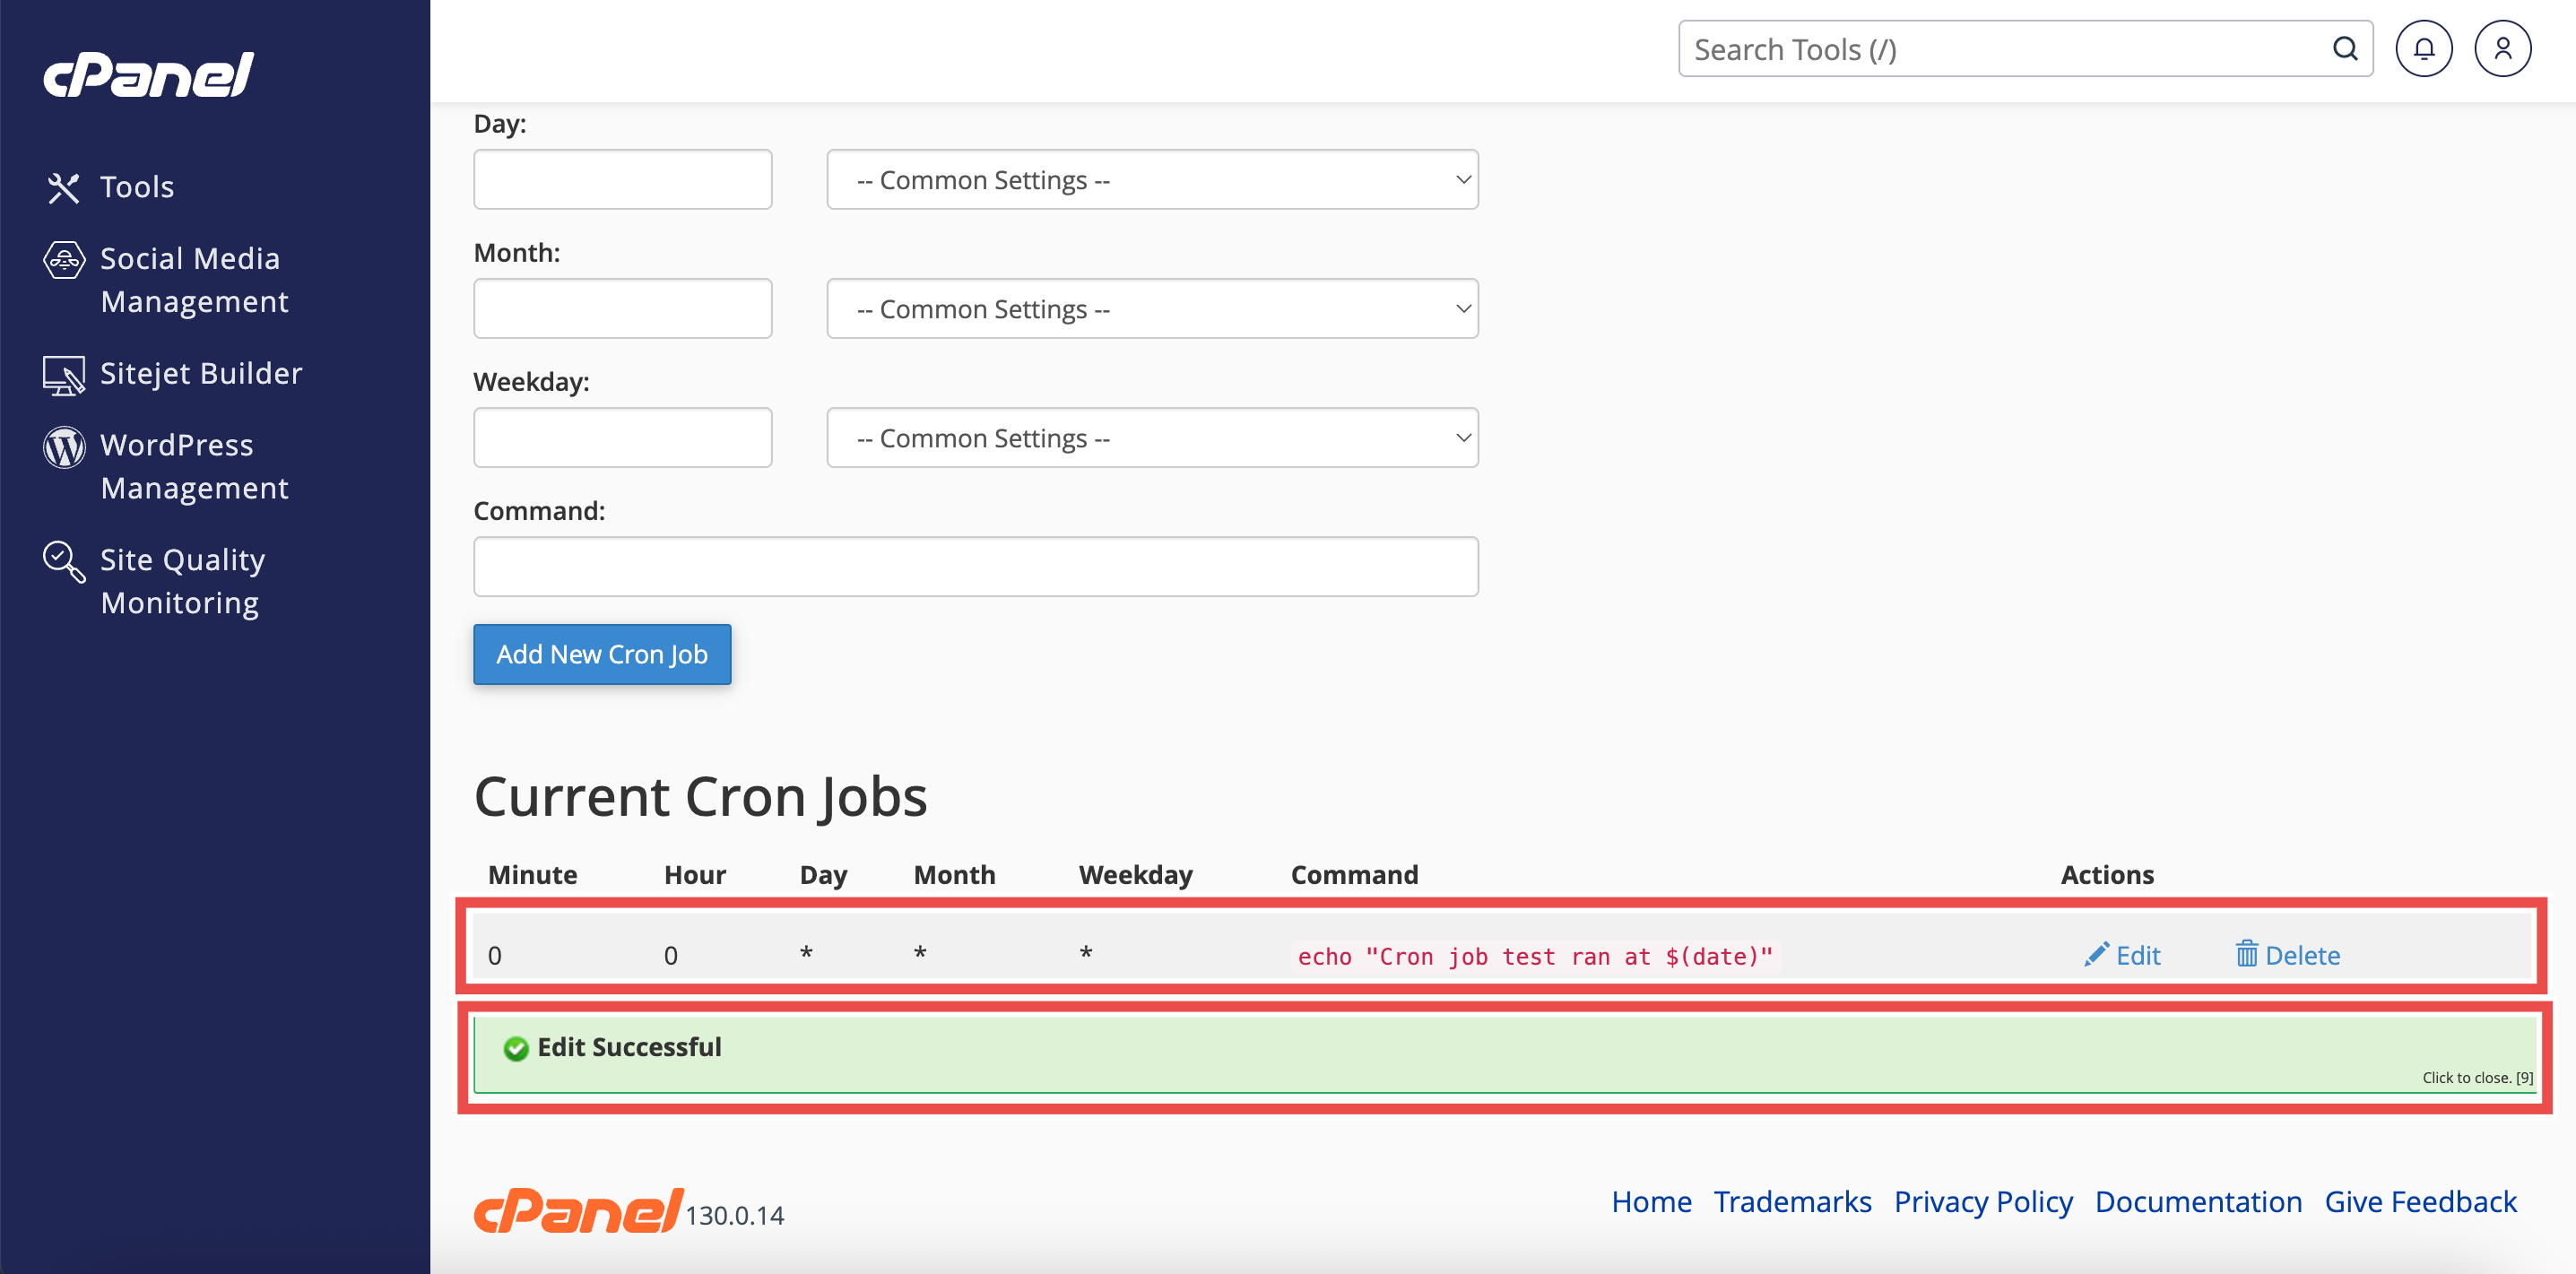
Step 7: Verify Changes
- A success message will appear confirming that the cron job has been edited successfully.
-
Additionally, check the Current Cron Jobs table to ensure the cron job shows the new schedule or updated command, confirming that the edits were applied successfully.
Conclusion
Following these steps allows existing cron jobs to be updated easily in cPanel. Editing cron jobs ensures tasks run at the correct intervals with the intended commands.
Should you encounter any issues or have any questions, our support team at IPSERVERONE is always here to assist you. Don’t hesitate to reach out to us at support@ipserverone.com for any help you need.