Search Our Database
How to Edit an Address Book in cPanel
Introduction
This Knowledge Base article provides a step-by-step guide on How to Edit an Address Book in cPanel. Editing an address book allows you to update its name or description so your contacts remain organized and easy to identify. The Calendars and Contacts Management interface in cPanel makes it simple to update details as your needs change.
Prerequisite
- Access to your cPanel login page.
- Existing address book to edit.
Step-by-Step Guide
Step 1: Log in to cPanel
- Access and log in to your cPanel account using your username and password.
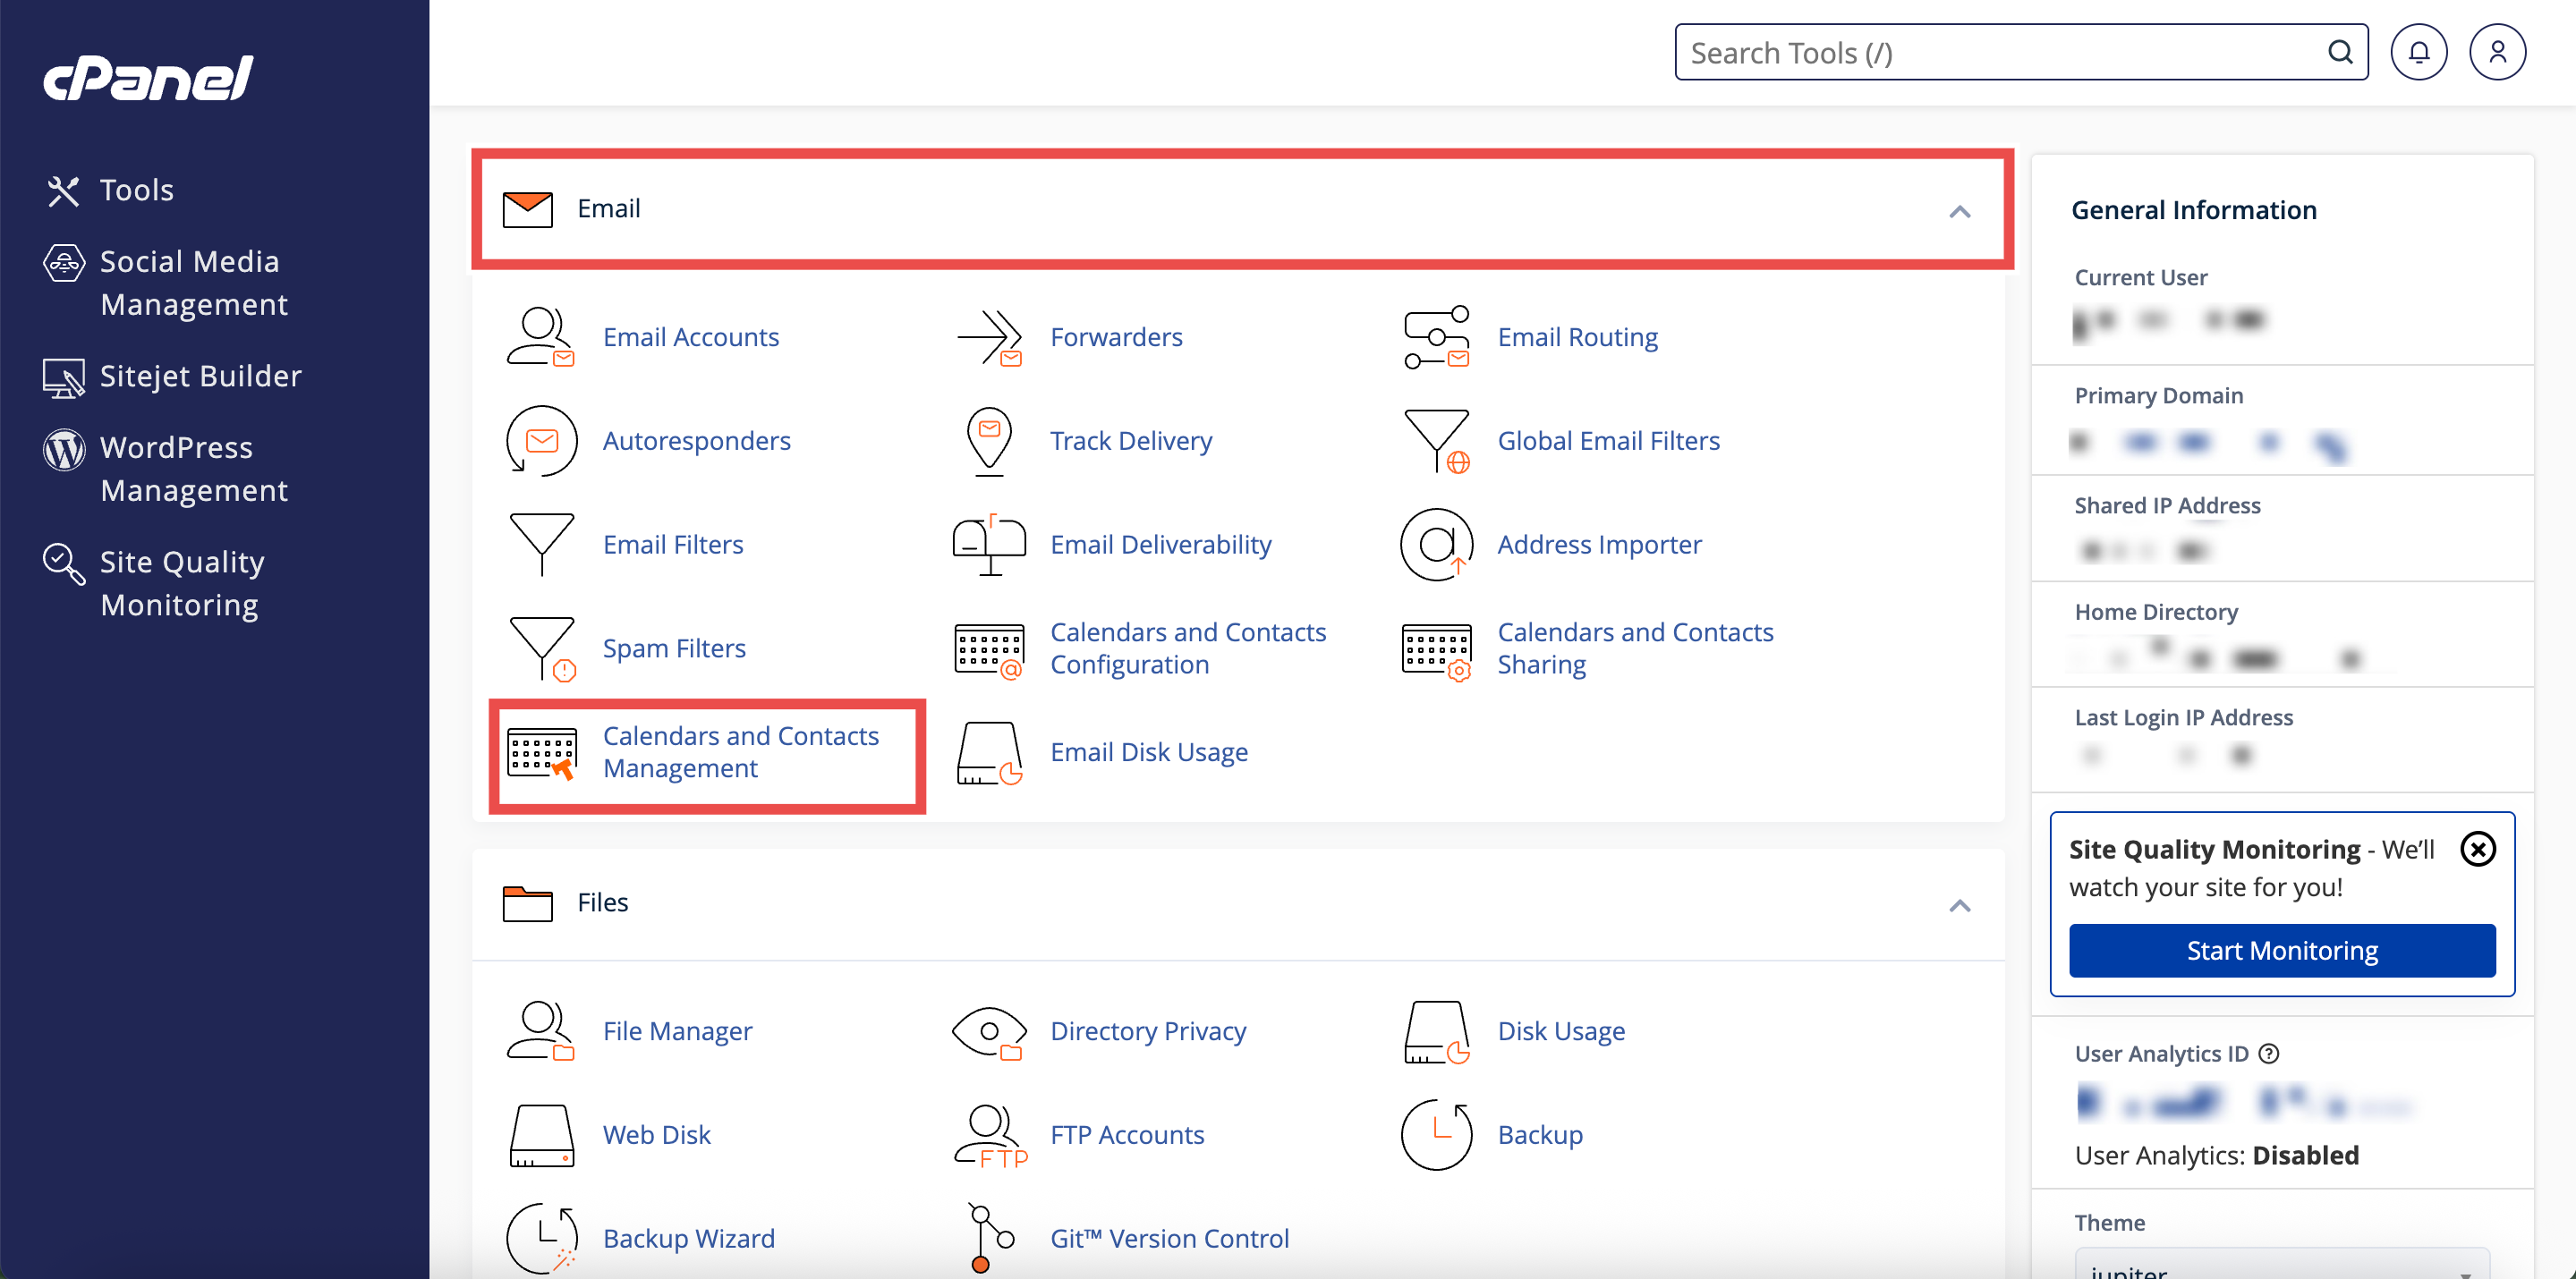
Step 2: Open Calendars & Contacts Management
- On the Home page, under Email, click Calendars & Contacts Management.
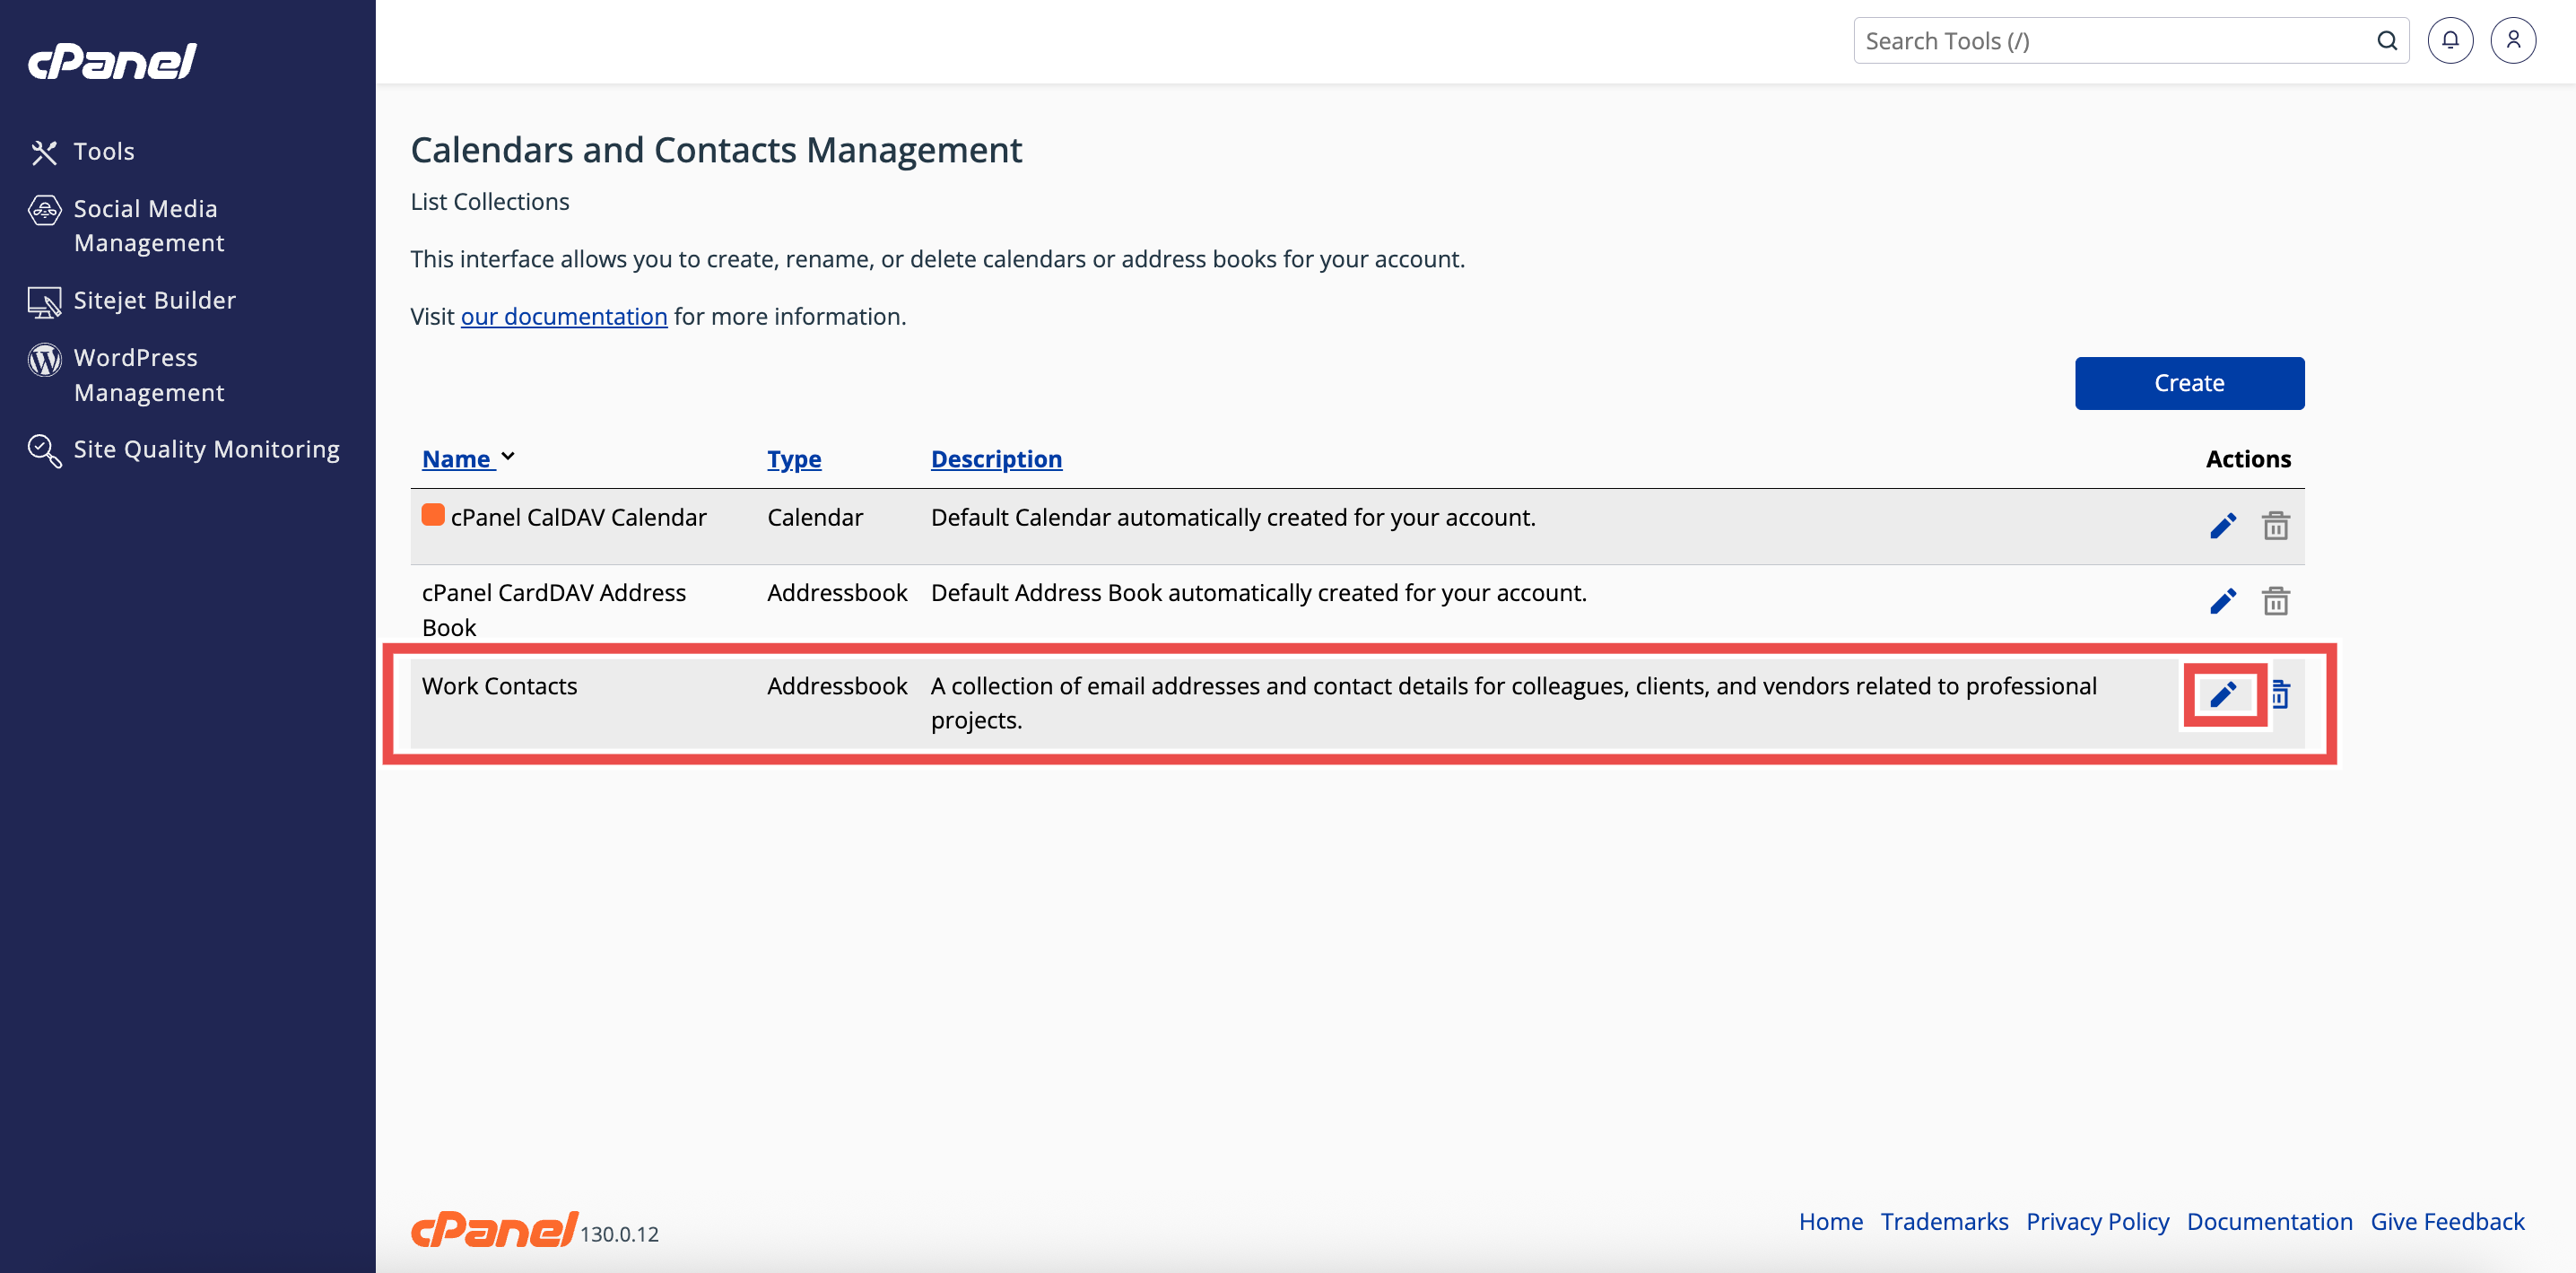
Step 3: Locate the Address Book
- In the Calendars and Contacts Management table, find the address book you want to edit.

Step 4: Open the Collection Editor
- Click the pencil icon in the Actions column next to the address book.
- This will open the Update Collection interface.
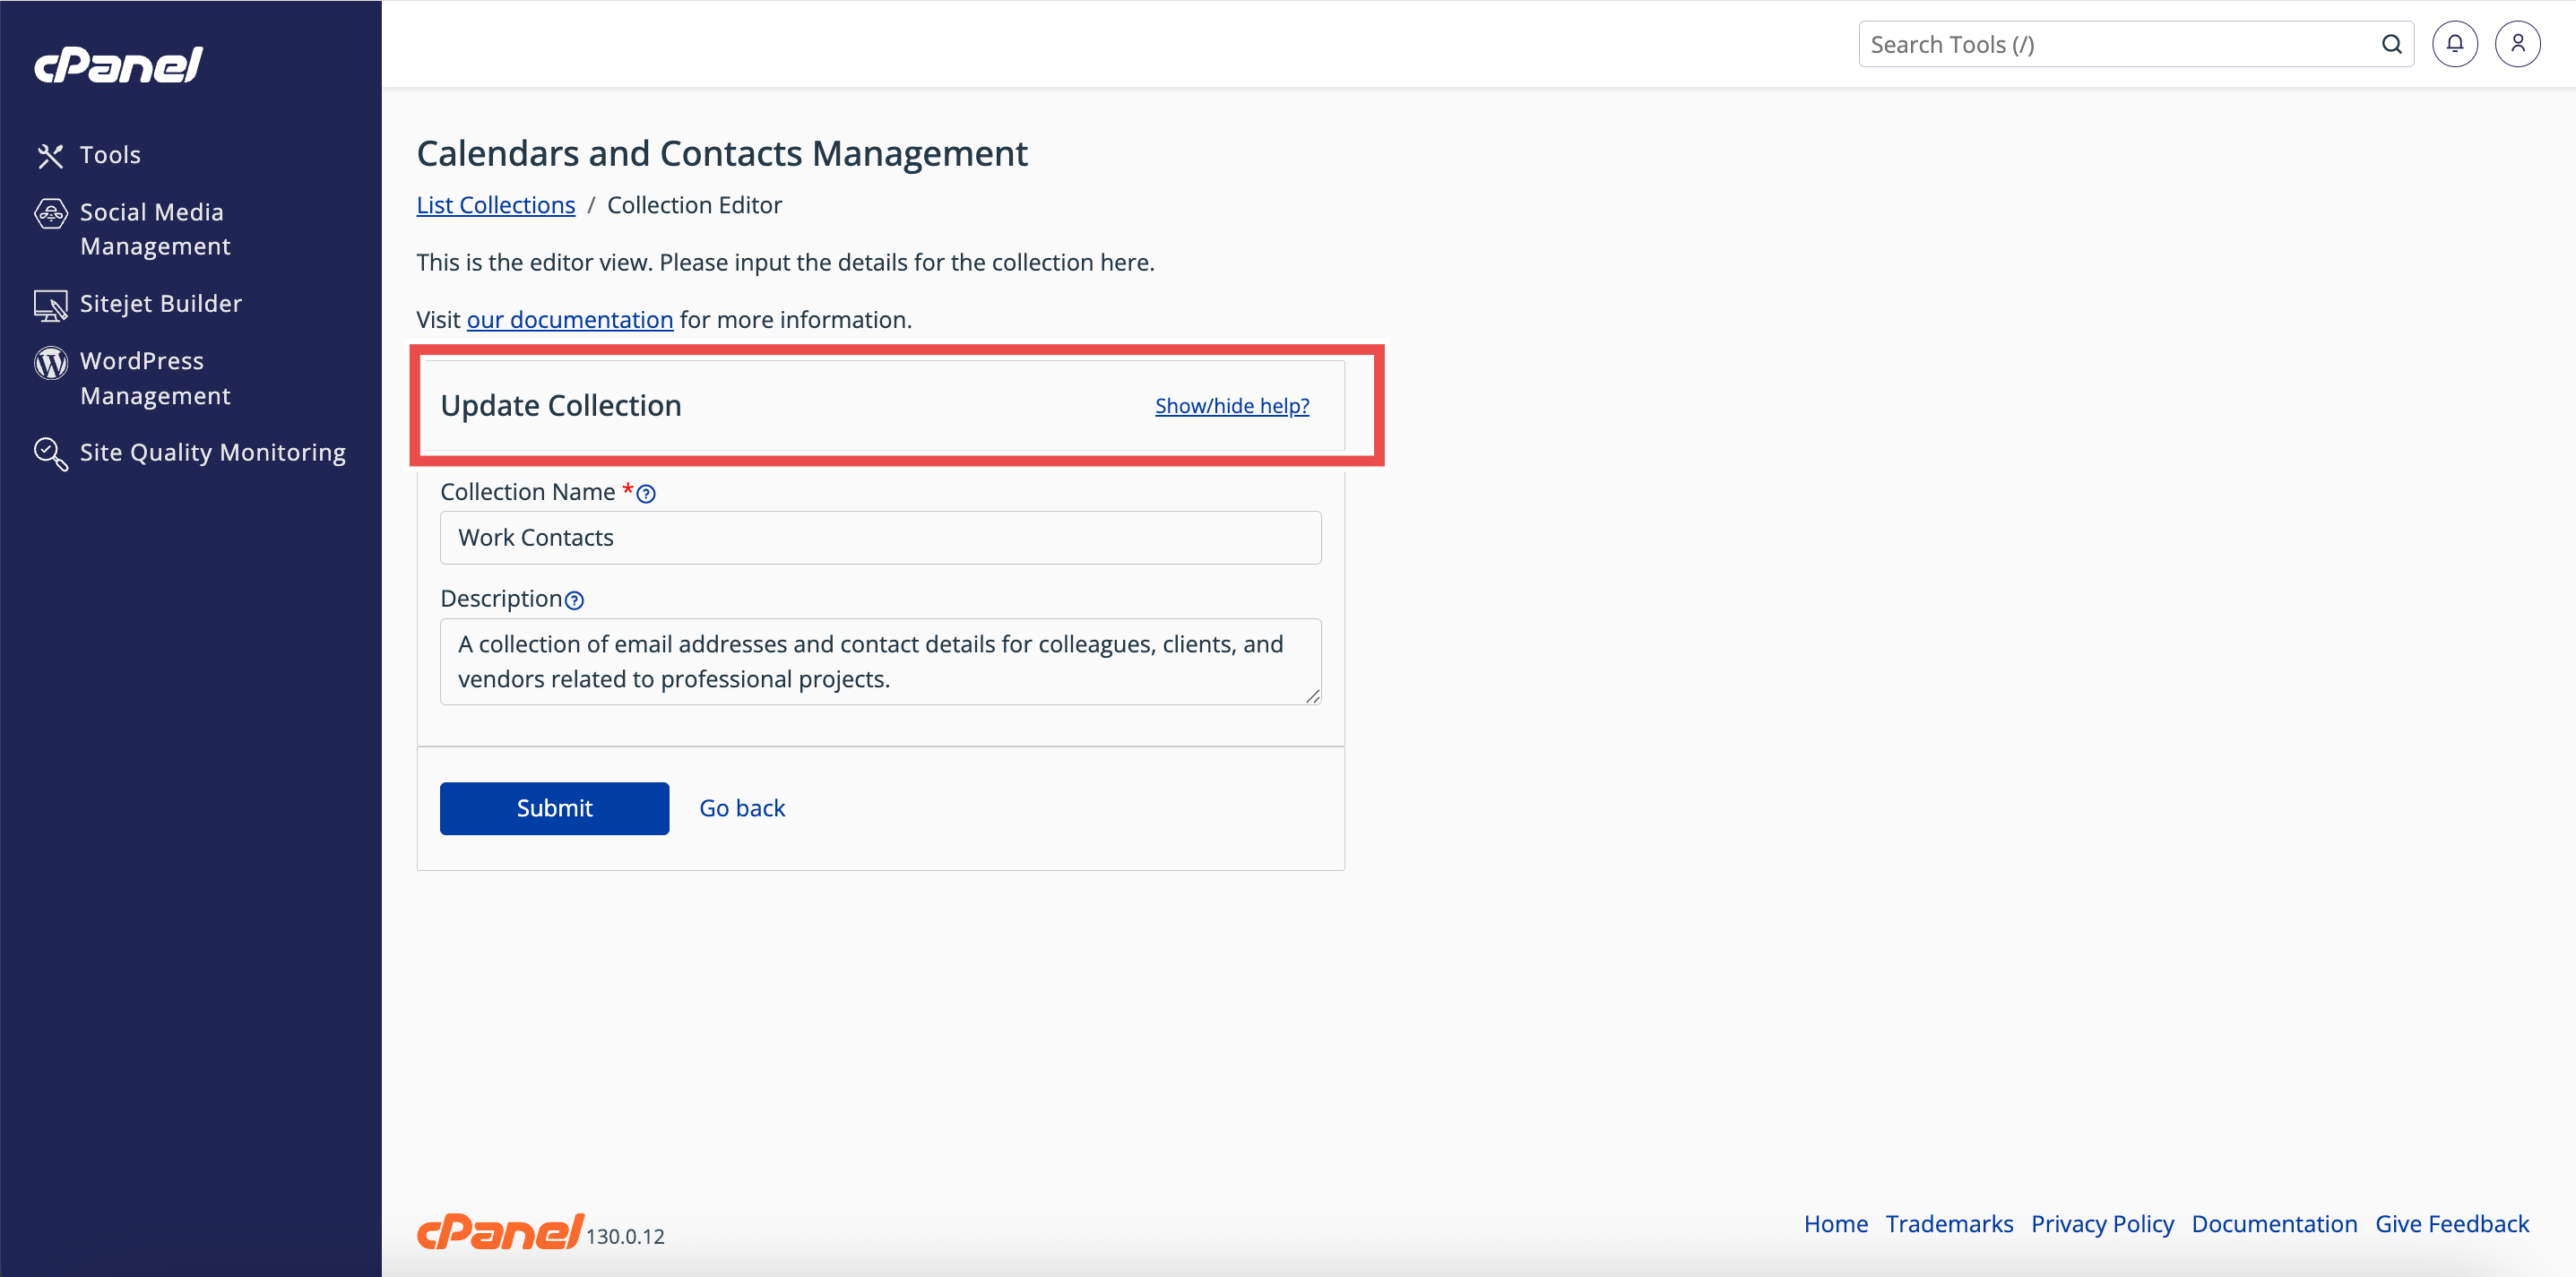
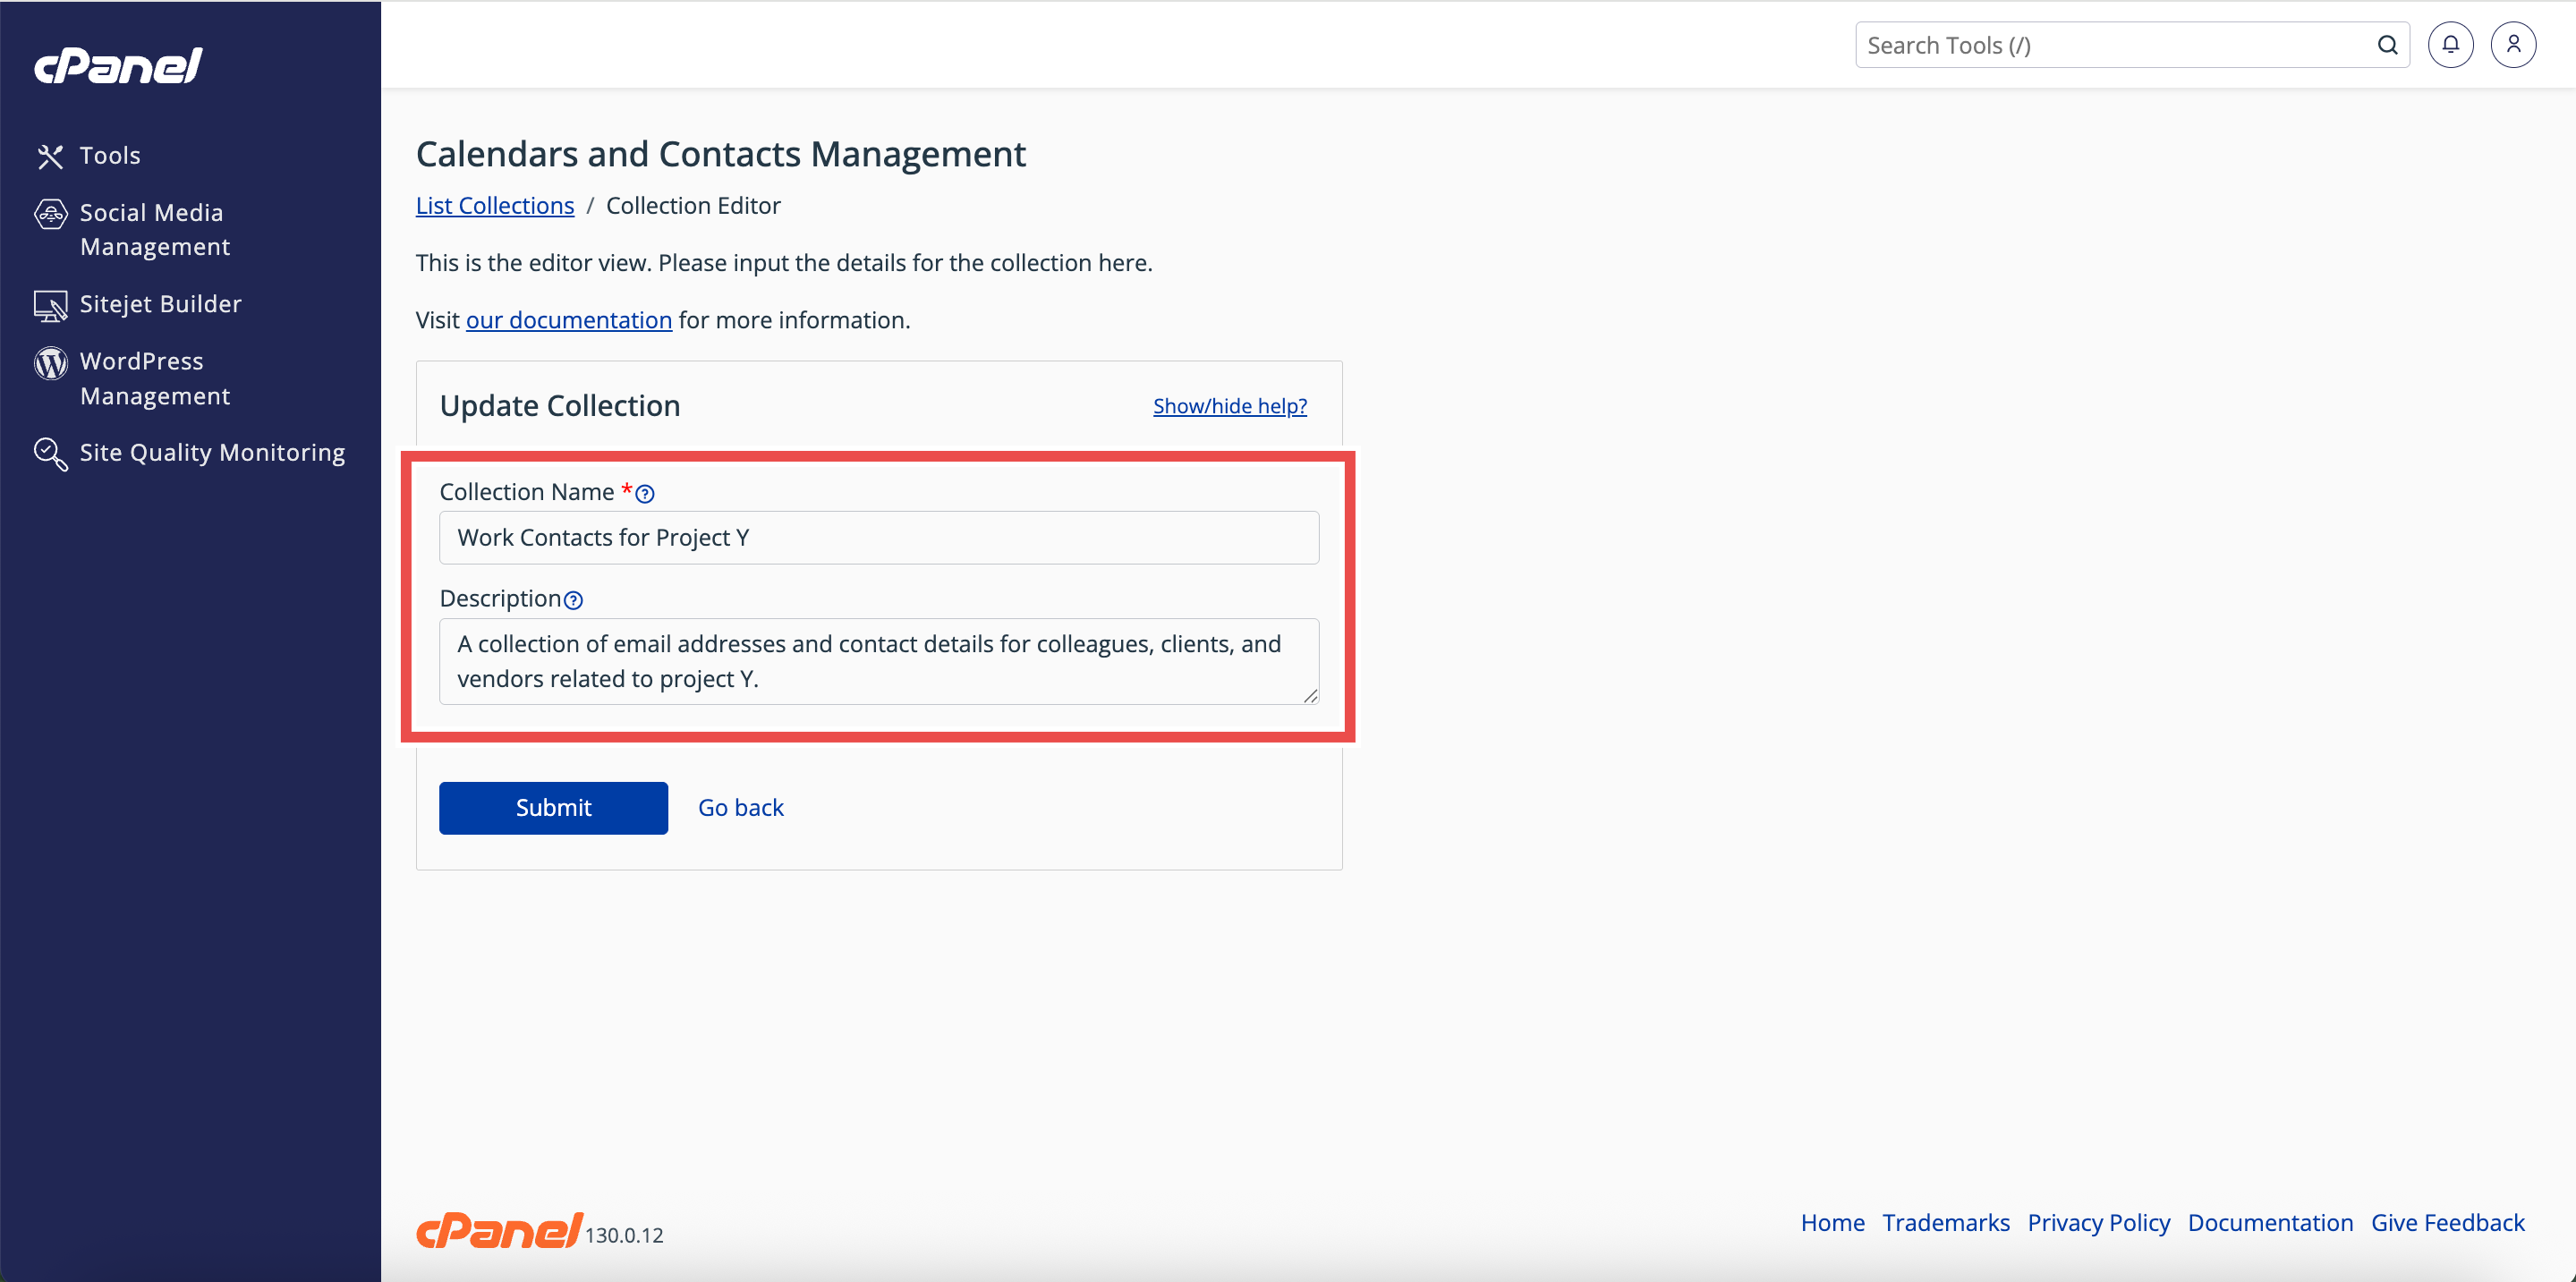
Step 5: Update Address Book Details
- Update the fields as needed:
- Collection Name: Enter the new name for your address book.
- Description (optional): Enter a new description for your address book.
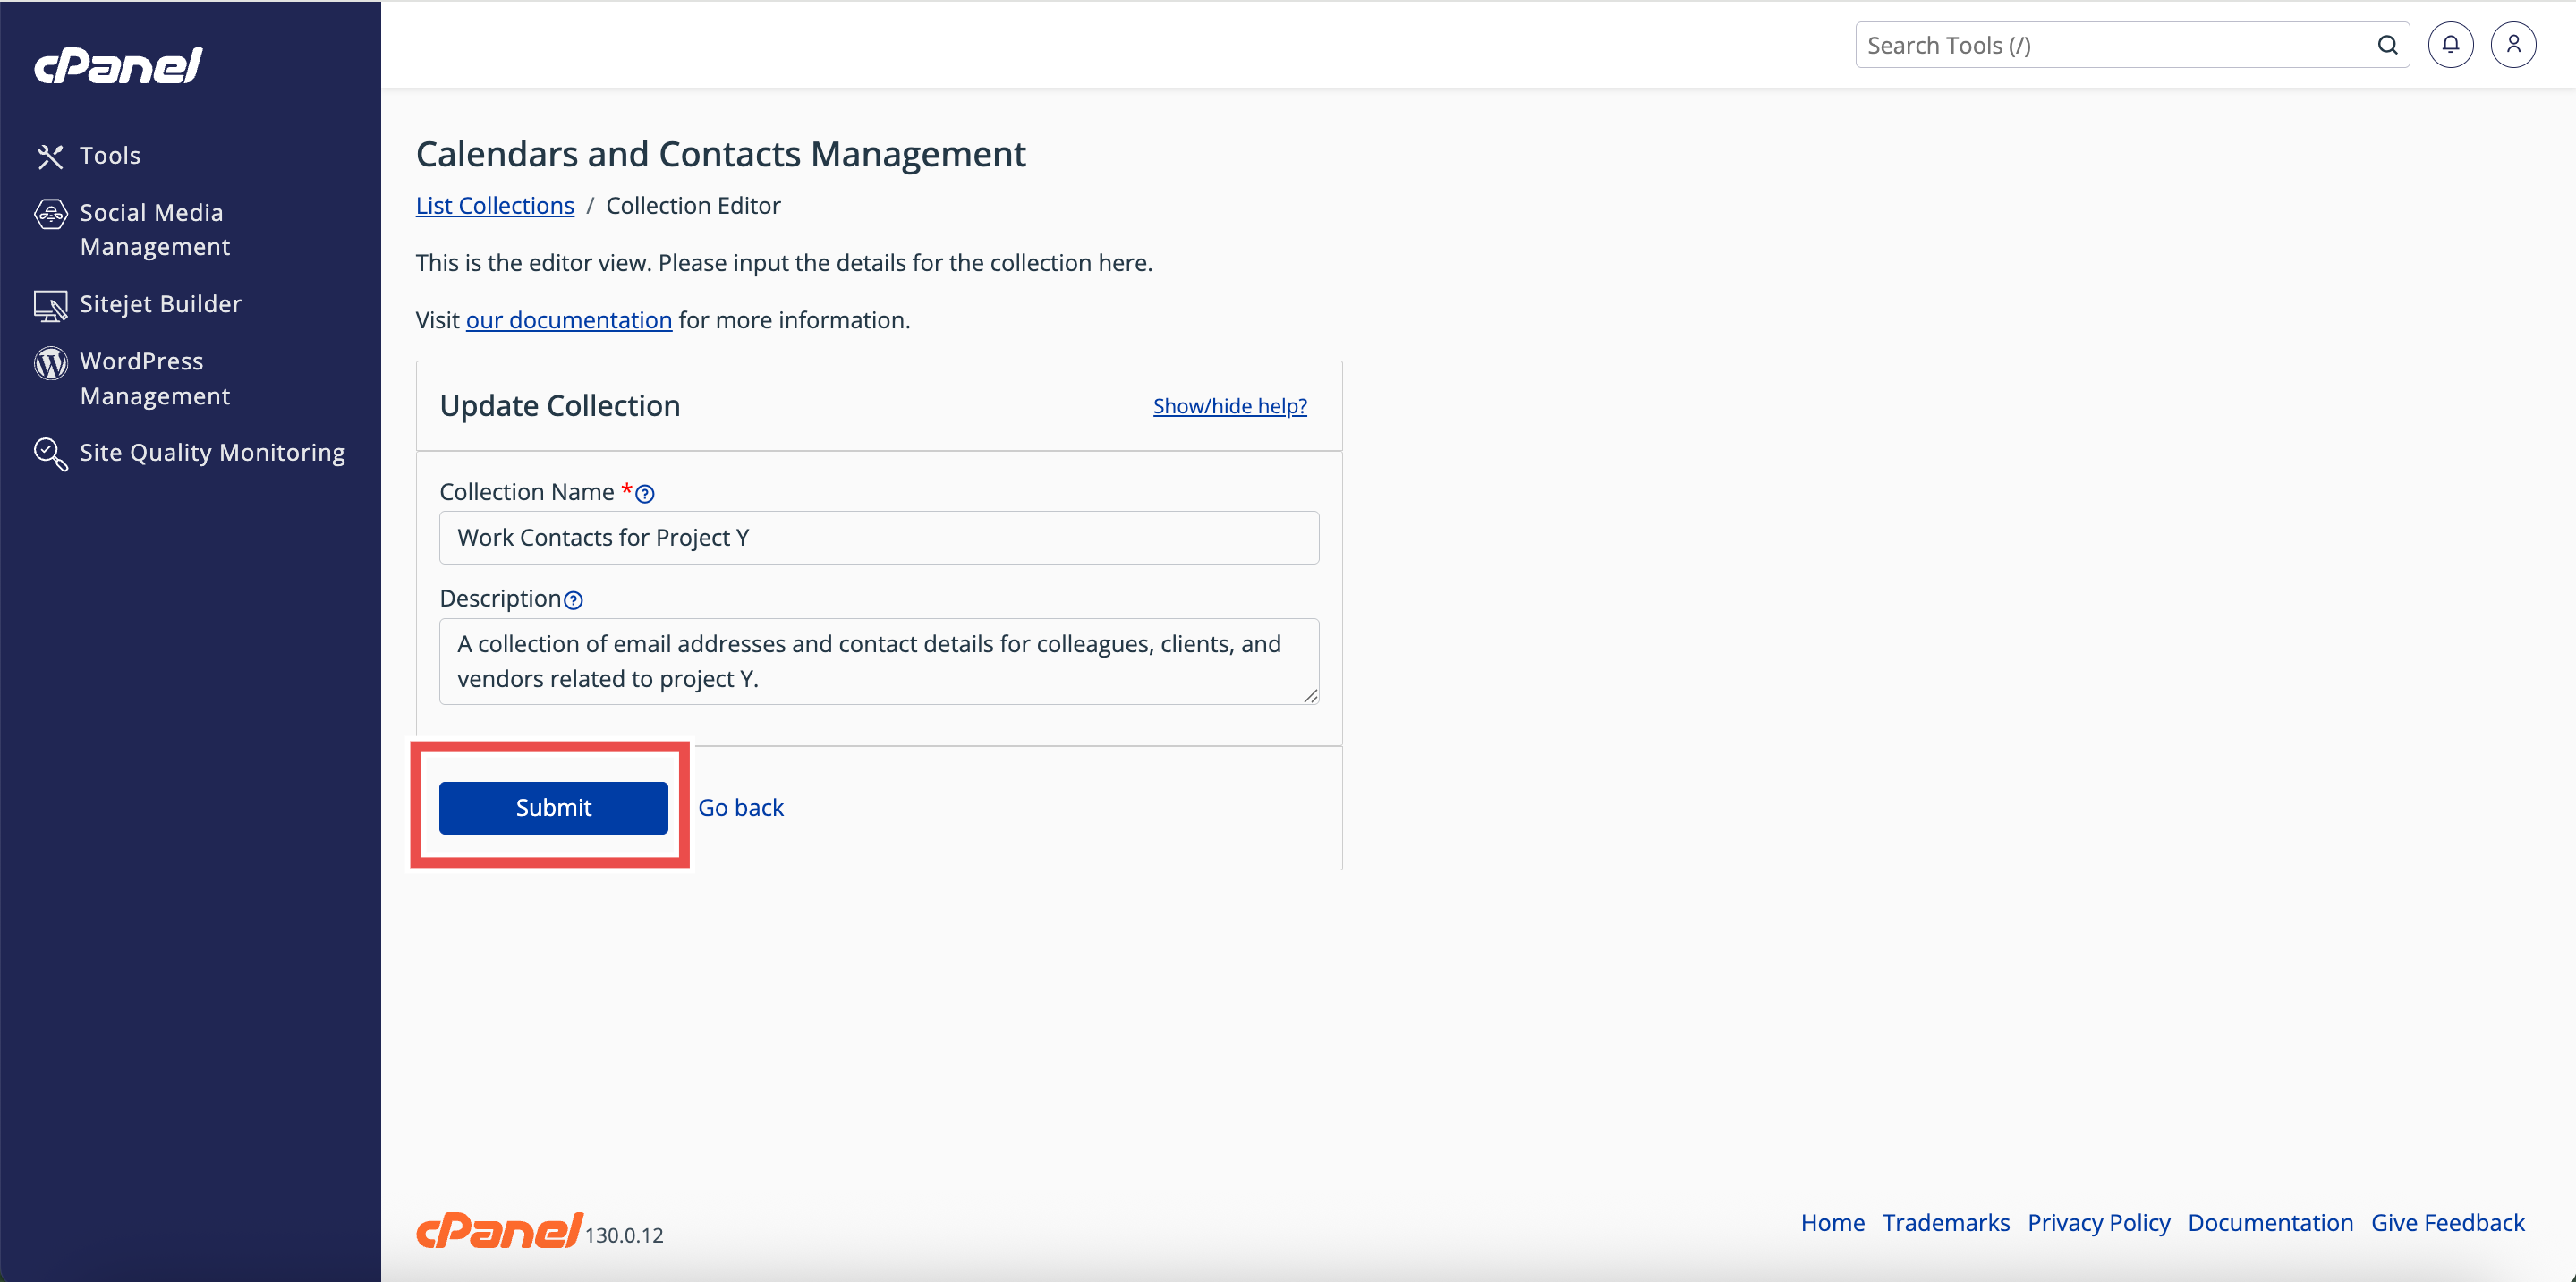
Step 6: Save Changes
- Click Submit to save the changes.
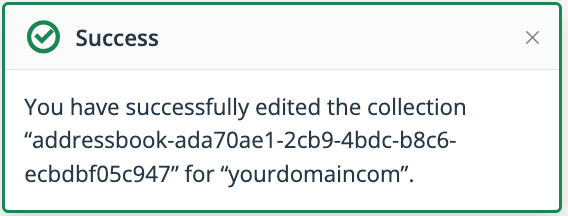
- A success message will appear confirming the update.
Step 7: Verify Changes
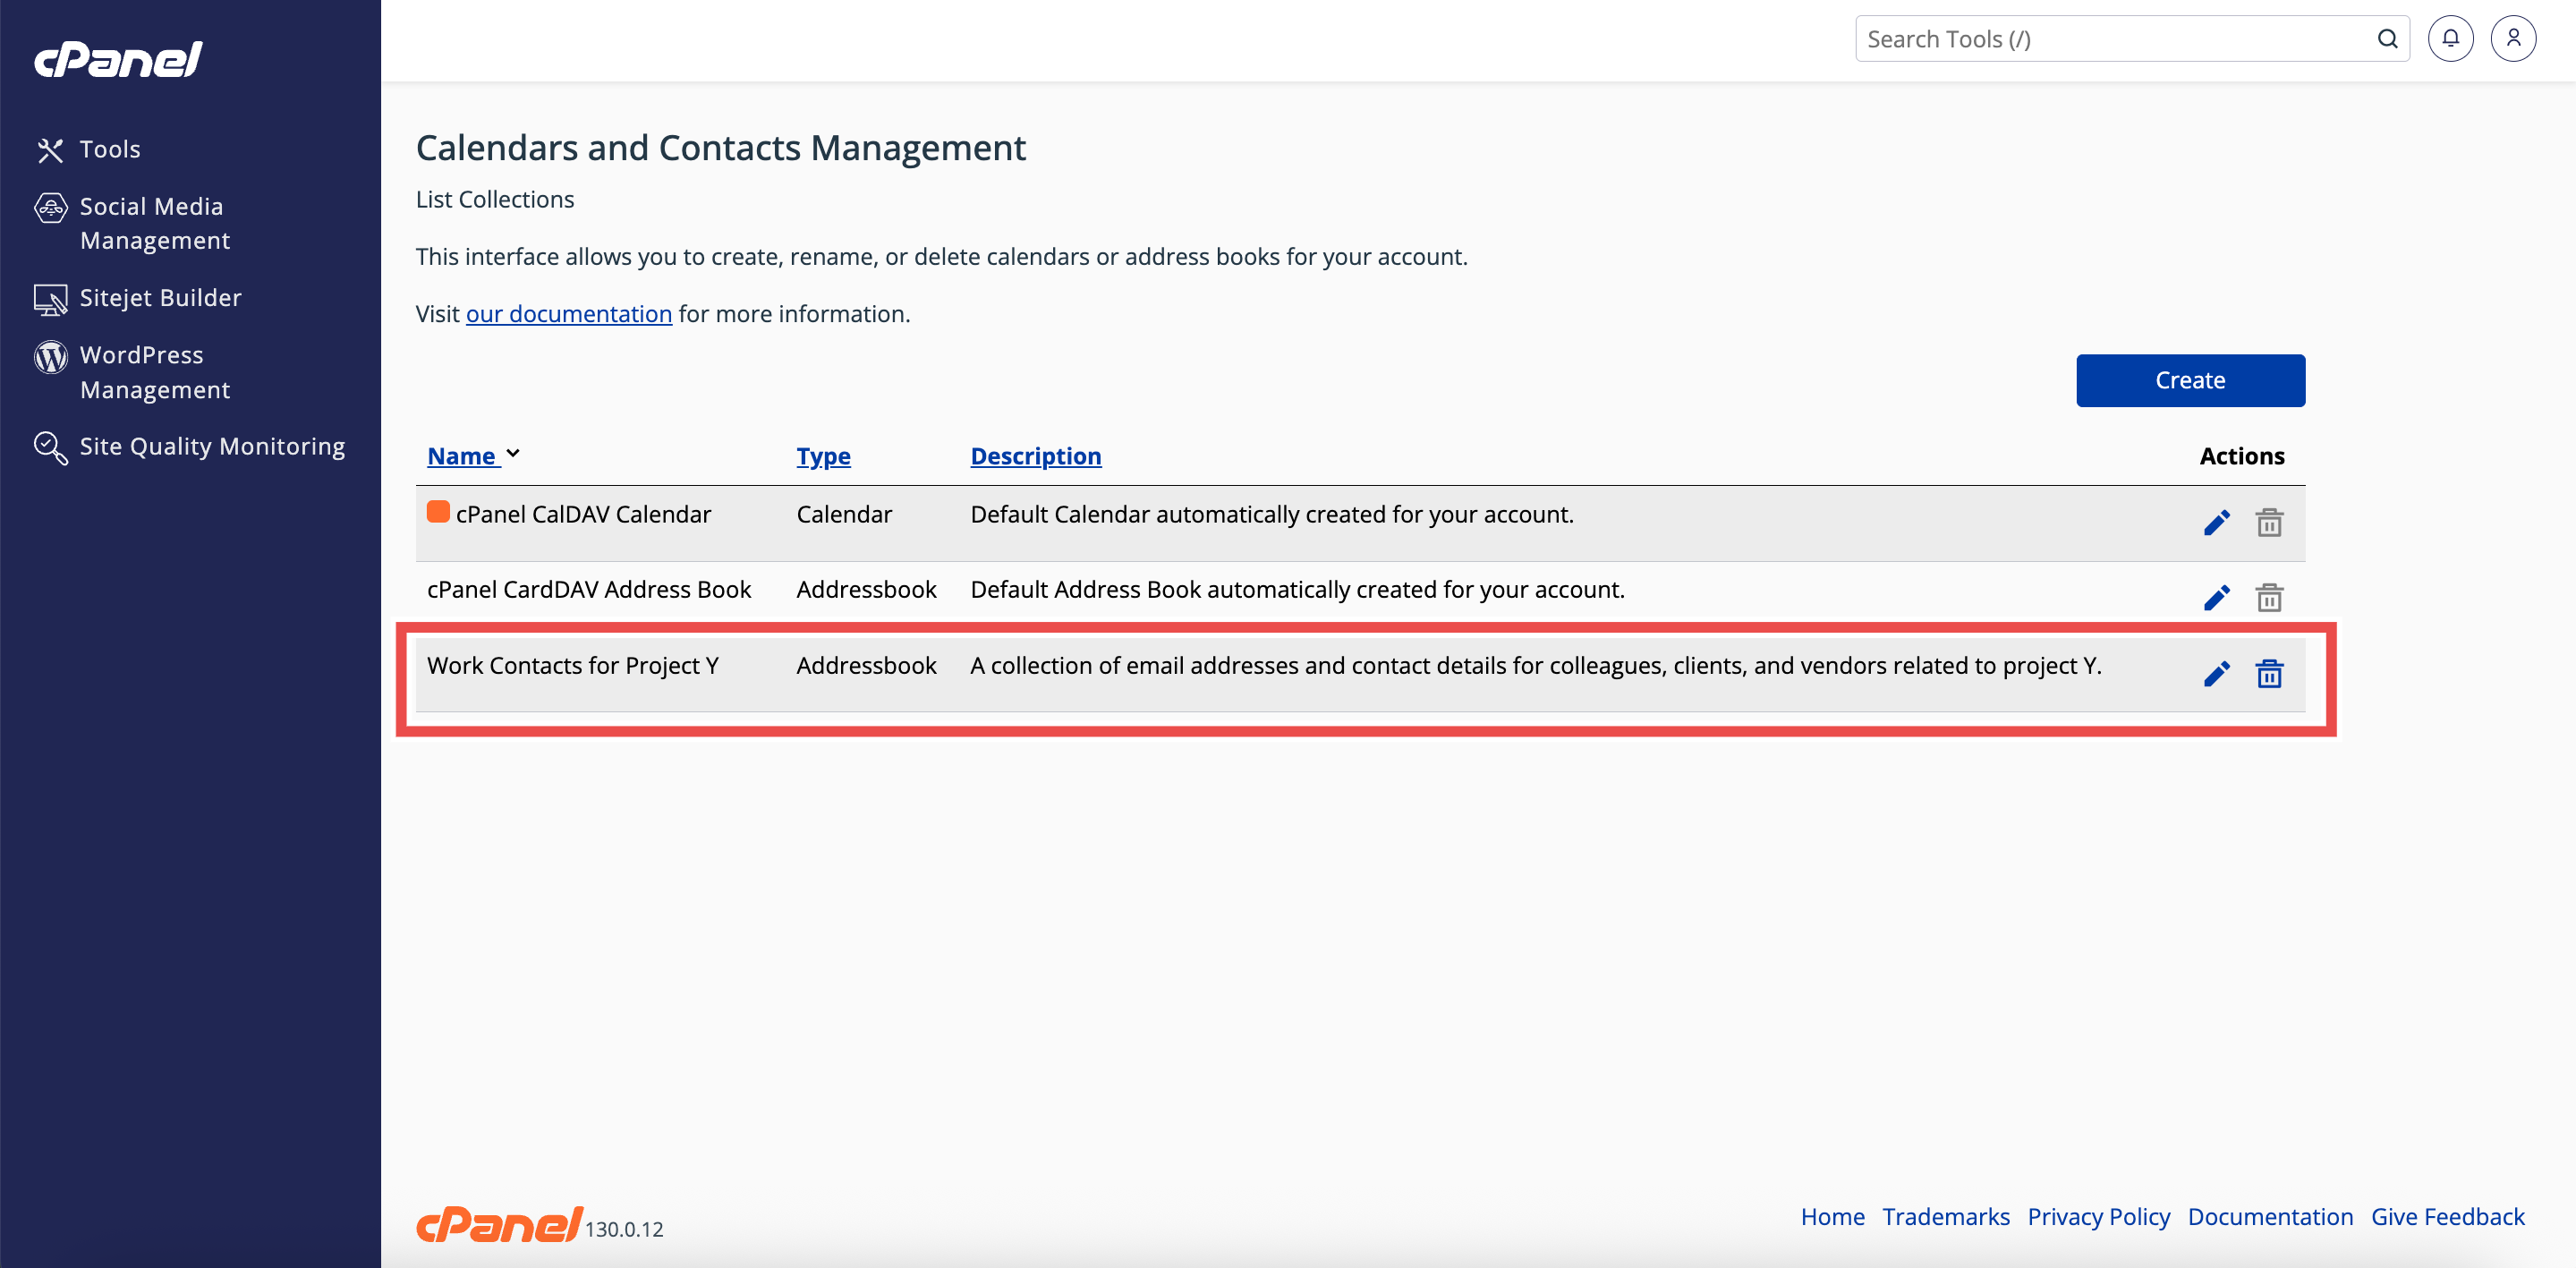
- Check the Calendars and Contacts Management table to ensure the updated address book details appear correctly.
Conclusion
By following these steps, you can easily edit an address book in cPanel to keep your contacts updated and organized. Always verify that the changes appear in the table to confirm successful updates.
Should you encounter any issues or have any questions, our support team at IPSERVERONE is always here to assist you. Don’t hesitate to reach out to us at support@ipserverone.com for any help you need.