Search Our Database
How to Create Network Usage Alarms in the Customer Portal
Introduction
Monitoring network usage is an important aspect of managing cloud resources efficiently. To help customers avoid unexpected overage charges or downtime, the Customer Portal provides a built-in alarm system that tracks data transfer usage.
By default, every customer account is automatically assigned a network usage alarm. This default alarm is triggered once bandwidth utilization reaches 80% of the free tier allowance. When triggered, the alarm sends an email notification to the primary account holder, and any delegated technical contacts, so that proactive action can be taken before limits are exceeded.
In addition to this system-wide default, customers may also create custom alarms and assign them to specific instances. Custom alarms provide greater flexibility, allowing administrators to set more granular monitoring thresholds or manage alerts on a per-instance basis.
This guide will explain how to view the default alarm, and step-by-step instructions on creating and assigning a custom alarm to an instance.
Prerequisites
- Access to the Customer Portal with administrator privileges.
- At least one active NovaCloud instance.
- The account has an active email address configured, and optional Delegate Access recipients defined for technical alerts.
- Basic understanding of bandwidth allocation and usage thresholds.
Step-by-step Guide
Step 1: View the Default Alarm
1. Log in to the Customer Portal.
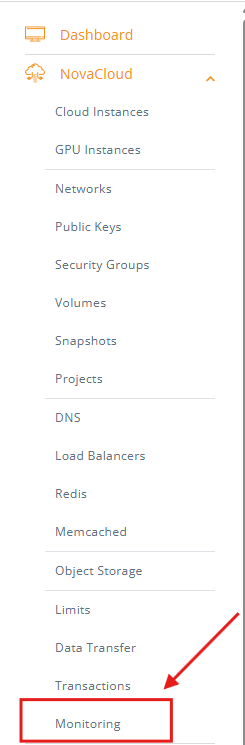
2. From the left-hand navigation, under Novacloud select Monitoring.
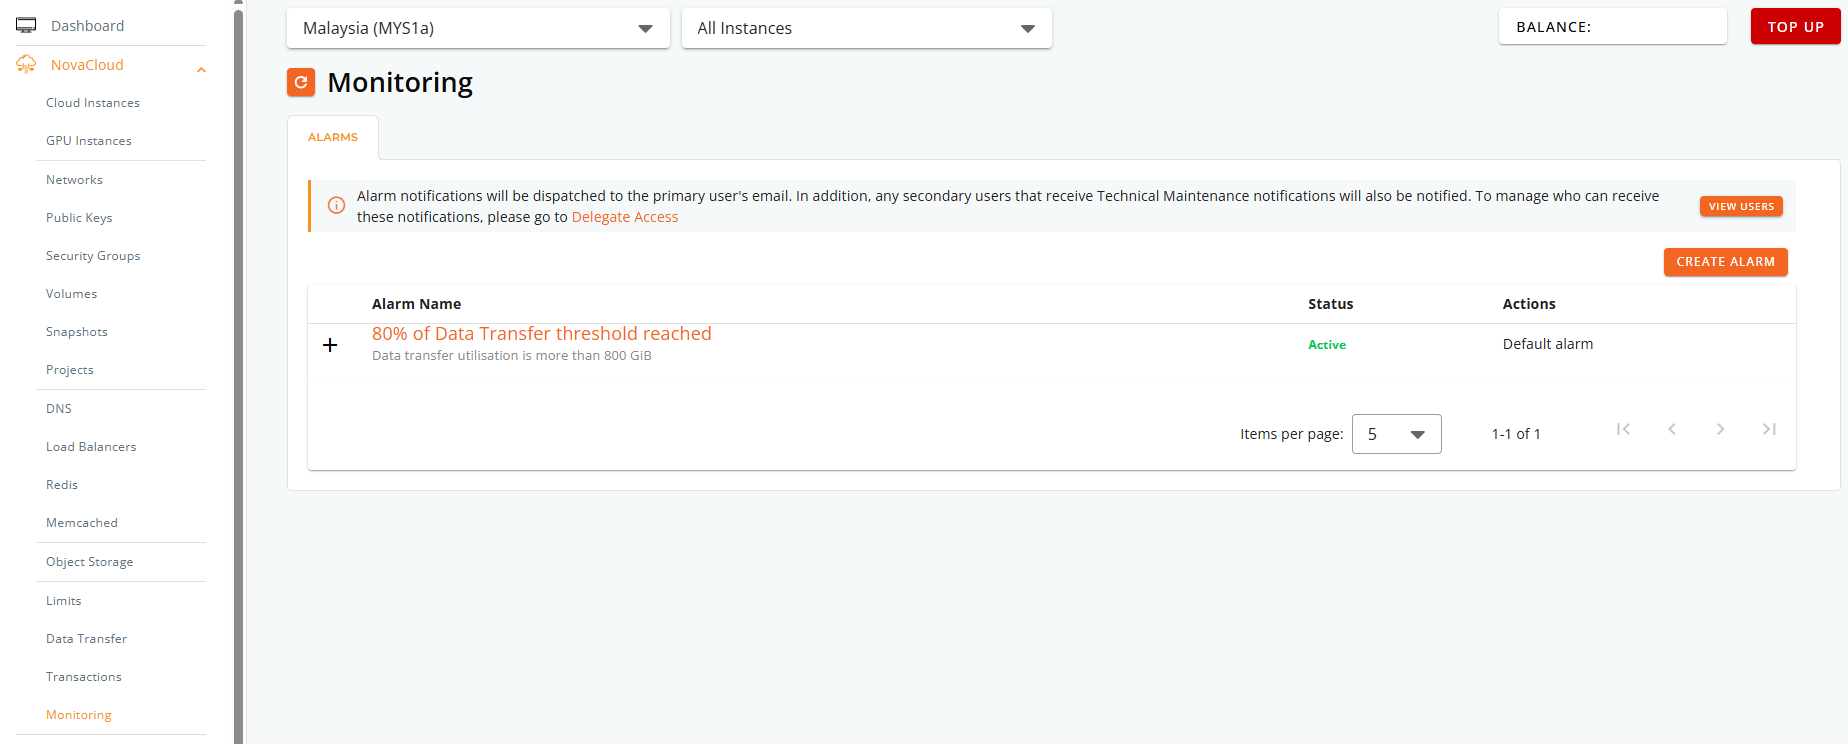
3. The system will display an automatically applied default alarm.
- Alarm Name: 80% of Data Transfer threshold reached
- Trigger Condition: Usage exceeds 80% of free tier allocation
- Status: Active
- Actions: Cannot be edited or deleted
Step 2: Create and Assign a Custom Alarm
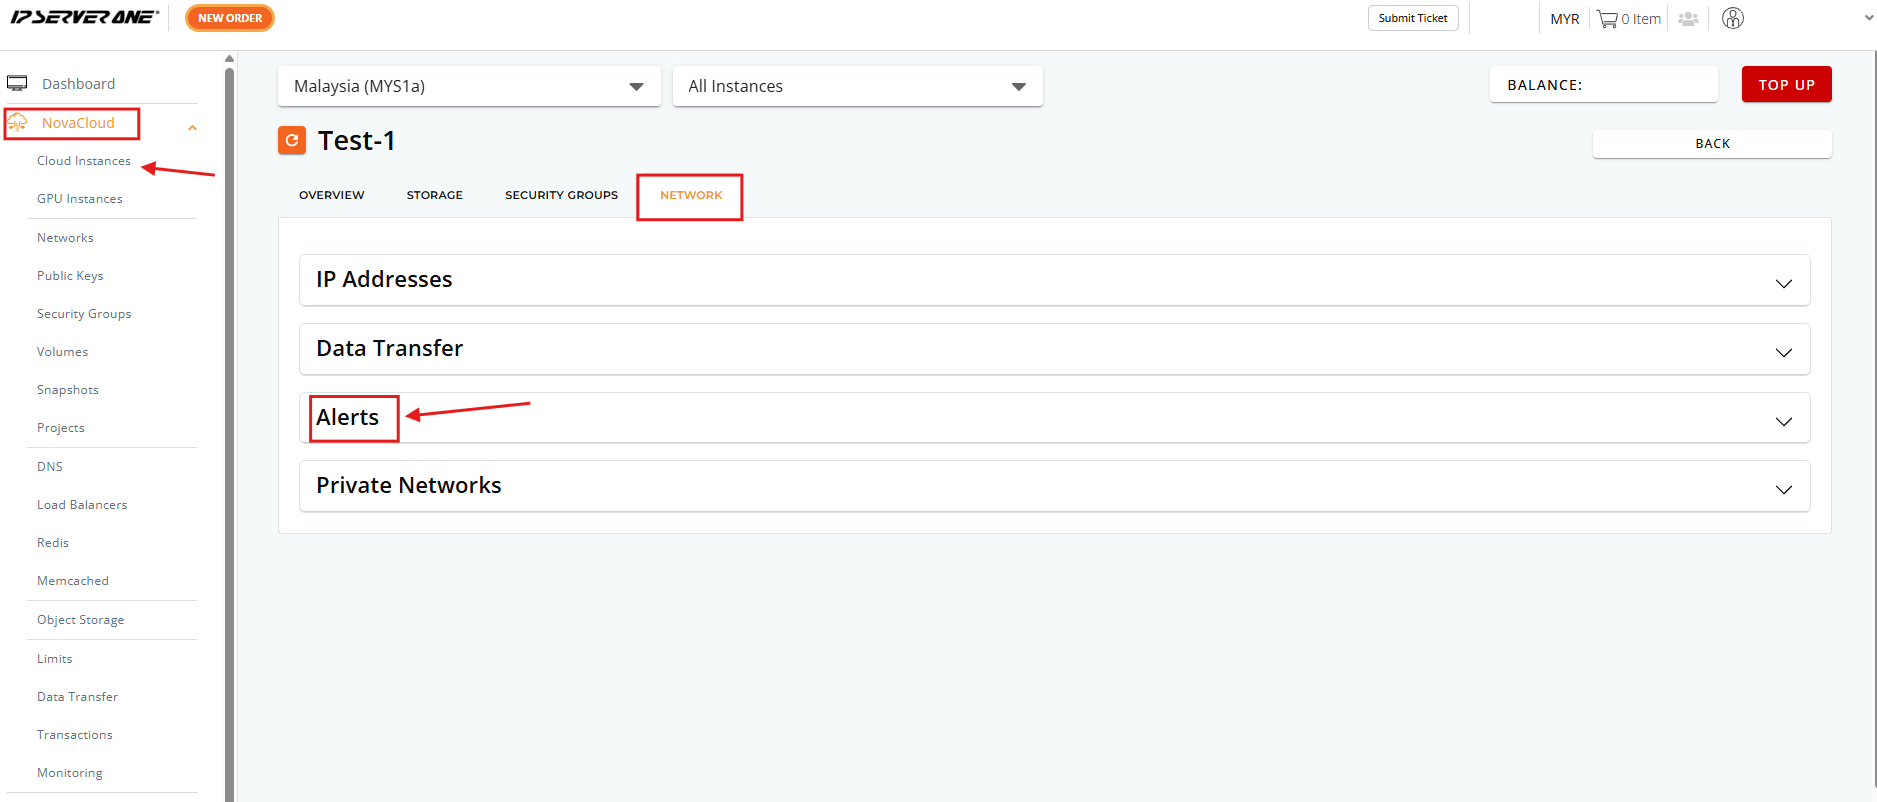
1. From the left-hand menu, select NovaCloud > Cloud Instance and choose the instance you want to monitor.
2. Click the Network tab in the instance details page.
3. Expand the Alerts section.
4. Click Create and Assign Alarm.

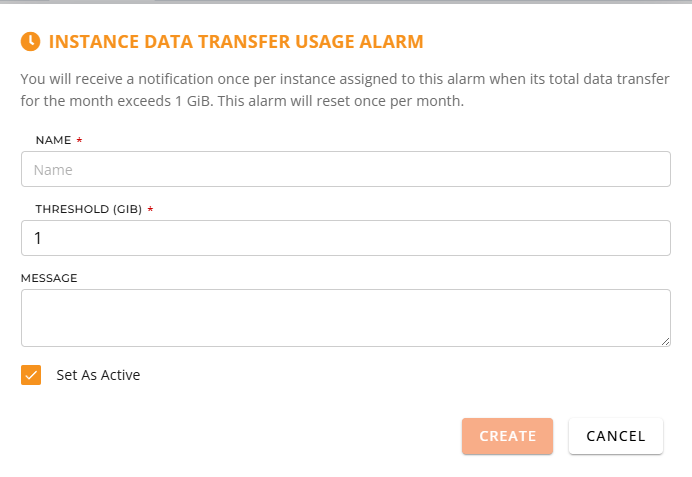
Step 3: Configure Alarm Settings
- Alarm Name: A descriptive name (e.g., Network Usage 50% Warning).
- Threshold: Specify the data transfer limit that will trigger the alarm (for example, 50% of quota or 500 GiB usage).
- Message: You may input the message to be received for this alarm notification
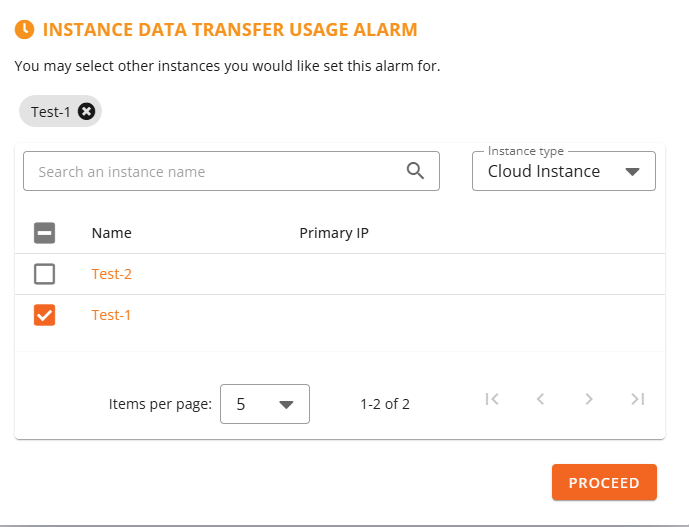
Step 4: Select Instances for the Alarm
After configuring the alarm settings, a prompt will appear to assign the alarm to one or more instances:
-
Review the list of instances displayed.
-
Tick the checkbox for each instance you wish to assign the alarm to.
-
Click Proceed to continue.
The alarm will now be linked to the selected instances.
Step 5: Assign the Alarm
1. Once configured, the alarm will now appear in the Alerts list of the chosen instance, with its Status set to Active.
2. Multiple alarms can be assigned to a single instance, providing layered monitoring strategies.

Conclusion
By default, a network usage alarm is already in place for all accounts, notifying customers when 80% of the free tier bandwidth is used. For more granular control, custom alarms can be created and assigned to specific instances directly within the Customer Portal. This ensures better visibility over network usage and prevents unexpected charges.
Should you have any inquiries about the guidelines, please feel free to open a ticket through your portal account or contact us at support@ipserverone.com. We’ll be happy to assist you further.