Search Our Database
How to Create Cloud Instance(s) that contain Memcached in Customer Portal
Introduction:
Memcached, a powerful open-source, in-memory caching system, is highly valued for its speed and efficiency. It functions effectively as a cache, making it ideal for use cases such as accelerating database-driven websites and applications by reducing the load on your database. By leveraging Memcached, you can significantly improve application responsiveness and enhance overall system throughput.
This guide provides a comprehensive and professional overview of how to create Cloud Instance that contain Memcached directly within the IPServerOne Customer Portal. By following these streamlined steps, you will be equipped to deploy Memcached-enabled instances with ease, enabling your projects to leverage its robust functionalities for optimal performance and efficiency.
Prerequisites:
- Users must first register and log in to their Customer Portal account.
- Users need to top-up their account with sufficient credit.
- Pre-configured Public Key(s) for Secure Access.
- At least one private network is required to launch the instance.
Step-by-step Guide:
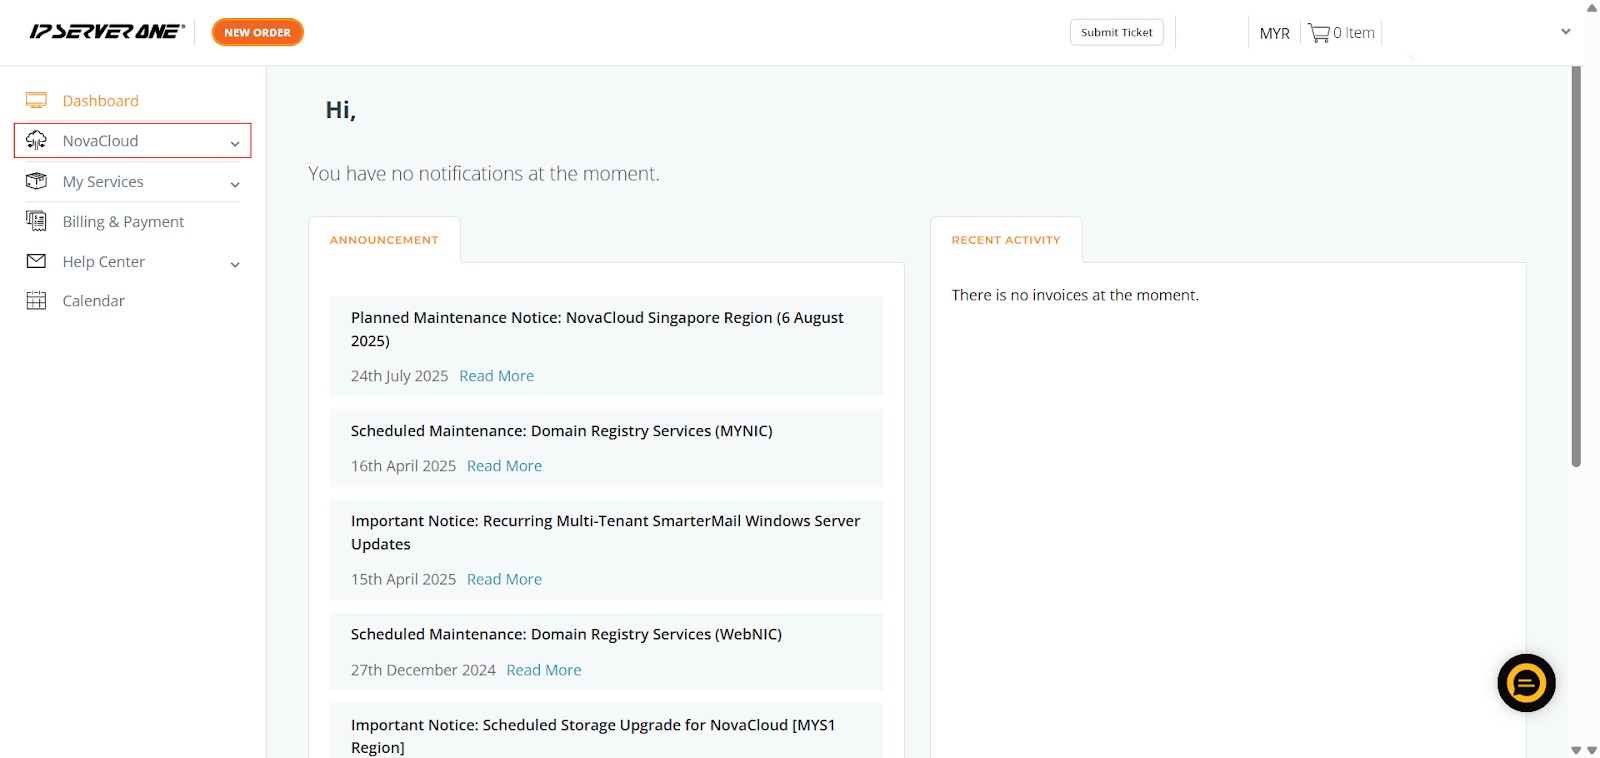
Step 1: Accessing the NovaCloud Dashboard
- Once logged in, on the left-hand side menu, locate and click on “NovaCloud” to expand its sub-menu.
Step 2: Navigating to the Memcached Section
- Within the expanded NovaCloud dropdown menu, find and click on “Memcached”. This action will direct you to the Memcached management interface.

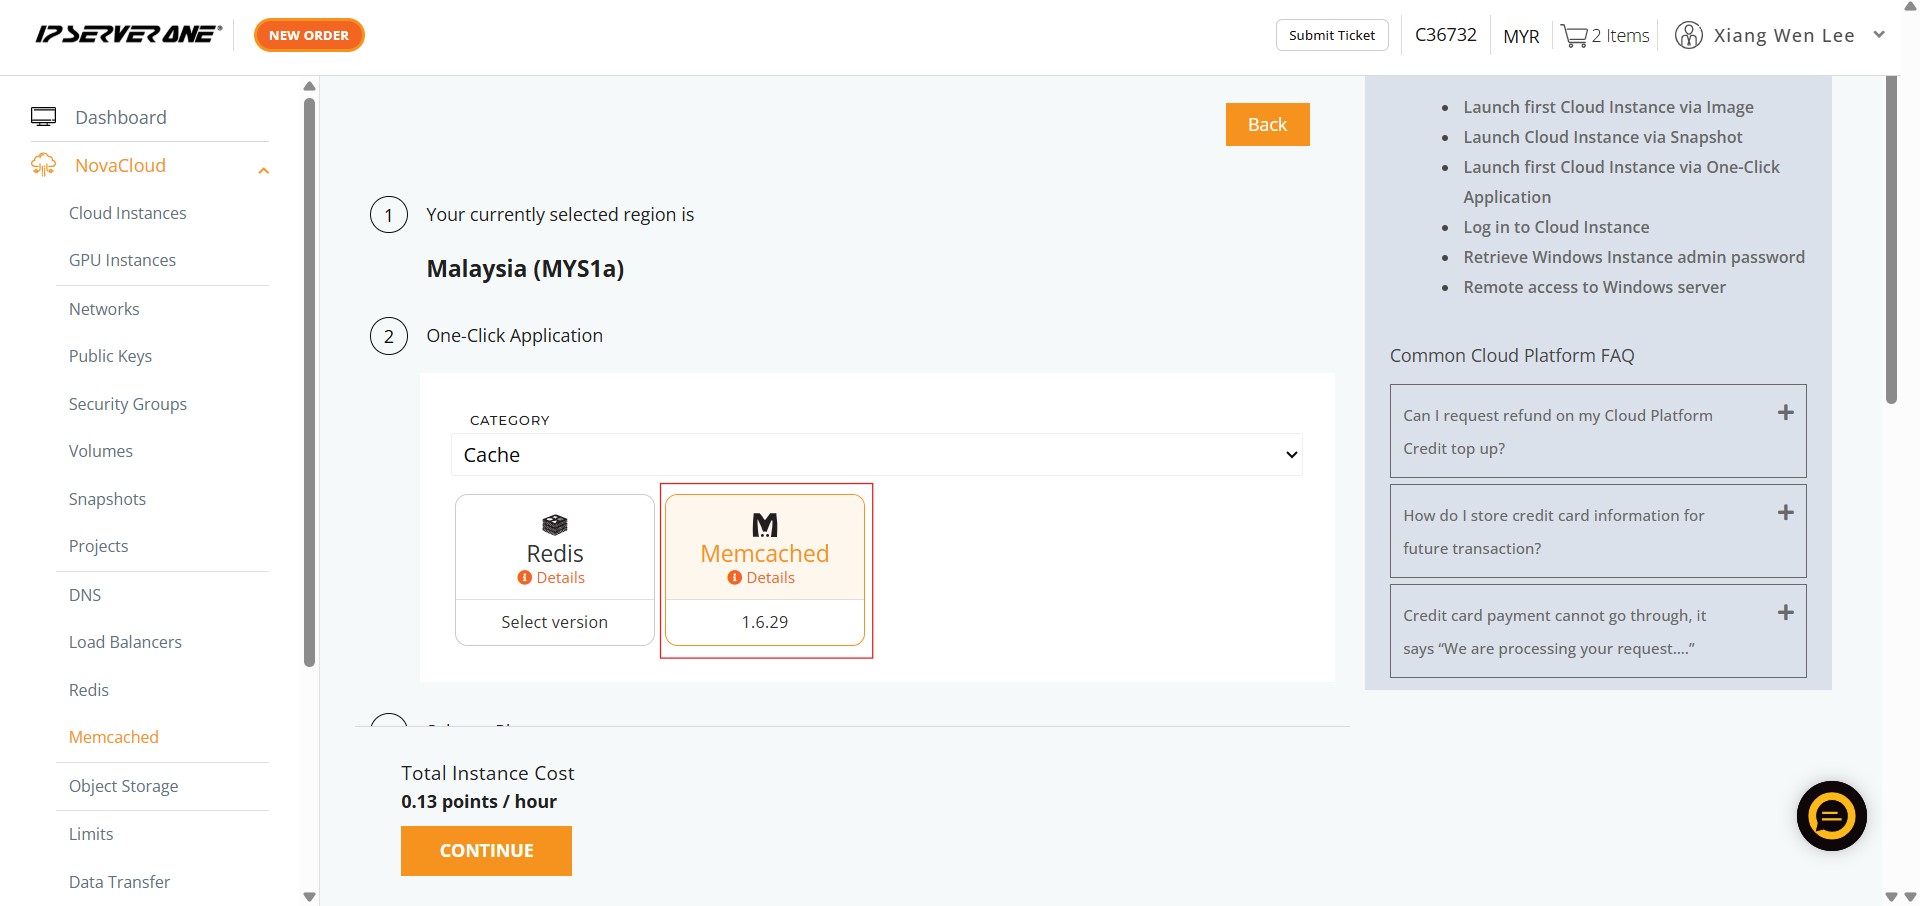
Step 3: Select Memcached
- This is implied by directly selecting “Memcached” under “Cache”.
- Under the “One-Click Application” section, select the “Cache” category from the dropdown menu, then click on the “Memcached” application icon.
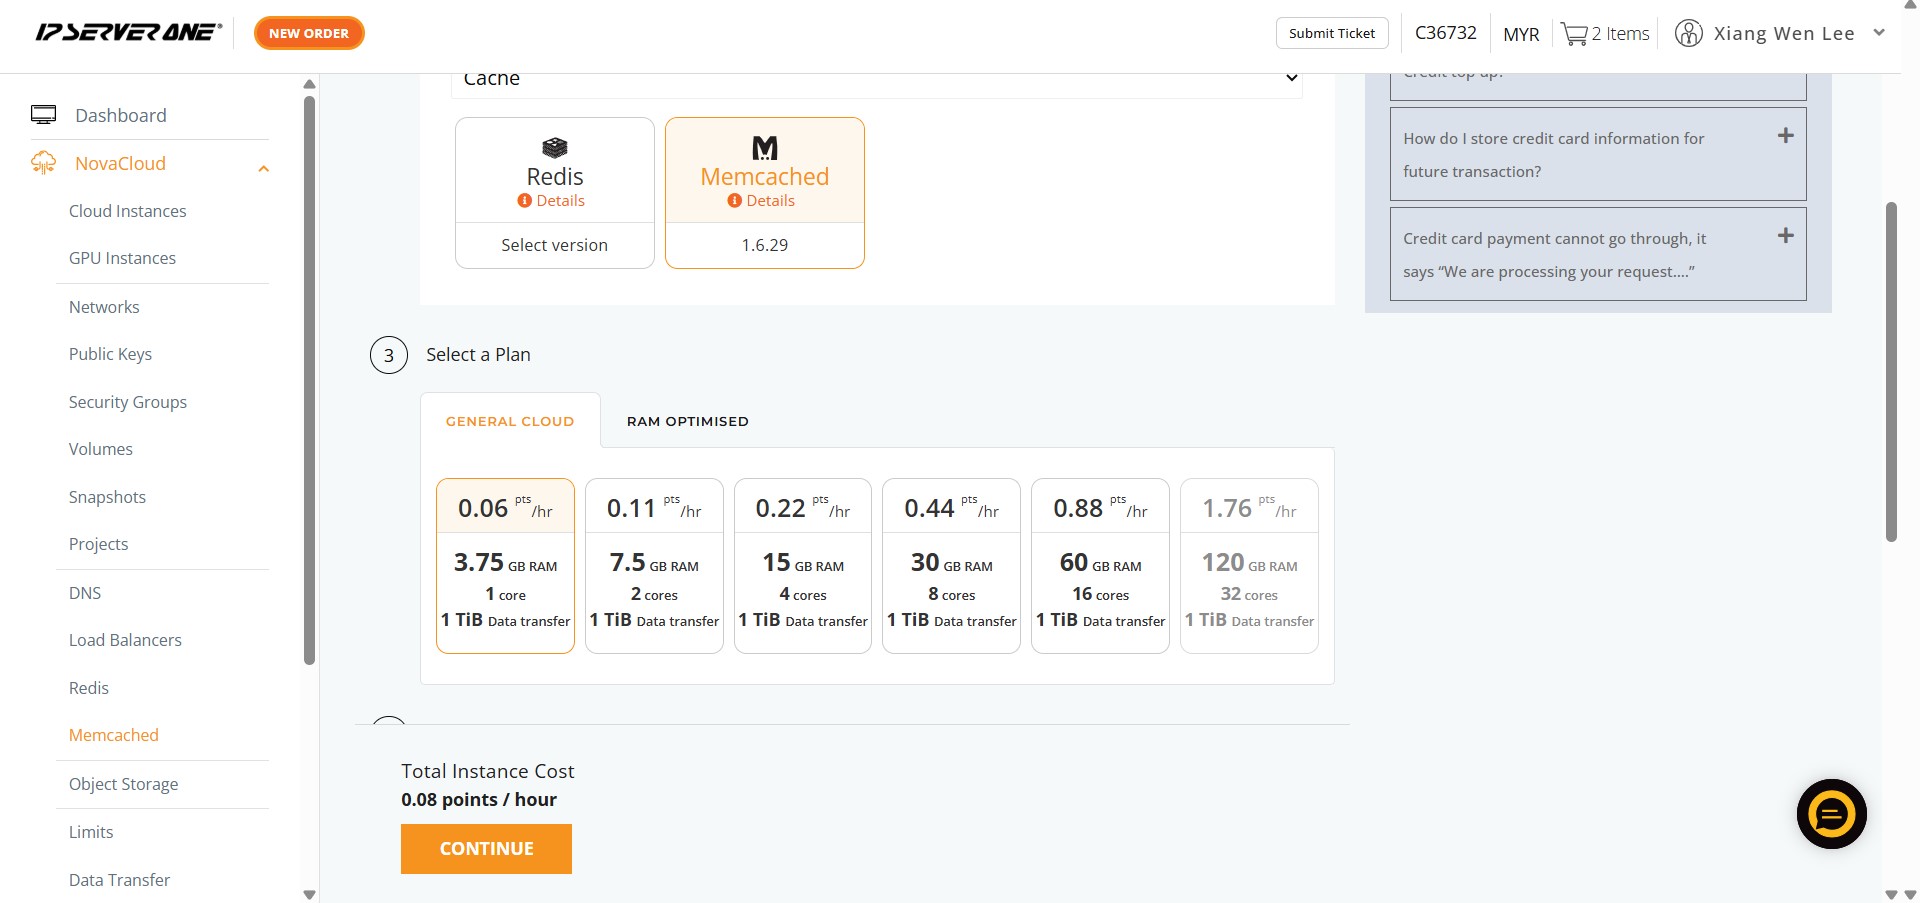
Step 4: Select Your Instance Plan
- Next, you will need to select a plan for your instance. You can choose a “General Cloud” plan, depending on your performance requirements.

Step 5: Specifying Volume Size
- You will then need to key in the desired Volume Size for your instance’s storage.
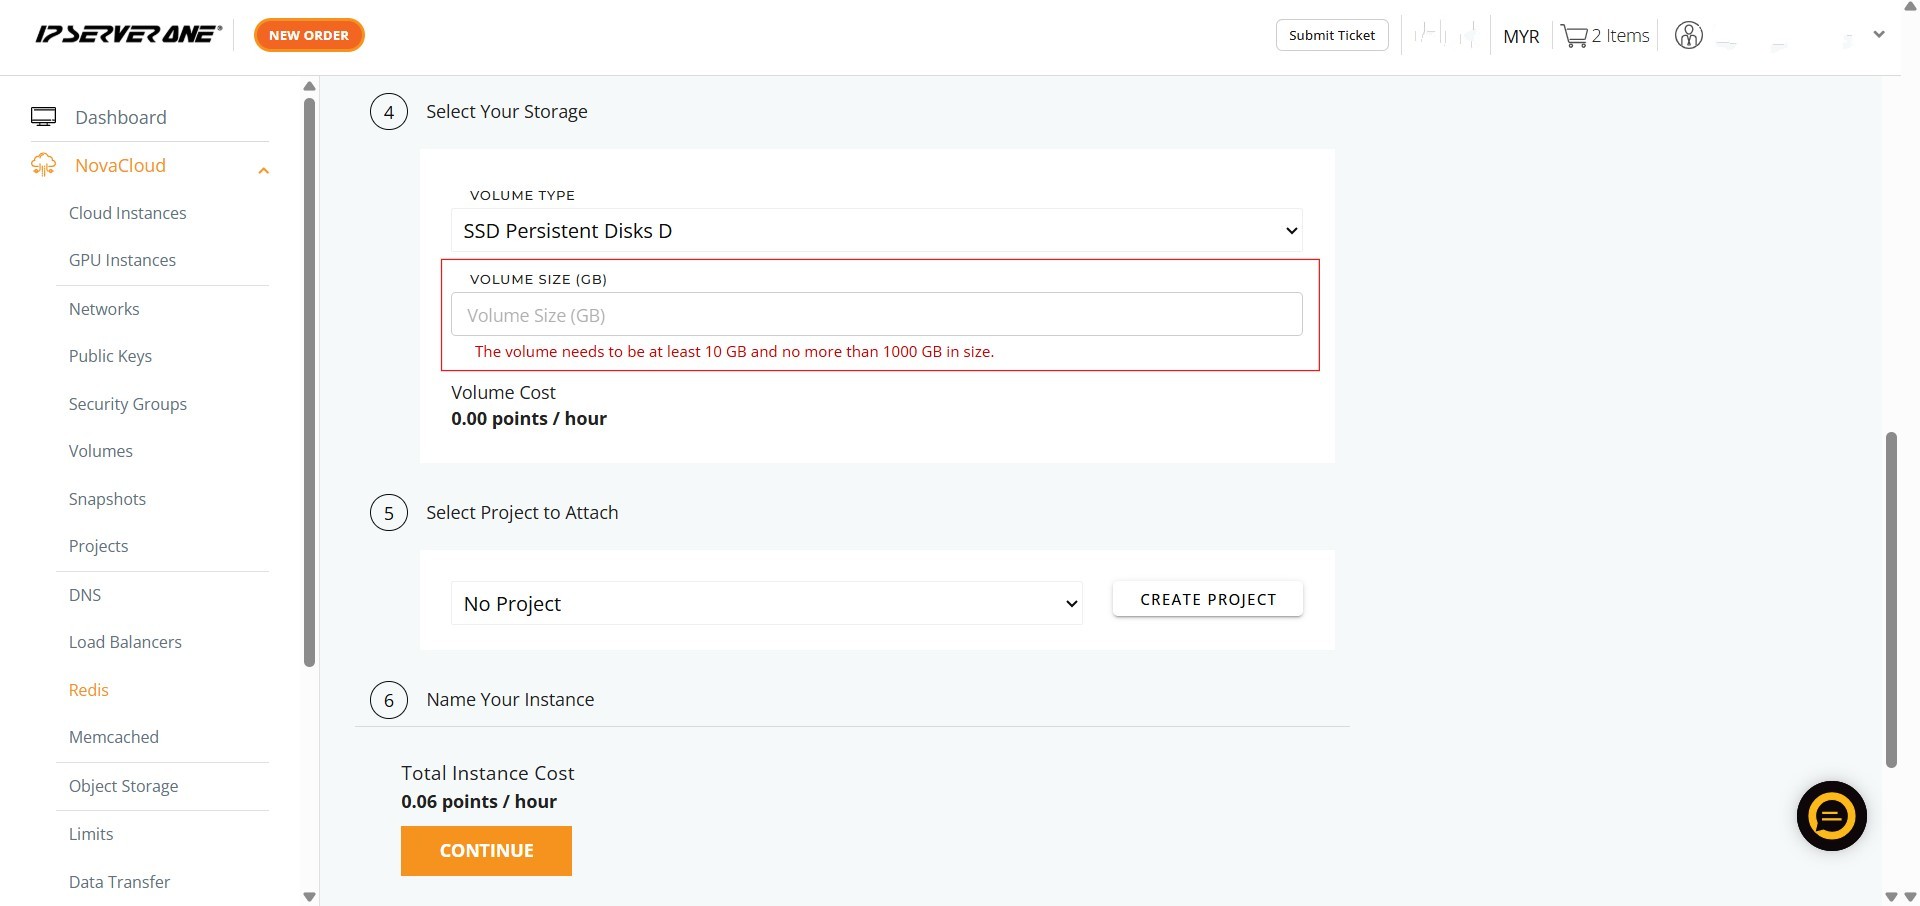
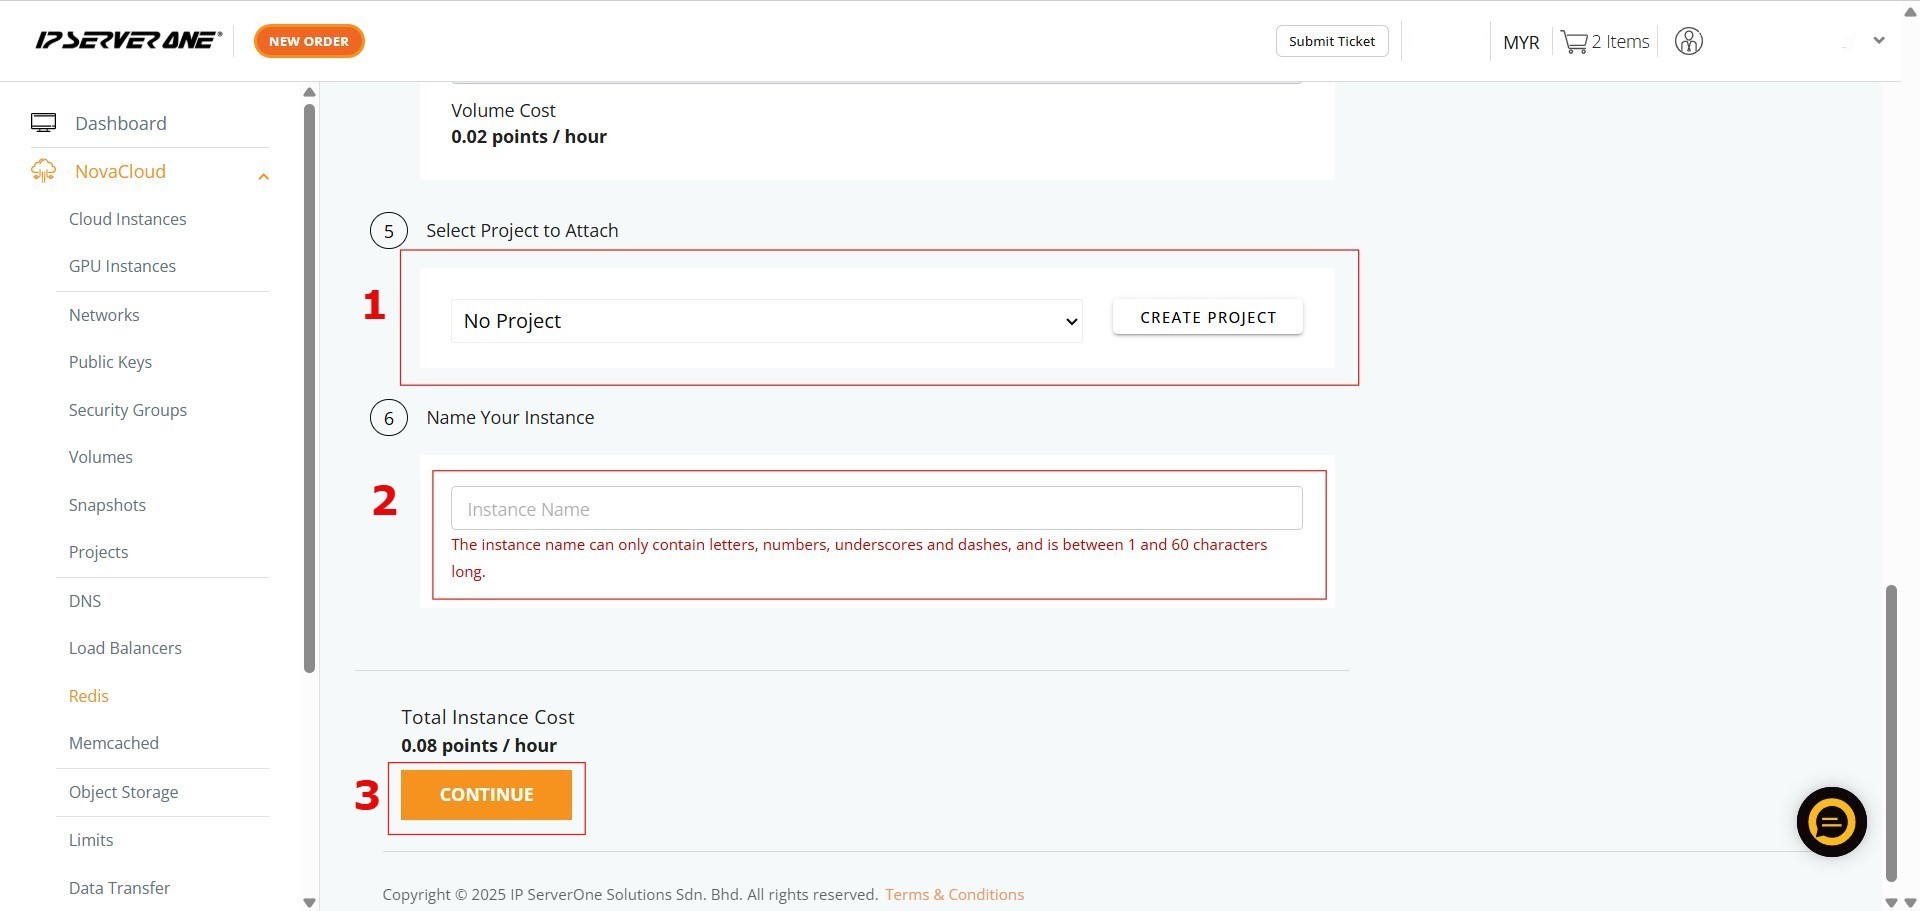
Step 6: Attaching a Project and Naming Your Instance
- Here, you can optionally select a Project to attach your instance to.
- Afterwards, enter a name for your instance in the “Instance Name” field.
- Once done, click “Continue”
Step 7: Selecting a Public Key
- On the next screen, you need to select a Public Key from the dropdown menu. This key will be used to access your instance.
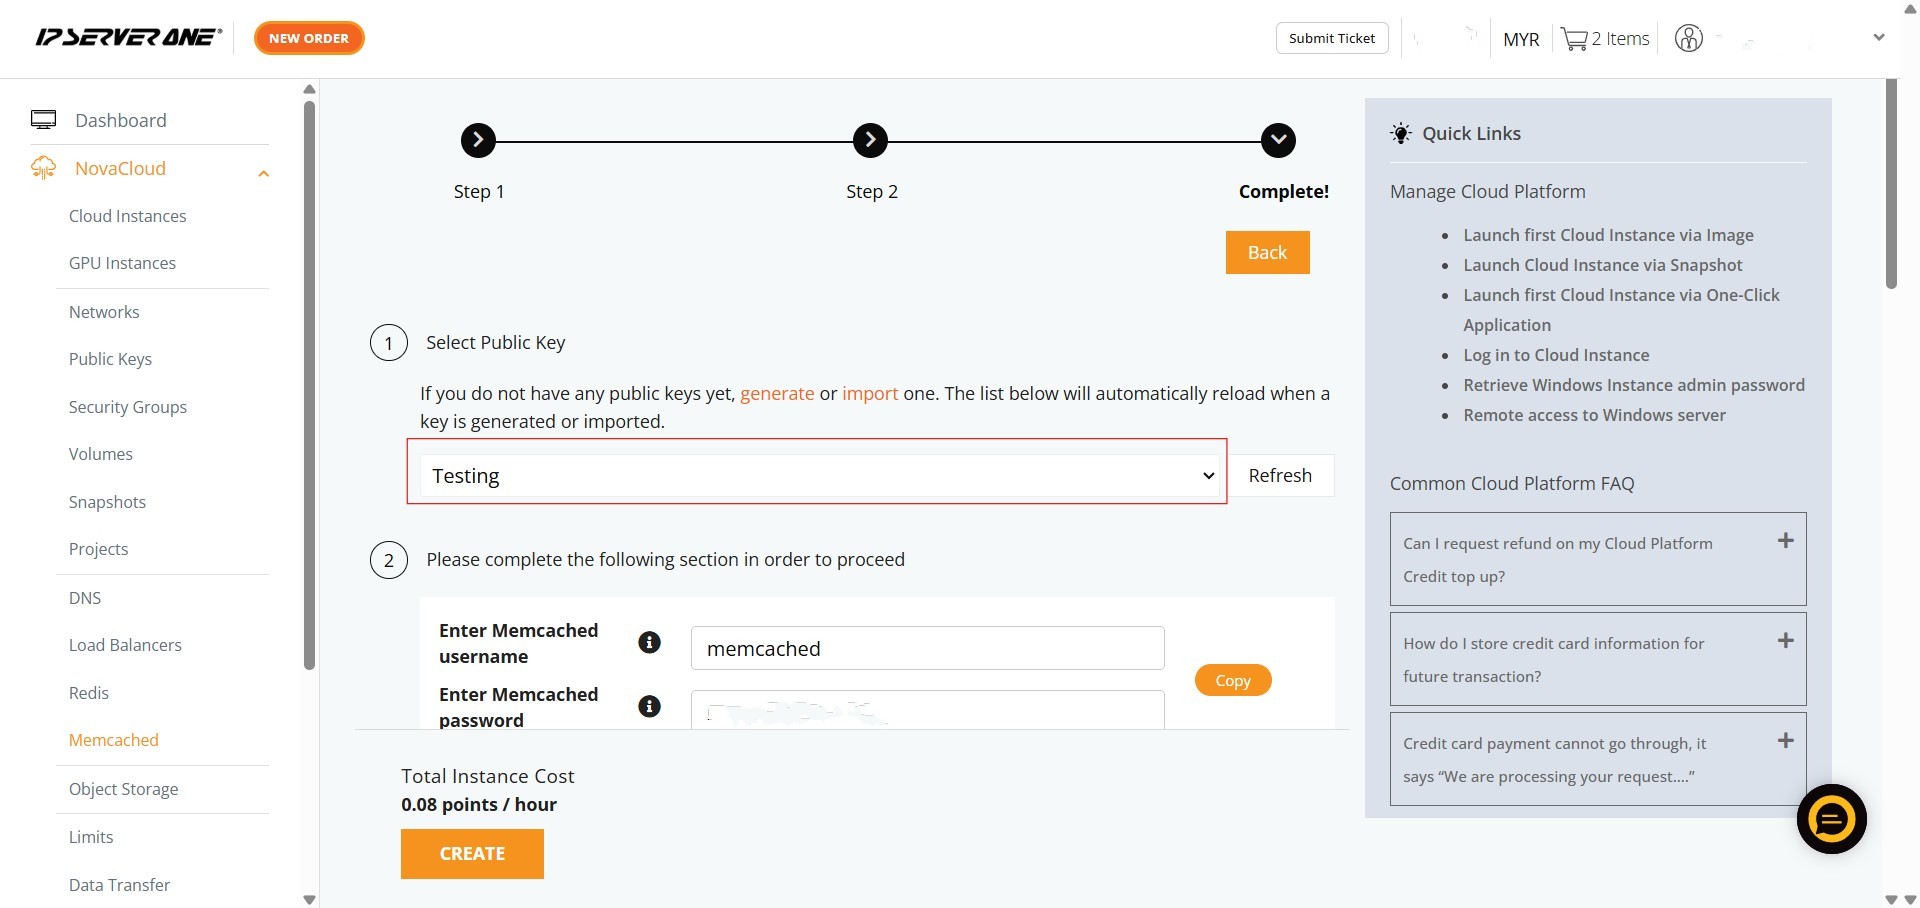
Step 8: Enter Memcached Credentials
- The system auto-generate Memcached username and Memcached password, but you have the flexibility to change them.
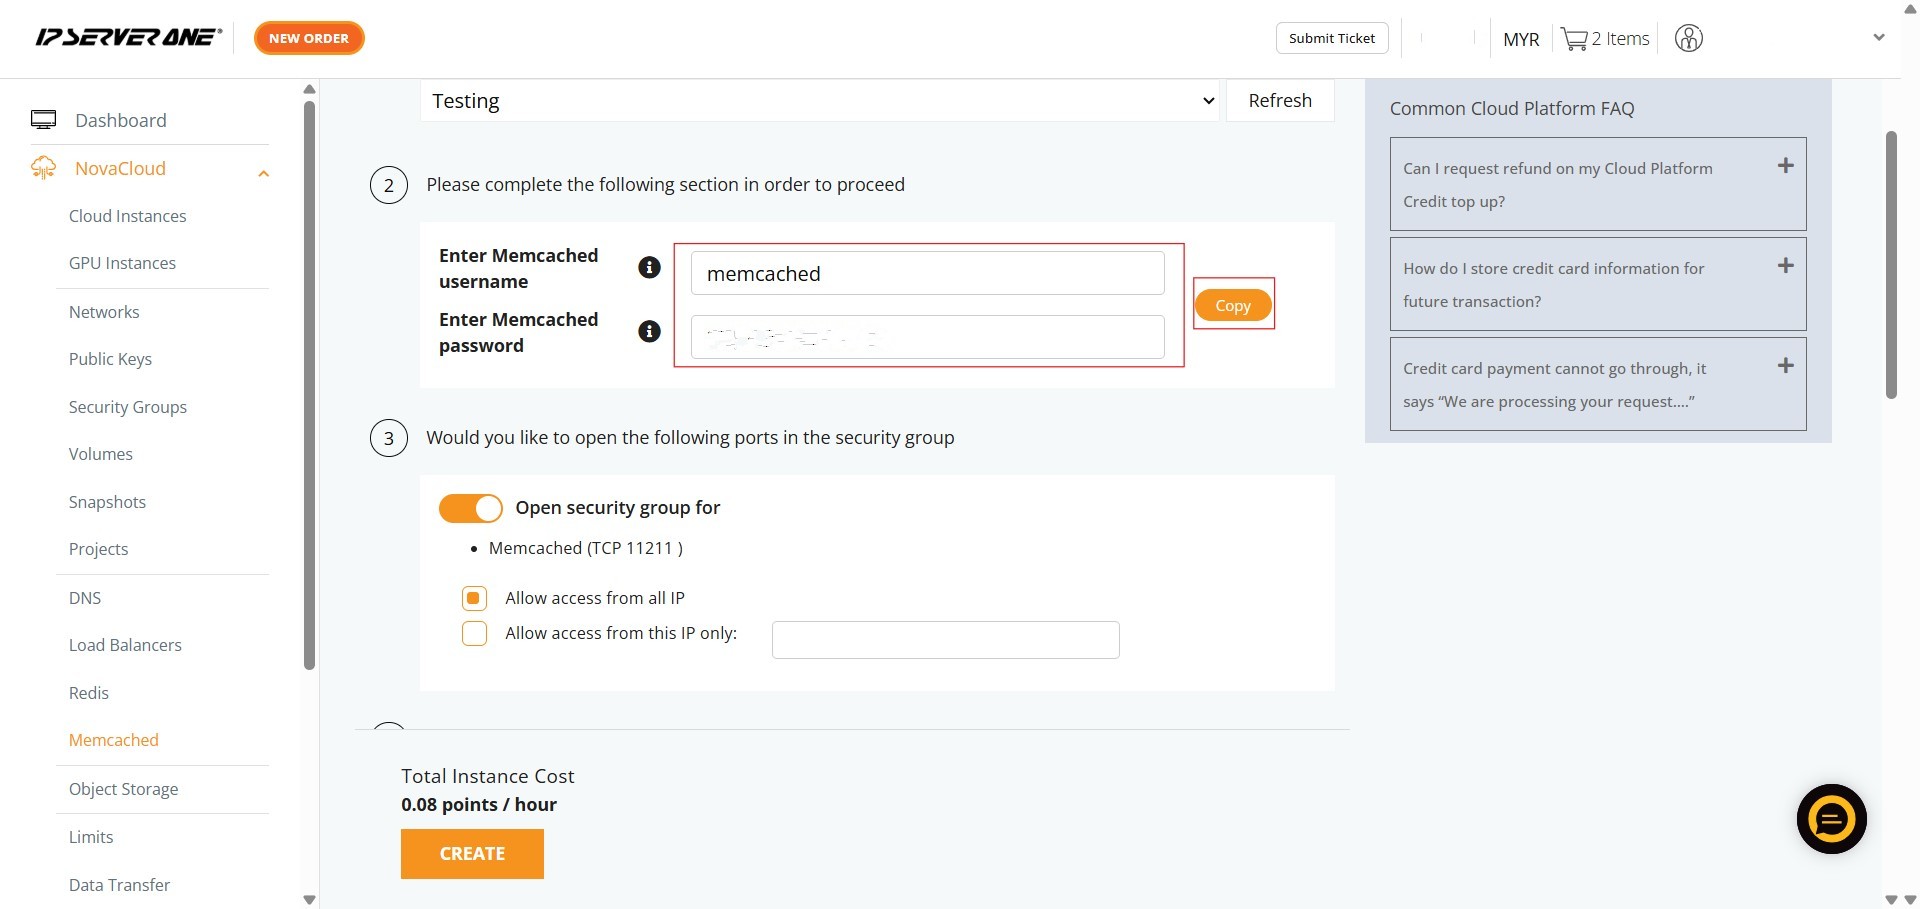
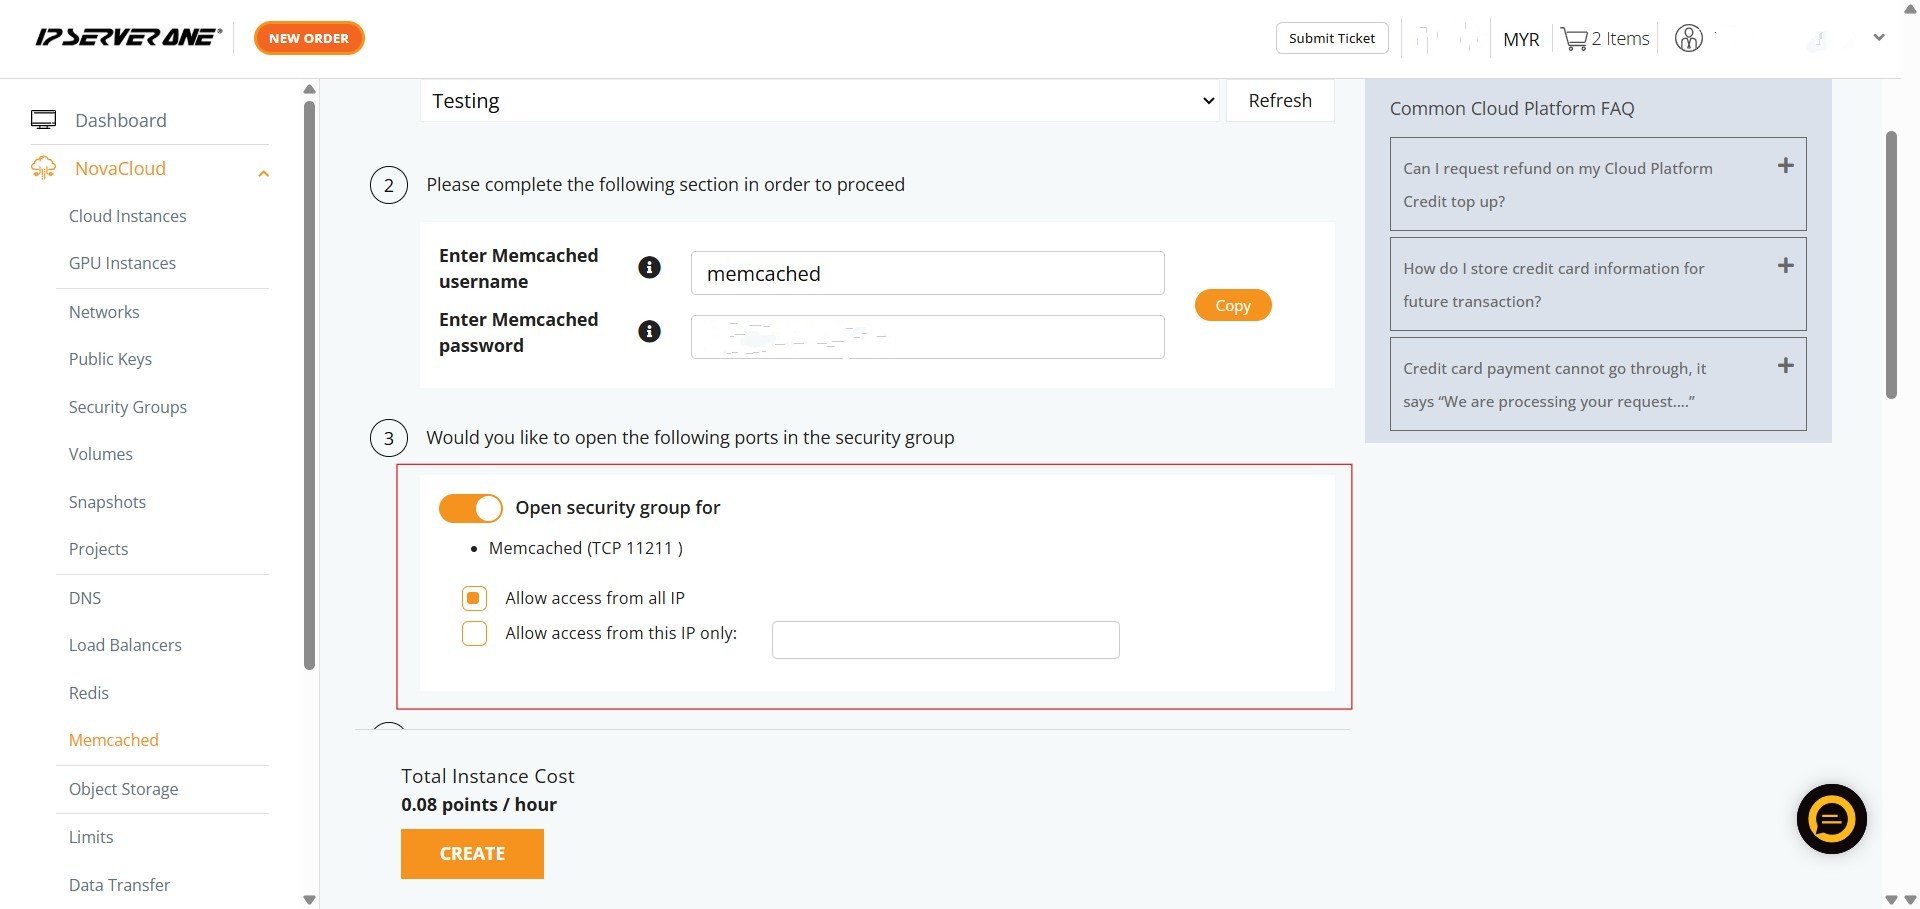
Step 9: Configure Memcached Security Group Access
- Under the section, “Would you like to open the following ports in the security group?”, system automatically enable the toggle for “Open security group for Memcached (TCP 11211)” and choose to “Allow access from all IP”.
Step 10: Applying Predefined Security Group Rules
- Review and apply any predefined security group rules as needed. Options typically include “Allow HTTP/S Traffic”, “Allow Remote Desktop”, “Allow SSH”, and “Allow ICMP”.

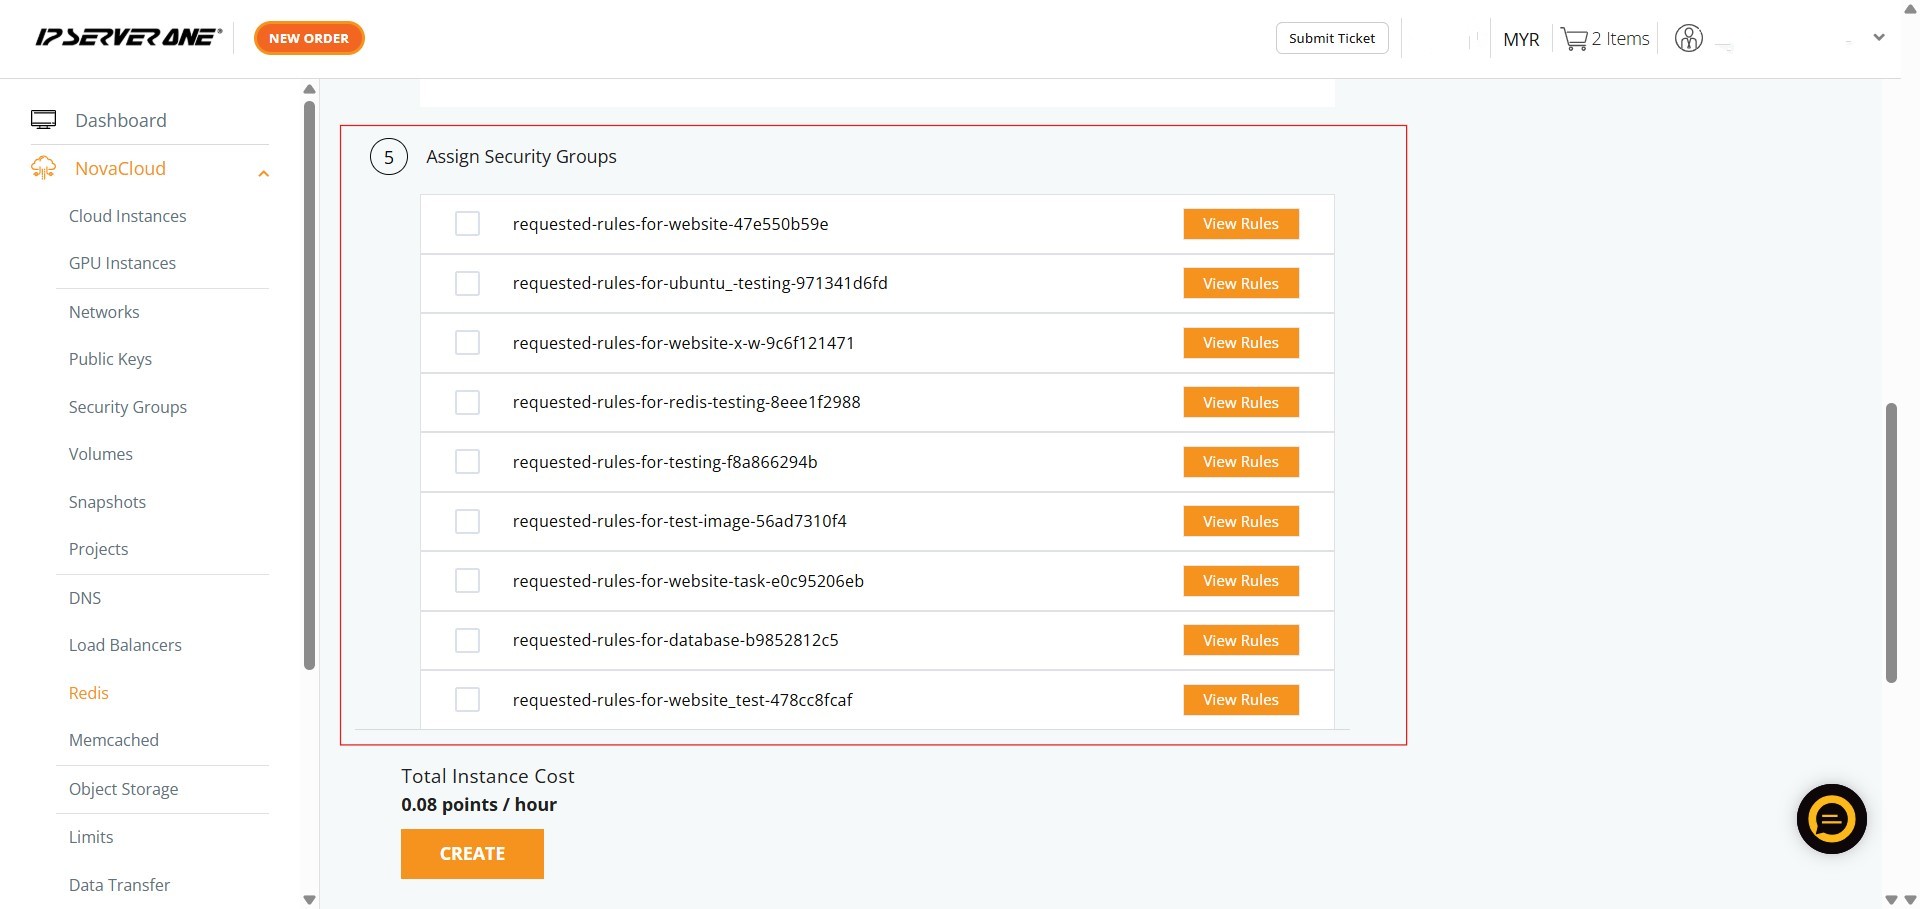
Step 11: Assigning Security Groups
- You can also assign specific security groups to your instance. This allows for fine-grained control over network access to your Redis instance.
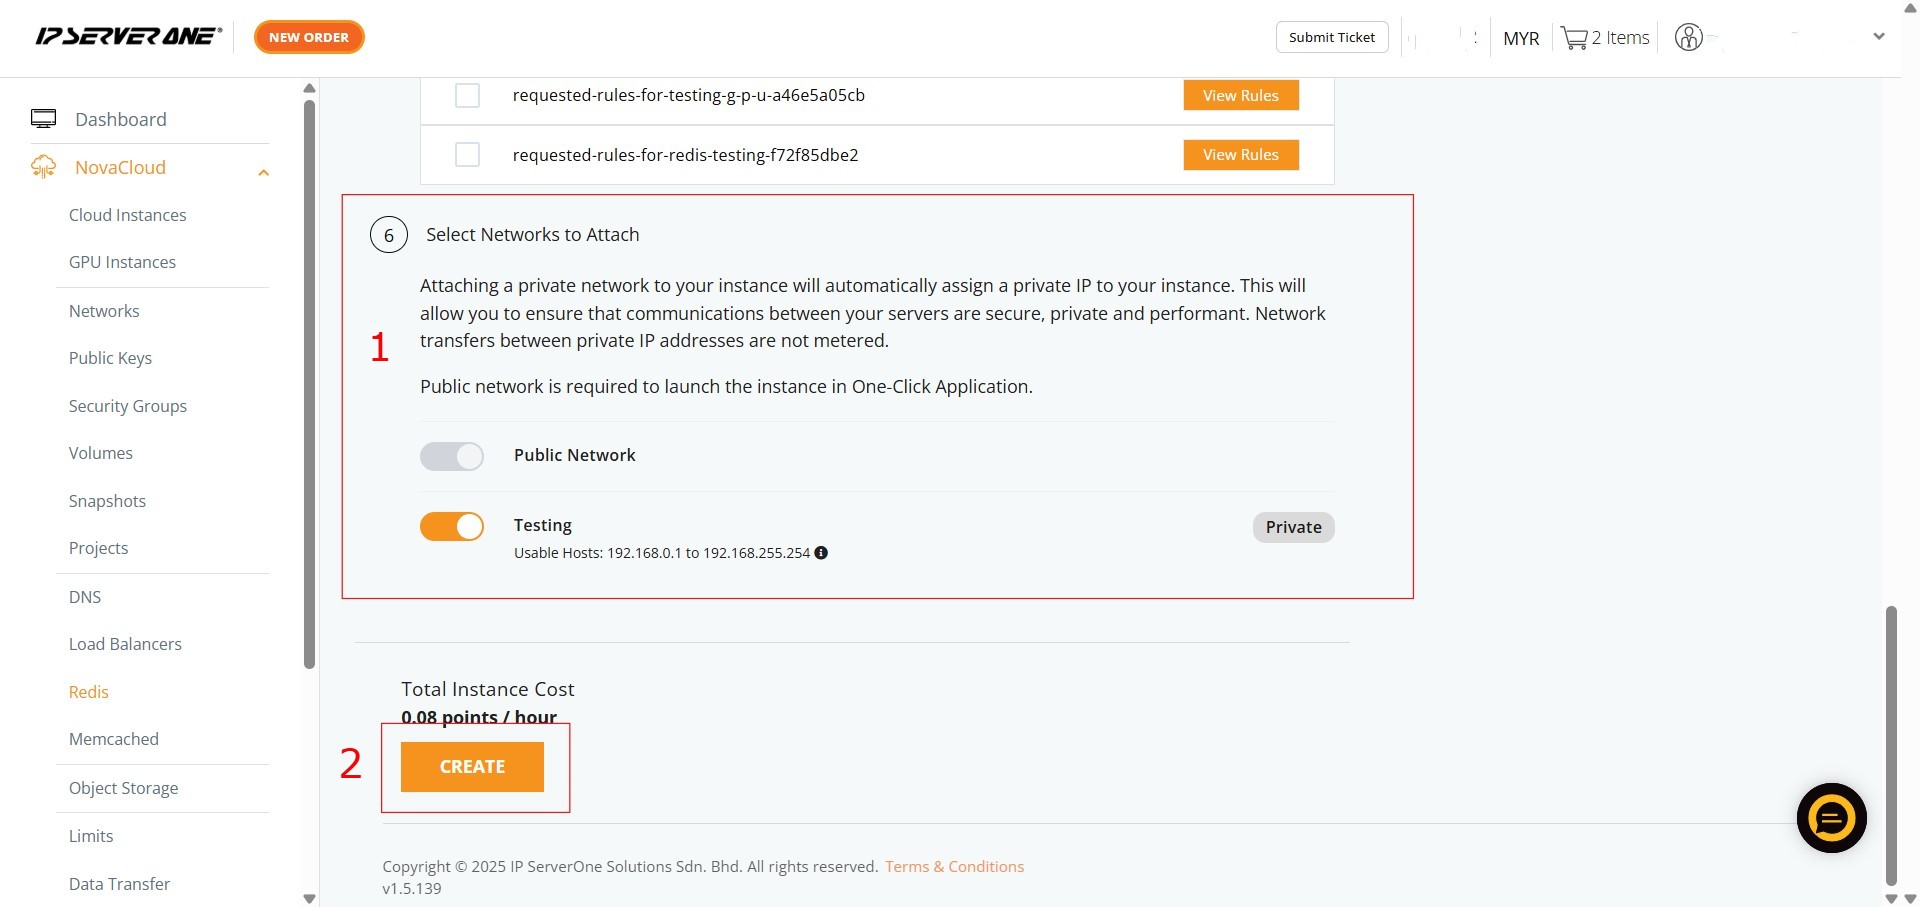
Step 12: Select Network Attachments
- Under “Select Network to Attach”, ensure “Private Network” is enabled to assign a public IP address to your instance.
- Click “Create” to finalize.
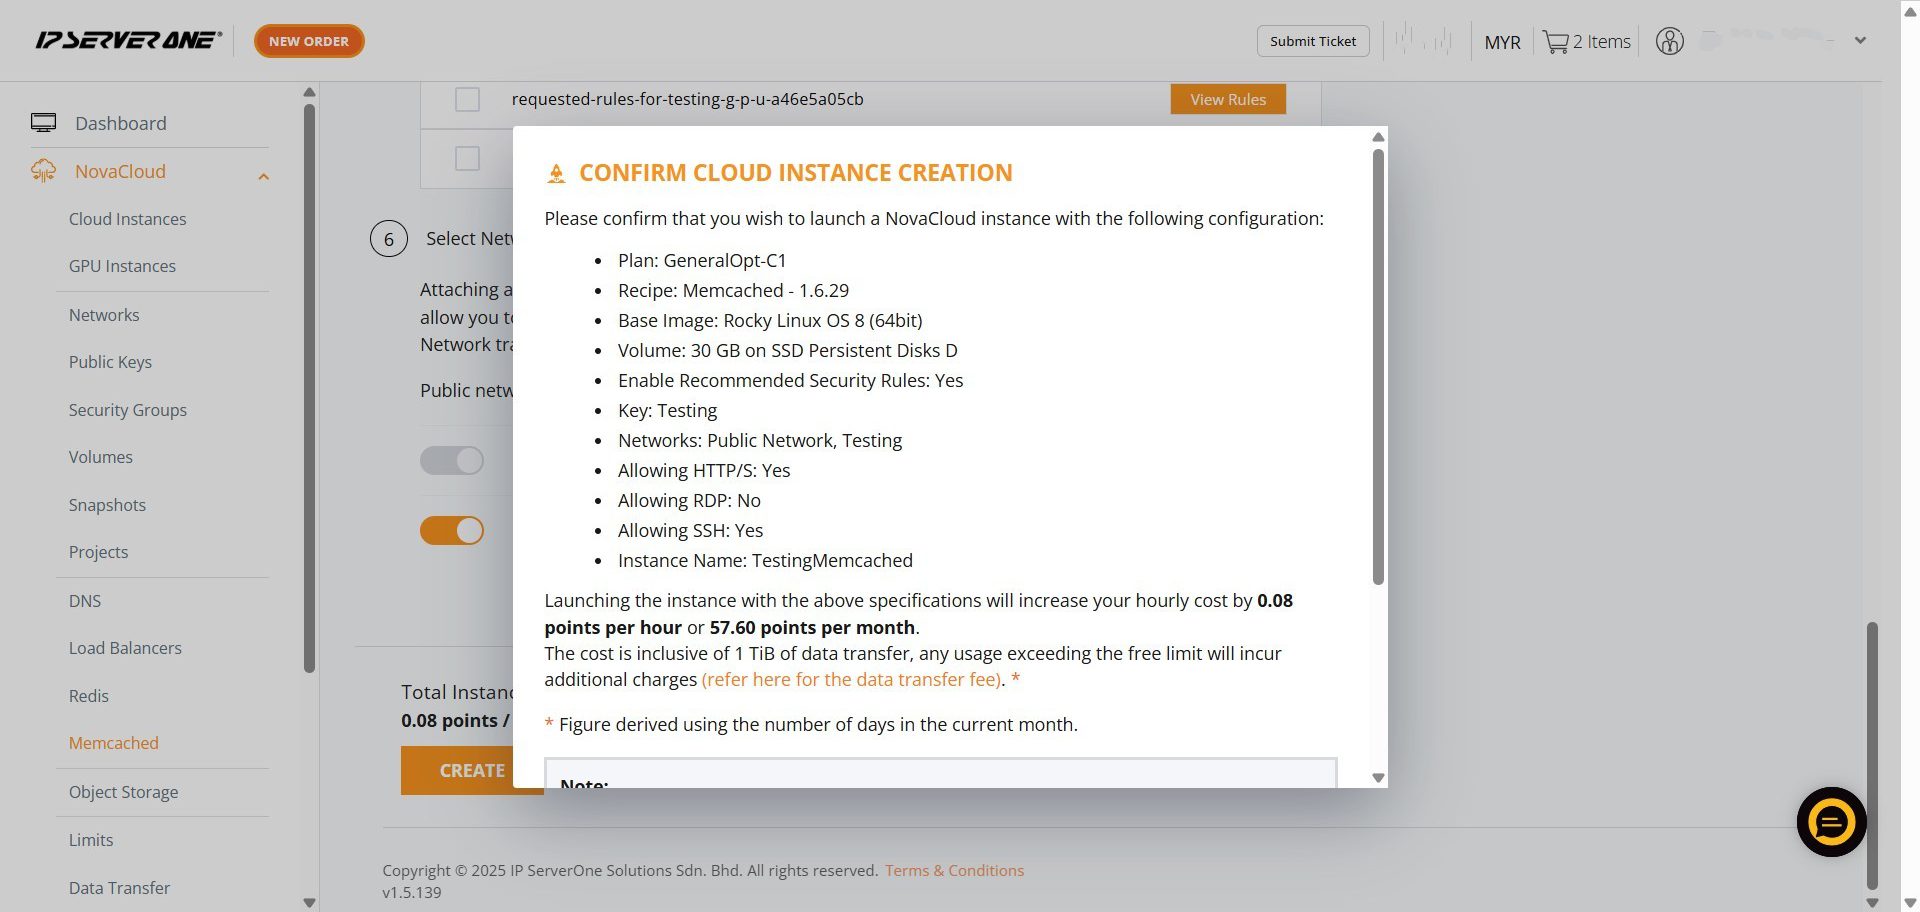
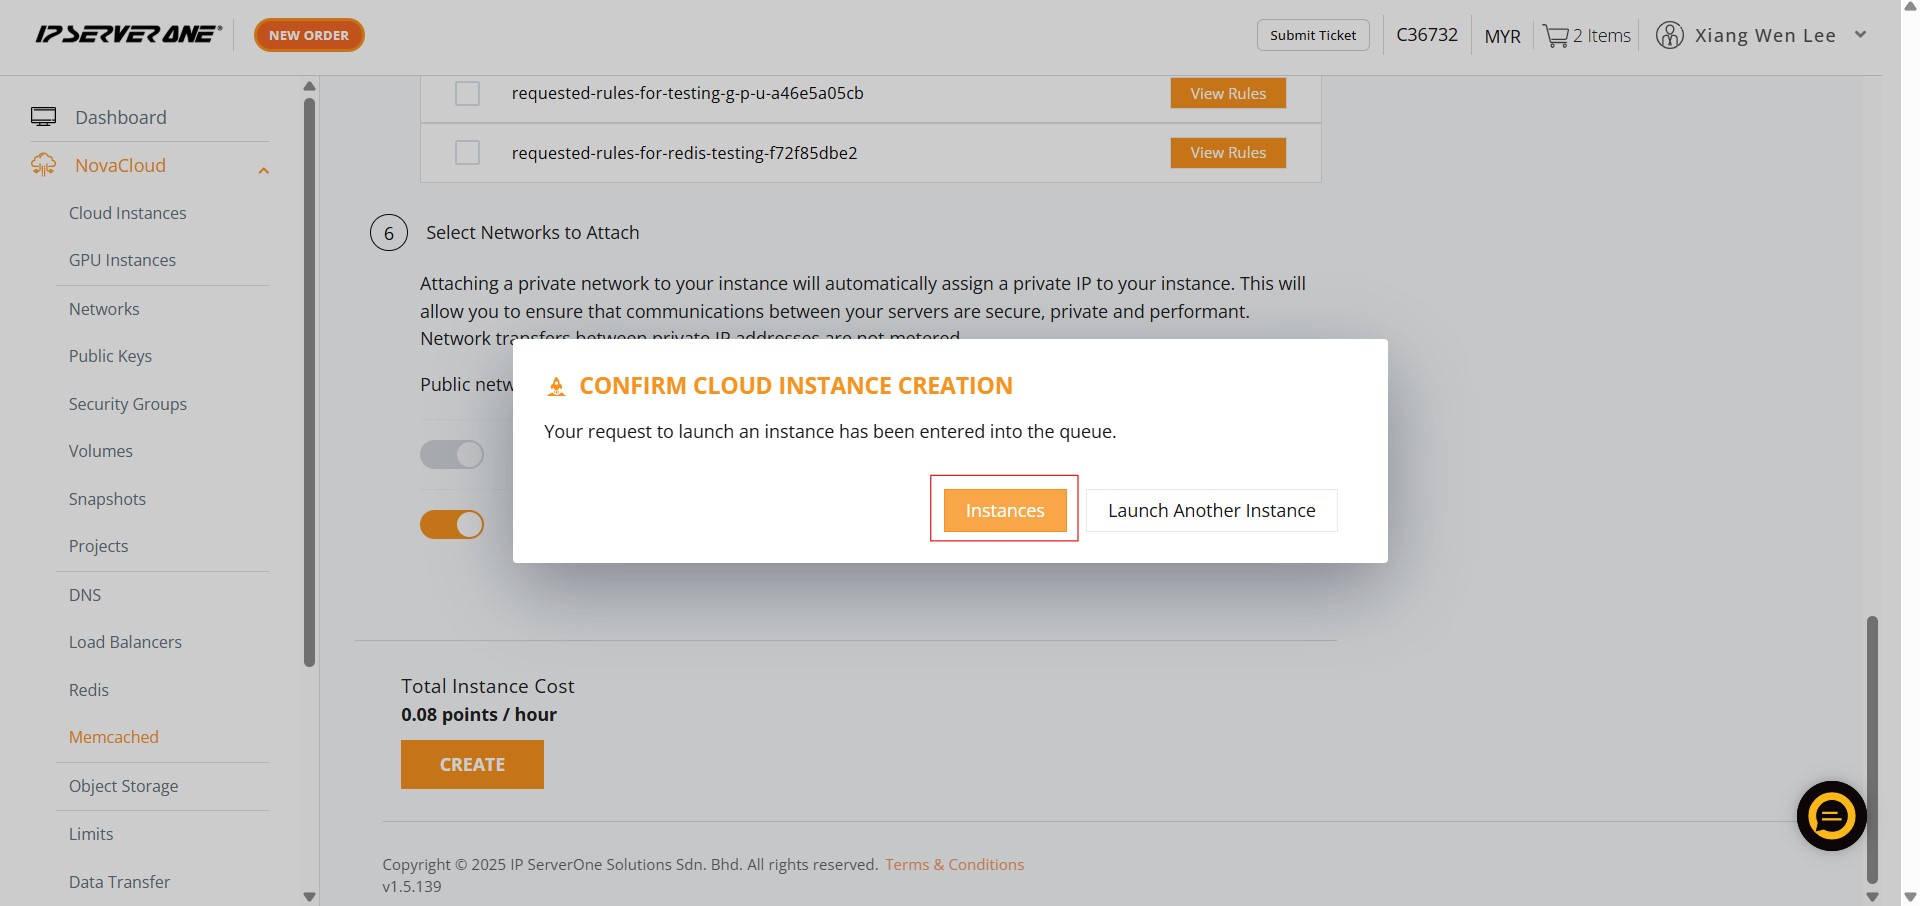
Step 13: Confirming Cloud Instance Creation
- A “CONFIRM CLOUD INSTANCE CREATION” pop-up will appear.
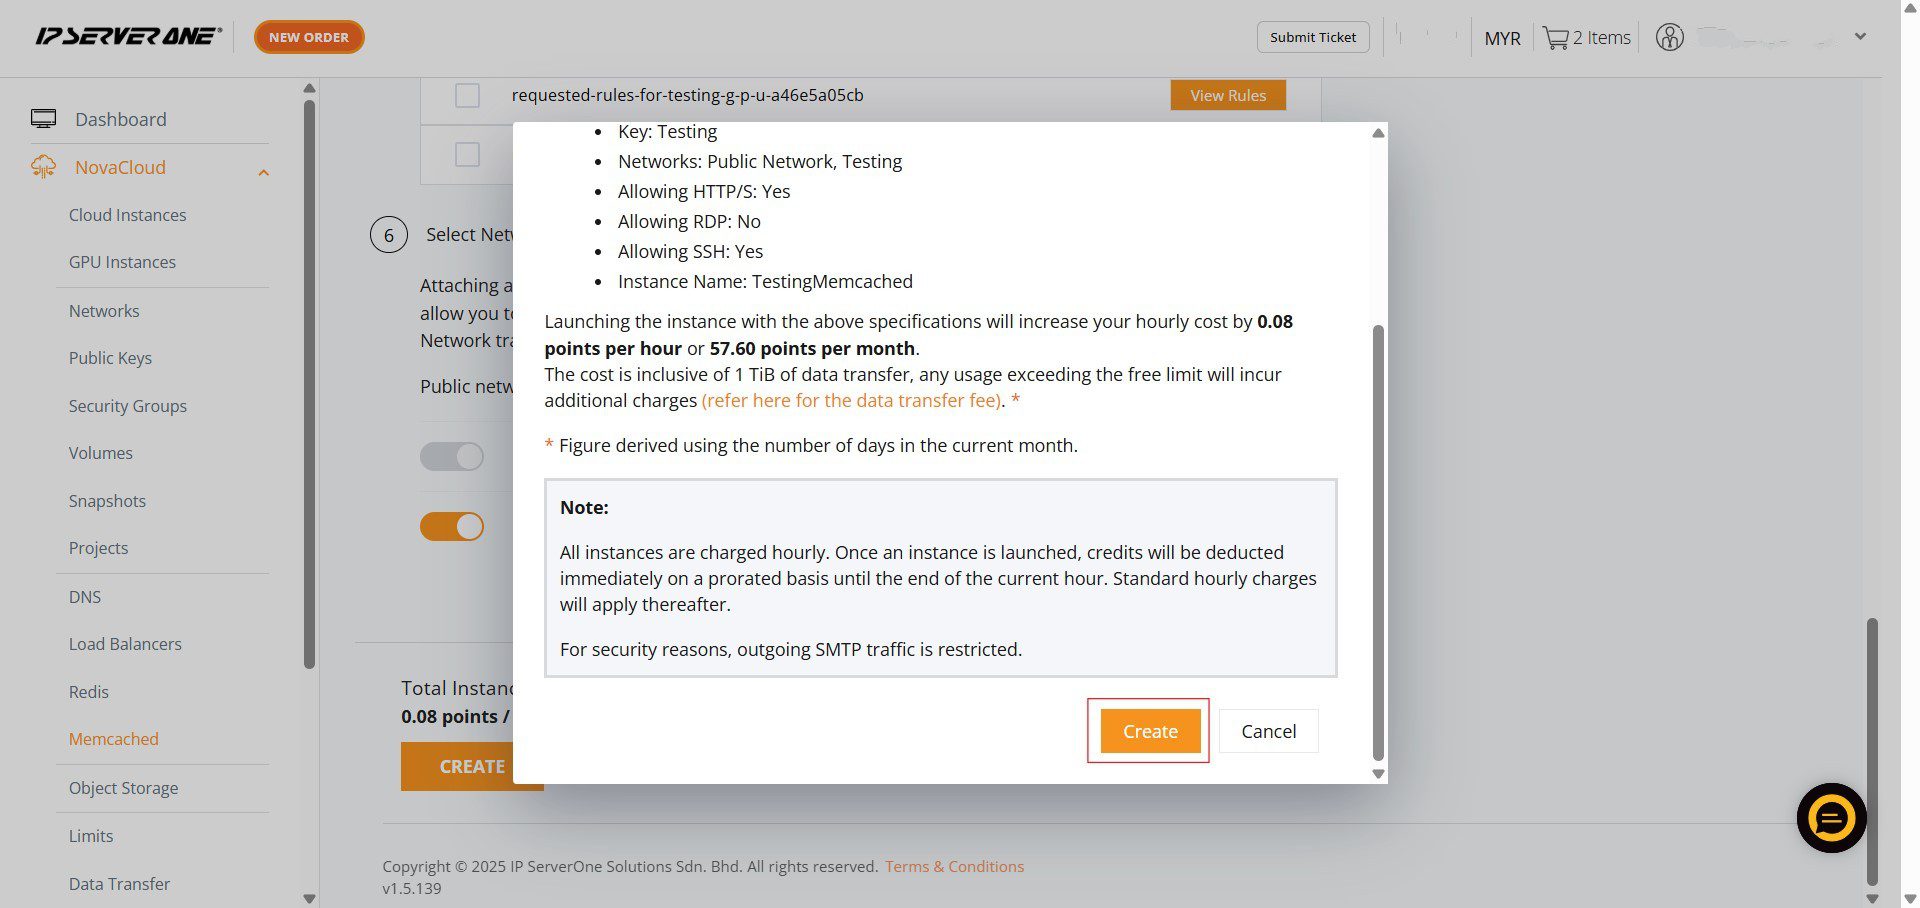
- You must scroll to the bottom of this pop-up and click “Create” again to confirm.
Step 14: Viewing Instances
- After confirmation, a pop-up indicating that your request to launch an instance has been queued will appear. Click on “Instances” to navigate to the “All Cloud Instances” page where you can monitor the provisioning status.
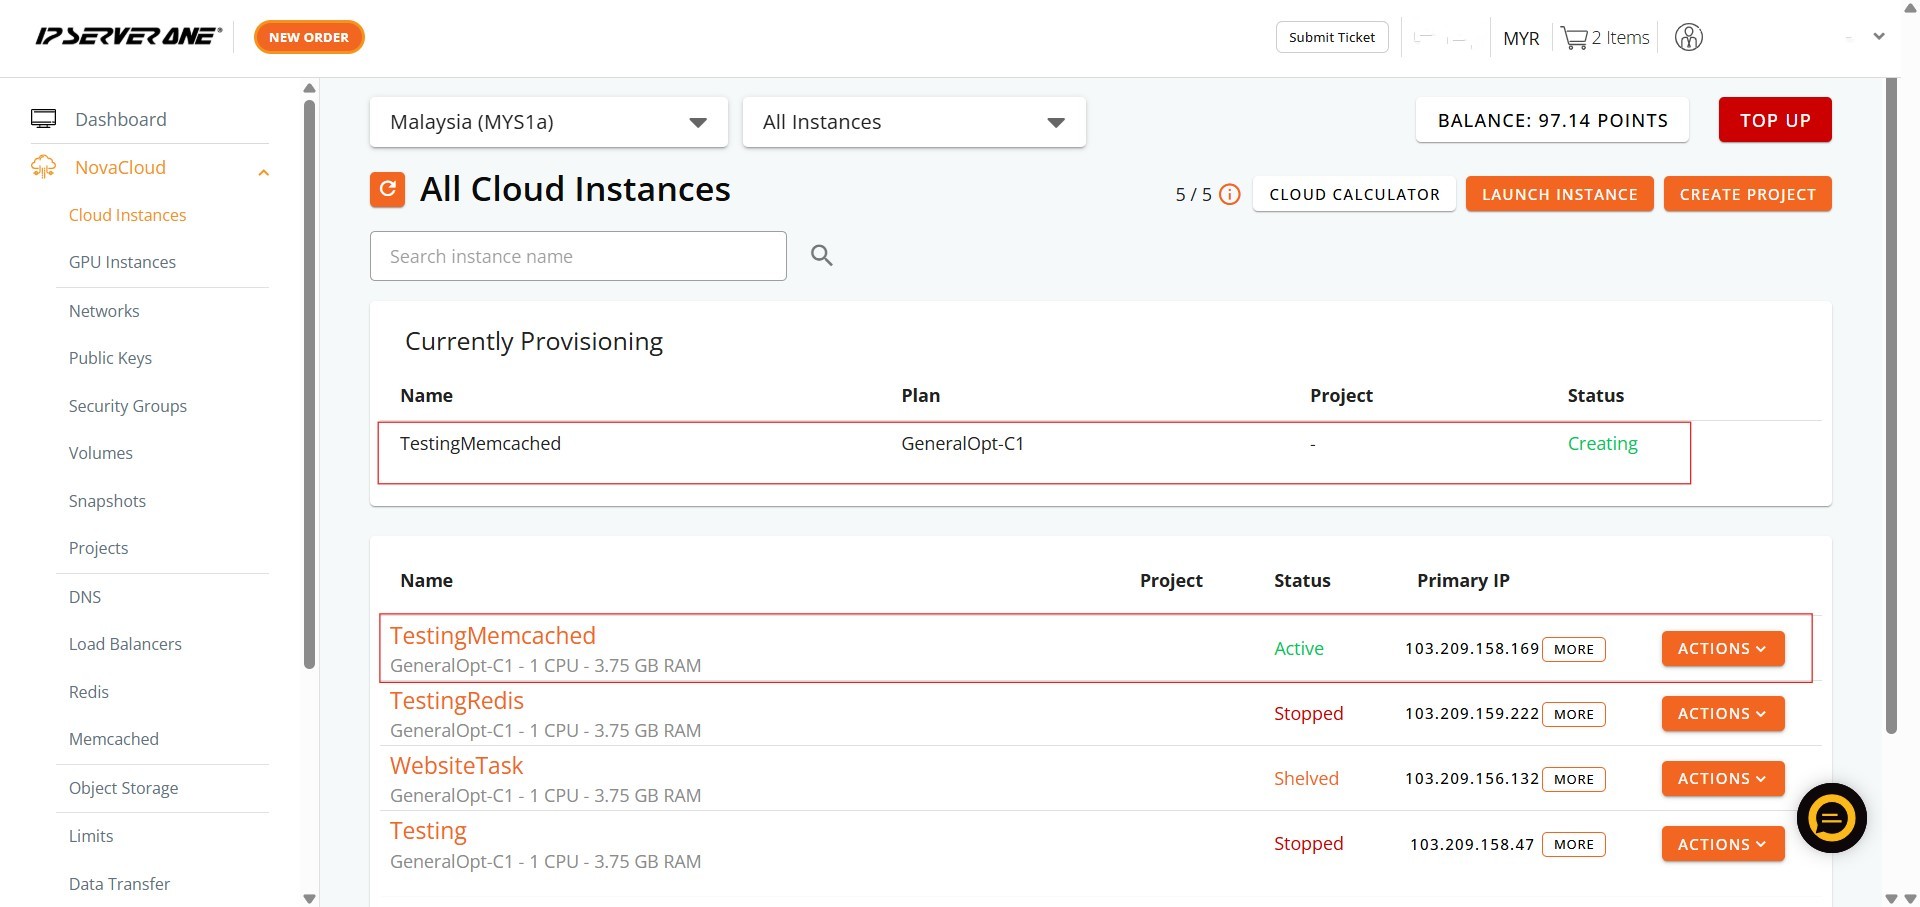
Step 15: Verifying Successful Provisioning
- On the “All Cloud Instances” page, you should now see your newly created Redis instance listed with a status of “Creating” or “Active”, indicating that the provisioning process is underway or complete.
Conclusion:
This guide has successfully outlined the process for creating Cloud Instance(s) that contain Memcached within the Customer Portal. By following these instructions, you leveraged the NovaCloud section, specifically navigating to the Memcached services, and utilizing the Memcached One-Click Application to deploy a Memcached instance efficiently.
Upon confirming the cloud instance creation, your Memcached instance was queued for provisioning, and its status can be monitored in the “All Cloud Instances” section of your Customer Portal. It is important to remember that all instances are charged hourly, with credits deducted on a prorated basis until the end of the current hour, and standard hourly charges applying thereafter. For security purposes, outgoing SMTP traffic is restricted. This streamlined deployment method facilitates the quick establishment of an efficient Memcached caching solution.
Should you encounter any issues or have any questions, our support team at IPSERVERONE is always here to assist you. Don’t hesitate to reach out to us at support@ipserverone.com for any help you need.