Search Our Database
How to create an additional web disk account in cPanel?
📝 Introduction
Web Disk (also known as WebDAV) in cPanel allows you to manage and upload files to your website as if it were a local drive on your computer. You can create additional Web Disk accounts to give specific users access to certain directories without sharing your main cPanel login.
✅ Pre-requisites
-
A hosting account with cPanel access
-
Web Disk feature enabled by your hosting provider
-
The cPanel username and password
Steps to Create an Additional Web Disk Account
Step 1: Log in to cPanel
Go to your domain’s cPanel URL, for example:
https://yourdomain.com:2083/
Enter your cPanel username and password.
Step 2: Open the Web Disk Feature
Scroll down to the Files section.
Click on Web Disk.

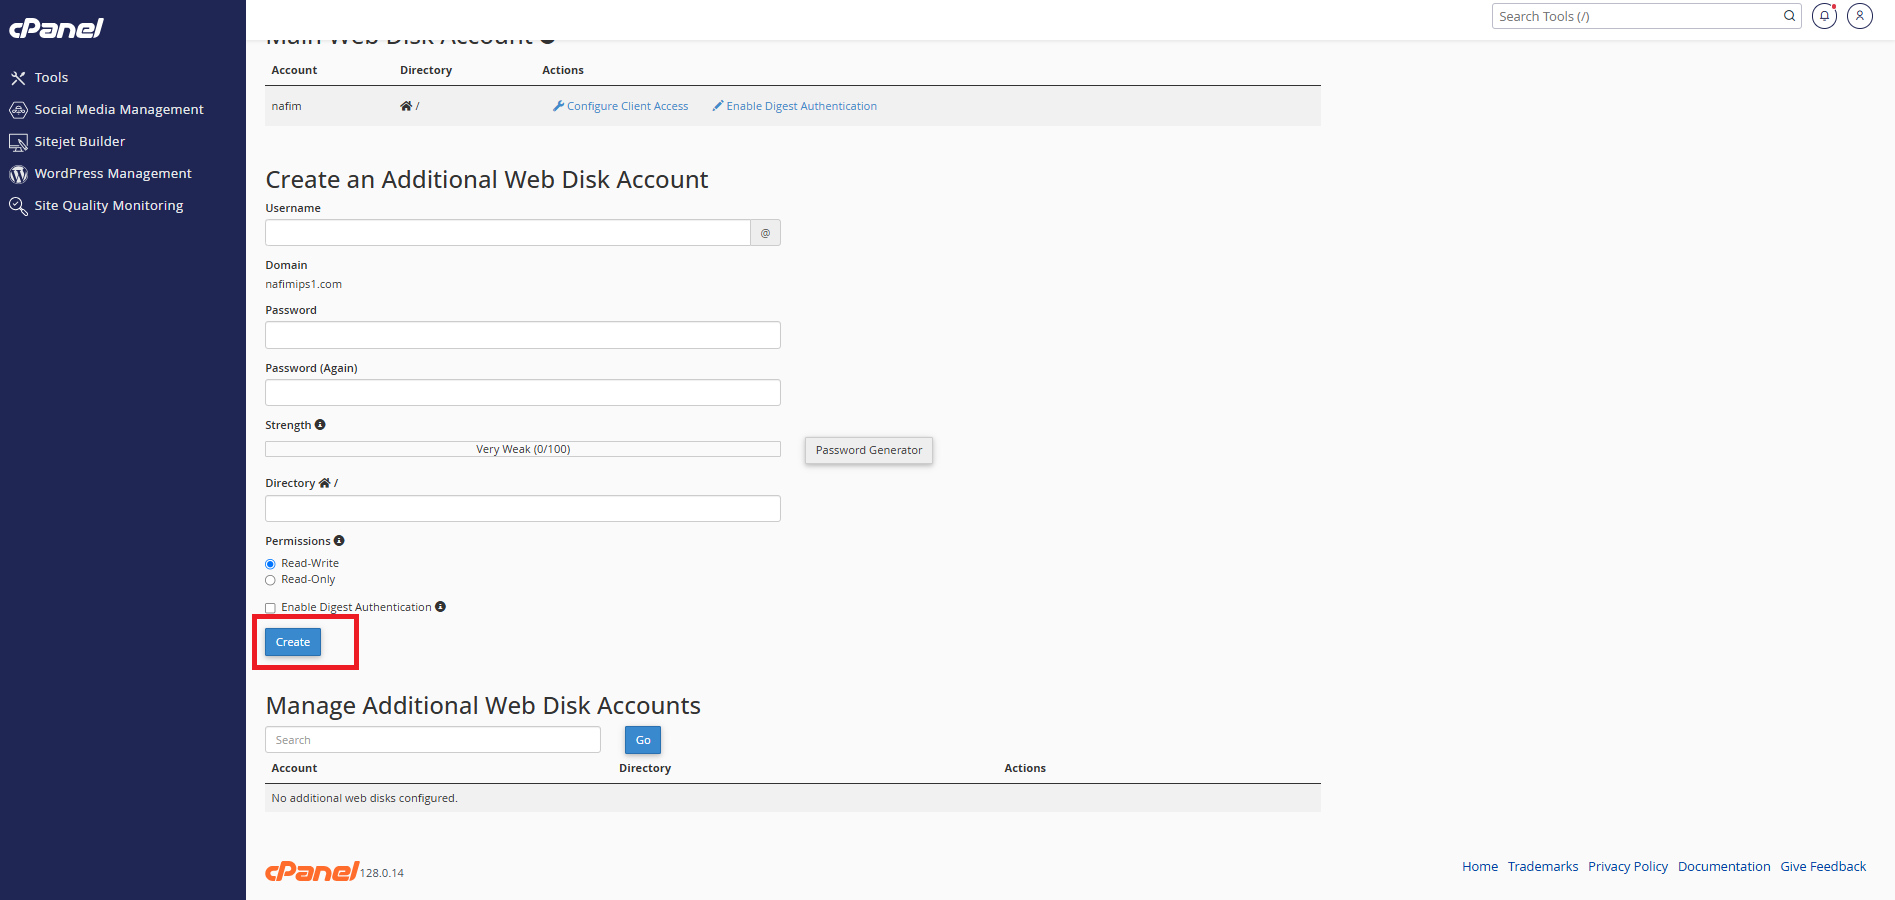
Step 3: Fill in Web Disk Account Details
In the Create an Additional Web Disk Account section:
-
Username: Enter the name for the user (e.g., clienteditor)
-
Domain: Choose the domain (if you have multiple)
-
Password: Enter and confirm a strong password
-
Directory: Define the folder the user should access (e.g., public_html/client1)
-
Permissions:
-
Select Read-Write to allow upload/edit/delete
-
Or Read-Only for viewing access
-
- Enable Digest Authentication (If Needed)
- Check the box for Enable Digest Authentication

Step 5: Create the Account
Click Create to finalize and set up the new Web Disk account.
🔍 Verification
To confirm the account was created:
-
Scroll down to the Manage Web Disk Accounts section
-
The new account should appear there
-
You can download a configuration script or set it up manually from your computer using the details provided

✅ Conclusion
Creating additional Web Disk accounts provides a secure and efficient way to manage file access for team members or clients. Each account can be restricted to specific directories, ensuring your website’s security and structure remain intact. If you require further assistance, feel free to contact our support team at support@ipserverone.com