Search Our Database
How to Create a WordPress Website Using a Cloud Instance
Introduction
Deploying WordPress manually involves multiple technical steps, including server configuration, database setup, and application installation. The One-Click Application feature streamlines this process by automating these tasks, eliminating the need for manual WordPress installation and configuration. This guide explains how to launch a WordPress instance using the NovaCloud > Instances section in the IP ServerOne Customer Portal. The automated setup handles database configuration, web server installation, and WordPress deployment, allowing users to have a fully functional website within minutes rather than hours of manual setup.
Prerequisite
Step-by-step Guide
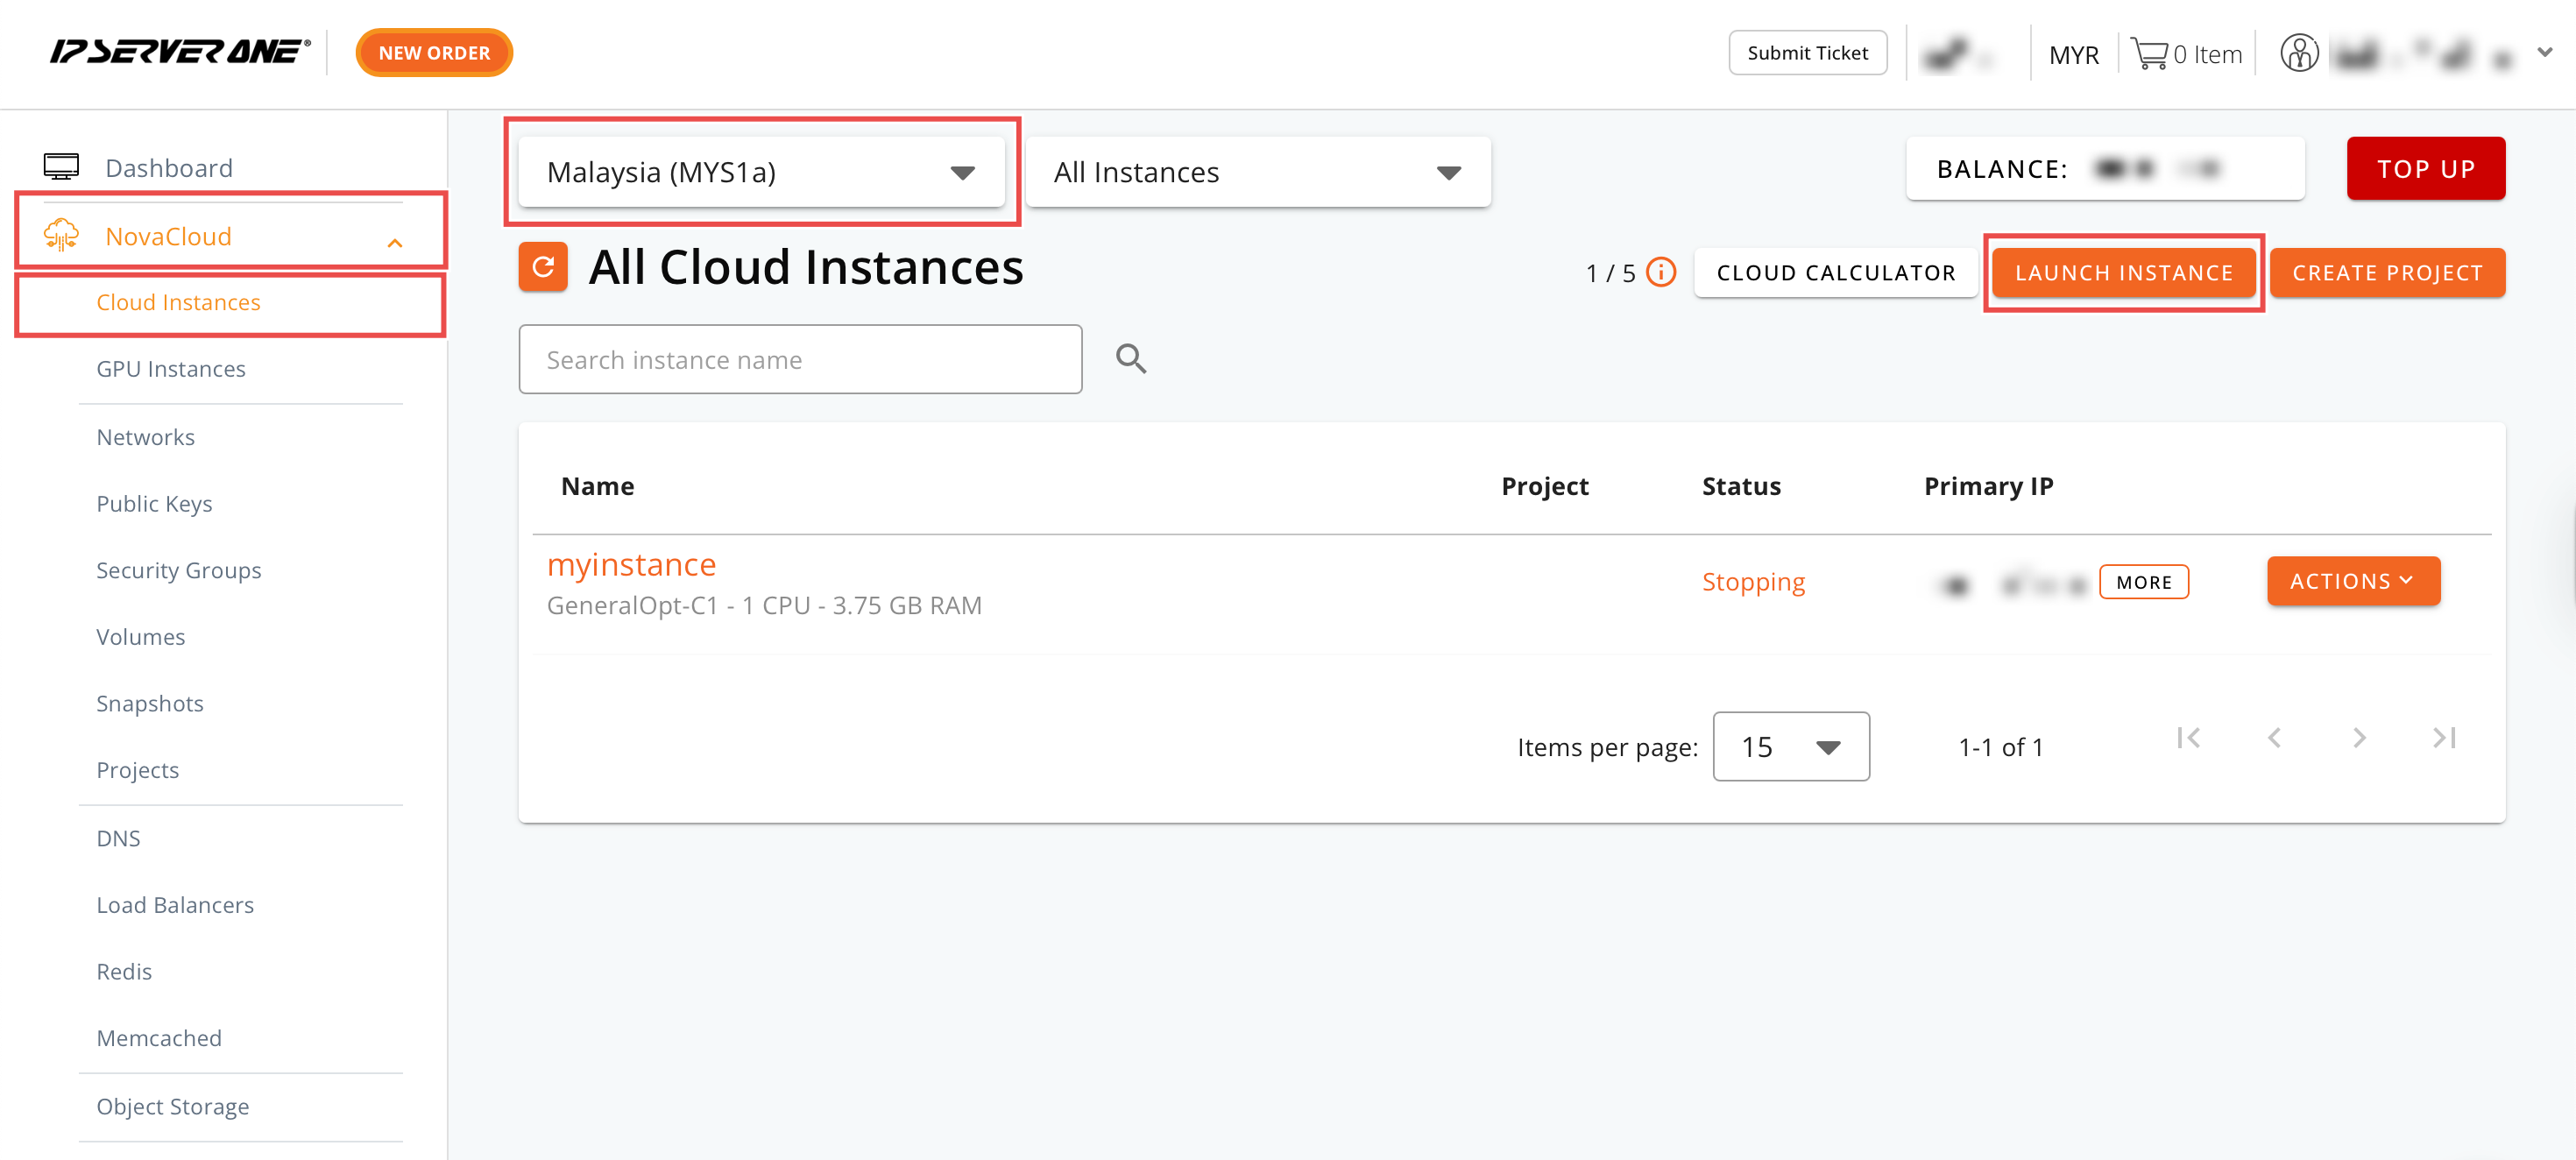
Step 1: Launching Instance
Log in to your portal account. Click on NovaCloud and navigate to Instances from the dropdown menu. Choose the region where you want to launch your instance and click Launch Instance.
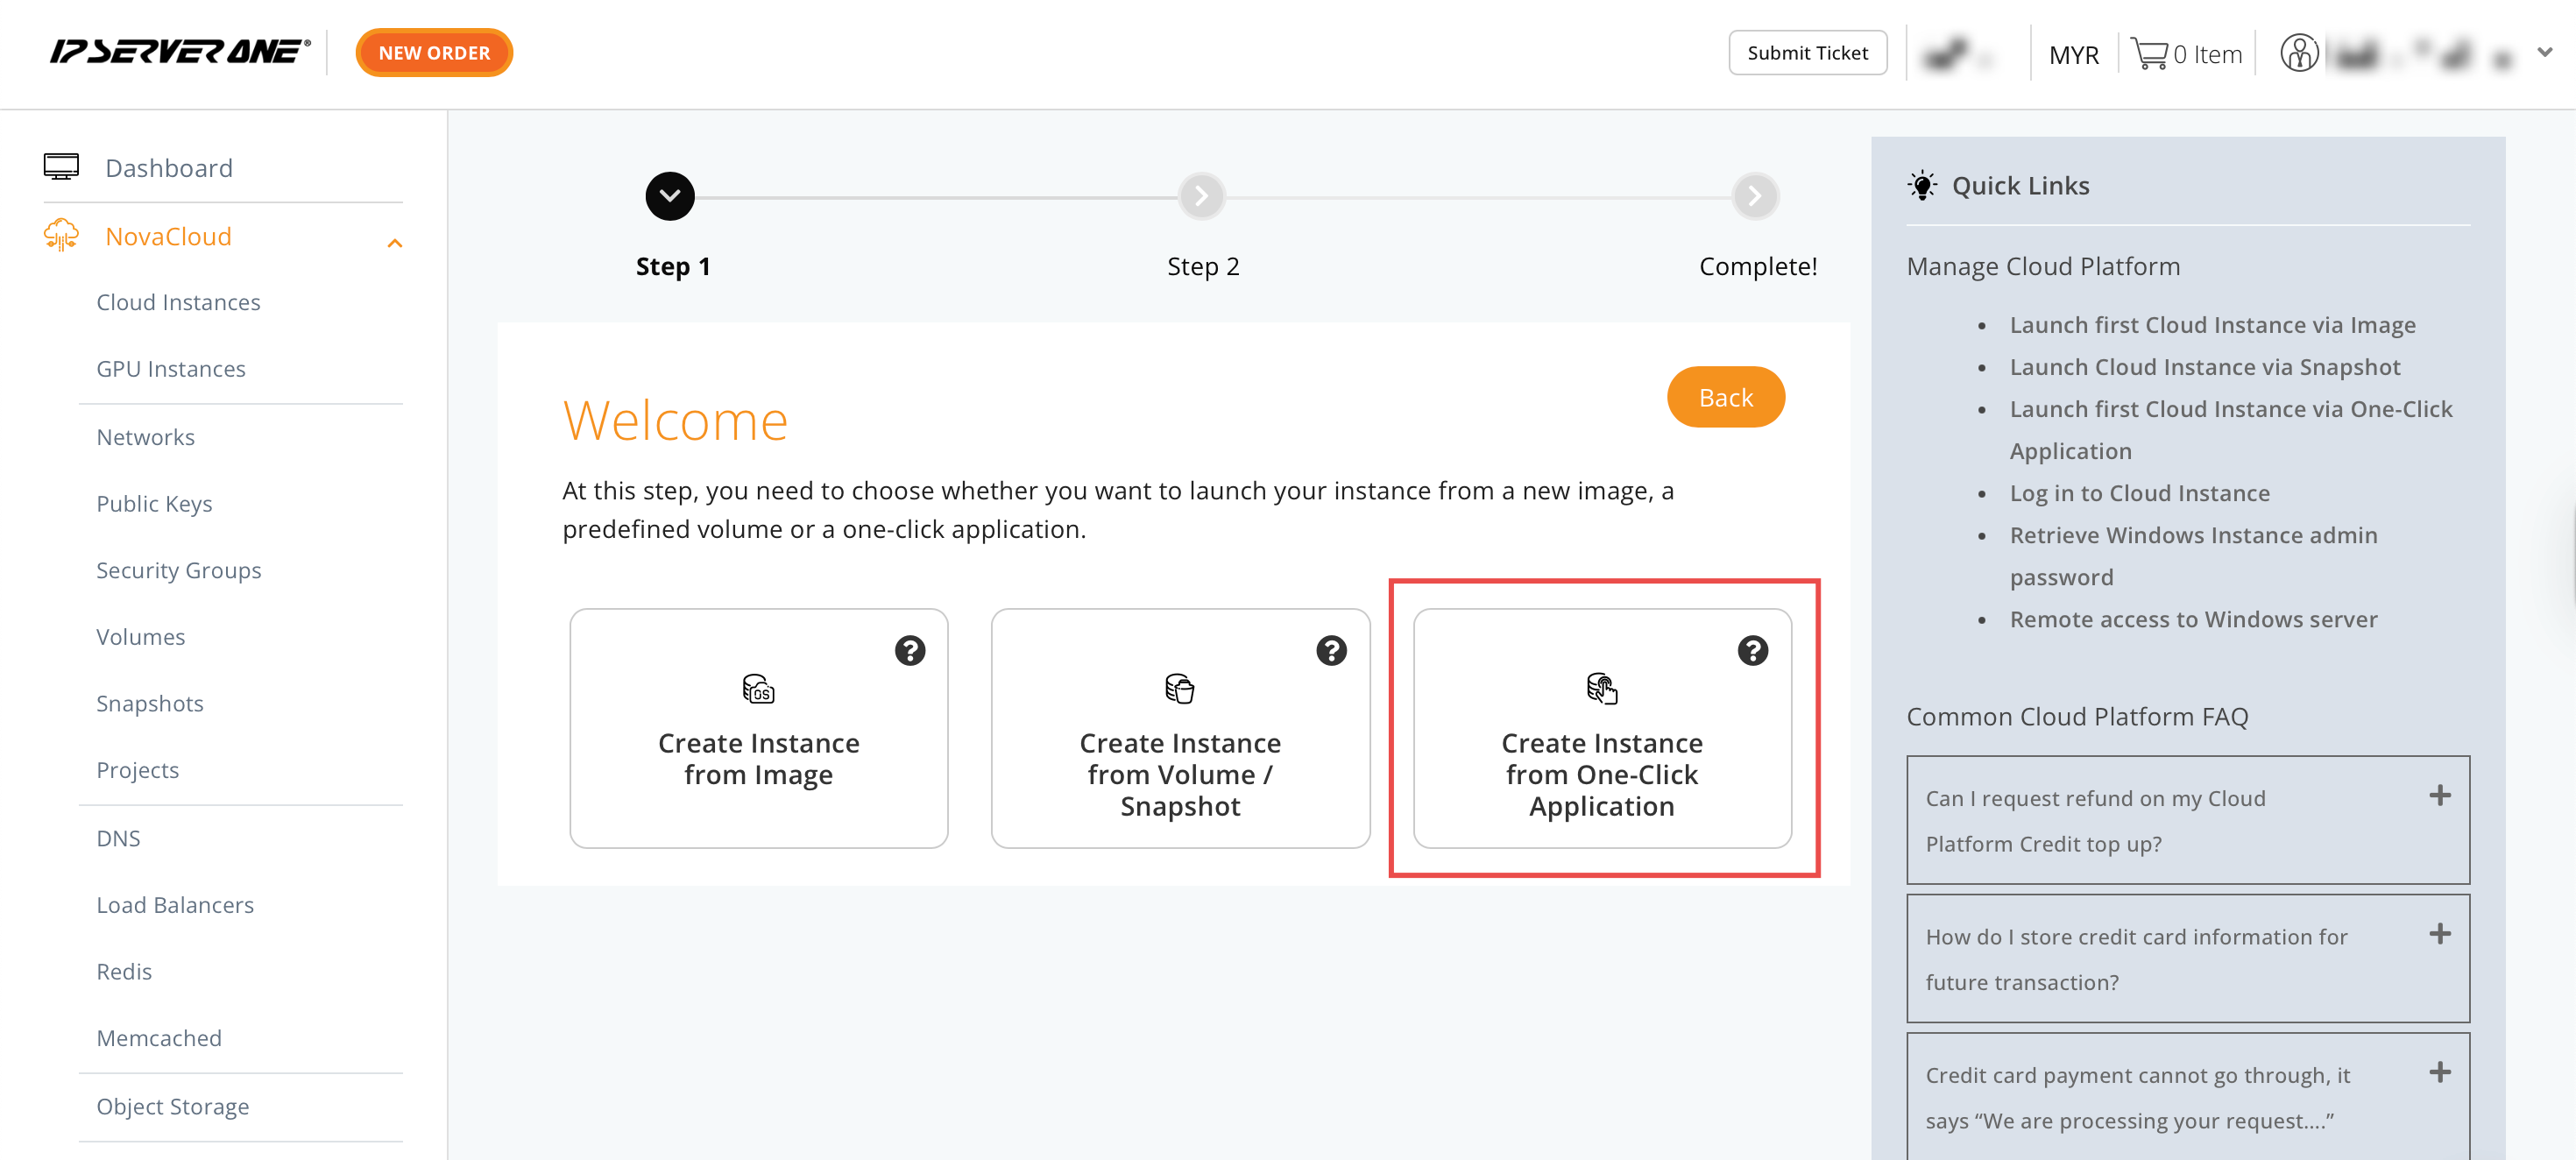
Step 2: Create Instance from One-Click Application
Select Create Instance from One-Click Application.
Step 3: Setting WordPress application and provisioning server
Choose Content Management from the dropdown menu and select the latest version after clicking on WordPress. To provision the server with your requirements, please select or input based on your preference on the following:
- Plan: General Cloud / Ram Optimised
- Storage: Minimum 30 GB for WordPress applications
- Projects: Optional
- Instance Name
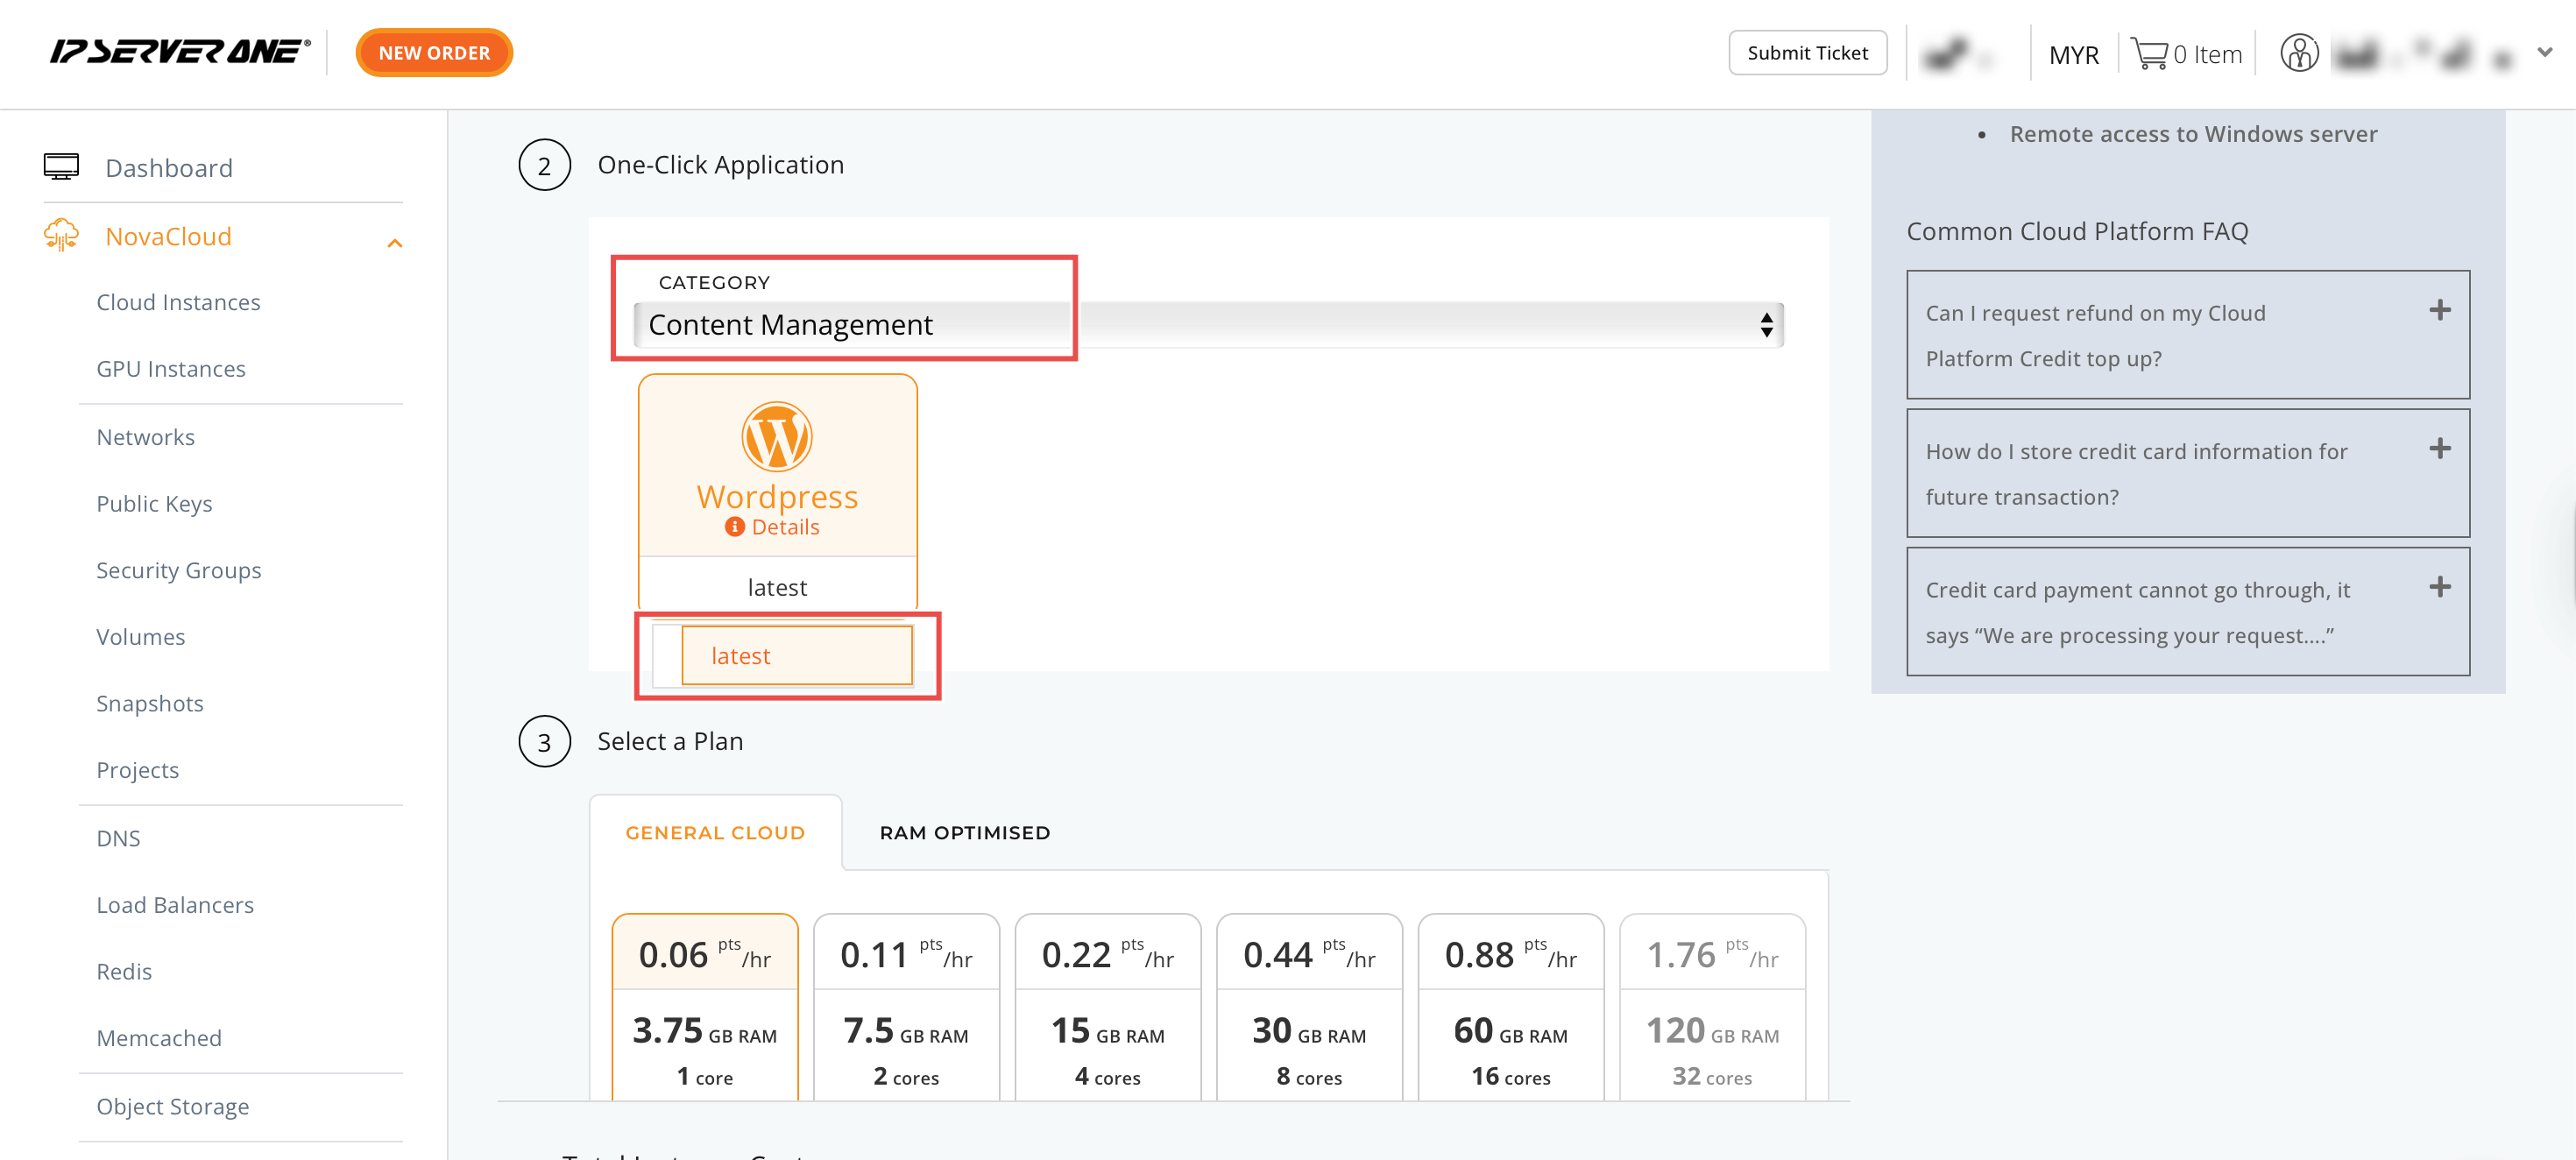
Afterwards, click Continue.
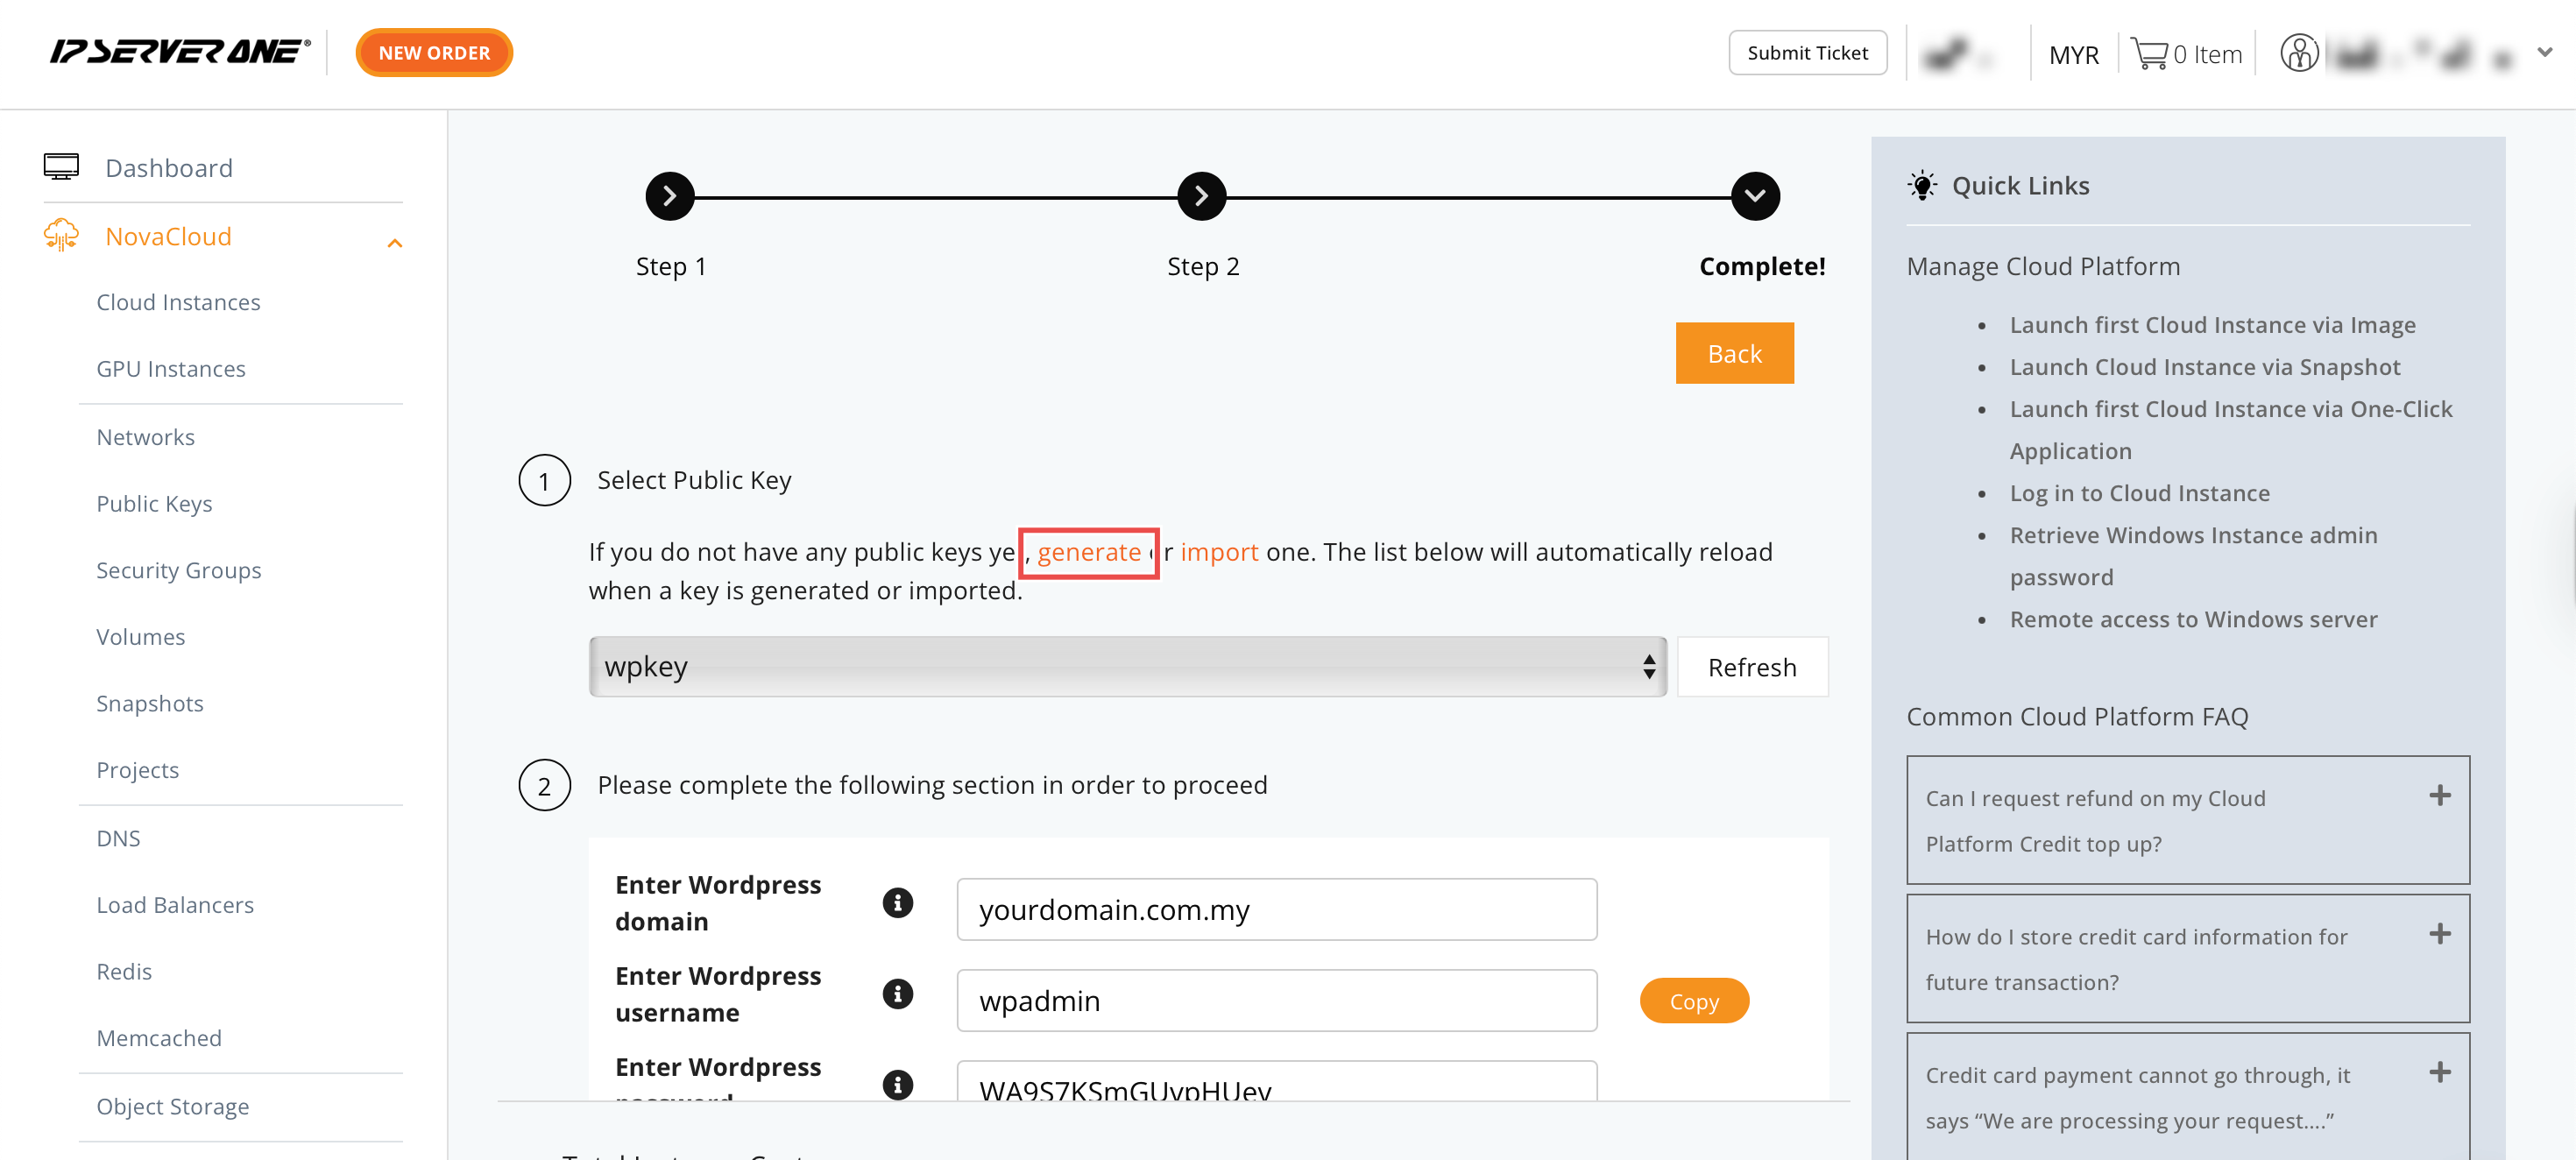
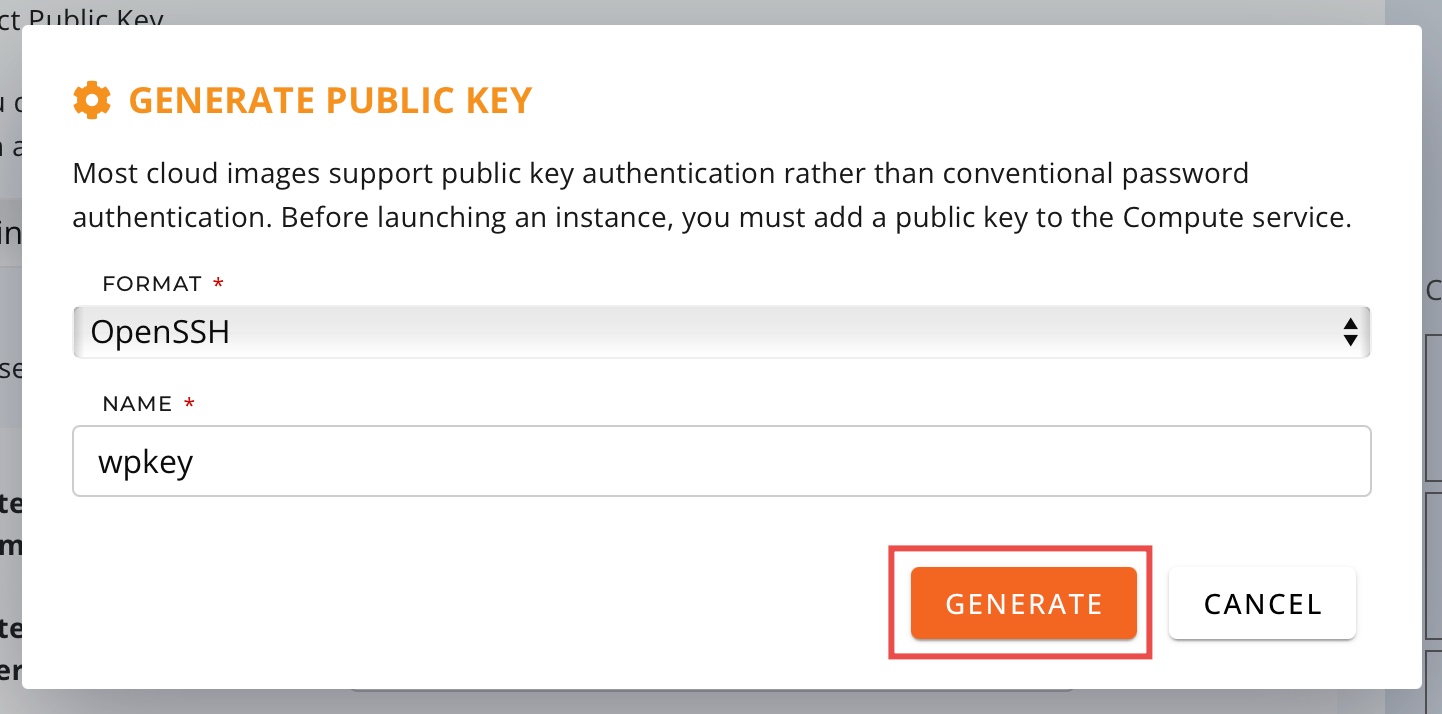
Step 4: Select Public Key
You can select an existing key pair to use by choosing from the dropdown menu. If you do not have any public keys yet, you can either generate or import one.
- Click generate.
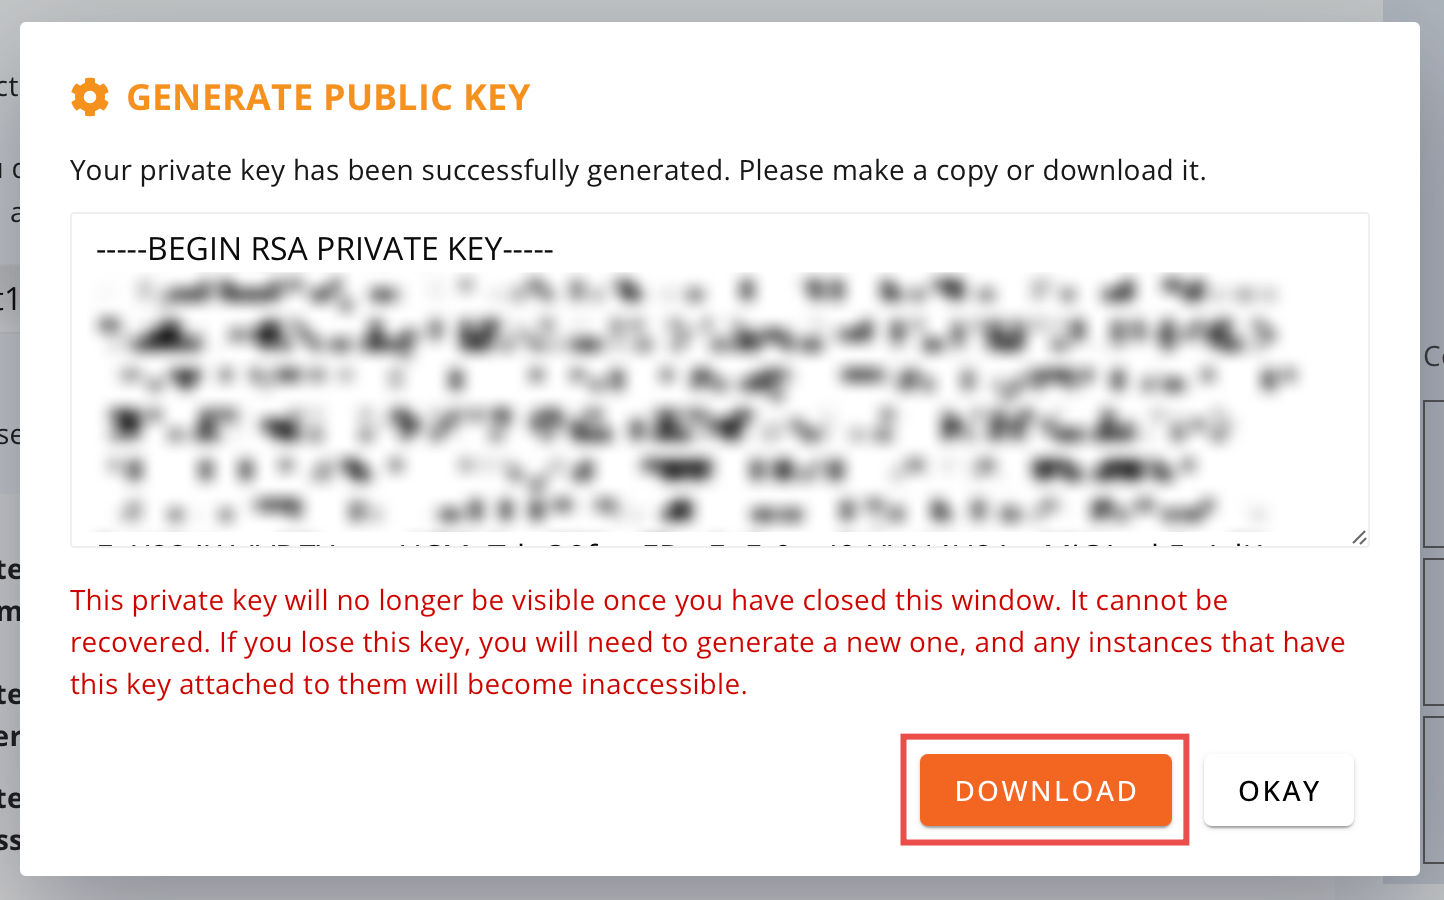
- Enter a name for the key pair and click Generate.
- Download the private key (.pem file) and store it securely.
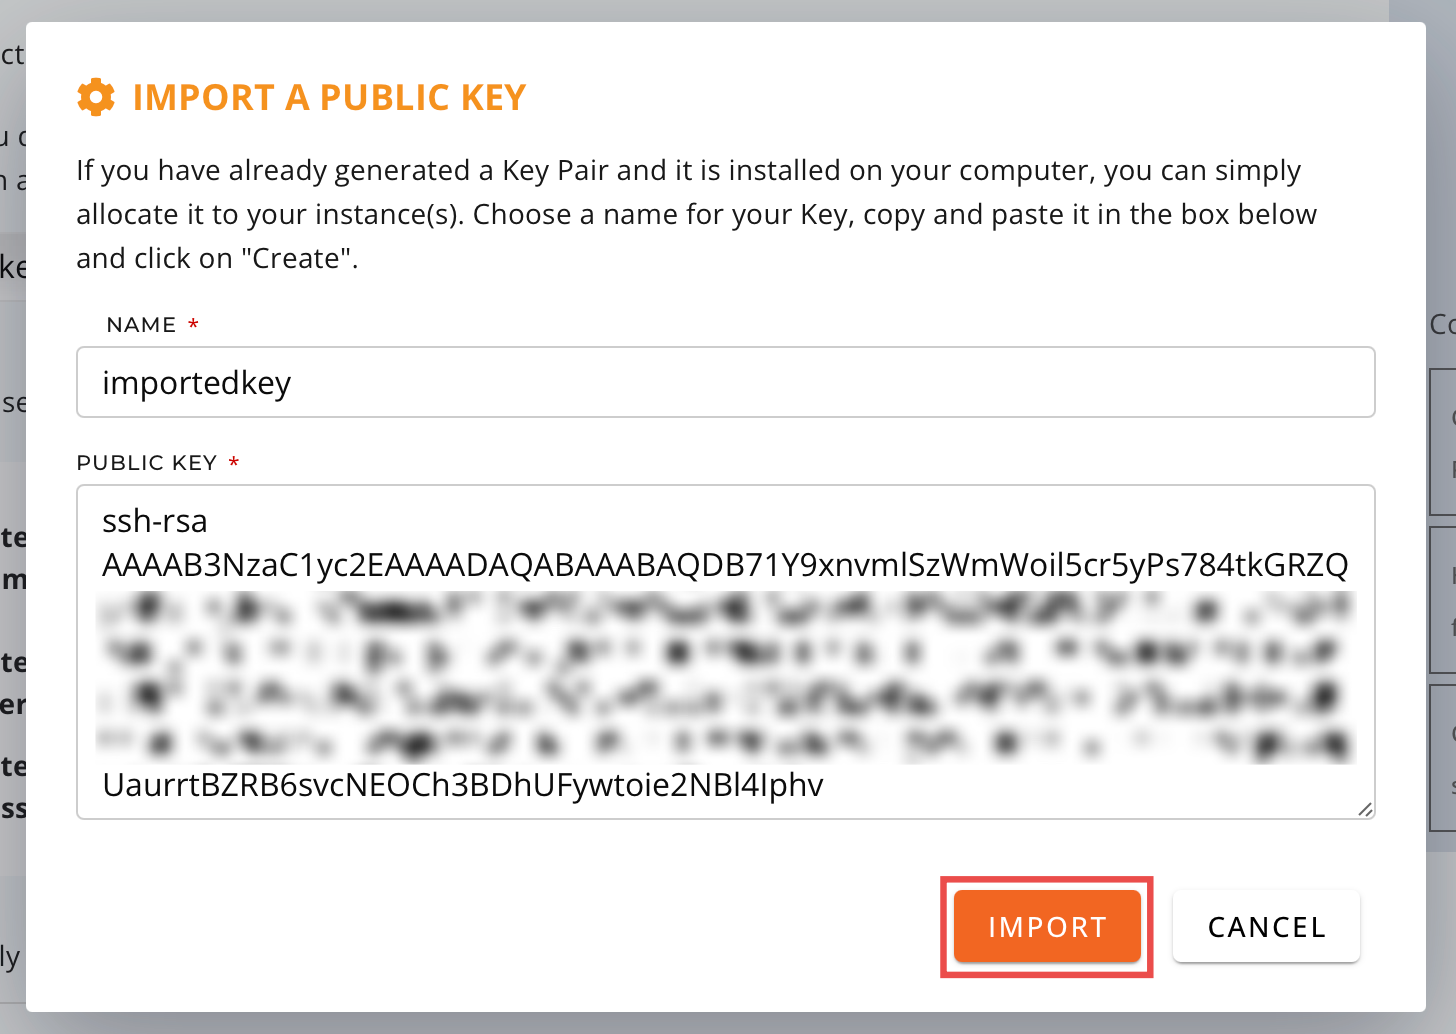
- Click import.

- Name your public key and paste the contents of your .pub file in the box. Click Import.
Step 5: Complete Application Credentials
- Enter your domain and the necessary credentials.
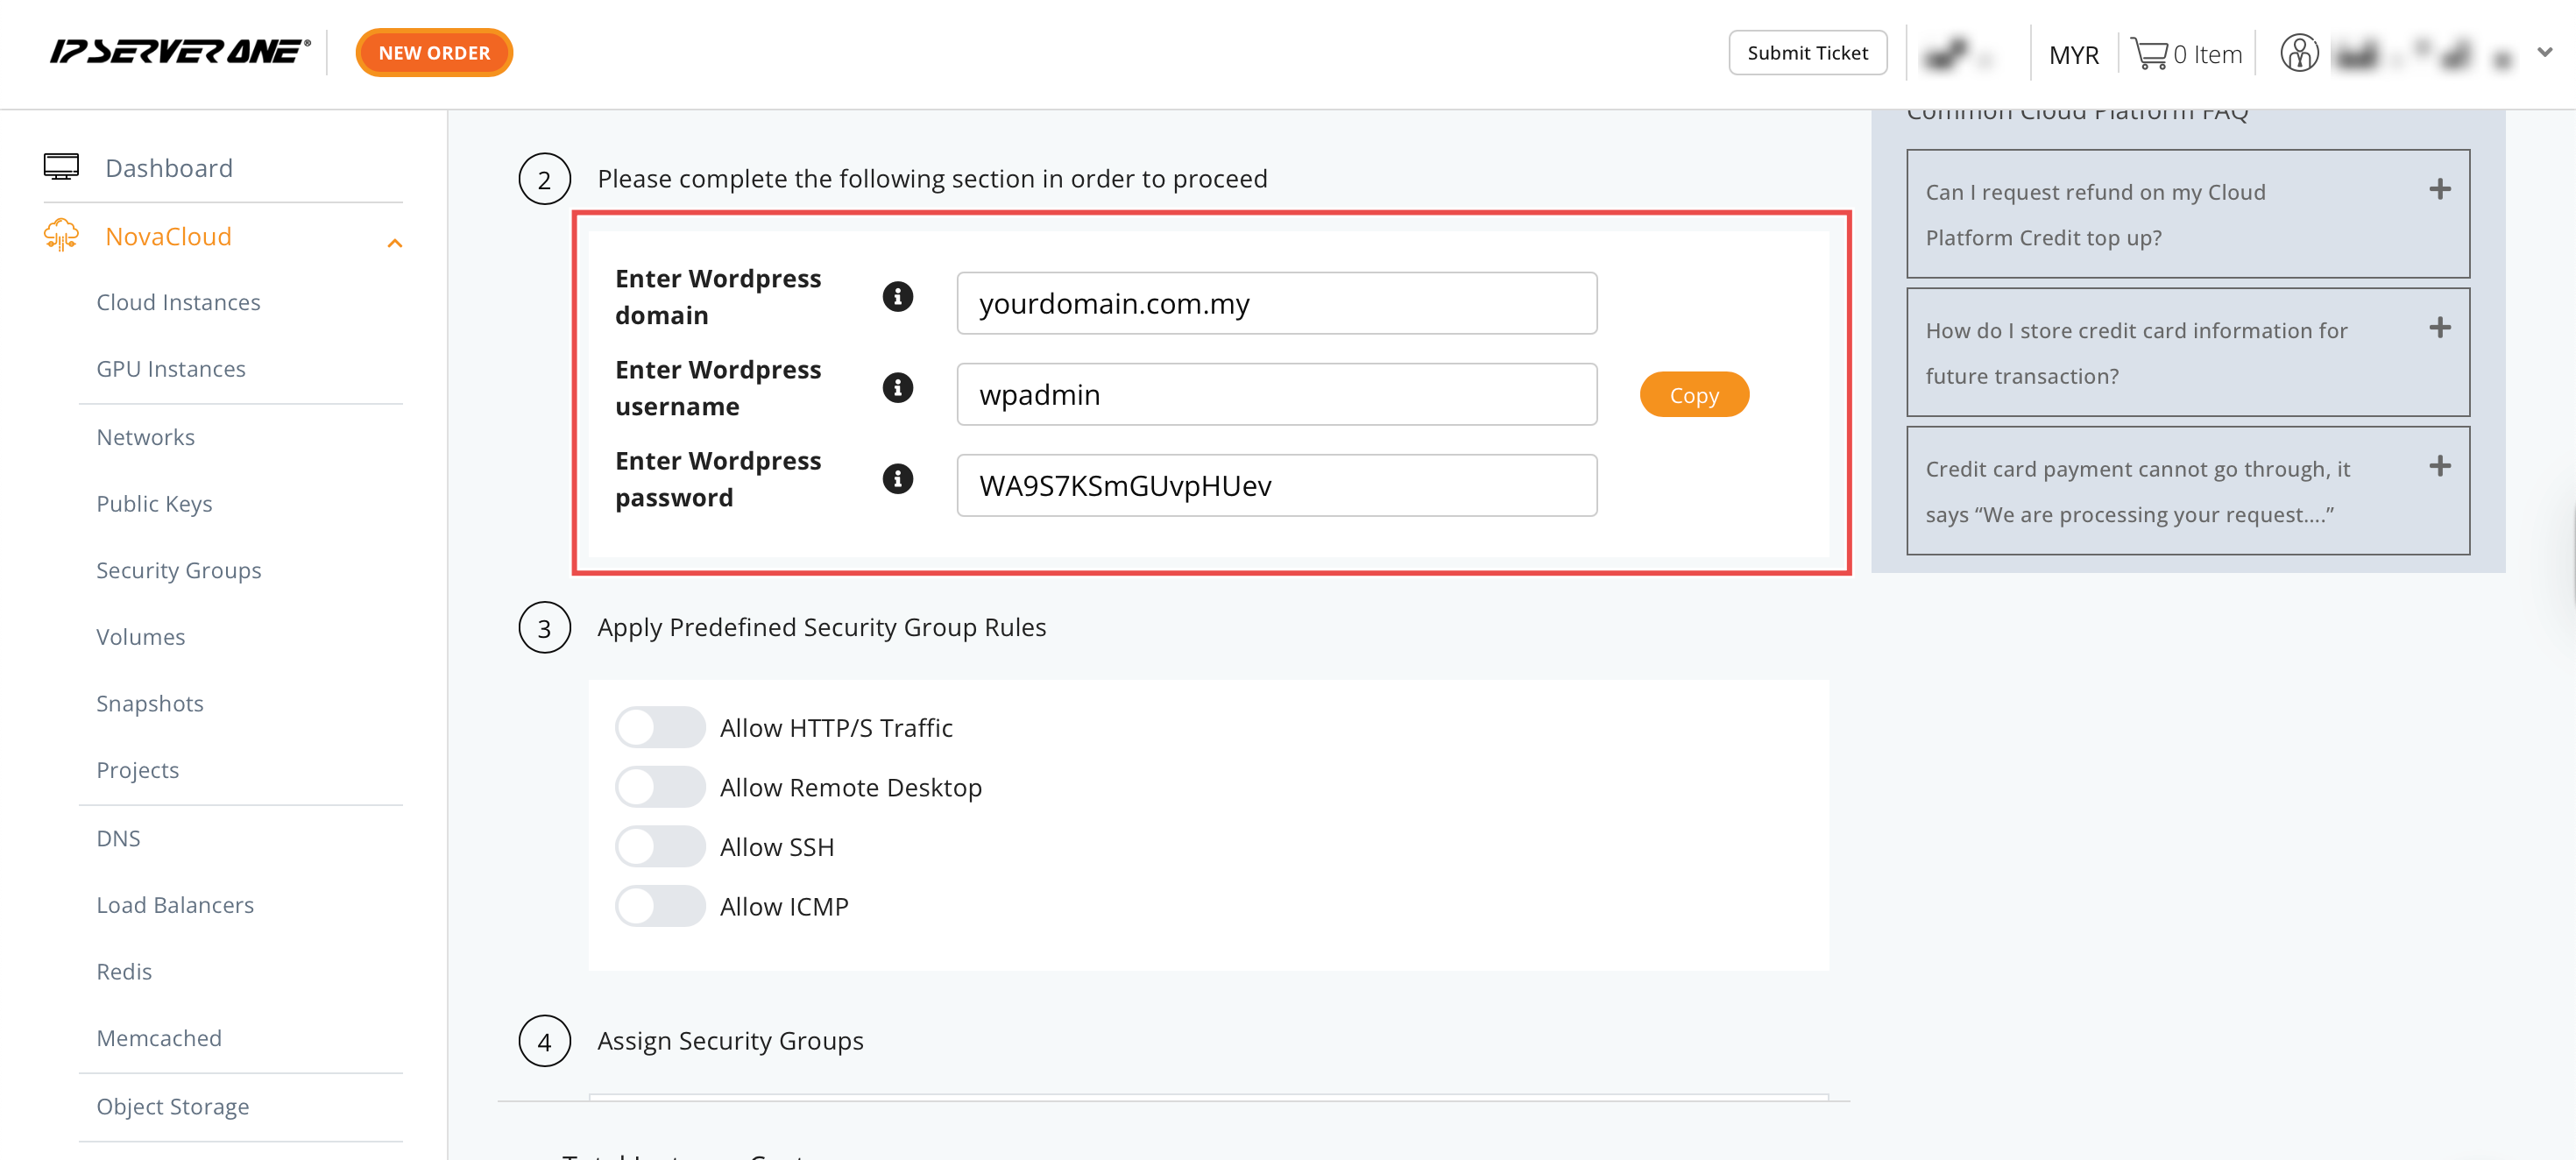
Step 6: Apply Predefined Security Group Rules and Assign Security Groups
Apply any predefined security group rules as needed. However, it is mandatory to apply the following for your WordPress application:
- Allow HTTP/S Traffic
- Allow SSH
You are not required to select a security group, as it will automatically assign a default security group. If you want to configure your security group at a later time, you may refer to this Knowledge Base.
Afterwards, click Create.
Step 7: Review Instance Costs and ‘Create’
Verify the total cost of your instance and click Create. A pop-up of the confirmation will appear, you can view the details of your instance by clicking Instances.
Step 8: Verify the WordPress website
You can verify whether your website has successfully been created by pasting the IP Address of the instance in your browser as:
http://ip-address

Conclusion
Launching a WordPress instance through the IP ServerOne Customer Portal is a streamlined process using the NovaCloud > Instances One-Click Application feature. This functionality allows users to deploy a fully configured WordPress website within minutes without needing technical expertise or manual server configuration. By selecting appropriate specifications and security settings, users can quickly establish a professional web presence while ensuring their instance is set up with best practices in mind.
For additional instance management tasks such as scaling resources or managing security groups, refer to related guides within the Customer Portal documentation.
Should you have any inquiries about the guidelines, please feel free to open a ticket through your portal account or contact us at support@ipserverone.com. We’ll be happy to assist you further.