Search Our Database
How to Configure POP Settings on Gmail Web
Introduction:
Managing your professional communications effectively requires precise control over how your emails are retrieved and stored. For Gmail users accessing their accounts via the web interface, configuring POP (Post Office Protocol) settings is a vital step in tailoring your Email Hosting experience to your specific workflow.
By utilizing the Gmail web settings, you can define your POP status and determine exactly what happens to your messages—such as whether they are archived or deleted—once they have been accessed by your chosen mail client. This configuration is performed by navigating to the “See all Settings” menu and accessing the “Forwarding and POP/IMAP” tab, where you can finalize your preferences and save changes. This level of administrative control ensures your email environment is managed with the personalized care and attention to detail required for reliable business operations.
Prerequisites:
- User must possess a fully registered and active Gmail account.
- The procedure explicitly requires accessing the Gmail Web interface.
- User should understand that POP (Post Office Protocol) is designed to download mail from the server to a single device. Unlike IMAP, which syncs across all devices, POP is best for users who prefer to manage their Email Hosting archives locally.
Step-by-step Guide:
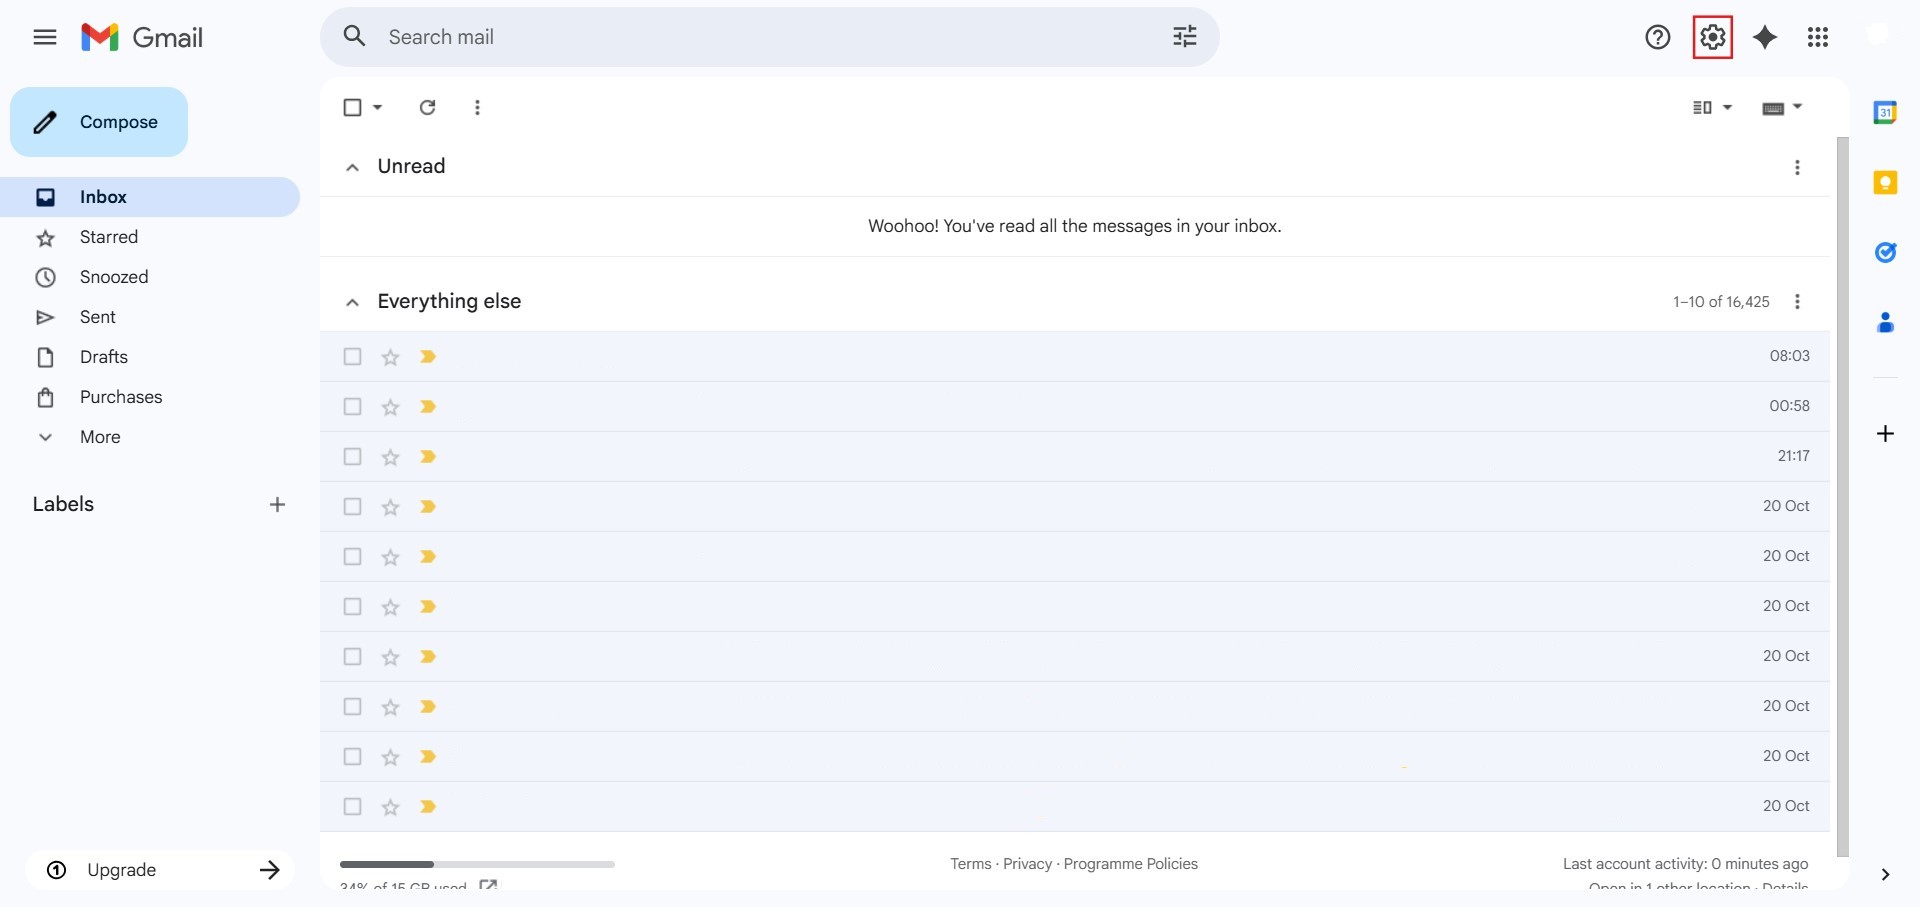
Step 1: Access Settings
- The initial action required is to Click setting.
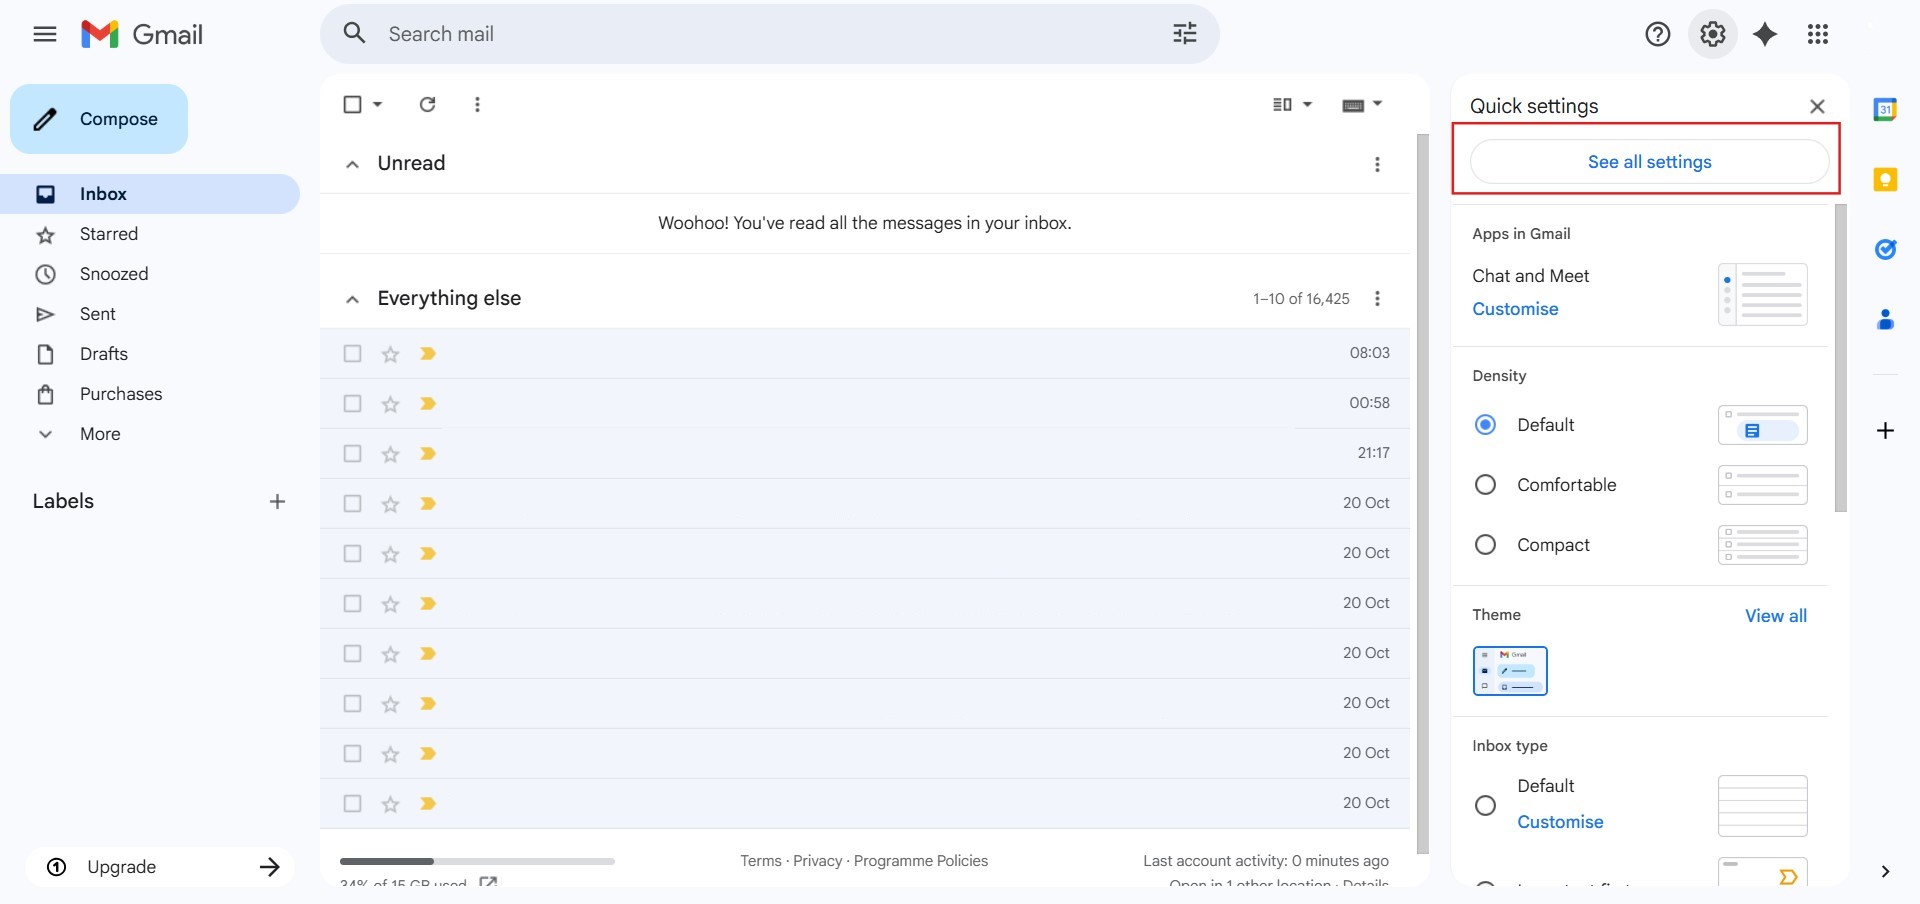
Step 2: Navigate to All Settings
- After clicking “setting,” proceed to select See all Settings.
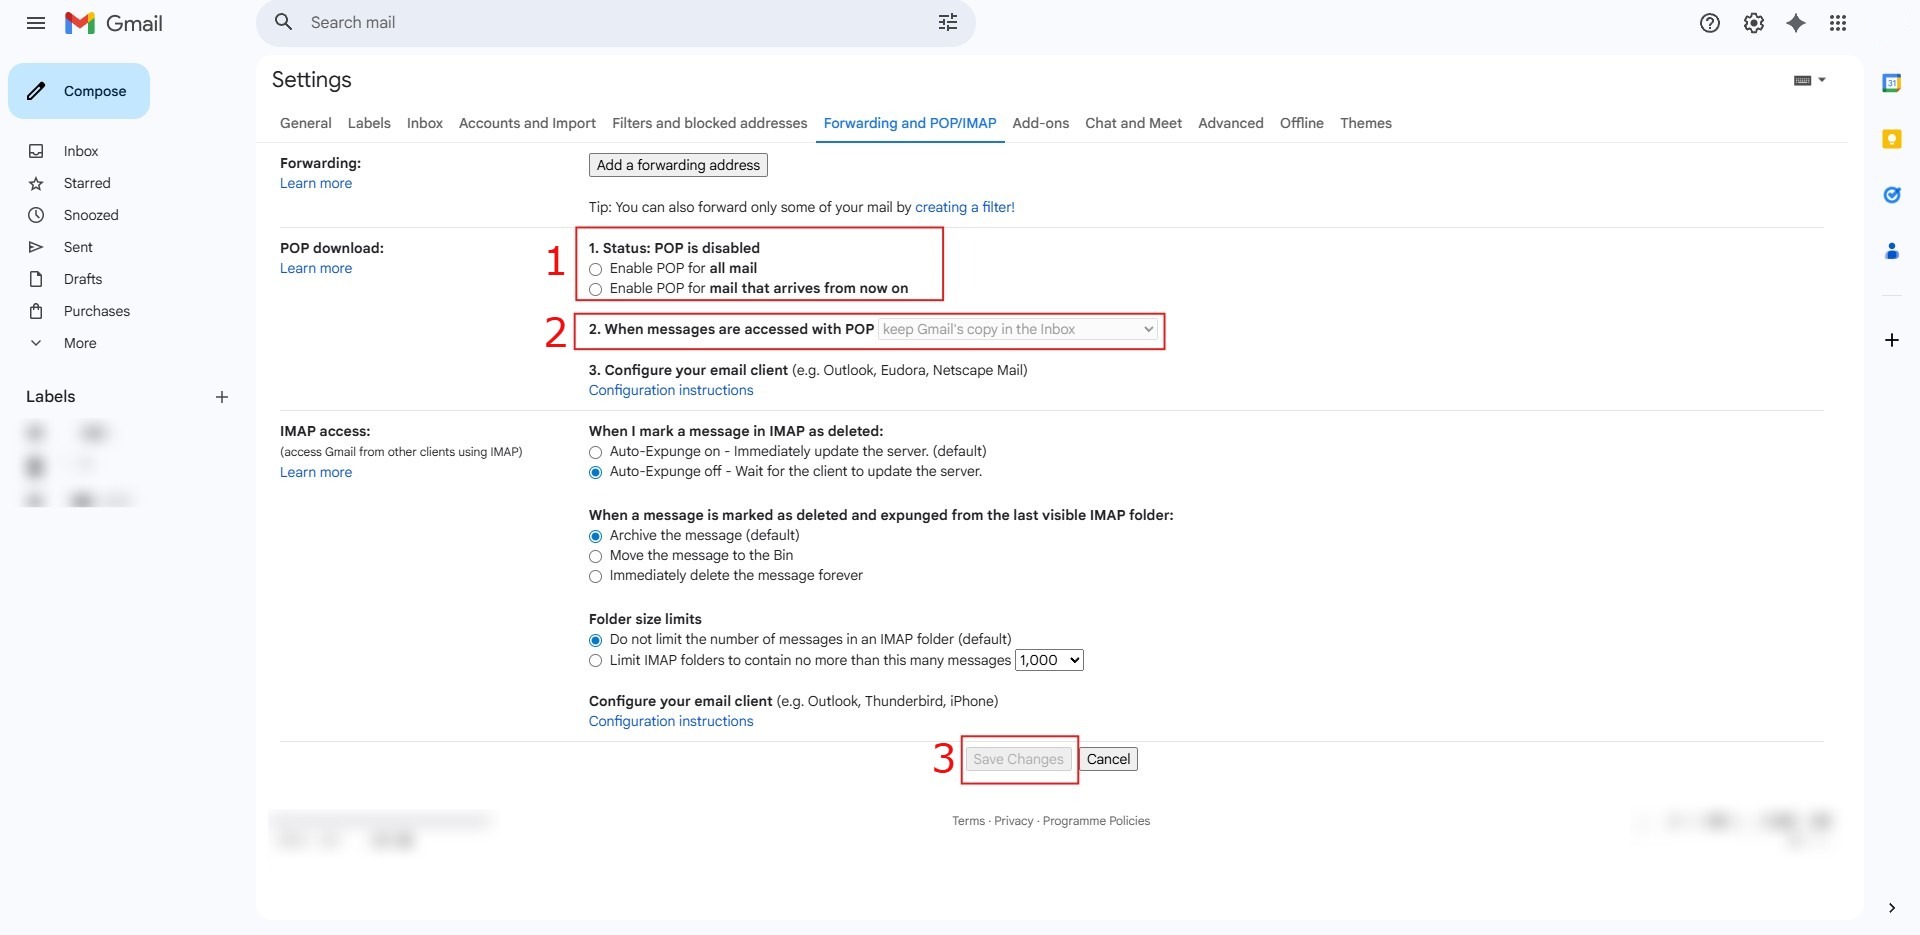
Step 3: Navigate to POP/IMAP
- Click on the tab labeled “Forwarding and POP/IMAP” located in the top menu bar of the settings page.

Step 4: Configure POP Settings
- Under the “POP Download” section, select “Enable POP for all mail” or “Enable POP for mail that arrives from now on.”
- Use the dropdown menu to decide what happens when messages are accessed with POP (e.g., keep Gmail’s copy in the Inbox).
- Scroll to the bottom of the page and click the “Save Changes” button to finalize your configuration.
Conclusion:
By following the steps to adjust your Forwarding and POP/IMAP configurations, you have successfully customized how your professional communications are handled within the Gmail web interface. This process provides you with the administrative control necessary to manage your Email Hosting services effectively, ensuring that your messages are archived or retrieved according to your specific workflow.
To maintain a reliable email environment, keep these final considerations in mind:
- Finalizing Preferences: Your configuration is only complete once you click “Save Changes” at the bottom of the settings menu; failing to do so will result in the system reverting to its previous state.
- Message Retention: Periodically review your settings for how messages are handled after access to ensure you are not inadvertently deleting important server-side records or reaching storage limits.