Search Our Database
How to compose an email in the New Roundcube interface
Introduction
Roundcube is a widely used, browser-based IMAP email client designed for flexibility, ease of use, and modern webmail access. With the release of its latest interface update, Roundcube introduces a more intuitive layout that enhances user accessibility and responsiveness across devices. One of the primary features users interact with is the ability to compose and send emails.
In the updated interface, the compose experience has been redesigned with streamlined navigation, improved usability, and a cleaner layout. This is particularly beneficial for users transitioning from the legacy version, where composing an email relied on a more static design. The new compose panel now slides in from the right and offers clearly visible icons for attachments, formatting, priority options, and contact lookups.
This guide explains how to compose and send an email in the new Roundcube webmail interface. It is intended for users who have already logged into their Roundcube account and are using the updated user interface released with version 1.6 or newer. It also highlights relevant tips and common areas of confusion for users familiar with the previous interface.
Prerequisites
- Access to Roundcube Webmail with the new interface enabled (Version 1.6+).
- A valid email account configured on the server.
- Logged into Roundcube via a supported web browser (e.g., Chrome, Firefox, Edge).
- JavaScript enabled in the browser for full functionality.
Step-by-step Guide
Step 1: Composing Email
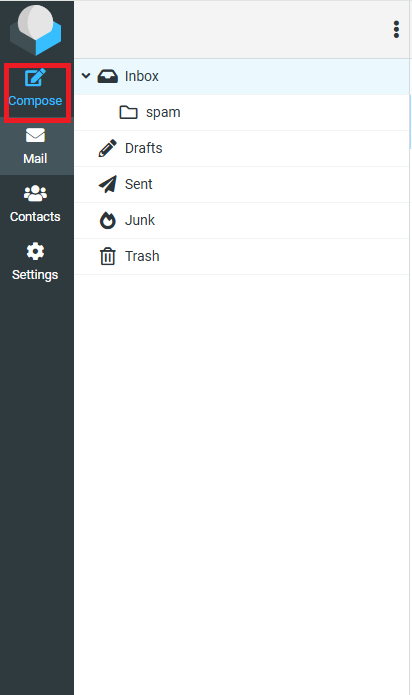
- Login into the Roundcube.
The new Roundcube interface
- On the left panel, Click the “Compose” Button
Step 2: Fill in Recipient Information
In the compose panel:
- Enter the recipient’s email address in the To field.
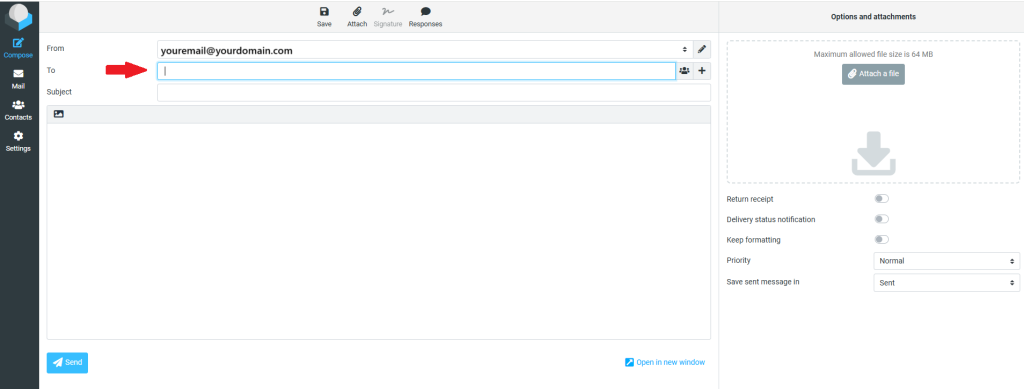
- Add additional recipients in Cc or Bcc if needed by clicking the the “+” icon corresponding options


- Use the address book icon to search and insert contacts.
Step 3: Write a Subject and Message
- Enter a clear subject line in the Subject field.
- Click inside the large blank space to compose your message.
- Use the formatting toolbar at the top to apply bold, italic, lists, links, etc.
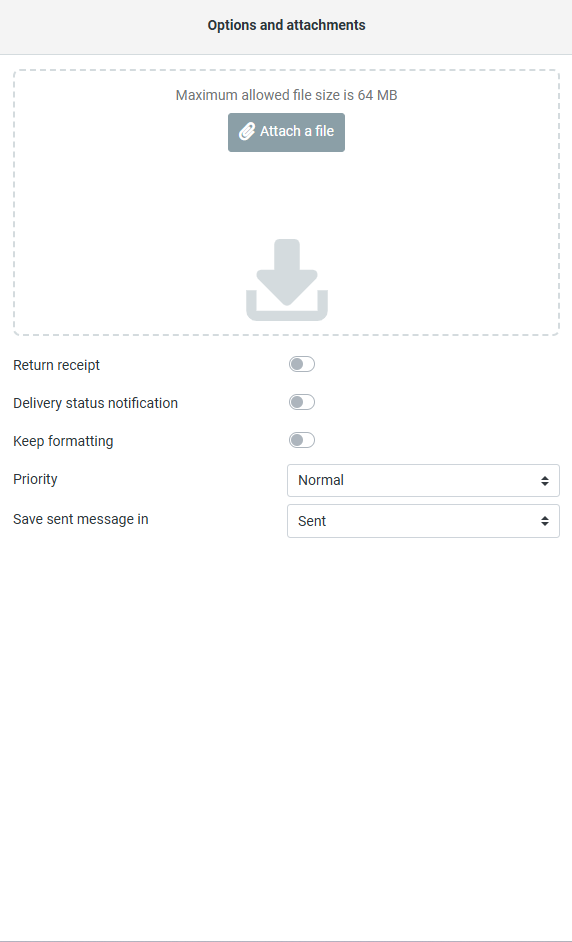
Step 4: Add Attachments (Optional)
On the right panel, click the “Attach a file” button to attach files. You can also drag and drop files directly into the box.
Step 5: Send the Email
Once your email is ready:
- Review for accuracy.
- Click the “Send” button in the upper right corner of the compose panel.
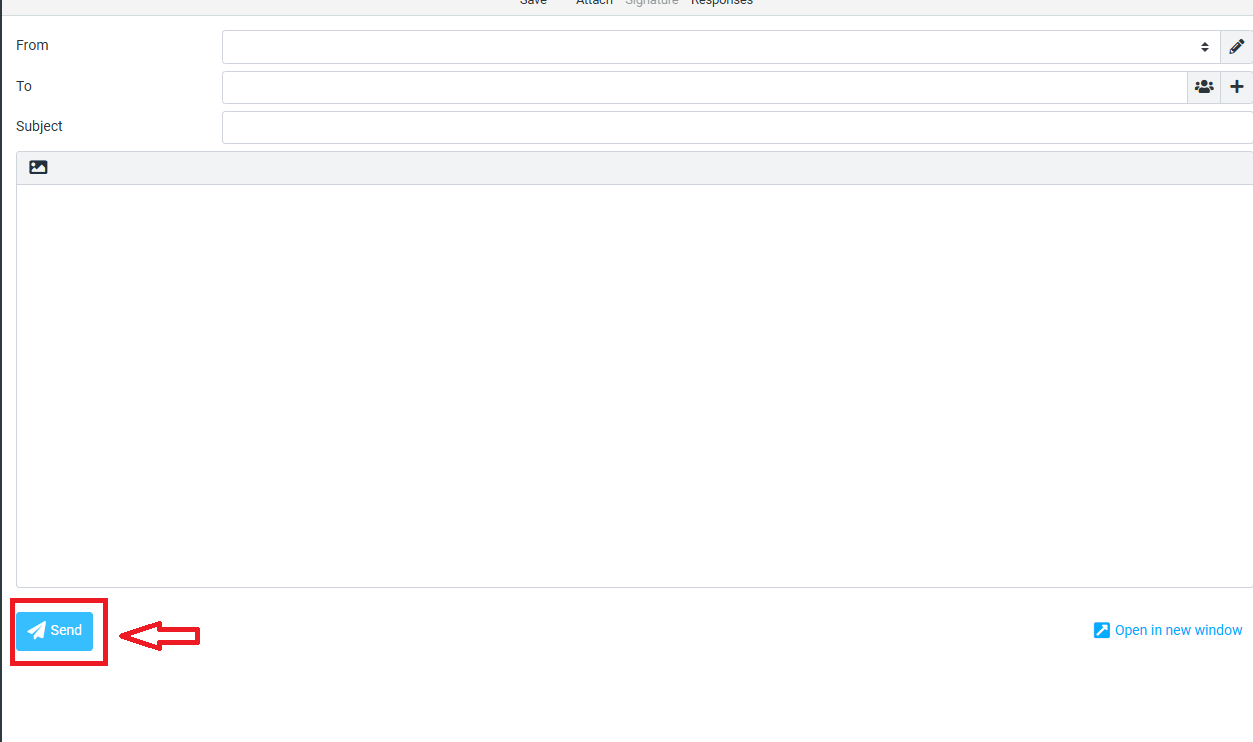
If the message is sent successfully, the panel will close, and the email will appear in your Sent folder.
Conclusion
Composing an email in the new Roundcube interface is now more user-friendly and efficient. With a responsive layout, modern toolbar, and streamlined actions, the updated experience simplifies everyday tasks for both new and experienced users. All essential functions — from adding recipients to formatting and attachments — are just a click away in the updated interface.
Should you have any inquiries about the guidelines, please feel free to open a ticket through your portal account or contact us at support@ipserverone.com. We’ll be happy to assist you further.