Search Our Database
How to Change Quota for FTP Account in cPanel
Introduction
This Knowledge Base article provides a step-by-step guide on How to Change the Quota for FTP Account in cPanel. Adjusting the quota allows you to manage how much storage space each FTP account can use, which is useful for limiting or expanding access as needed. This helps you allocate server resources more effectively and maintain better control over how storage is utilized across different users.
Prerequisite
- Access to your cPanel login page.
- An existing FTP account already created in your cPanel account.
Step-by-Step Guide
Step 1: Log in to cPanel
- Access and log in to your cPanel account using your username and password.
Step 2: Open FTP Accounts
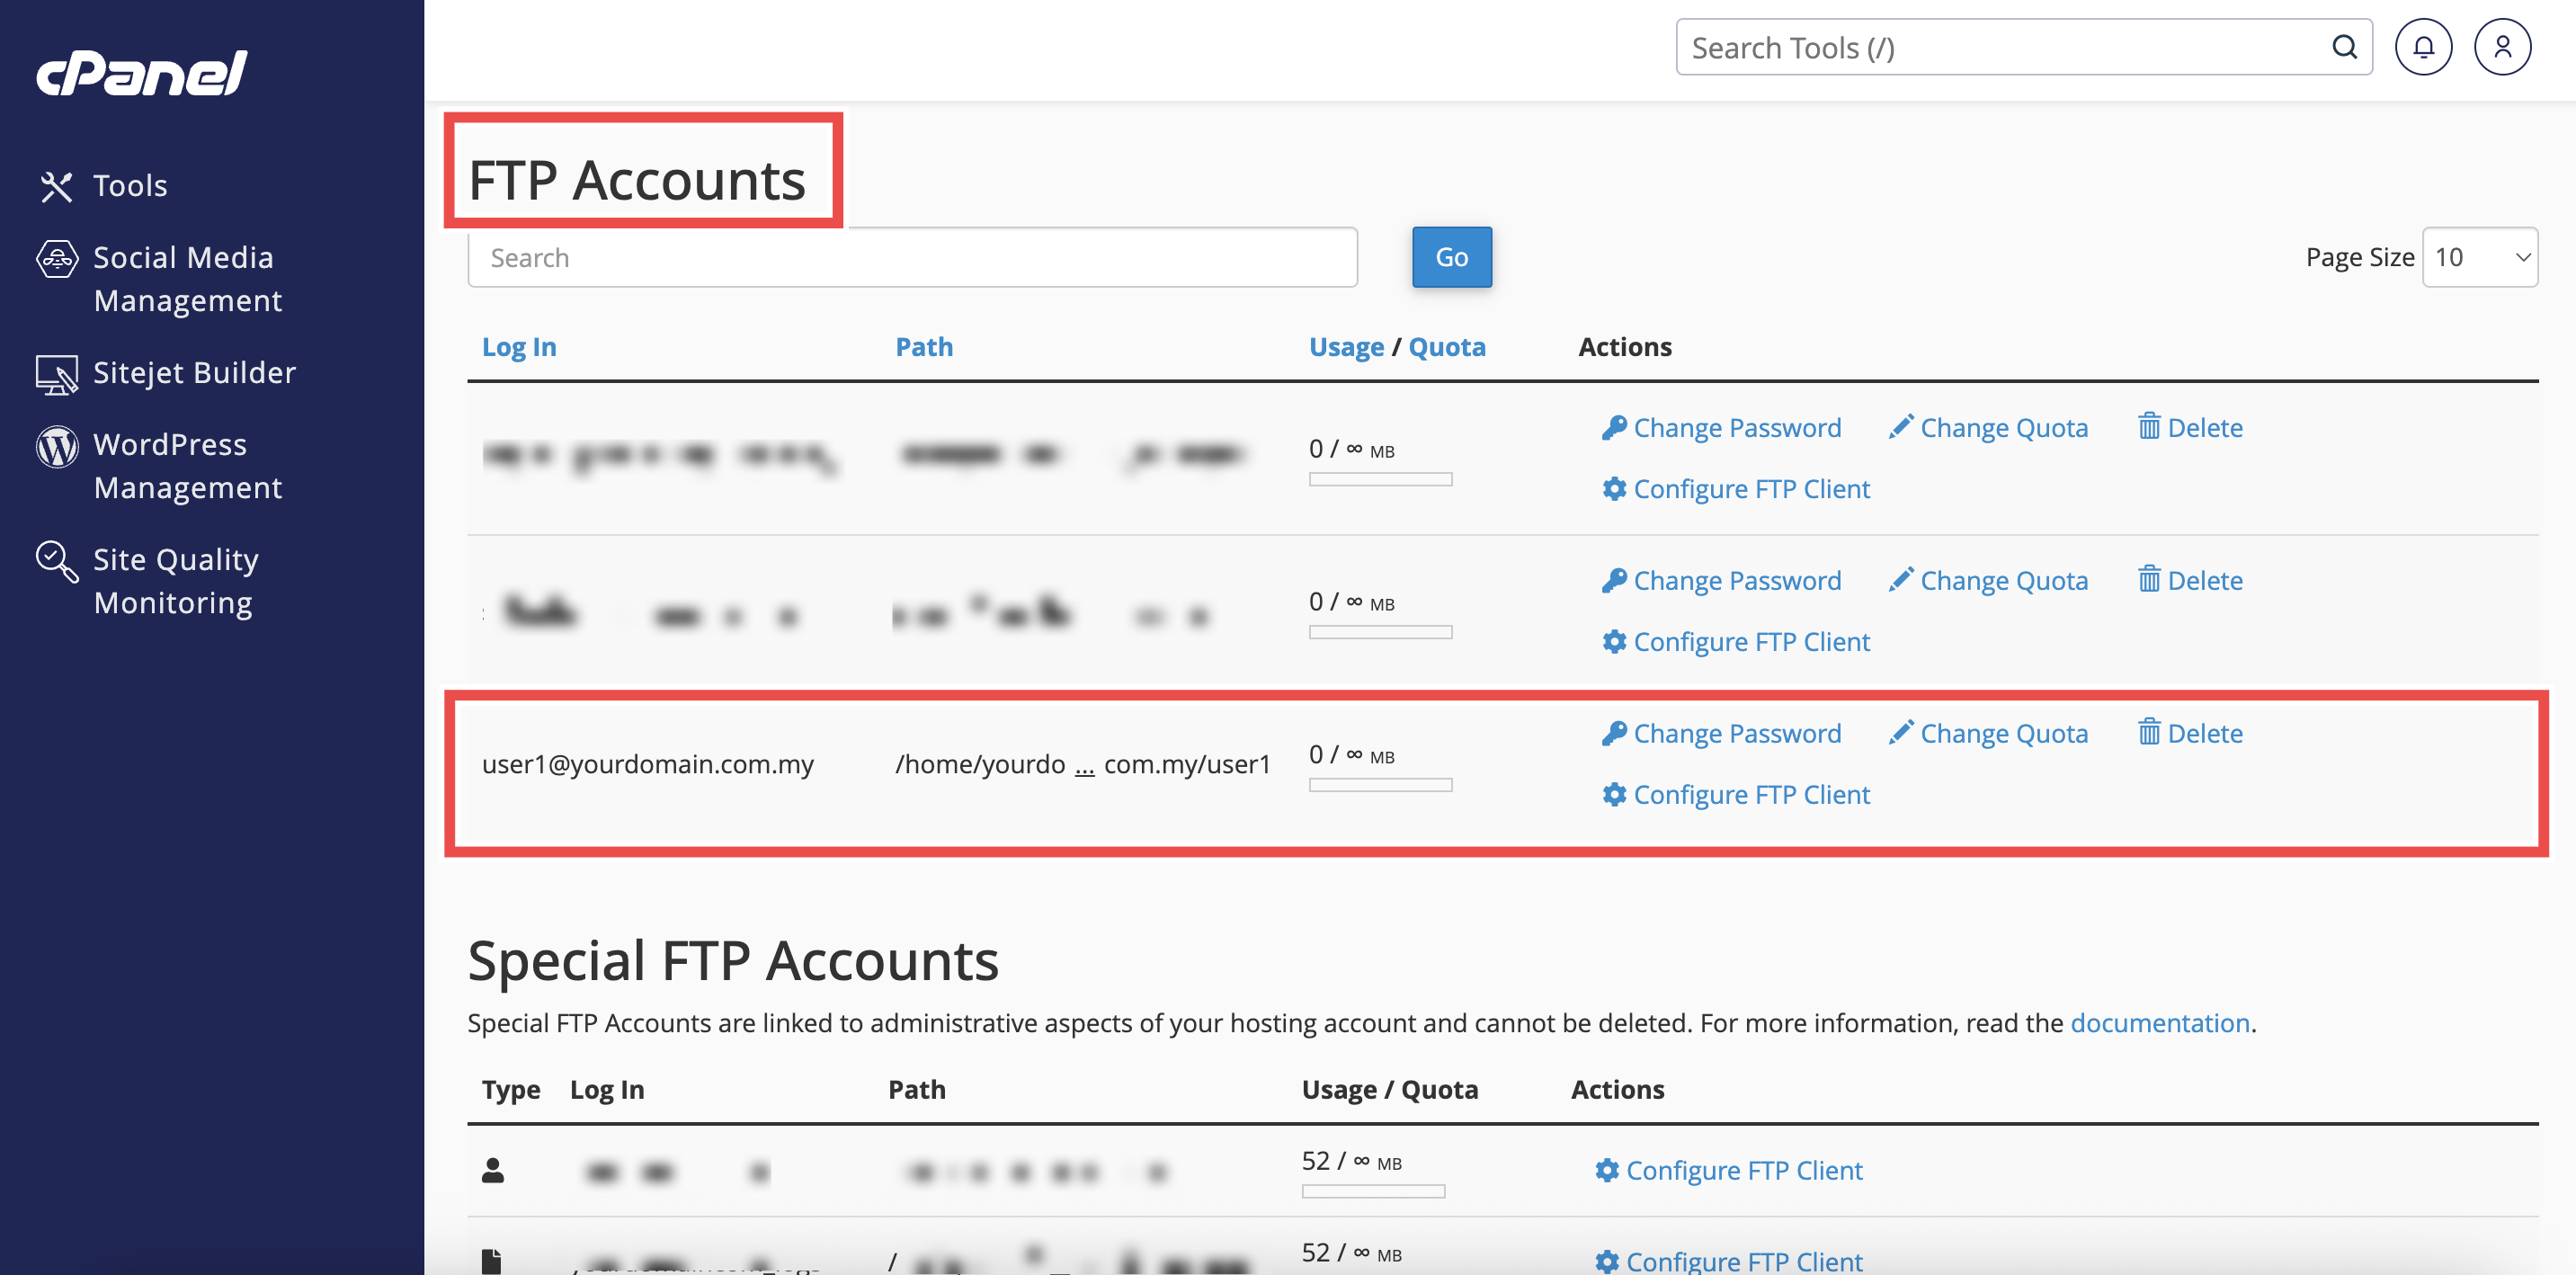
- In the Home page, under Files, click FTP Accounts.

Step 3: Locate the FTP Account
- In the FTP Accounts table, find the account whose quota you want to change.
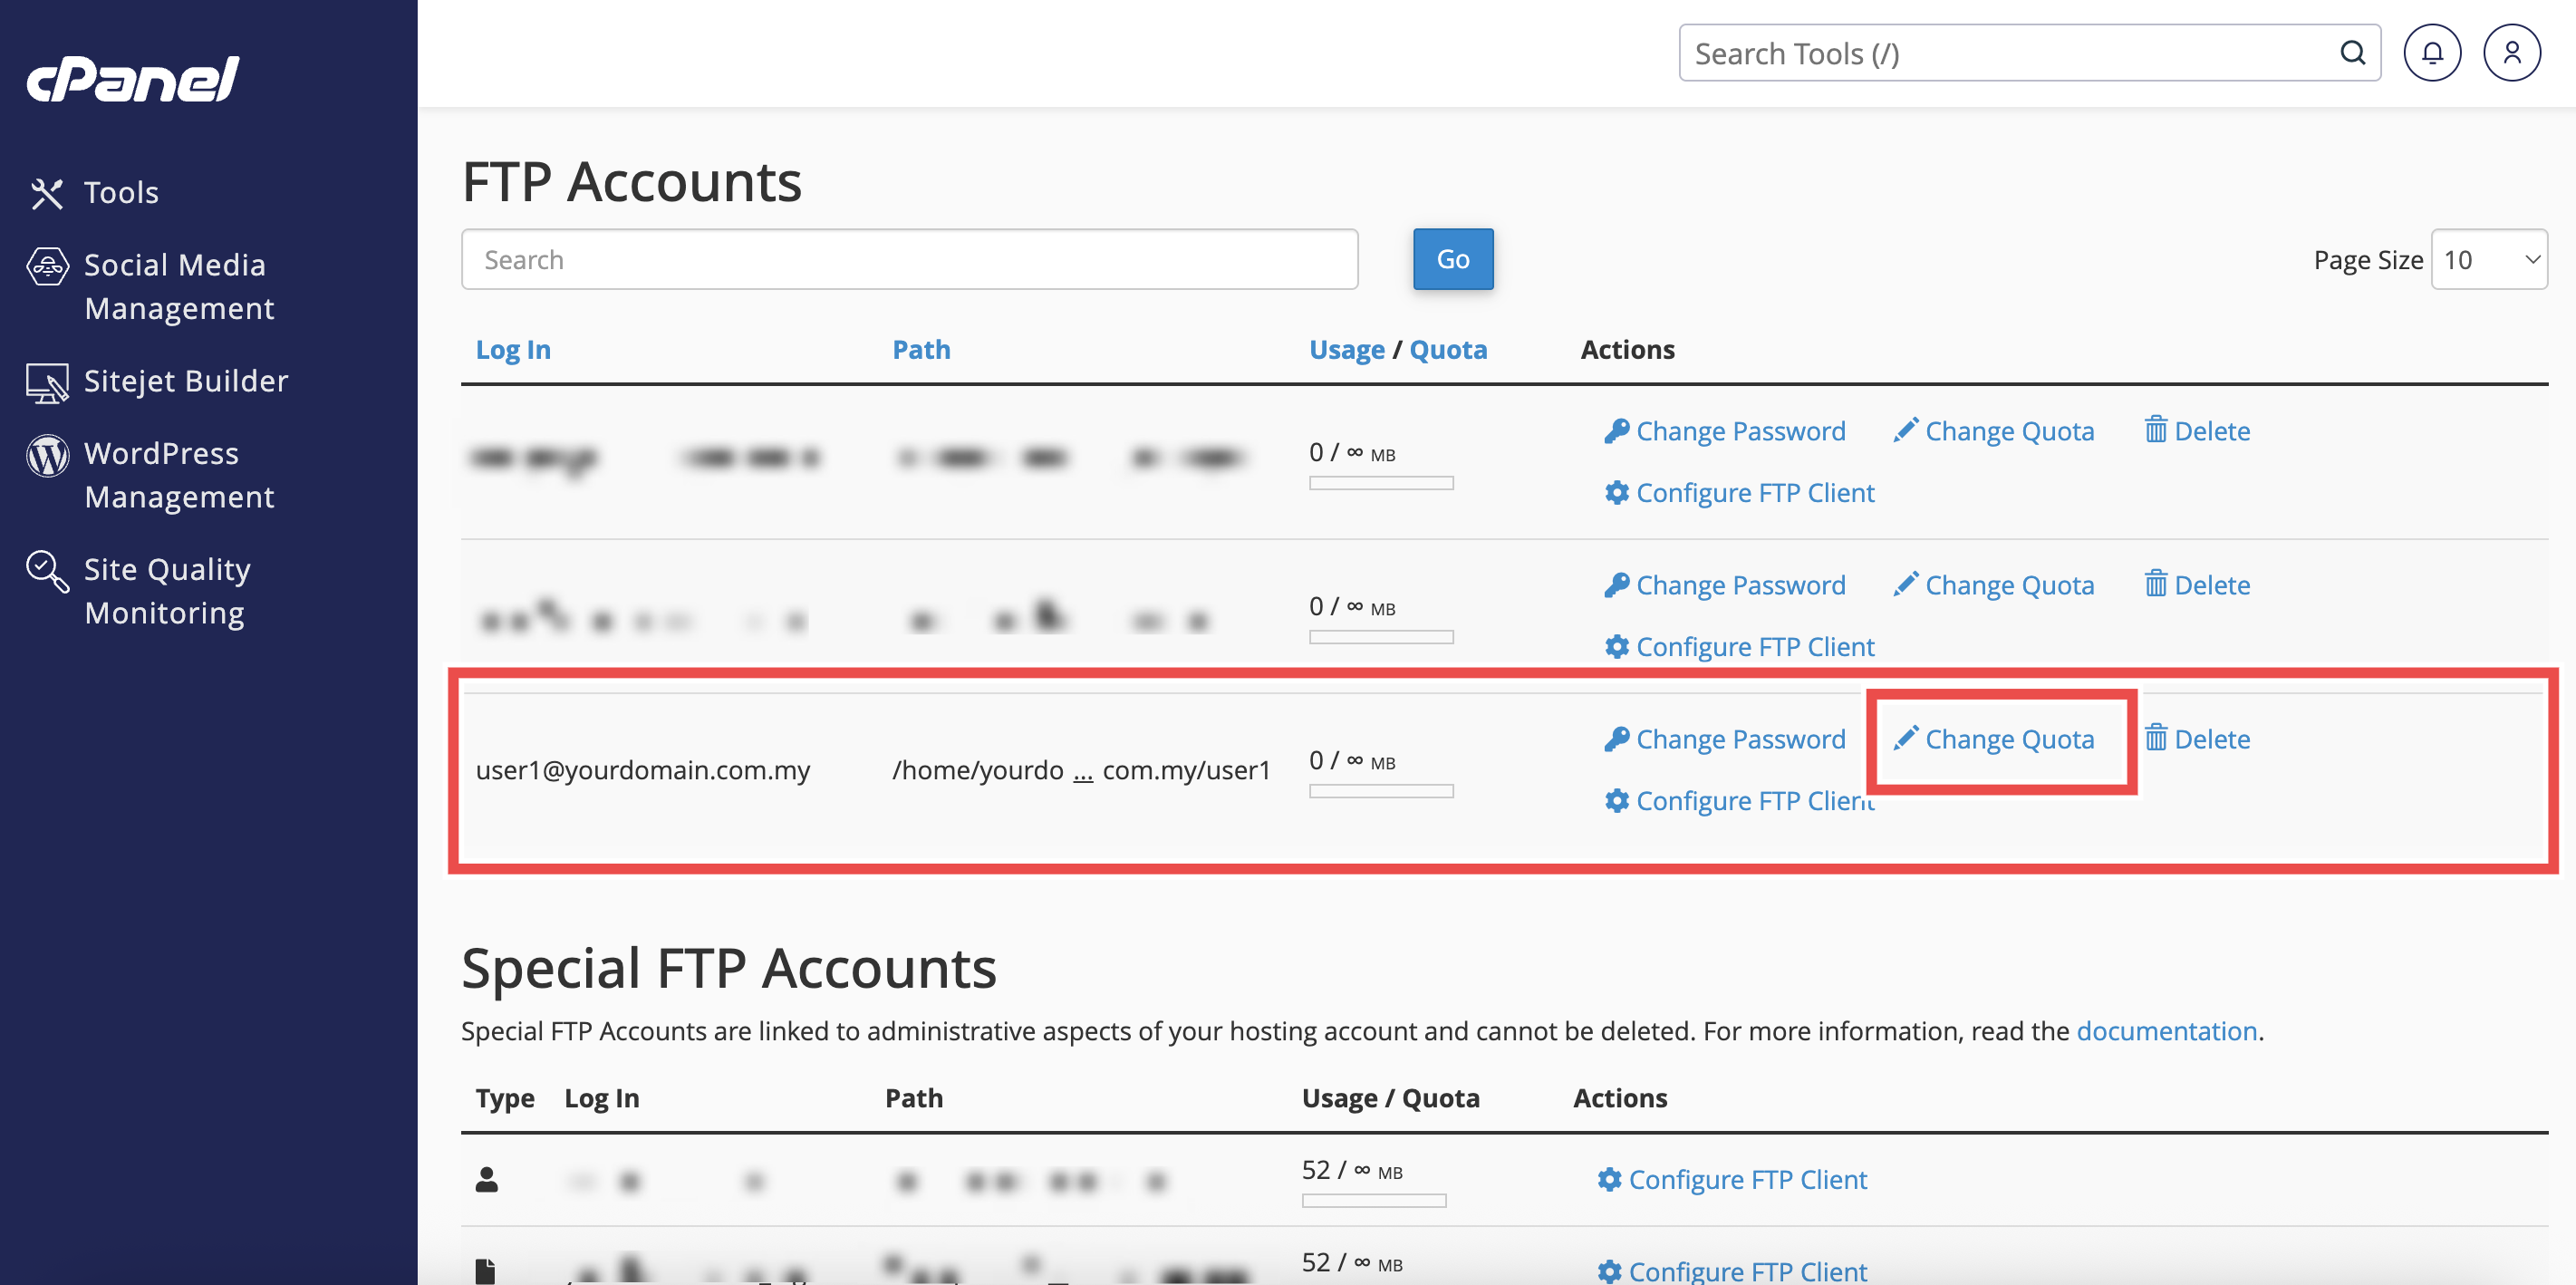
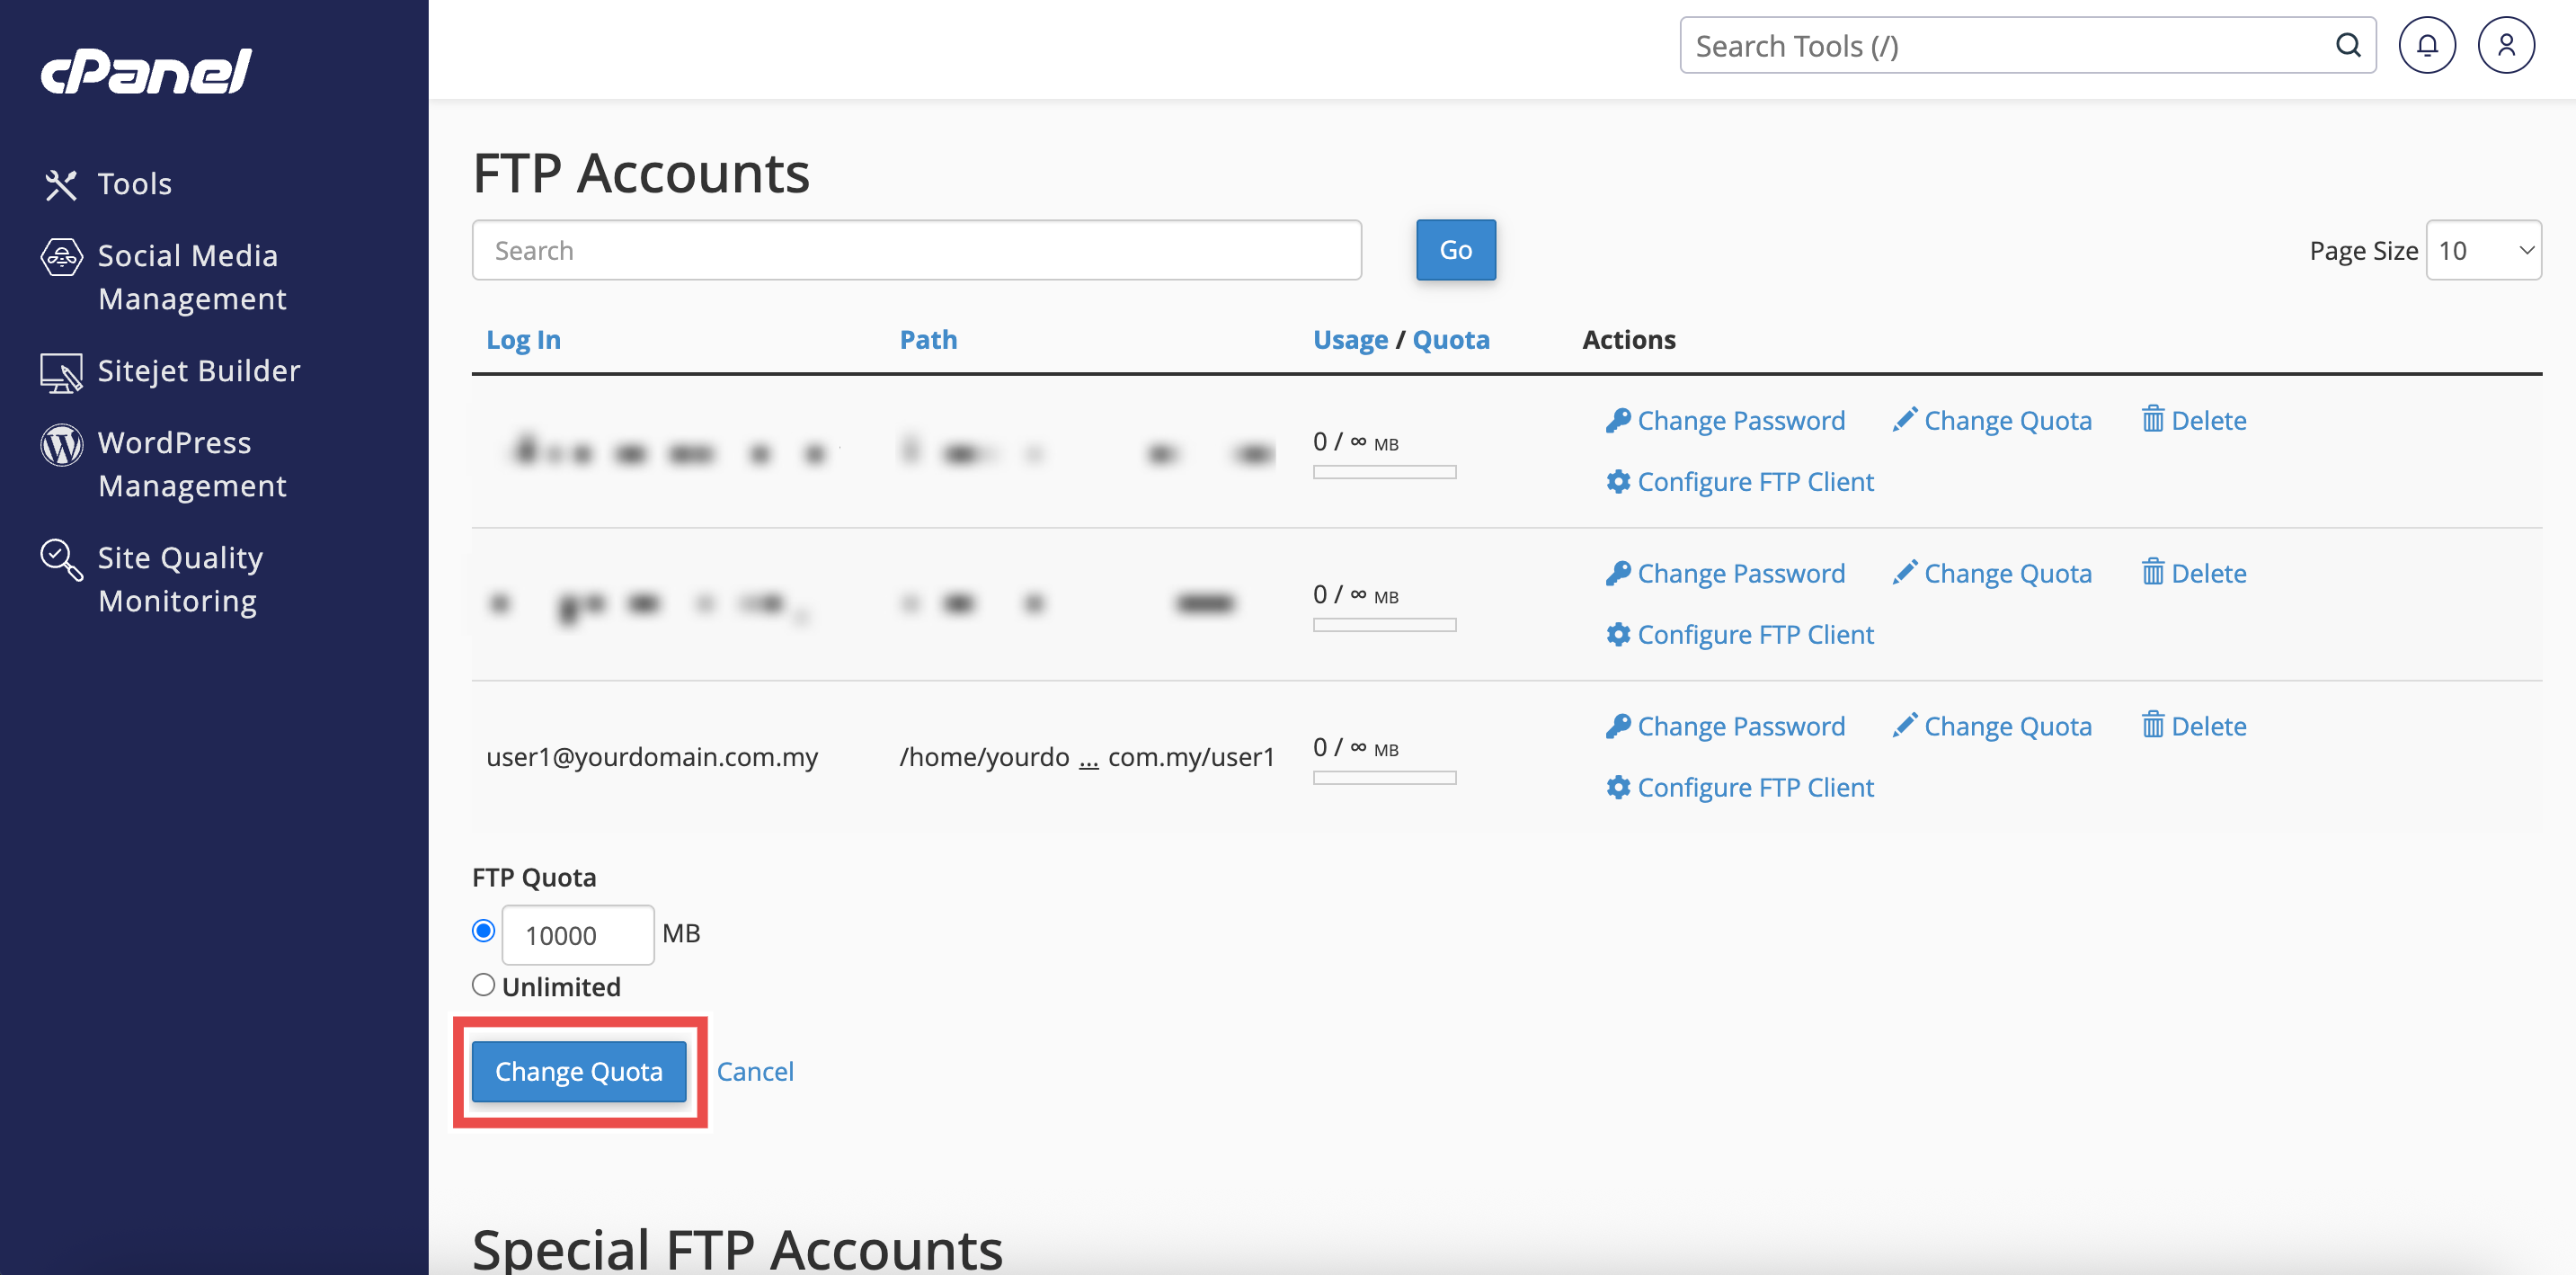
Step 4: Change Quota
- Next to the selected FTP account, click Change Quota.
- Enter the new quota in MB, or select Unlimited if you want no restriction. For example: If the account quota is currently set to Unlimited, you can change it to 10000 MB to set a limit.
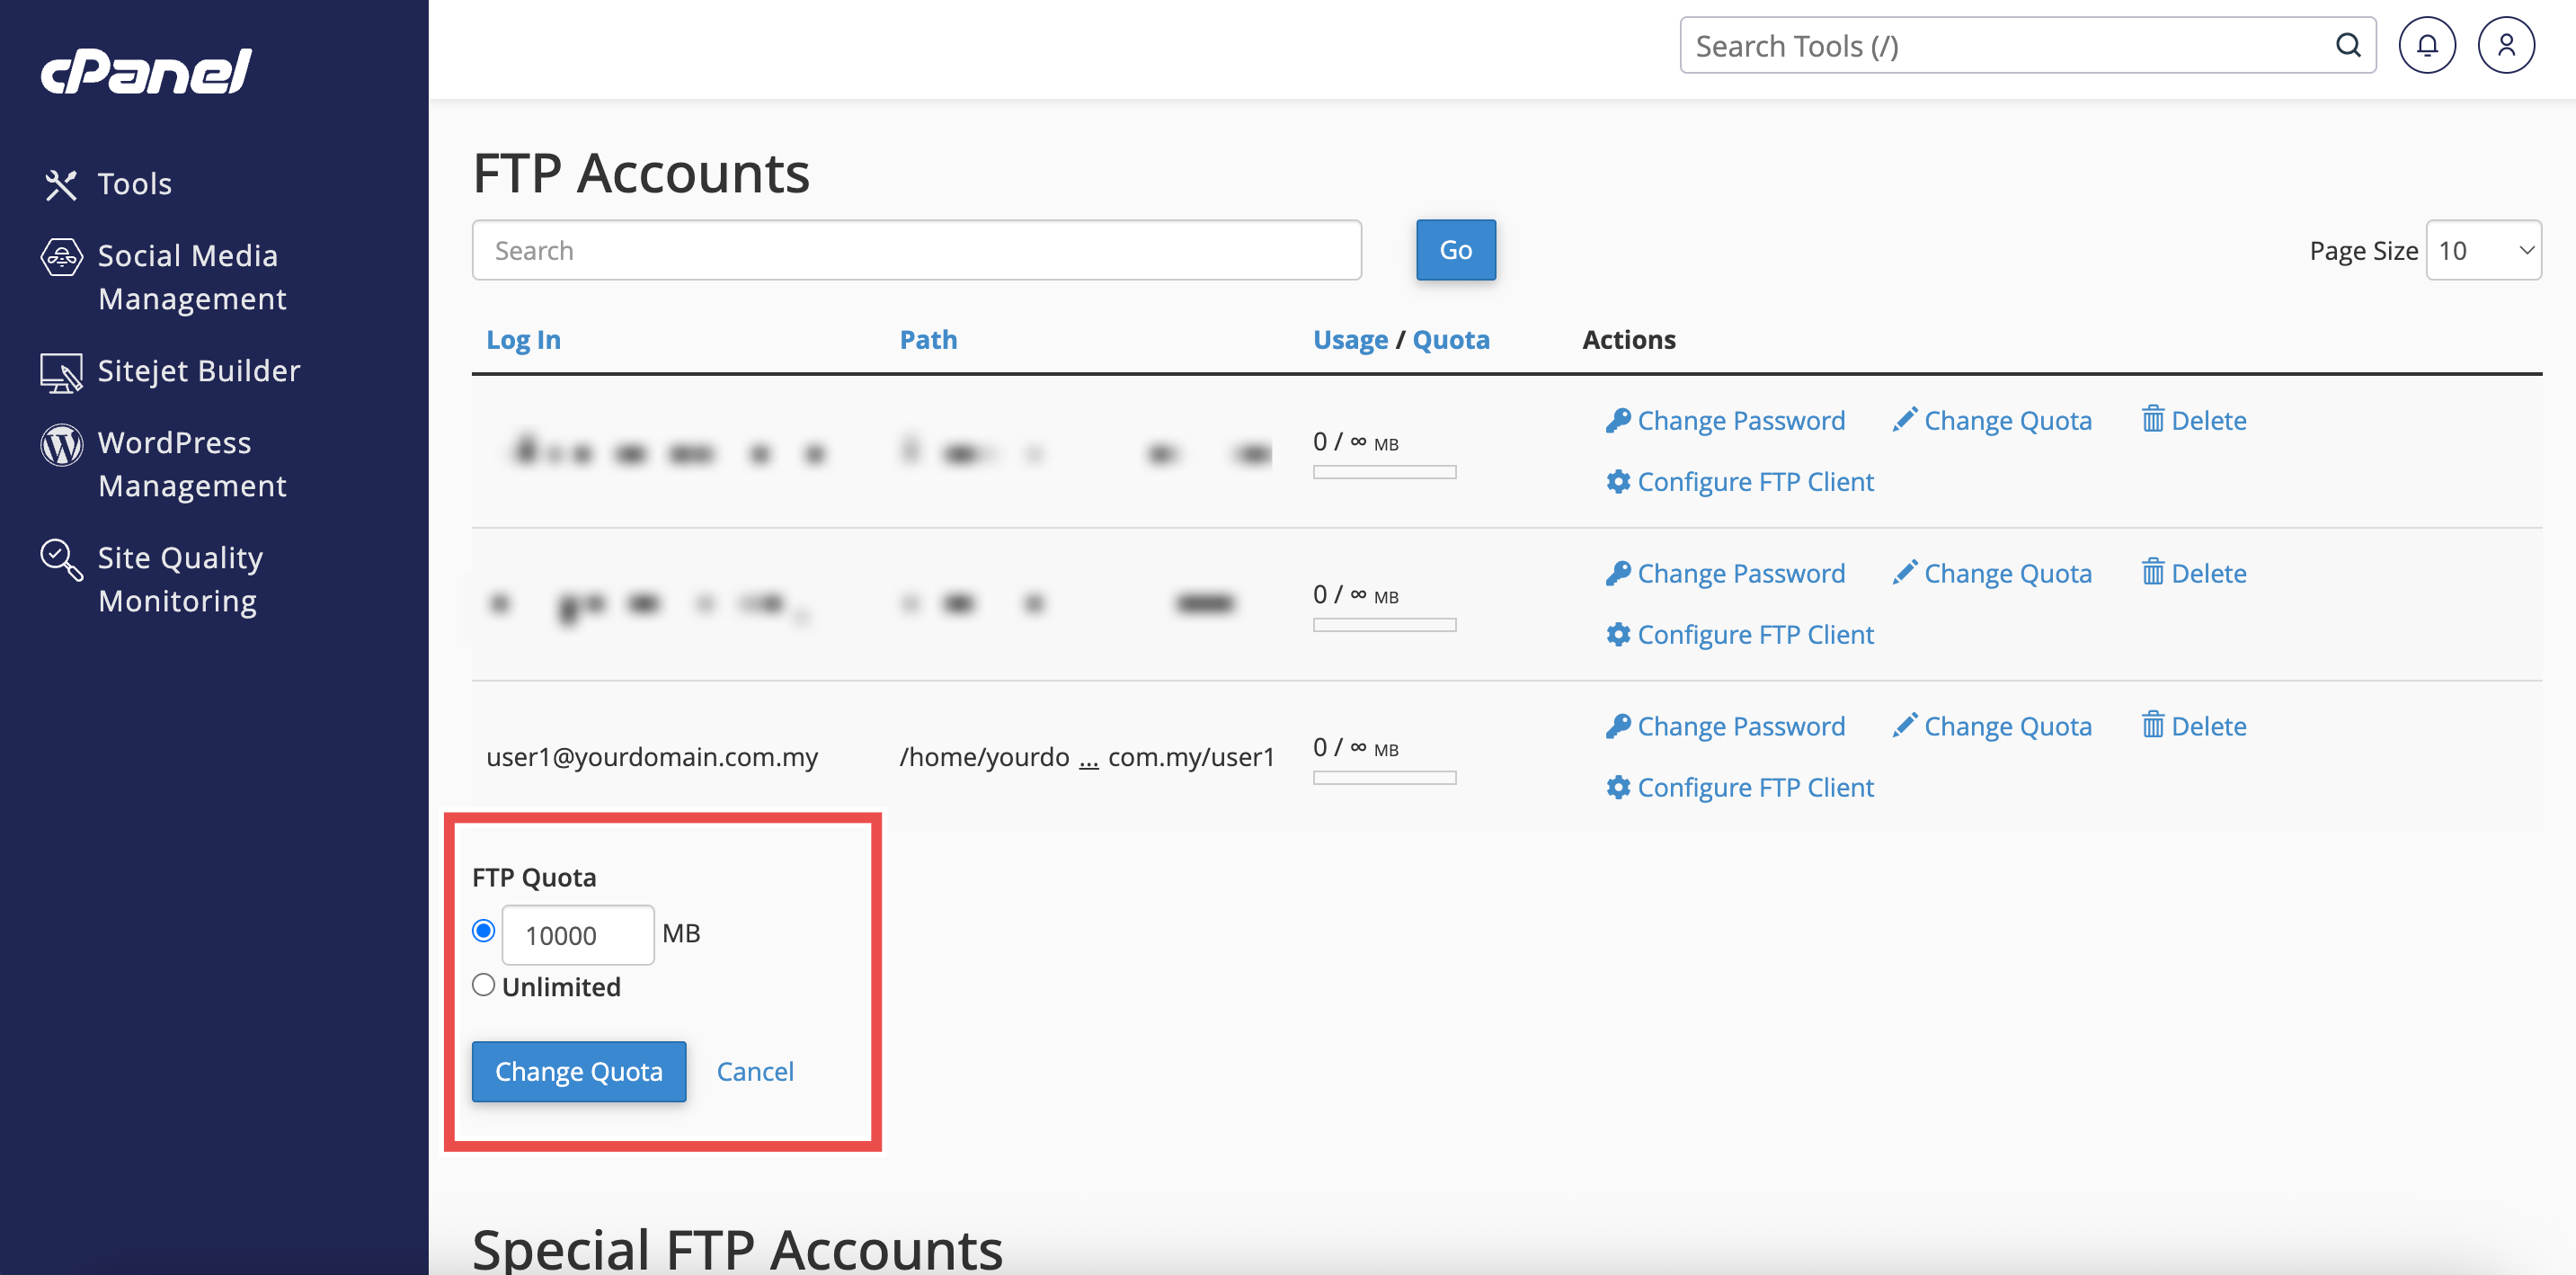
Step 5: Save the Changes
-
Click Change Quota to apply the new quota.
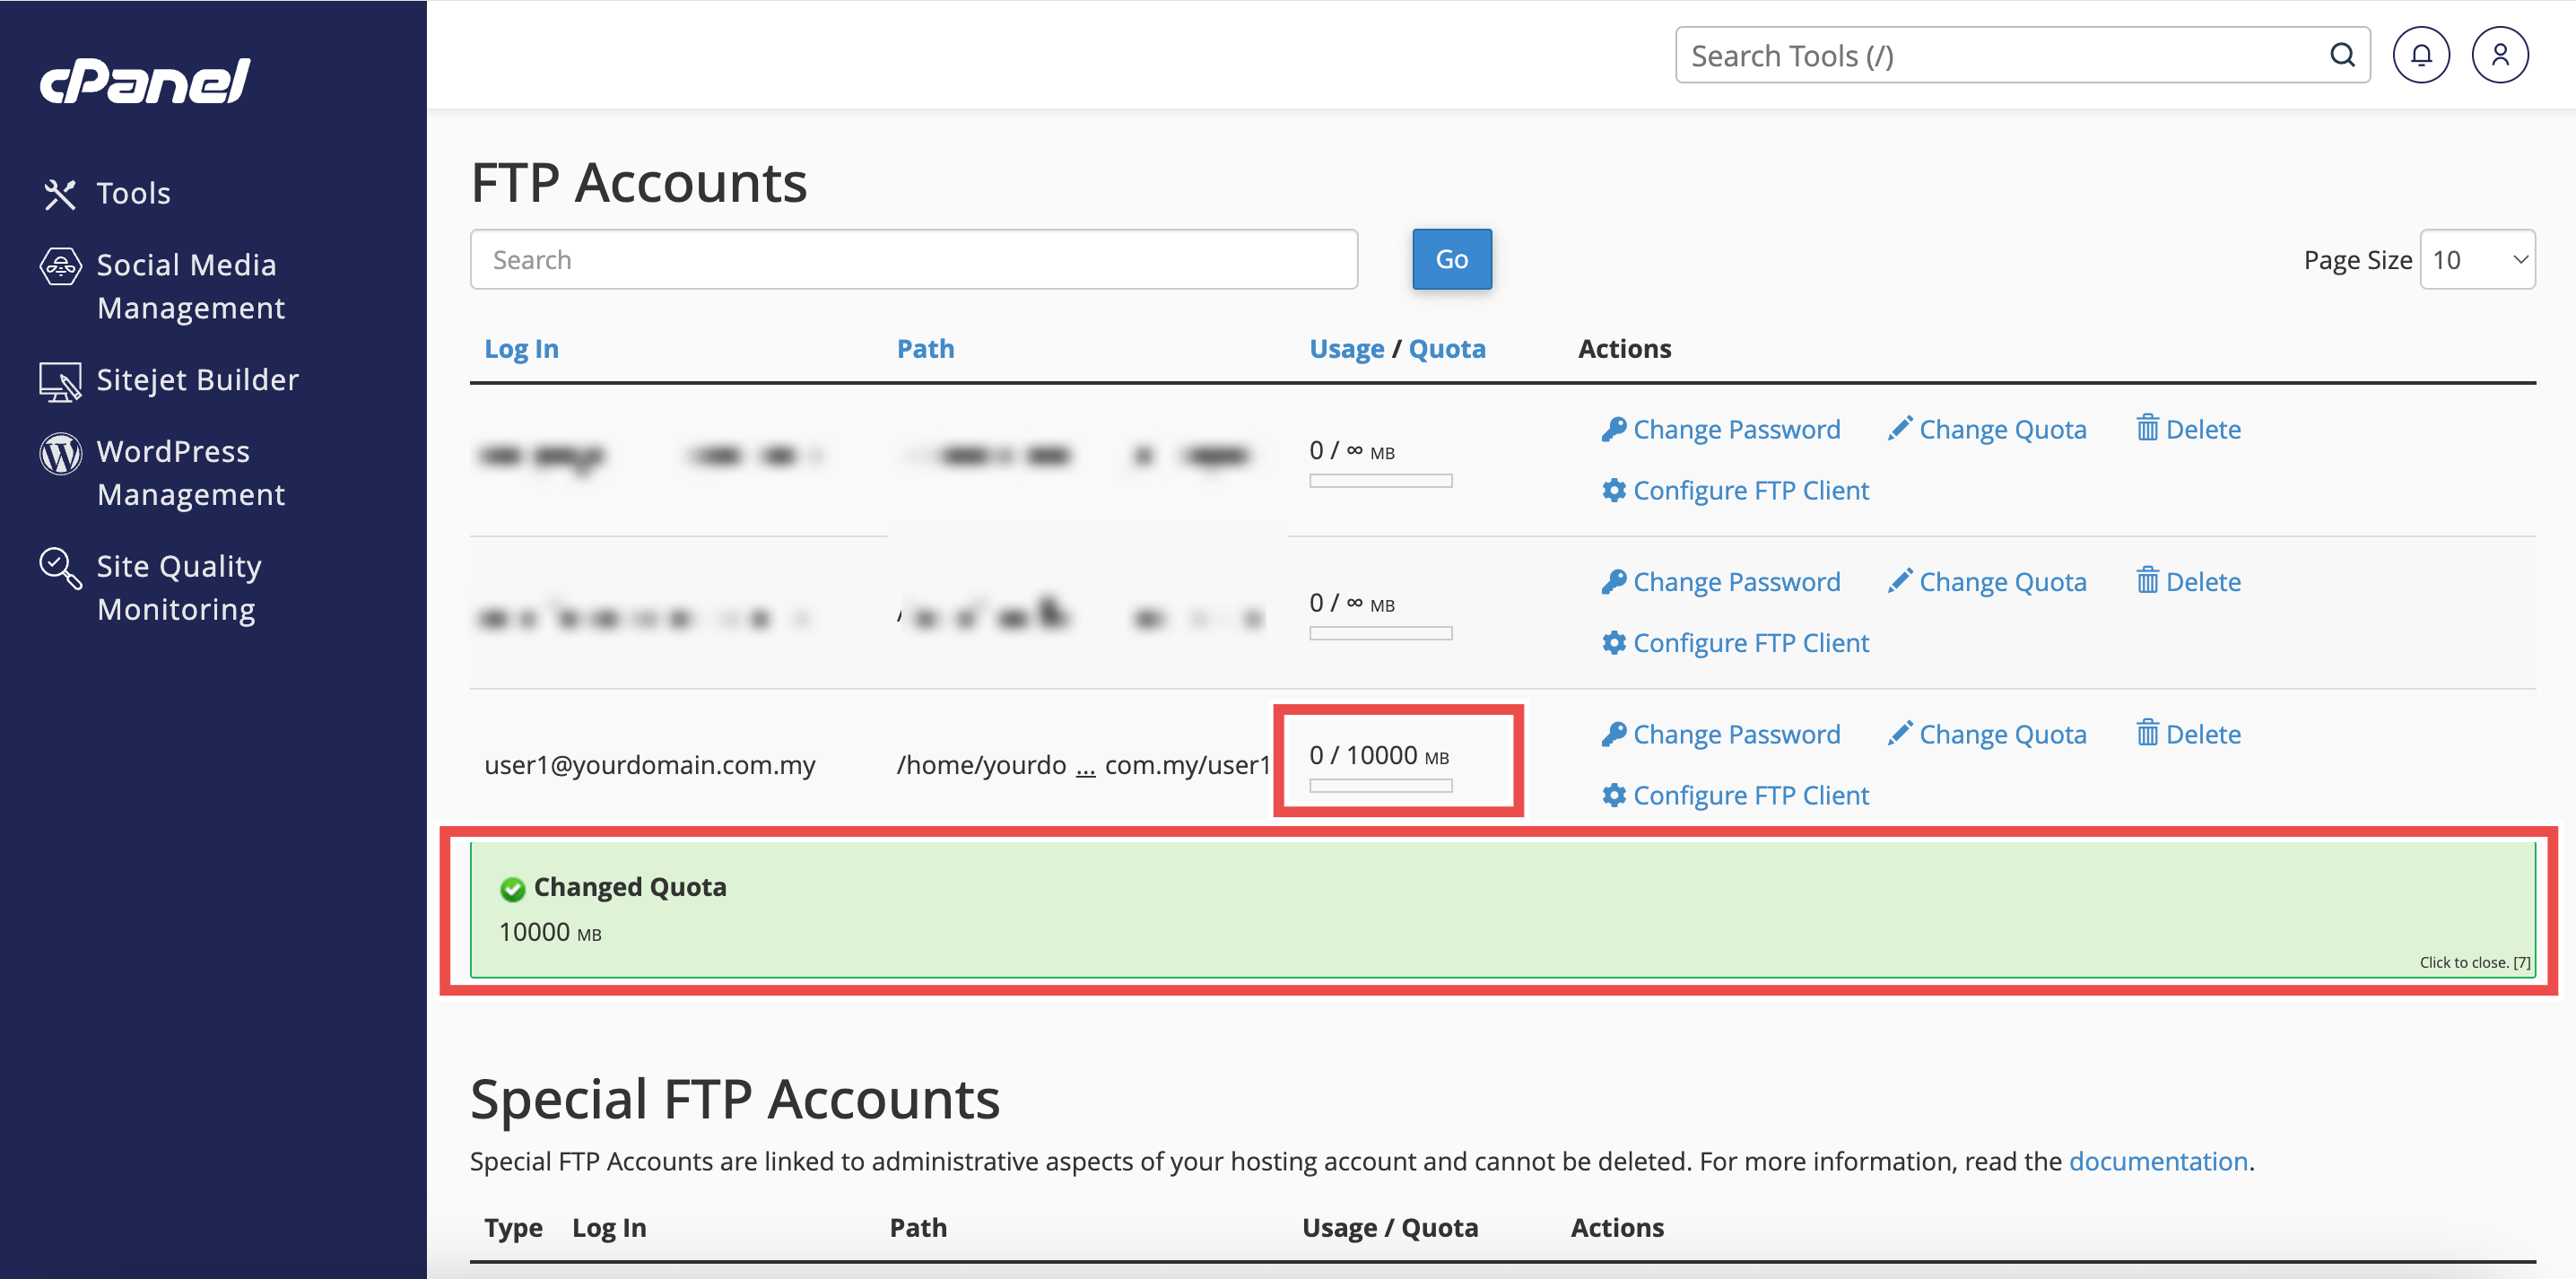
Step 6: Verify the Changes
- After updating, a “Changed Quota” confirmation message will appear to confirm the update.
- You can also verify by checking the updated quota value in the FTP Accounts table.
Conclusion
By following these steps, you can easily change the quota for an FTP account in cPanel. This helps you manage disk usage effectively across multiple users.
Should you encounter any issues or have any questions, our support team at IPSERVERONE is always here to assist you. Don’t hesitate to reach out to us at support@ipserverone.com for any help you need.