Search Our Database
How to Blacklist Email Addresses using Spam Filters in cPanel
Introduction
This Knowledge Base article provides a concise, step-by-step guide on How to Blacklist Email Addresses using Spam Filters in cPanel. Blacklisting allows you to mark emails from specific addresses or domains as spam, even if Apache SpamAssassin would normally allow them through. This is useful for blocking persistent spam senders, unwanted marketing emails, or messages from specific domains that you want to filter out. You can blacklist individual email addresses, entire domains, or use wildcards to create flexible blocking rules.
Prerequisite
- Access to your cPanel login page.
- Apache SpamAssassin must be enabled for your account.
Step-by-Step Guide
Step 1: Log in to cPanel
- Access and log in to your cPanel account using your username and password.
Step 2: Open Spam Filters
- In the Home page, under Email, click Spam Filters.

Step 3: Open Additional Configurations
- Scroll down to the Additional Configurations (For Advanced Users) section.
- Click Show Additional Configurations to display additional settings.

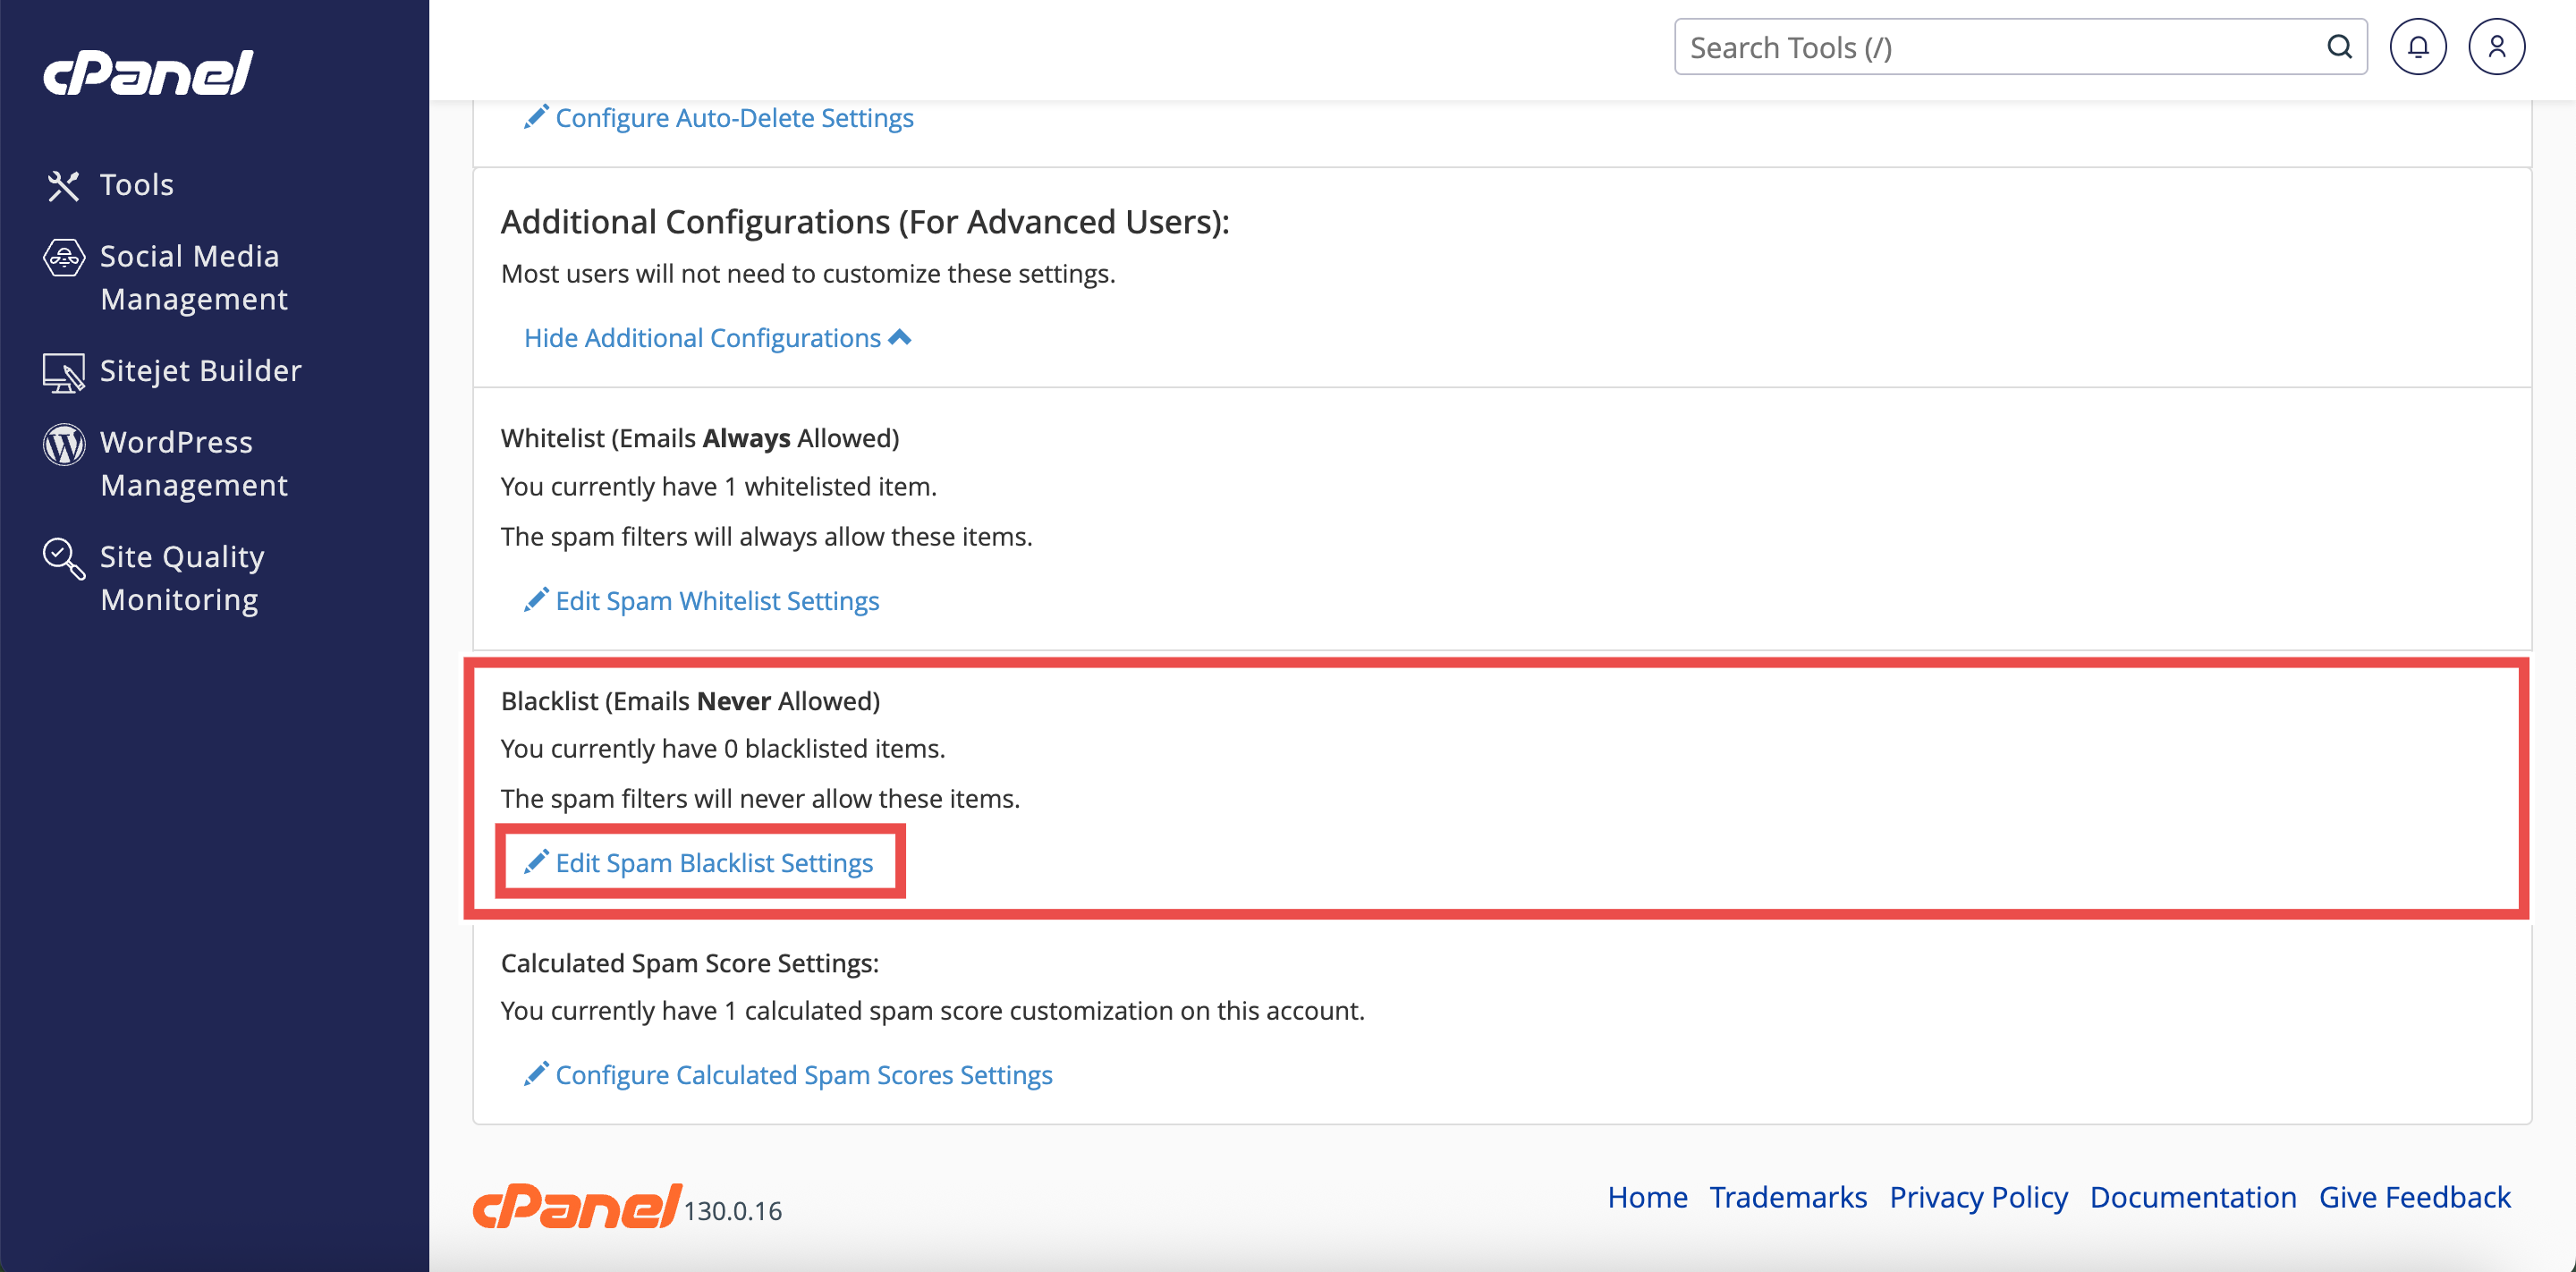
Step 4: Open Blacklist Settings
- Locate the Blacklist (Emails Never Allowed) section.
- Click Edit Spam Blacklist Settings.
- This will direct you to the Blacklist interface.
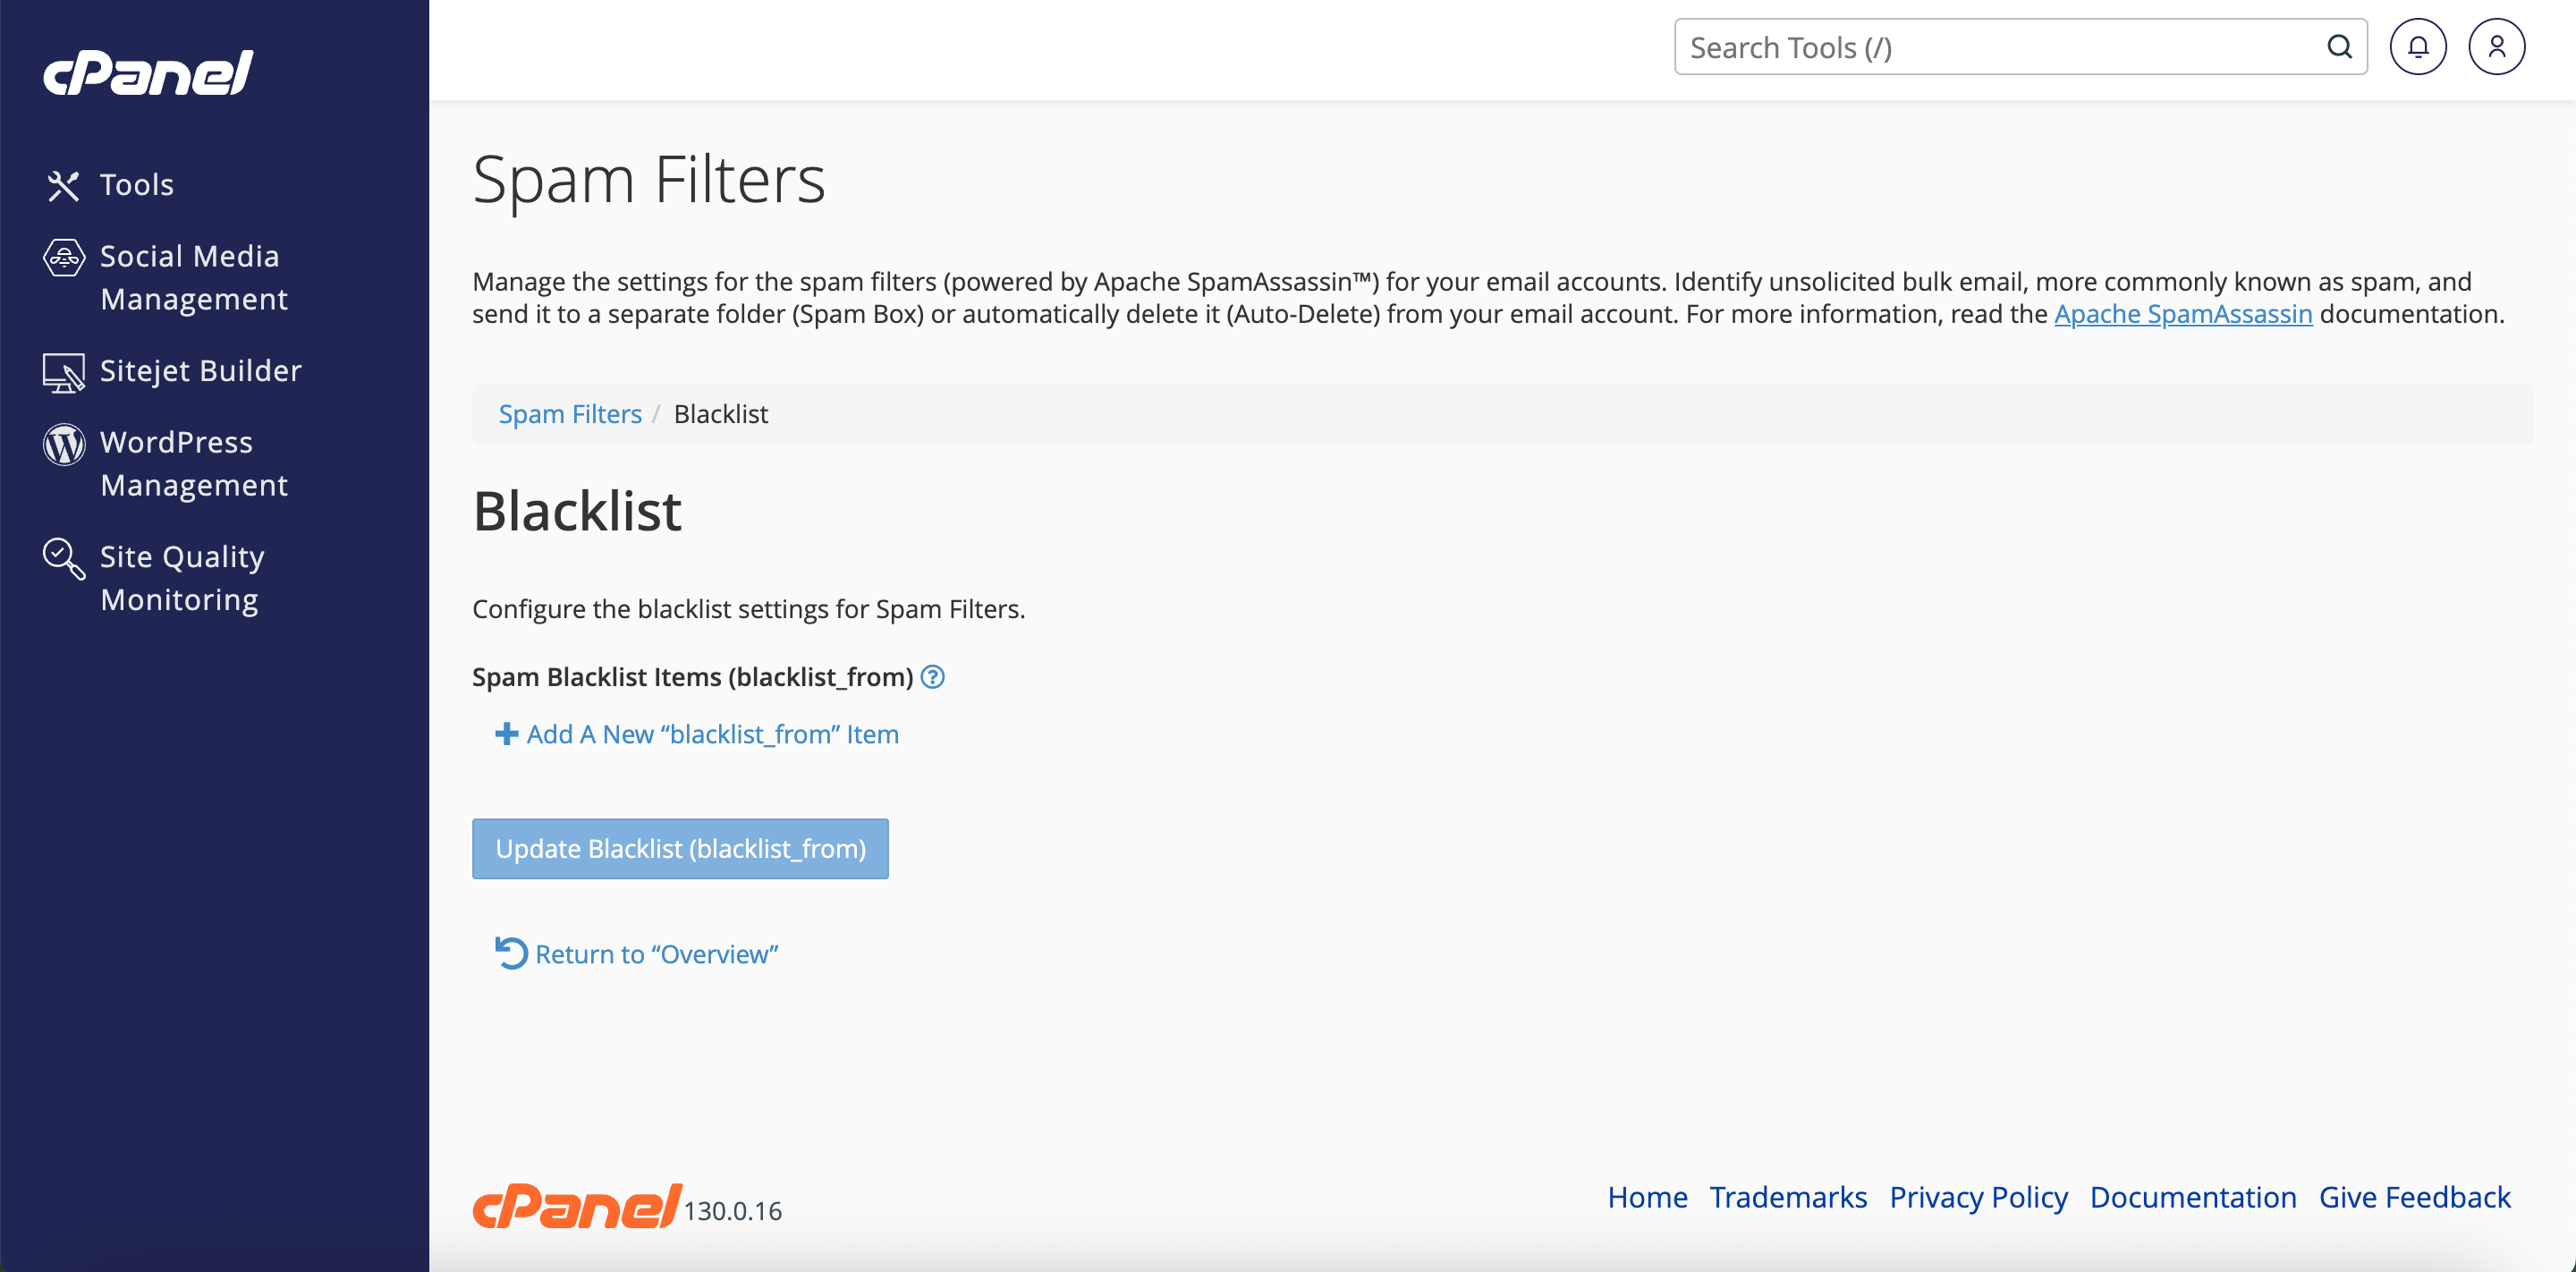
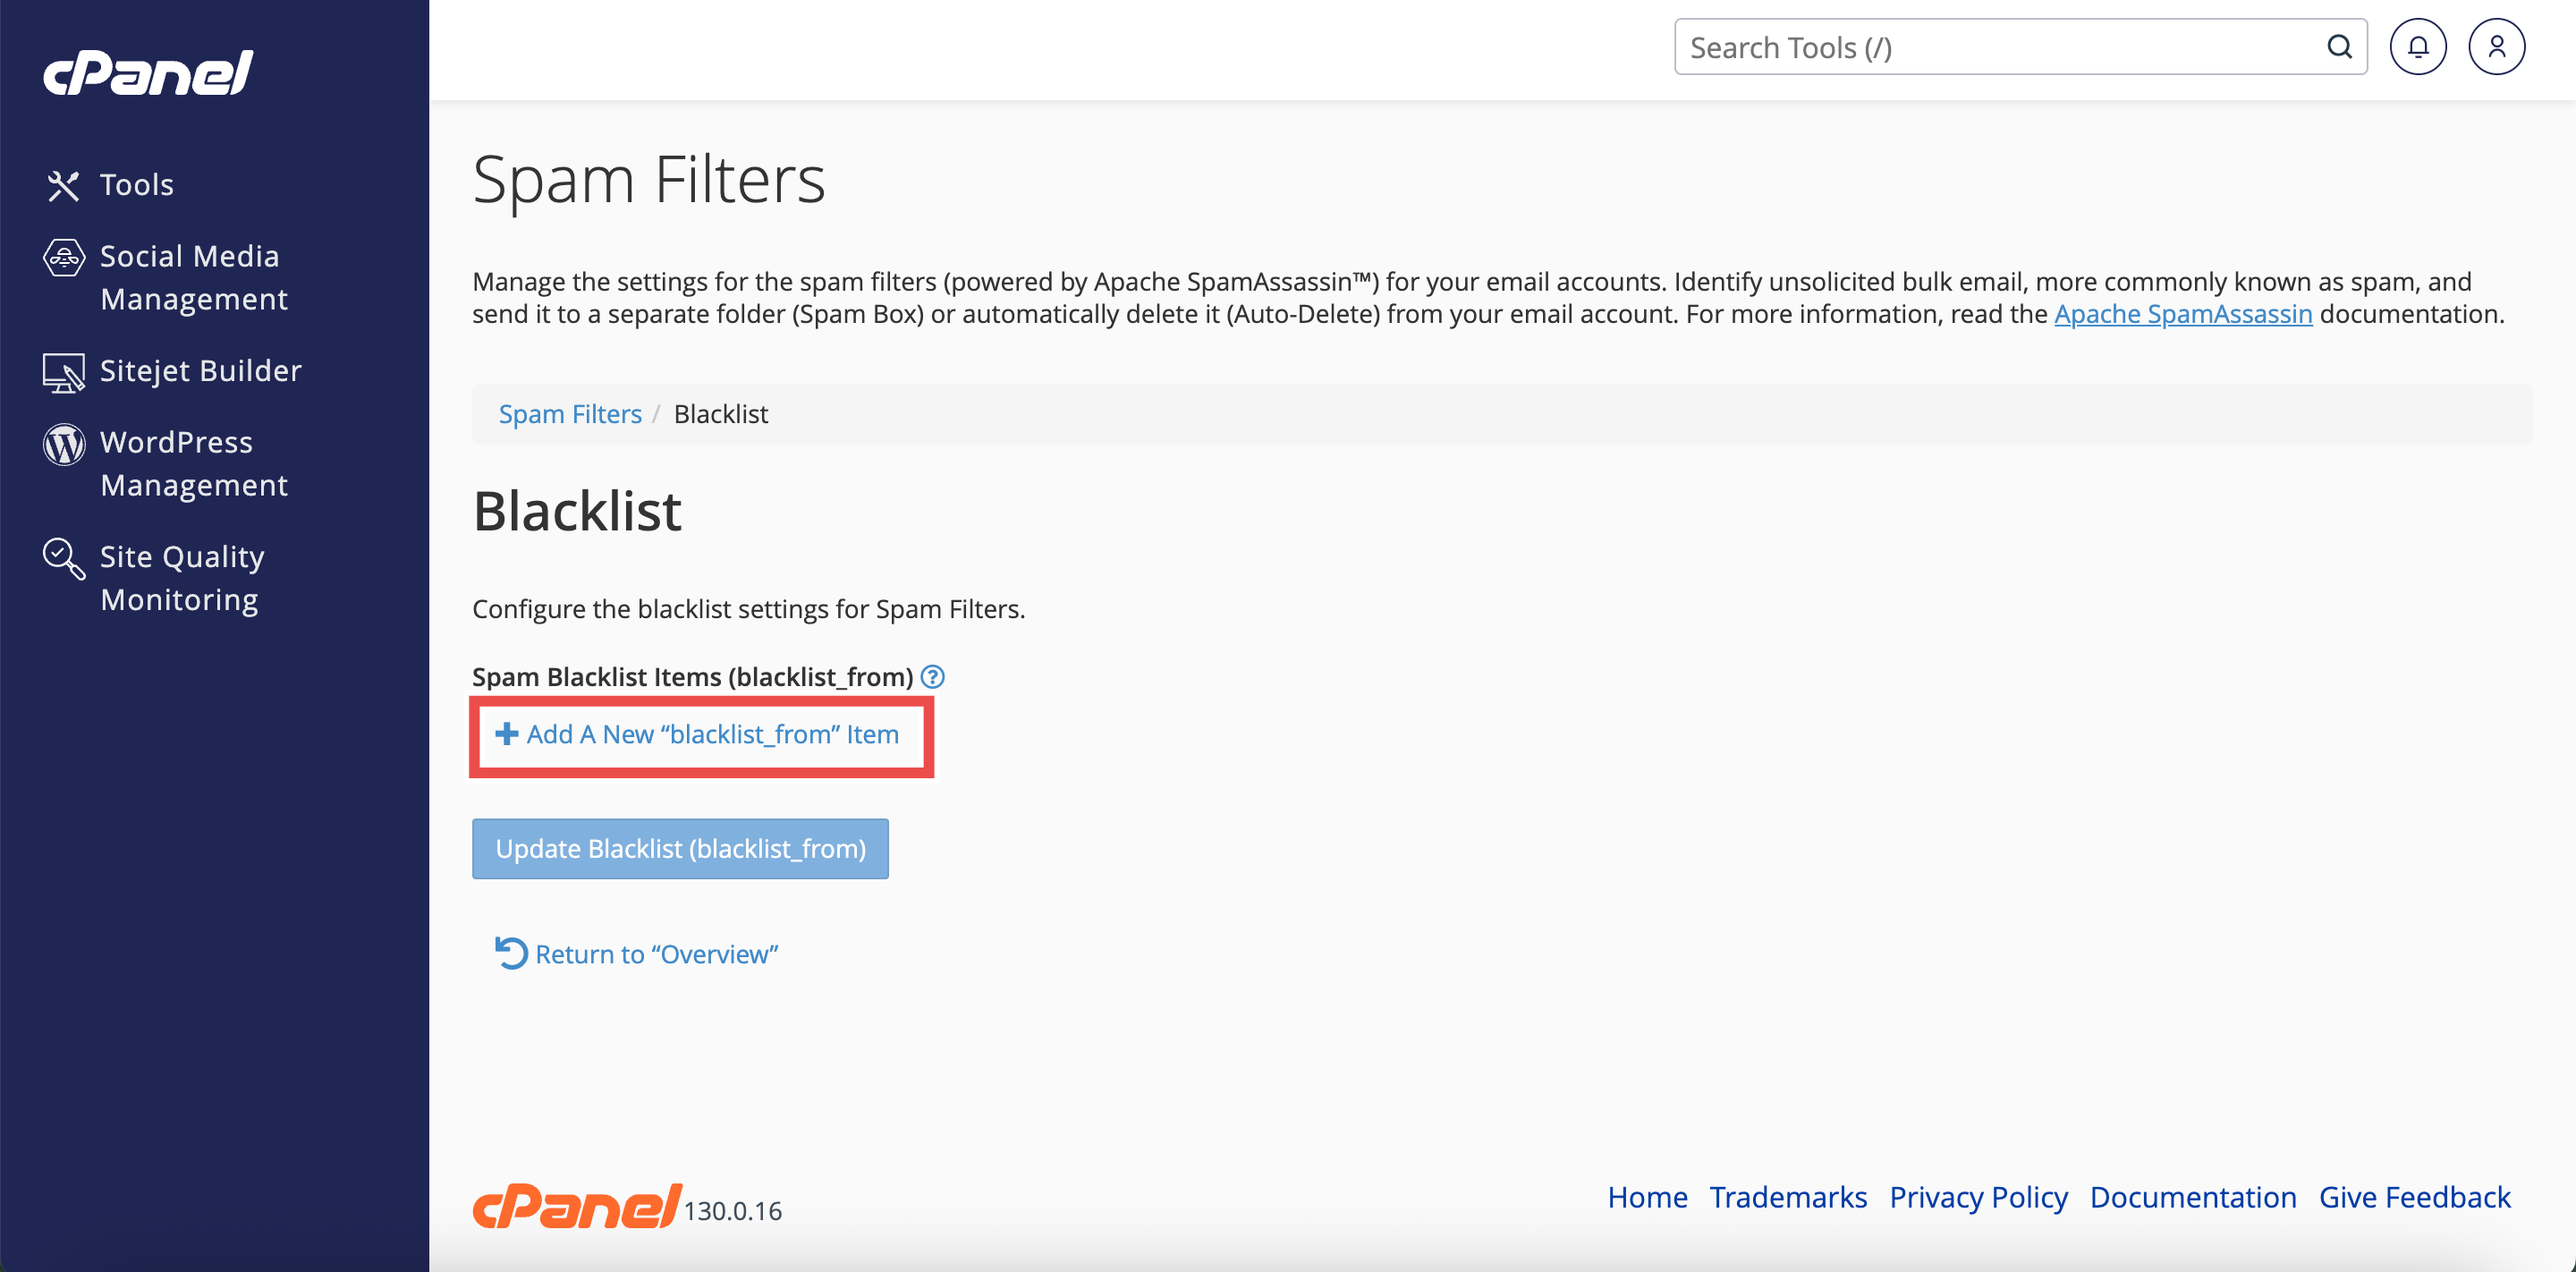
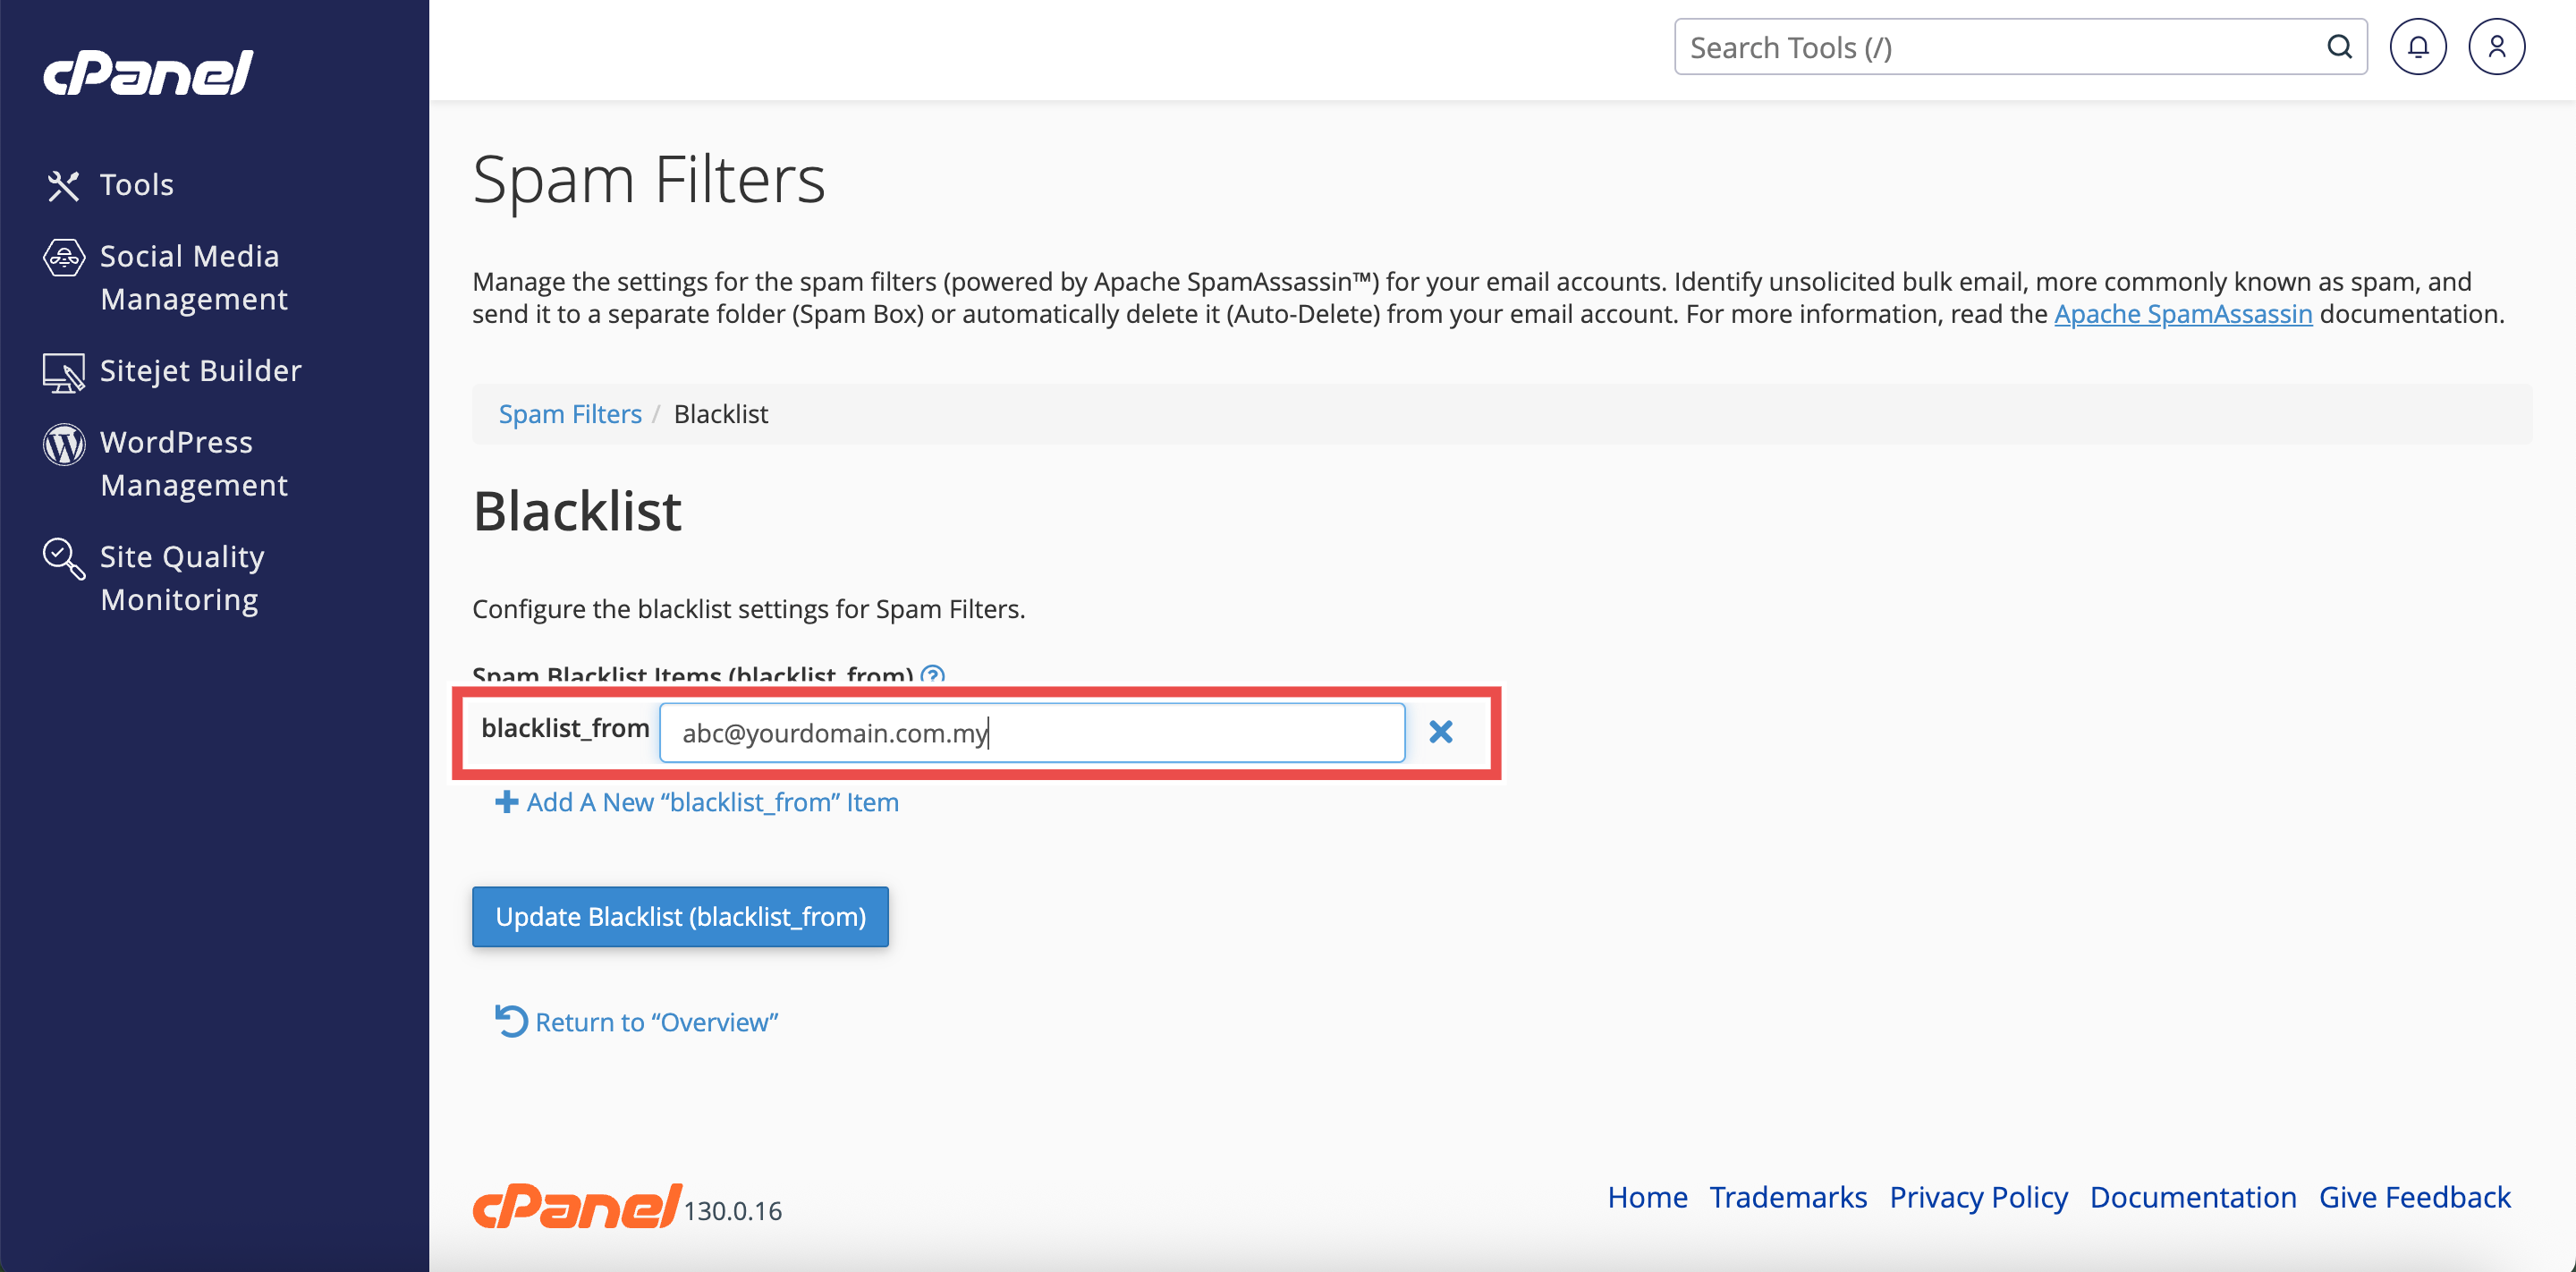
Step 5: Add Email Addresses to the Blacklist
- Click Add A New “blacklist_from” Item to add an email address.
- Enter the email address in the blacklist_from text box.
⚠️ Important Note:
- You can use wildcards for flexible blacklist rules:
- user@example.com — Blacklists a single email address.
- *@example.com — Blacklists all addresses from example.com (asterisk wildcard represents multiple characters).
- ?ser@example.com — Blacklists addresses with a single character variation, such as user@example.com (question mark wildcard represents a single character).
- Blacklisted addresses will be automatically marked as spam and handled according to your spam filter settings.
- To blacklist email addresses across multiple cPanel accounts, use the Exim System Filter File instead.
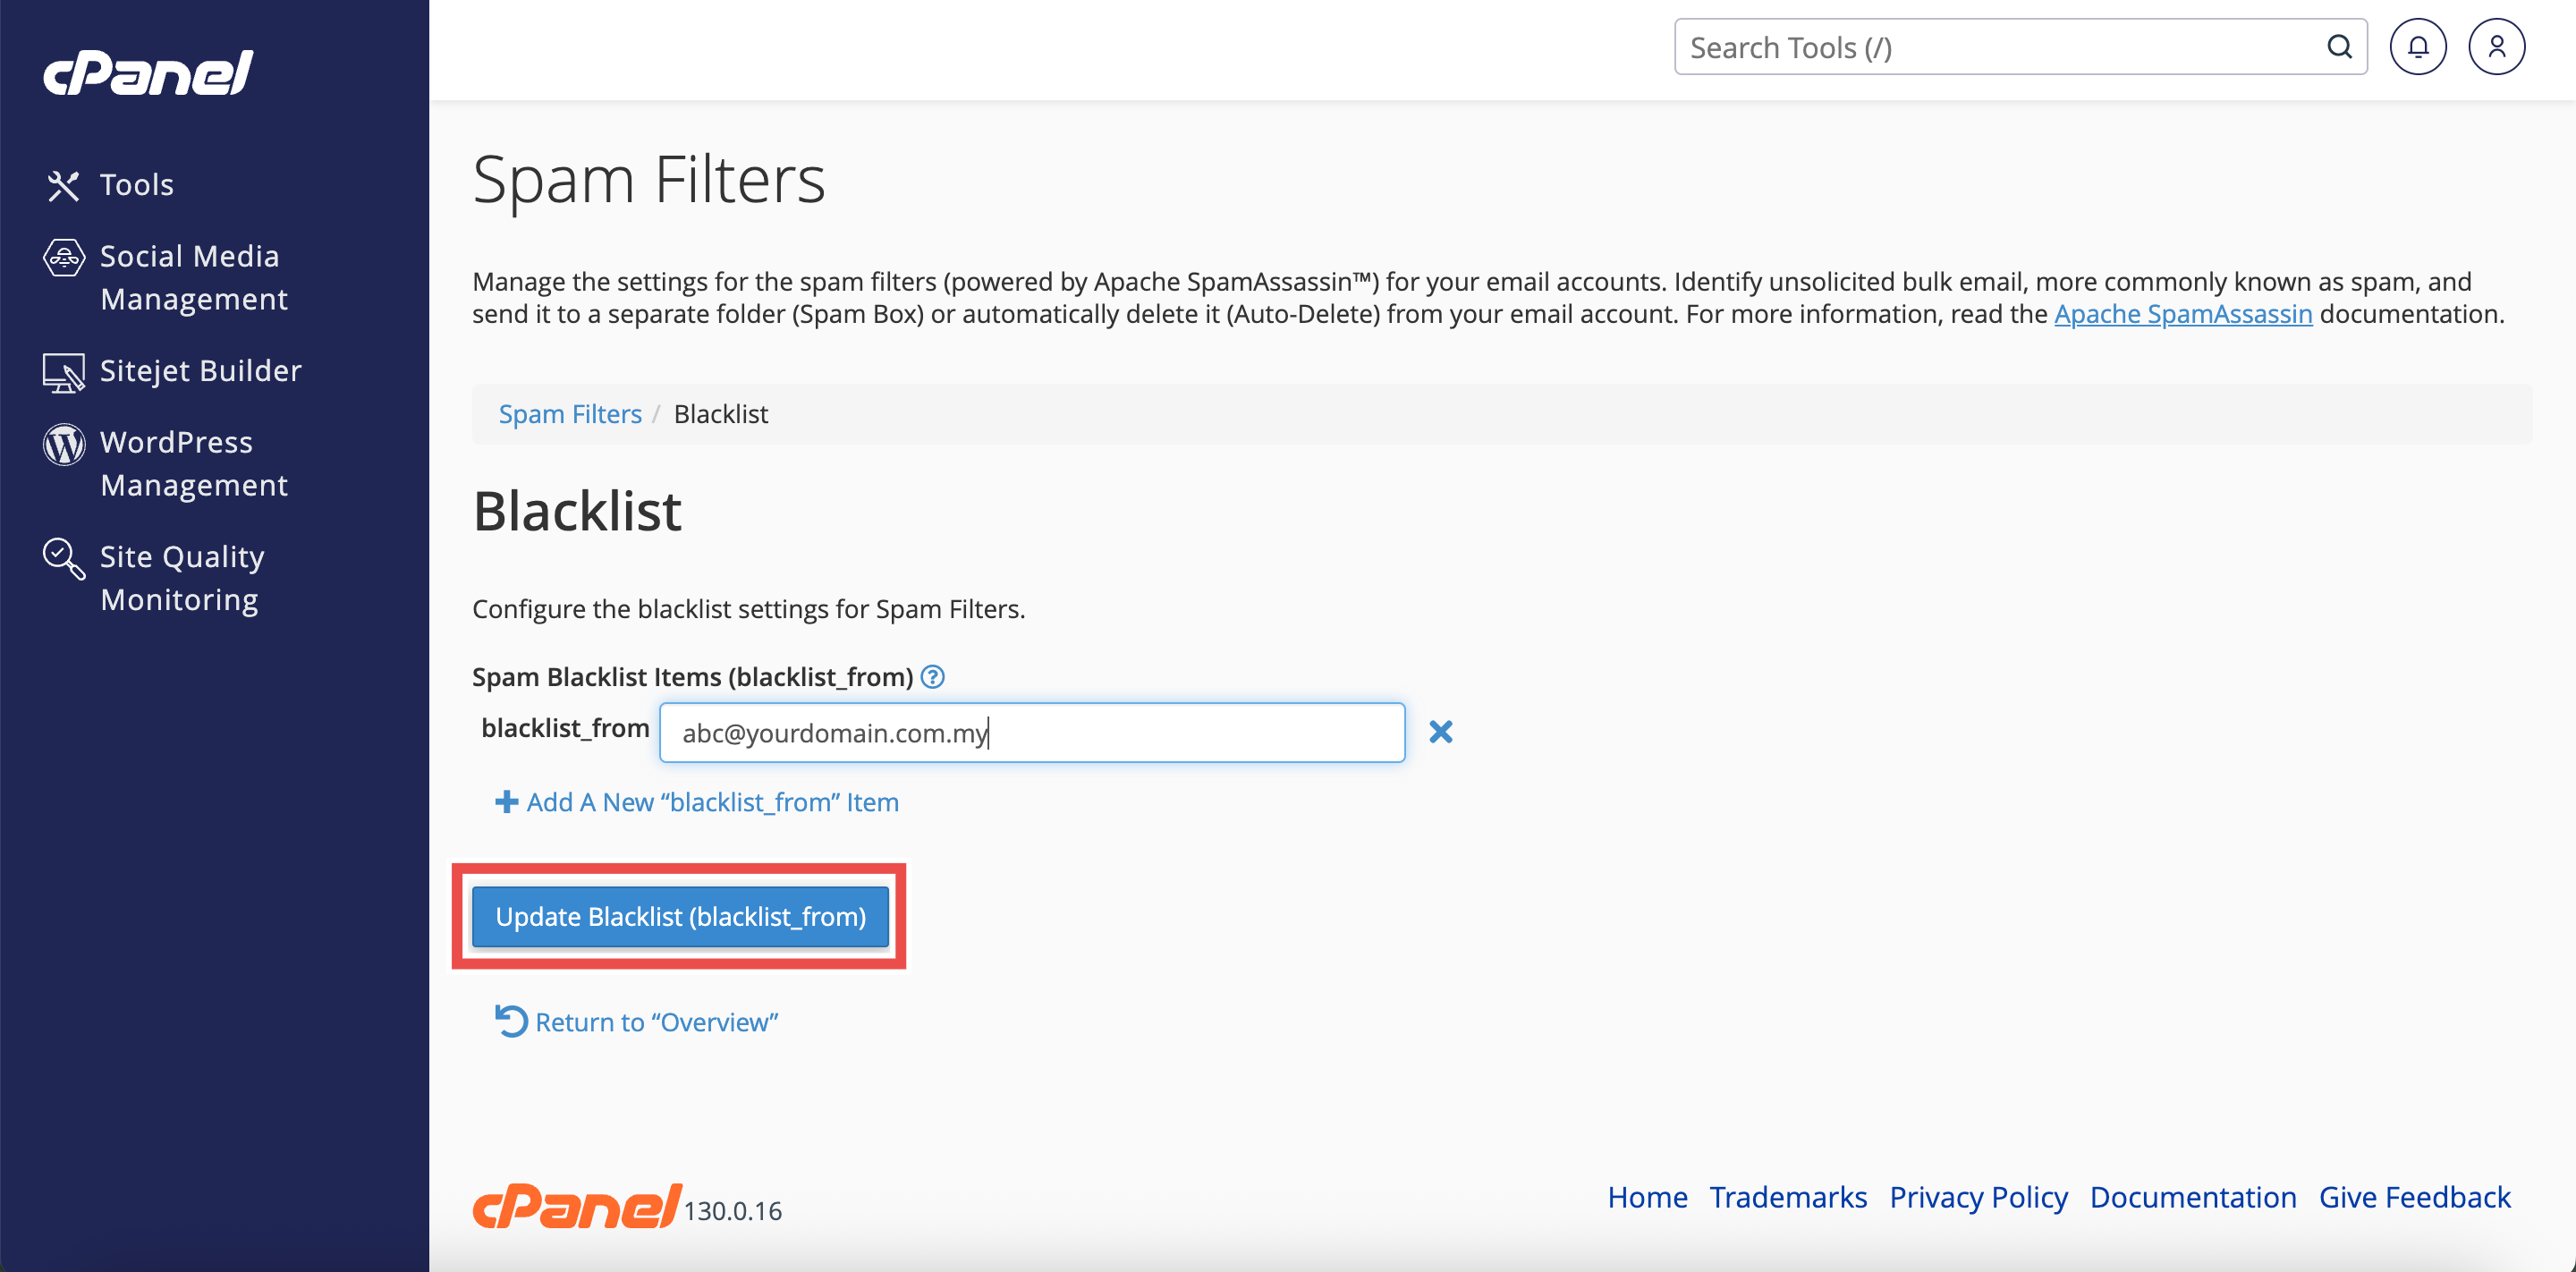
Step 6: Save Your Changes
- Click Update Blacklist (blacklist_from) to save your changes.
Step 7: Verify the Blacklist
- A pop-up message will appear to confirm that your blacklist has been updated.
- The blacklisted email address will appear in the Spam Blacklist Items (blacklist_from) section.

Conclusion
By following these steps, you can successfully blacklist email addresses using Spam Filters in cPanel. Blacklisting helps you block unwanted emails from specific senders or domains, improving your inbox organization and reducing spam.
Should you encounter any issues or have any questions, our support team at IPSERVERONE is always here to assist you. Don’t hesitate to reach out to us at support@ipserverone.com for any help you need.