Search Our Database
How to assign instance(s) to a project group in Customer Portal
Introduction
This article provides step-by-step guidance on how to assign one or more cloud instances to a project in NovaCloud. Assigning instances to a project helps you better organize resources, manage access control, and streamline collaboration across teams. By following this guide, you will be able to create a project, add instances to it, and verify that the assignment has been completed successfully.
Prerequisites
Before you begin, ensure the following:
-
You have access to the Customer Portal.
-
You already have at least one instance created.
Step-by-Step Guide
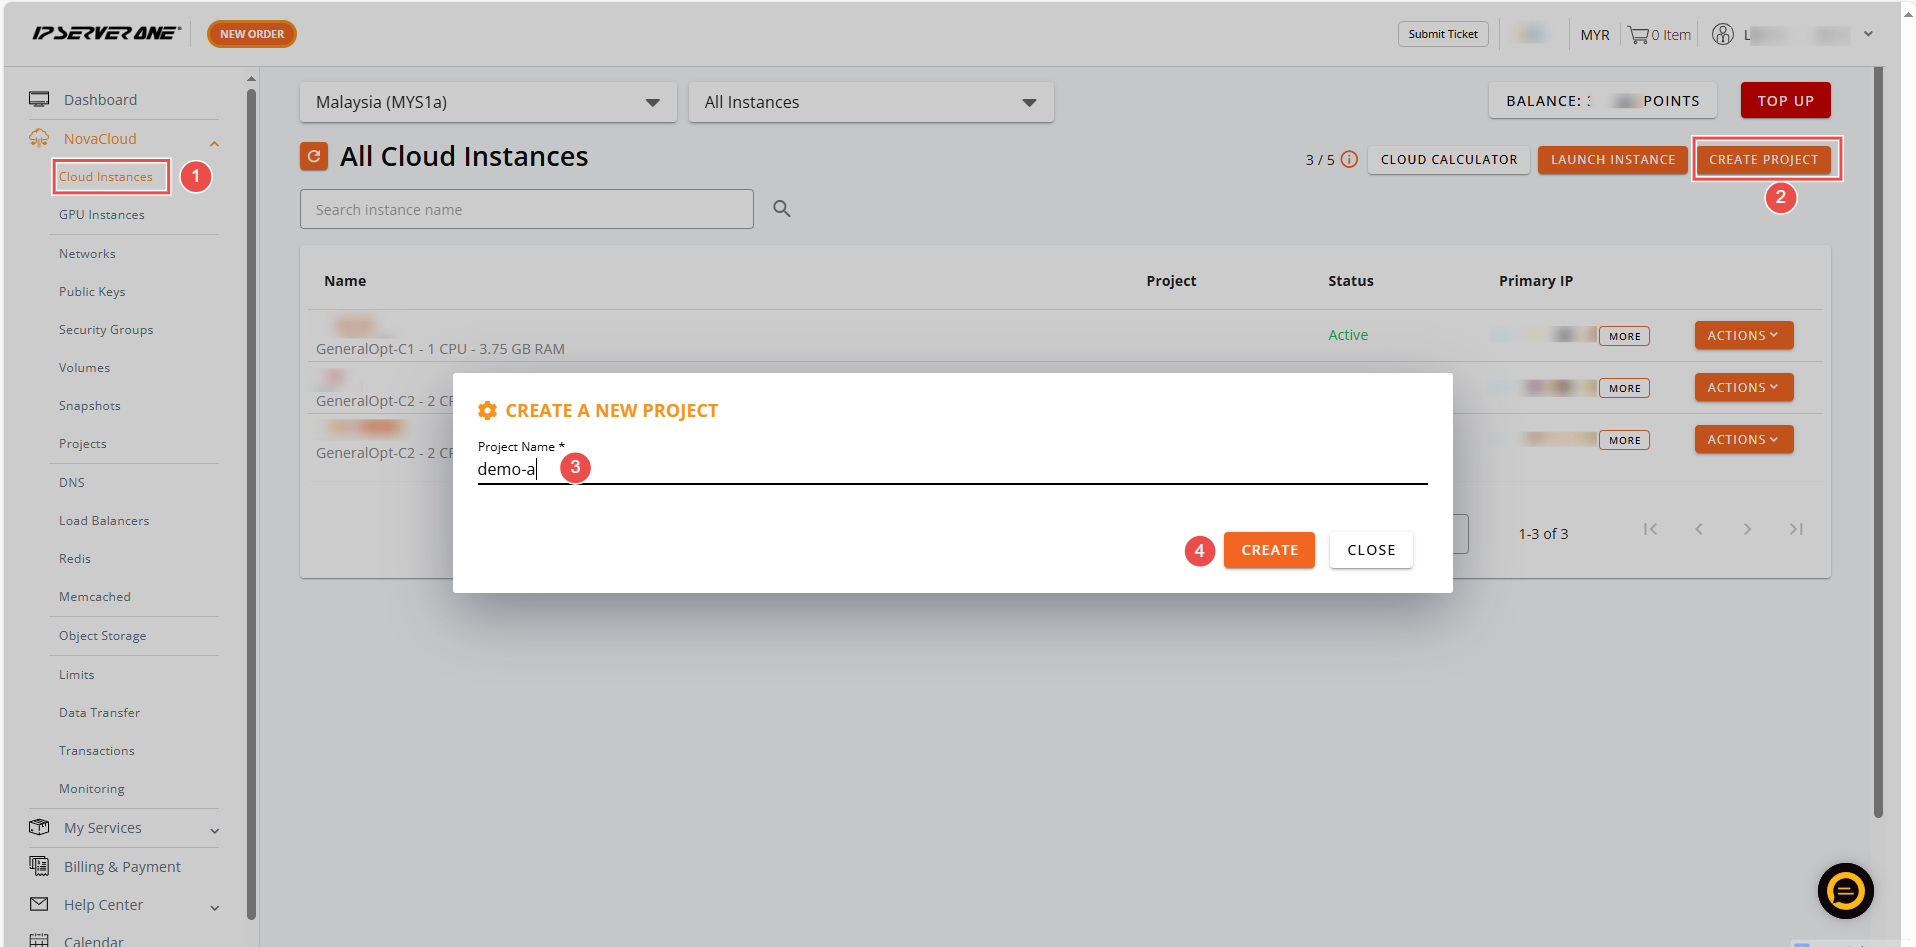
Step 1: Create a Project
- Navigate to NovaCloud > Cloud Instances.
- Click Create Project.
- Enter the project name.
- Click Create.
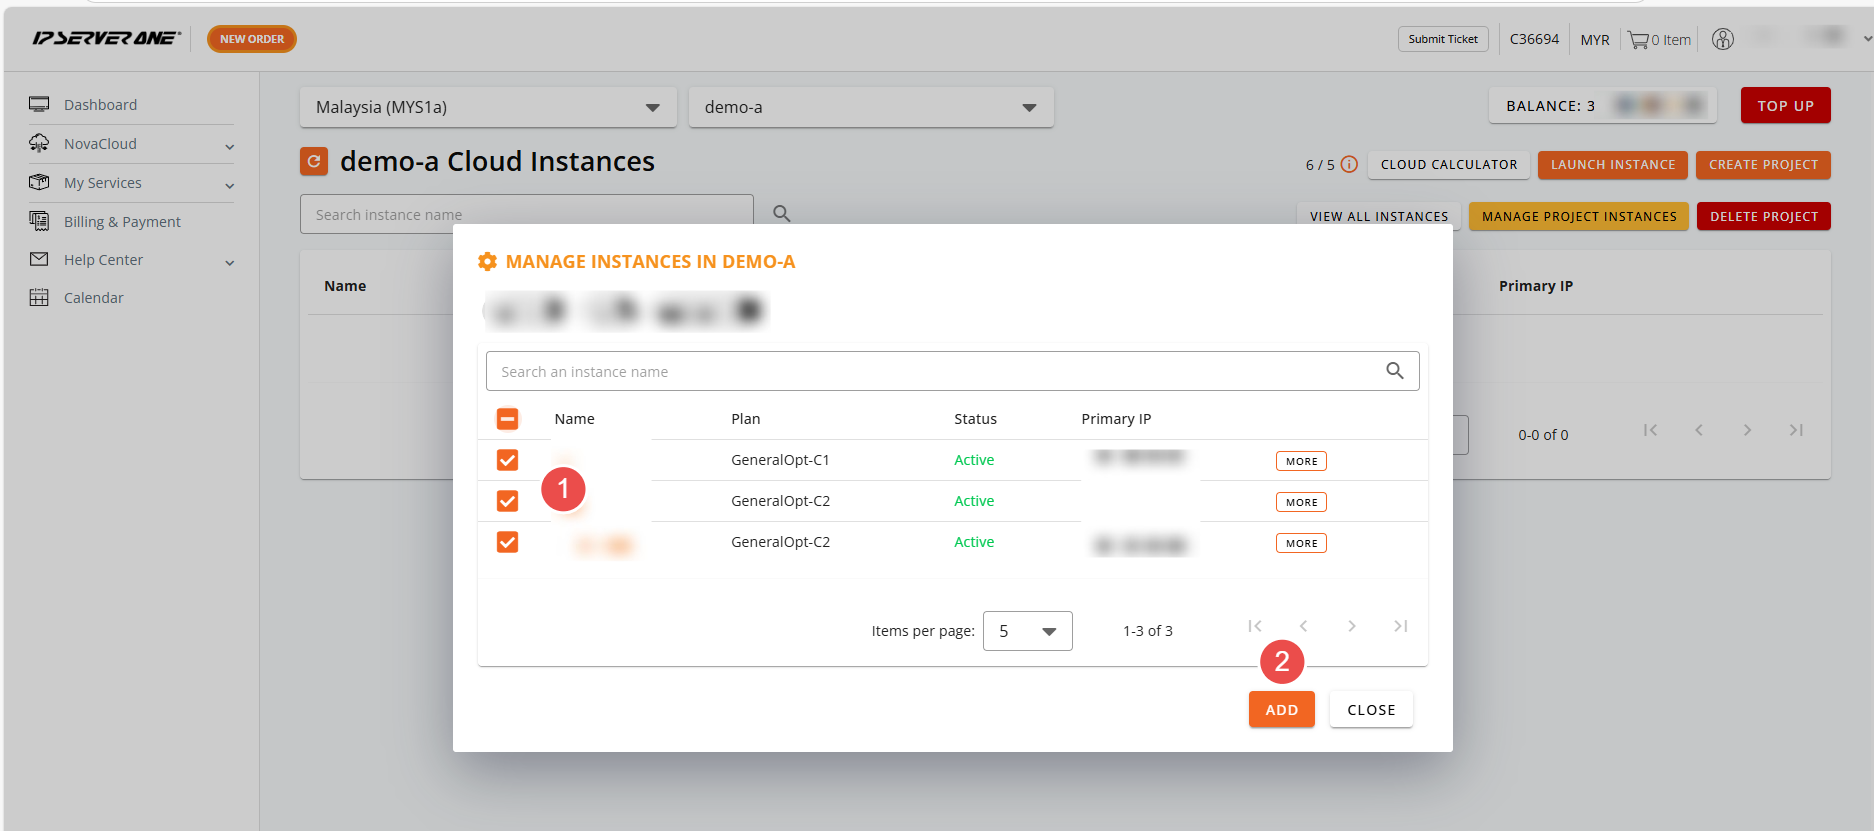
Step 2 : Assign Instance to the project
- From the list of available instances, select the instance(s) you want to assign.
- Click Add.
- The selected instance(s) will now appear under the assigned project.
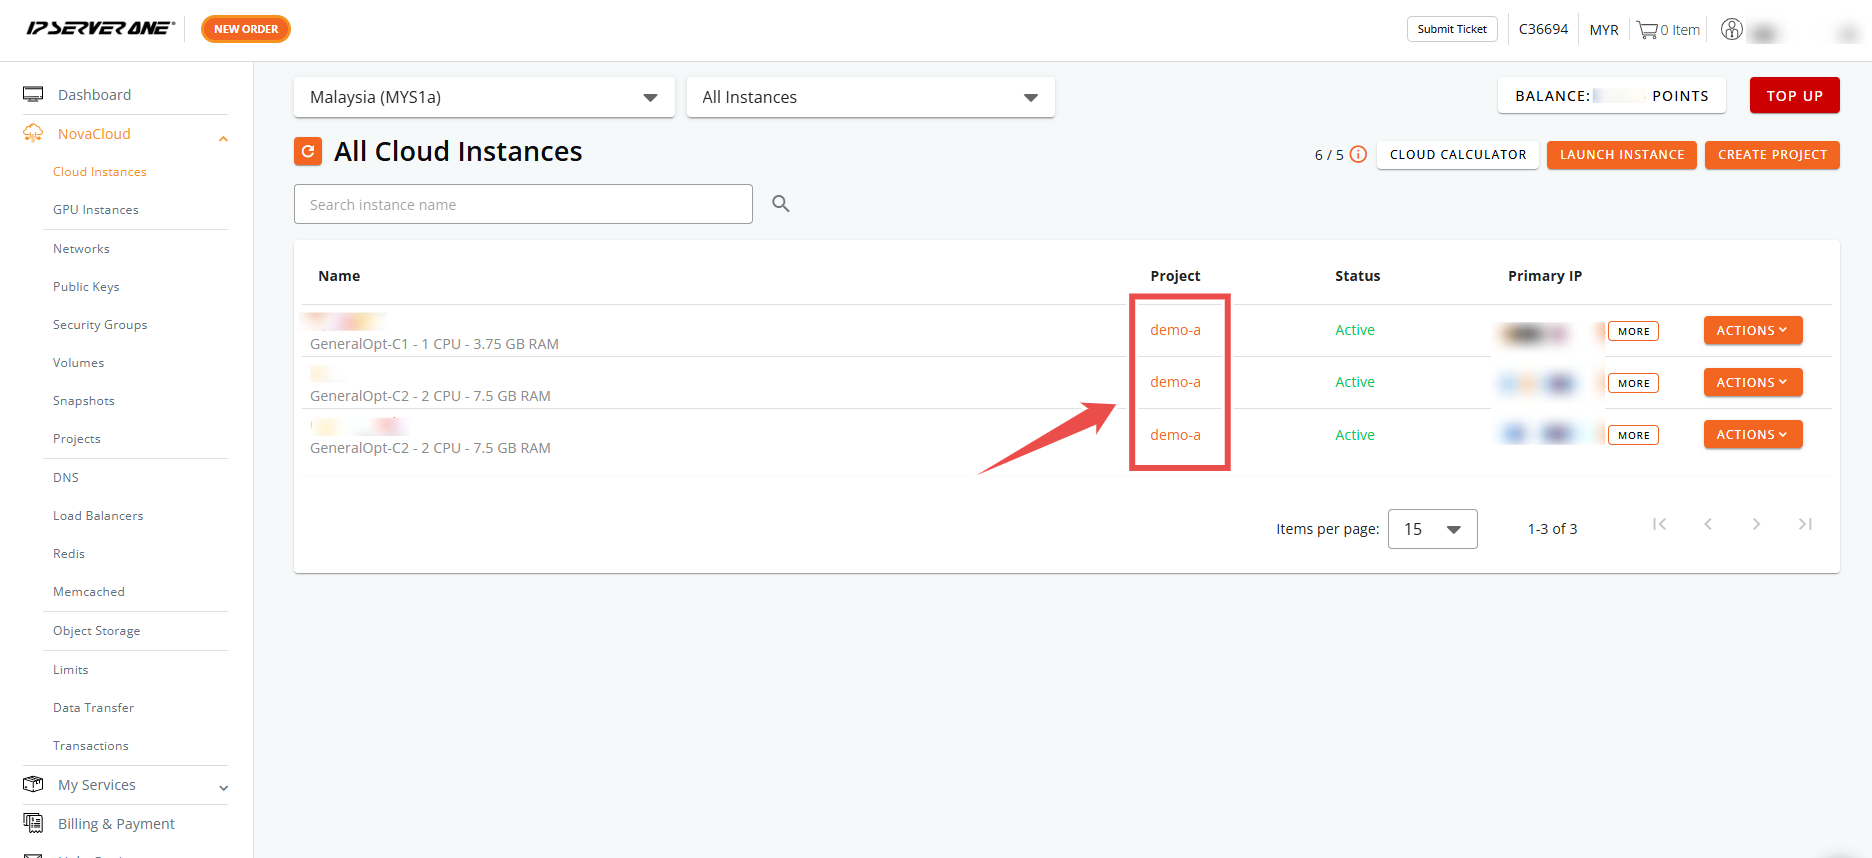
Step 3: Verification
- Go to the Cloud Instances page.
- Check the Project column.
- The assigned instance(s) should now display the associated project name.
Conclusion
By following this guide, you can easily assign cloud instances to specific projects in NovaCloud. This helps you maintain a clear structure, improve resource management, and ensure the right team members have access to the appropriate instances. Proper project assignment not only simplifies administration but also enhances collaboration and governance across your cloud environment.