Search Our Database
How to Add Mail Signature on Apple Mail
Introduction
Email signatures provide professional contact information and branding that automatically appears at the end of your messages. Creating custom signatures in Apple Mail allows you to maintain consistent professional presentation across all outgoing emails while saving time by eliminating the need to manually add contact details to each message. Apple Mail supports multiple signatures per account, enabling different signatures for various contexts or purposes. This guide explains how to create email signatures using Apple Mail’s Signatures settings, enabling professional and personalized email communication.
Prerequisites
- Apple Mail downloaded on your device.
- An existing email account set up in the Mail app.
Step-by-step Guide
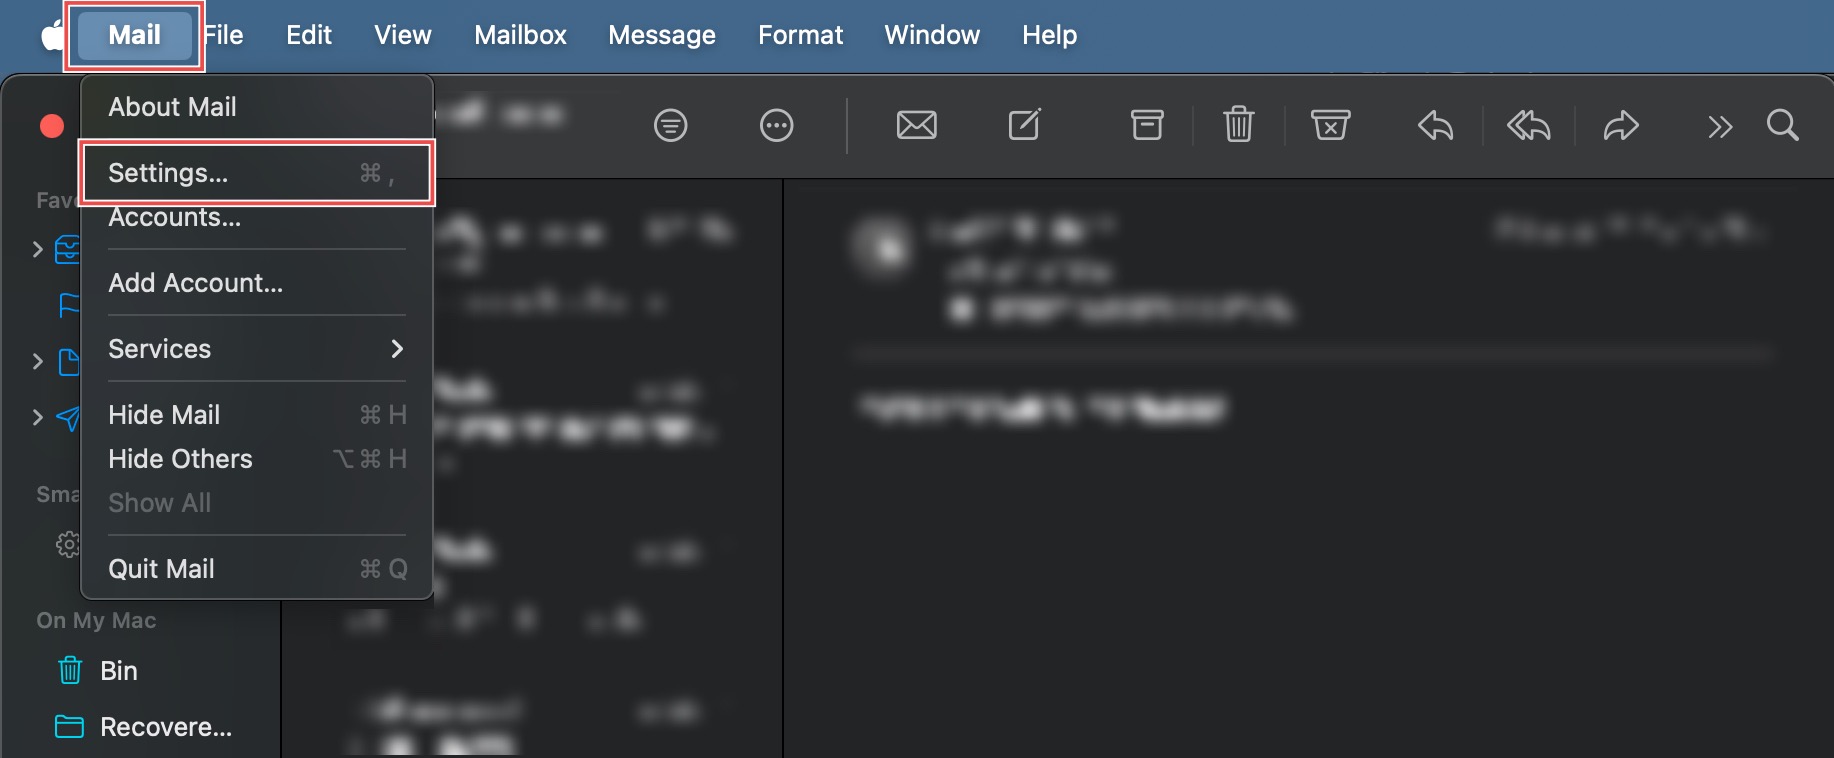
Step 1: Access Mail Settings
Open Apple Mail from your Applications folder. In the top menu bar, Click Mail > Settings… (or Preferences… on older macOS versions).
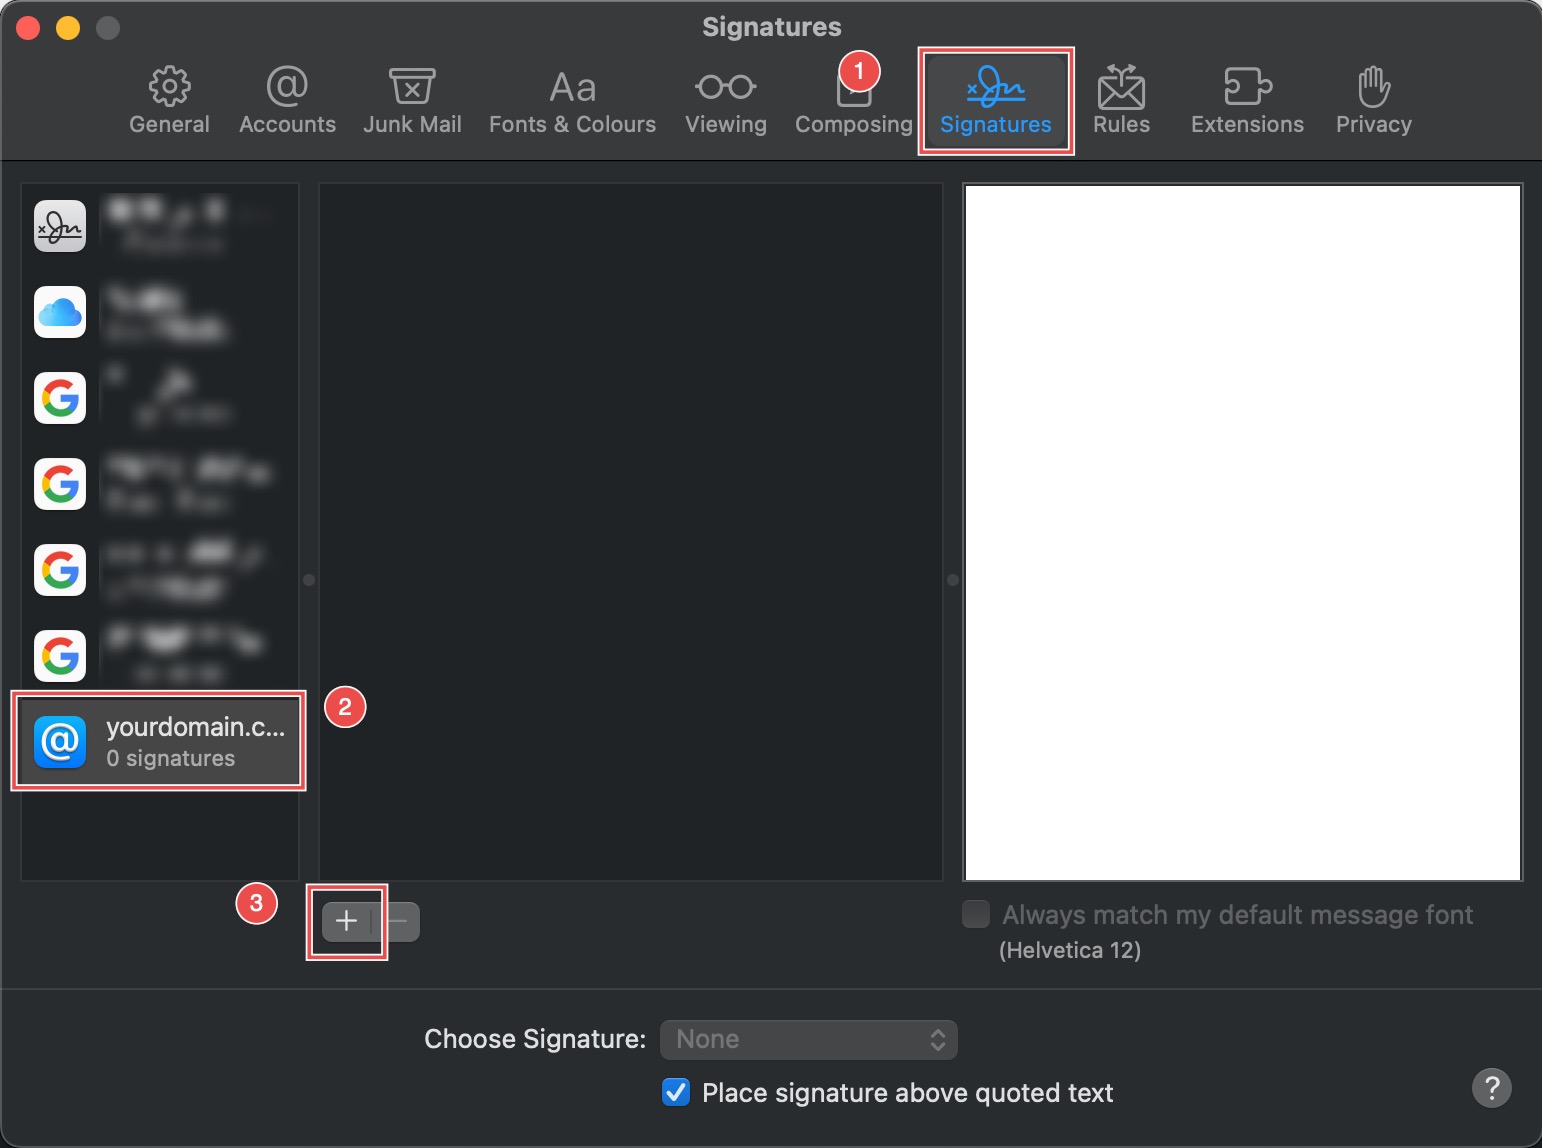
Step 2: Access Signatures Settings
In the pop-up window, click the Signatures tab and select the email account you wish to configure from the sidebar. Click the plus sign () at the bottom of the middle column to add a new signature.
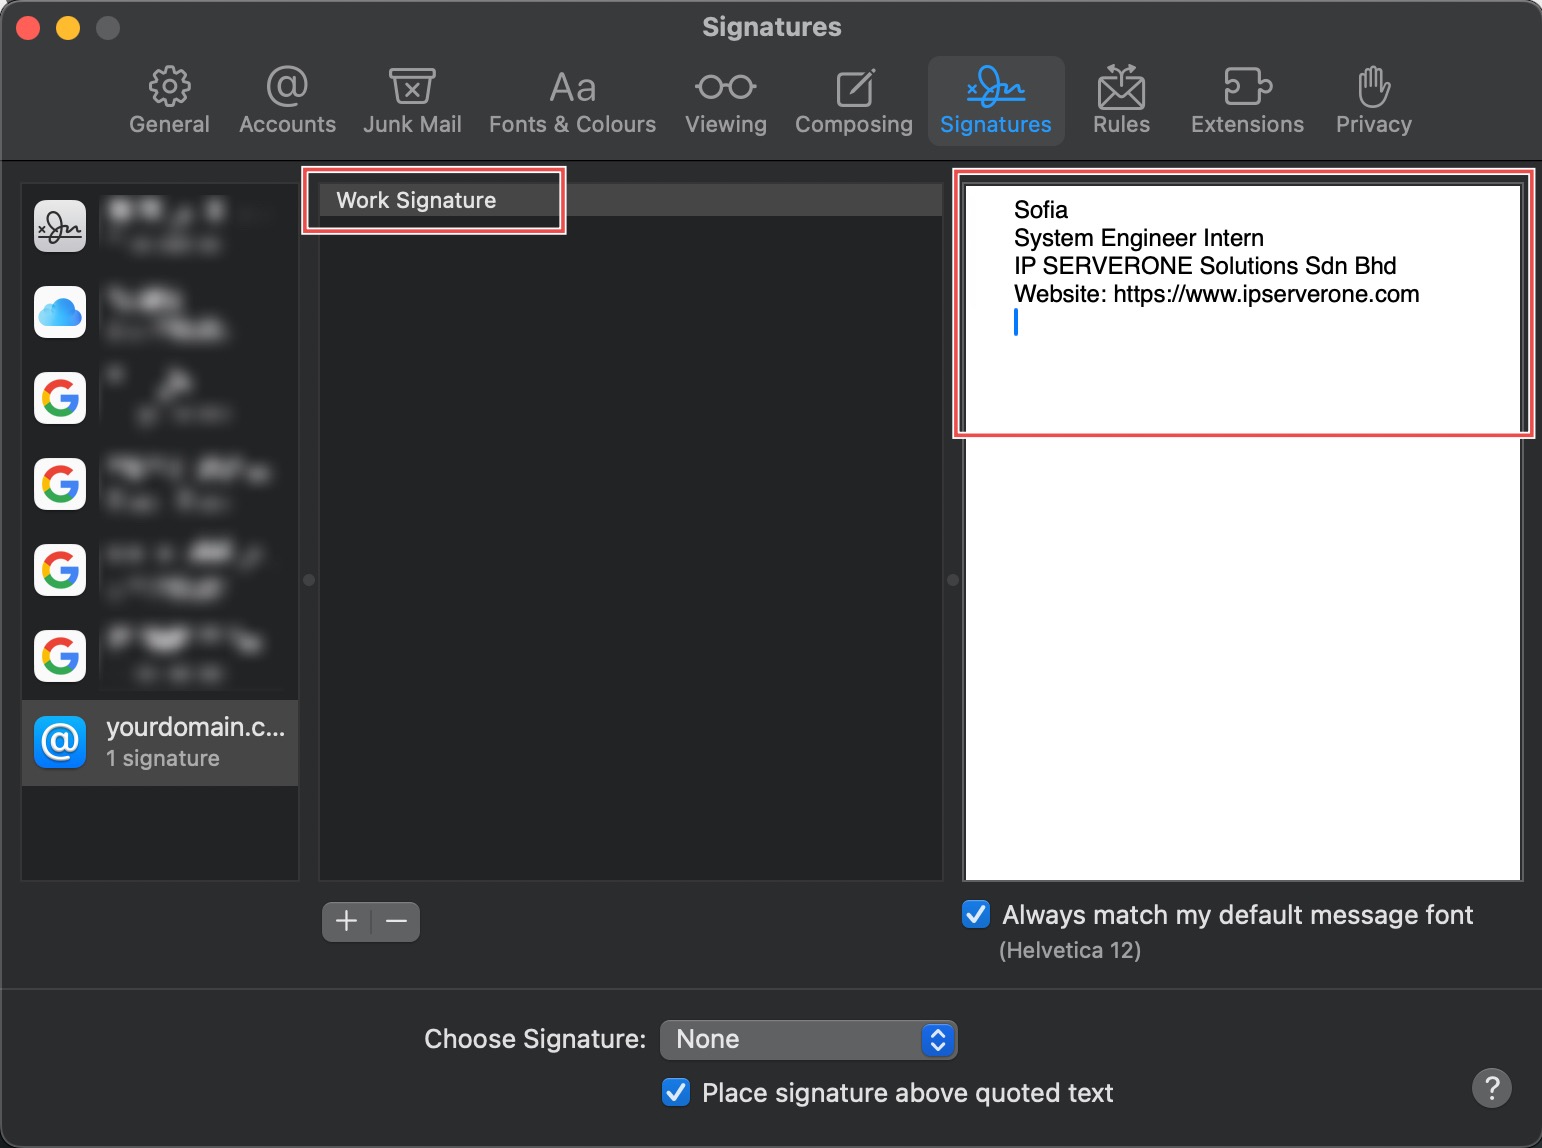
Step 3: Create Signature
Rename the signature by double-clicking the default name. Use the editing pane on the right side to draft your signature text and design.
To add images or logos, copy the image from a file, web page, or another source, and paste it directly into this drafting area.
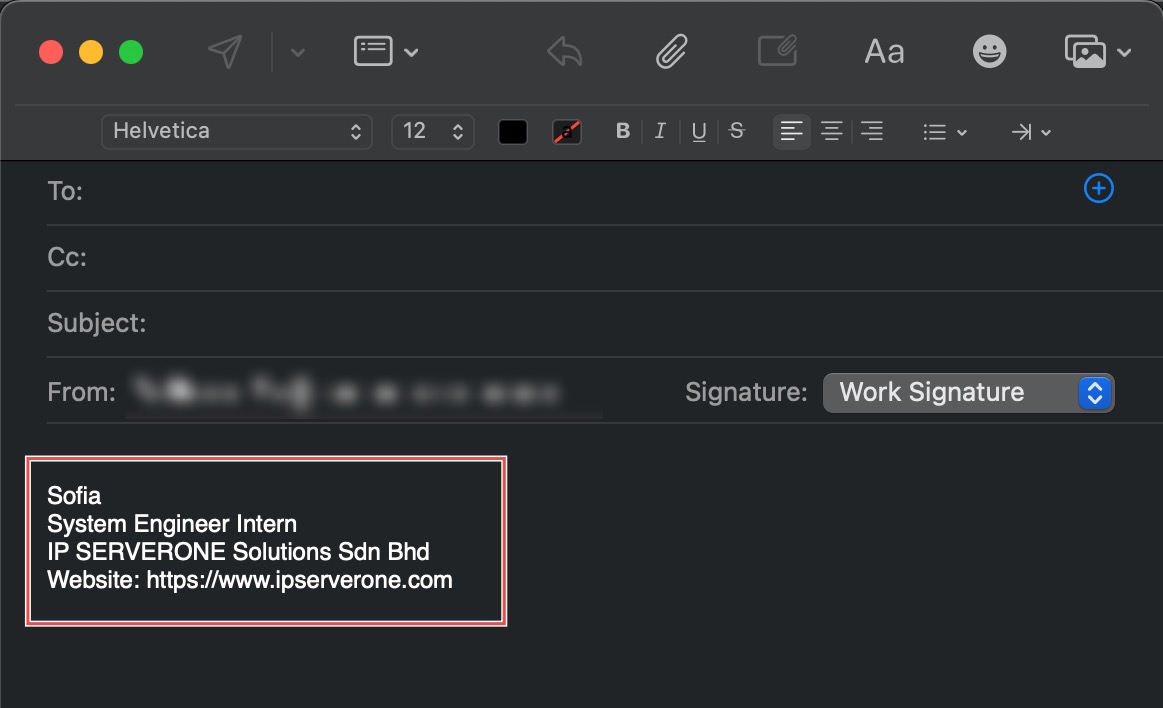
Step 4: Verify the Signature in a New Email
When you draft a new message, the signature you assigned to the account should automatically appear at the bottom of the message body.
Conclusion
Creating email signatures through Apple Mail’s Signatures settings enables professional and consistent email presentation. Custom signatures automatically append contact information and branding to outgoing messages, enhancing professional communication while saving time on repetitive formatting tasks.
Should you have any inquiries about the guidelines, please feel free to open a ticket through your portal account or contact us at support@ipserverone.com. We’ll be happy to assist you further.